 Login
Login

Customising Quicklinks
Quicklinks are a fantastic feature of Expert Agent which are very often overlooked.
Quicklinks will turn your system into a proactive Content Management System personalised for you and your day to day job role.
Expert Agent has a set of pre-configured Quicklinks available to you, and you also have the opportunity of creating your own custom Quicklinks, otherwise known as Saved Selections.
In this section we will be covering all areas of Customising your Quicklinks:
Quicklinks on your Right Toolbar
Saved Selections (Custom Quicklinks)
Forms
Forms allow you to view and edit the records details. From the applicant grid, we’ll click into an applicant form. This is done by simply clicking on a record from the grid. Remember all forms will work in the same way.
Clicking into an applicant record from the grid displays the full applicant form. It has three sections, just like the Grid.
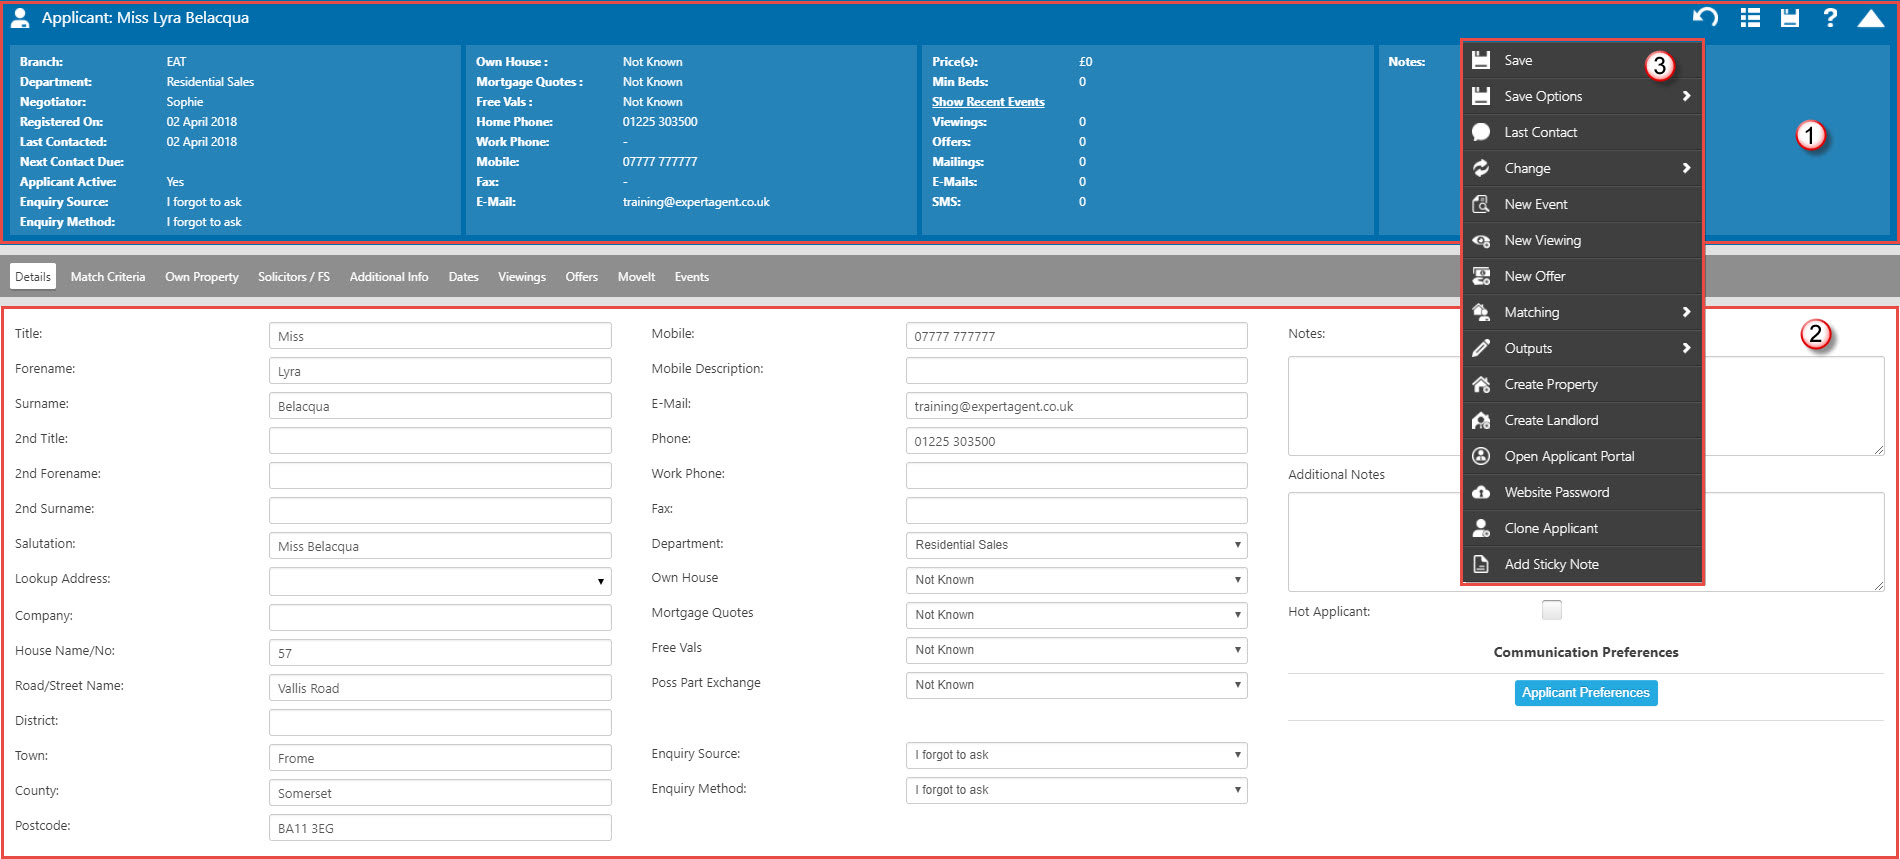
1. The Tool Tip

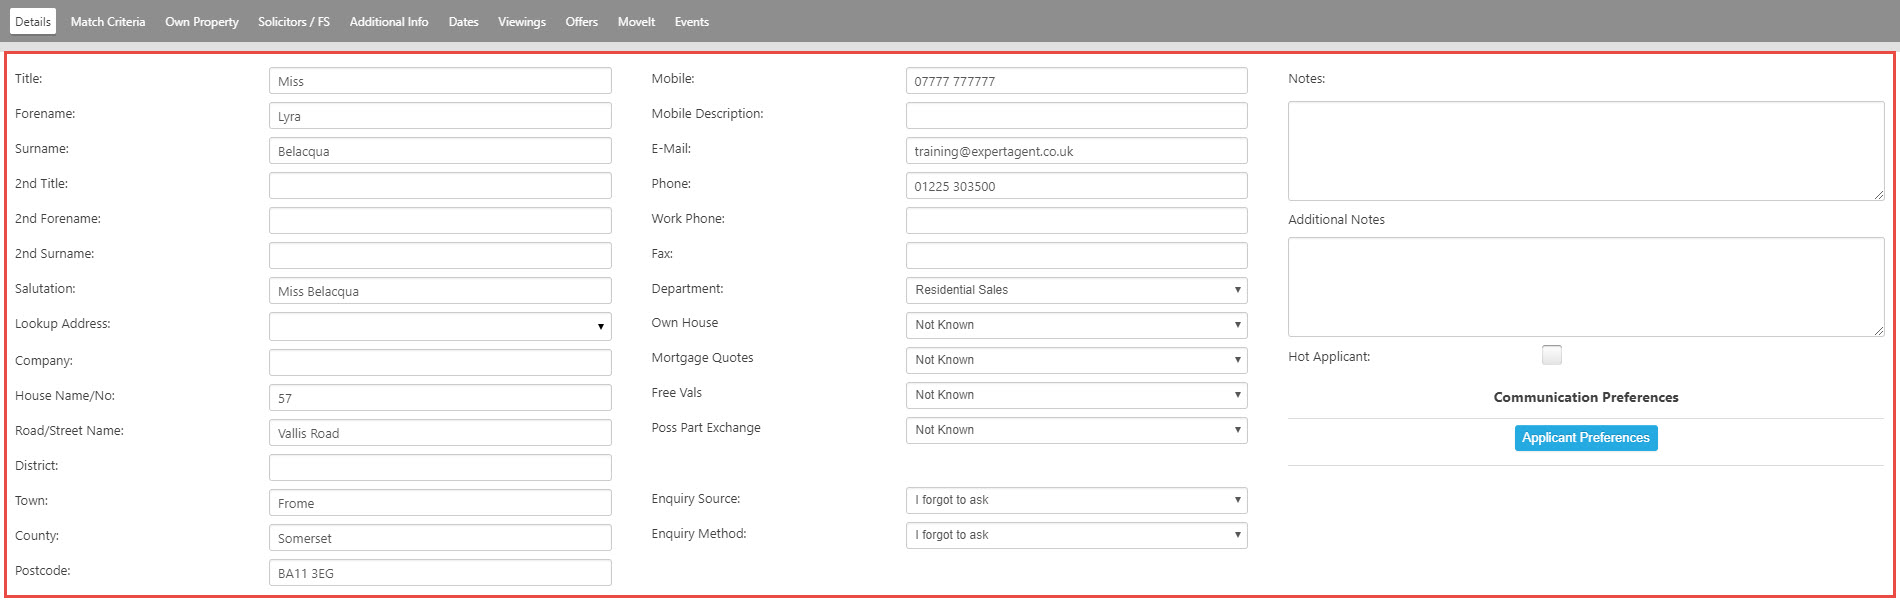
2. The Tabs
The tabs contain the forms important information.
3. Action Menu
The Action Menu contains all of the work flows available from within the form.
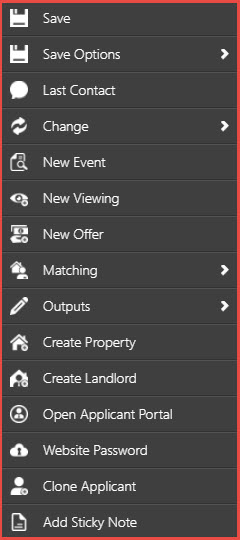
Save
If you have made any changes, it is imperative that you save before you navigate away to a different record. If you do not do this you will lose your changes.
Save & Flag
If you are interrupted whist in the middle of working and making changes on a record Save & Flag will save the record in the current state and flag it up in red in the Navigation History making it quick and easy to get back to.
Revert
The “revert” option will simply undo the last action you did.
Personalising your Dashboards
Dashboards are a fantastic way of finding singular records and getting a snapshot of related activity.
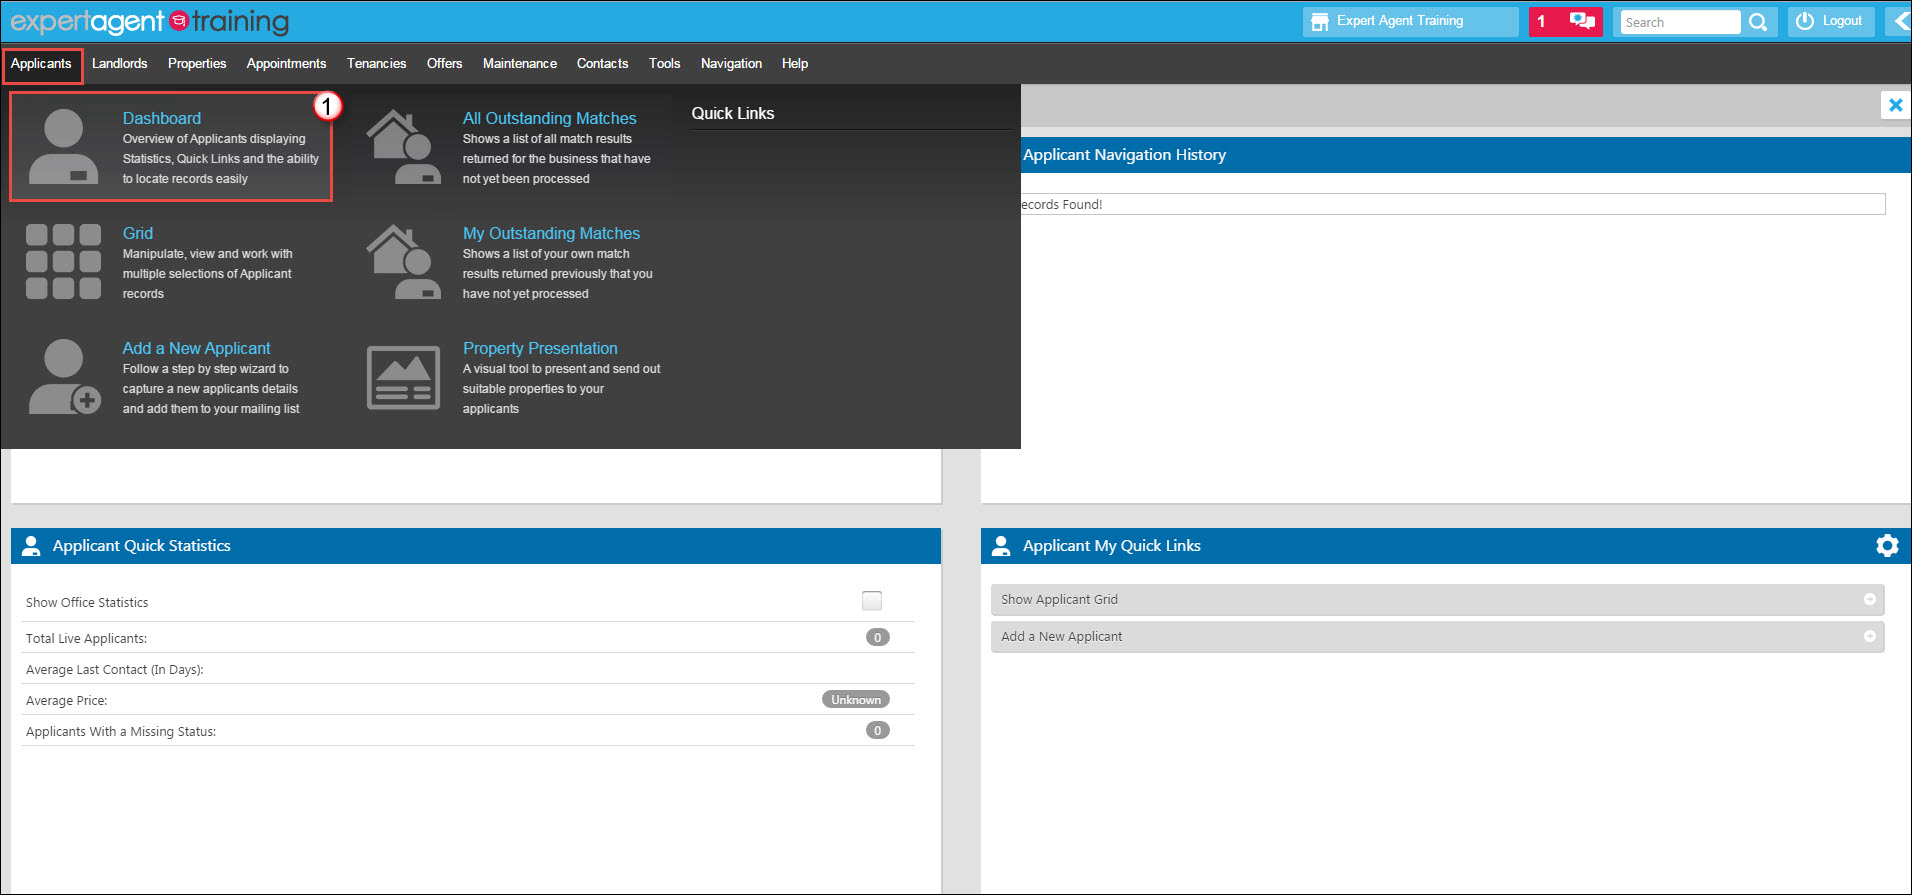
1. In order to access any dashboard, hover over the applicable section in the top menu (in this example we are using Applicants) and select the Dashboard option.
The 5 main sections of any Dashboard are:
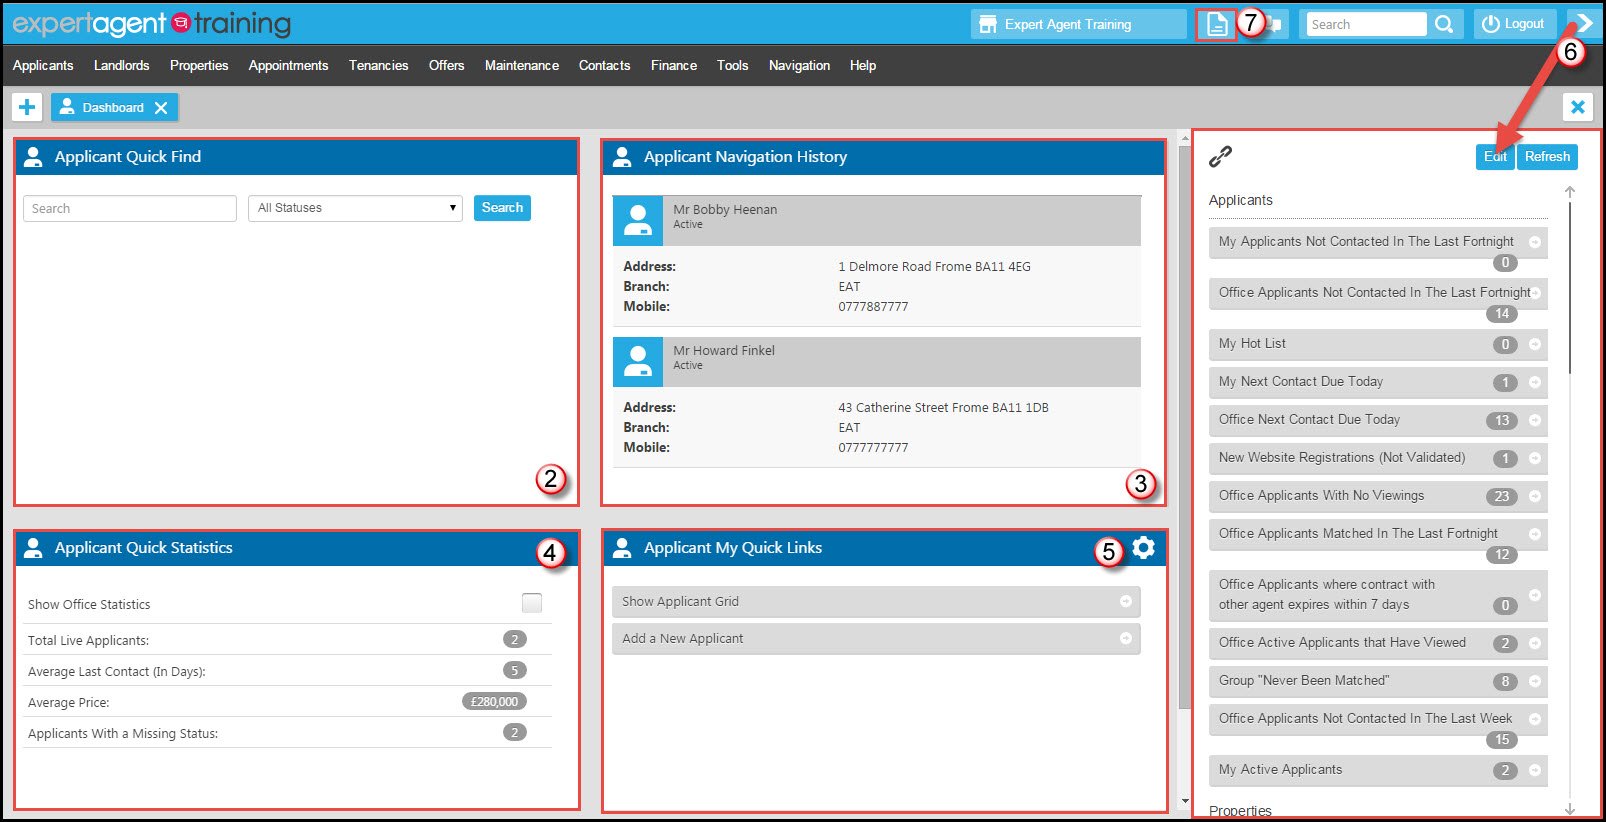
2. Quick Find
This will show the top 50 records. You can search on both Active and Inactive applicants.
3. Navigation History
This shows up to 20 records recently worked on. This supplements the Navigation item in the top menu.
4. Quick Statistics
This will show your office or personal statistics from the 1st of the month.
5. My Quick Links
These are configured by you – click “Edit” then choose the links you want to see. There are three sets – personal, office and group. e.g. “My Hot Applicants”. Your configured links show in the “my quick links” section. It is very important you ensure you set these up. This is where the system goes from being a clever website you are placing your data into to a proactive content management system. This is one of the first things you should setup when using Expert Agent.
6. Right Tool Bar
This is configured by you to suit your individual needs. The right toolbar is an extension on “My Quick Links” and can be opened by clicking on the arrow button to expand the Tool Bar to display your quick links from anywhere within the system.
7. Sticky Note Dashboard
This button will direct you to the sticky note dashboard where you can add in your own sticky notes onto various forms throughout expert agent as reminders or extra information.
Saved Selections
Expert Agent has an extended Quick Link feature in the form of Saved Selections. These saved selections give you the ability to create and save your own quicklinks. The Saved Selections feature is covered in the following Grids section of this chapter.
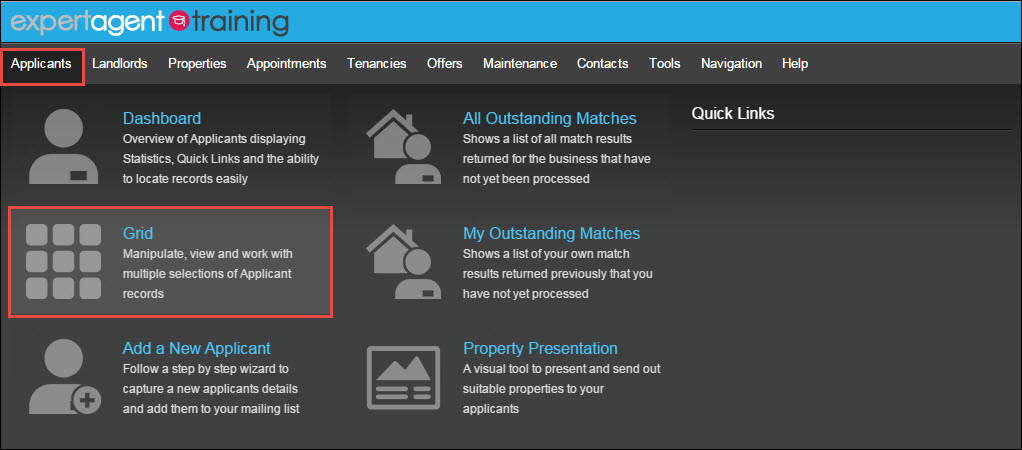
Personalising your Grids
Grids are a fantastic way for searching, sorting, finding and reporting on multiple records. They are an easy way to display and manipulate multiple records. To access your grid hover over the relevant option in the top menu and select grid from the drop down.
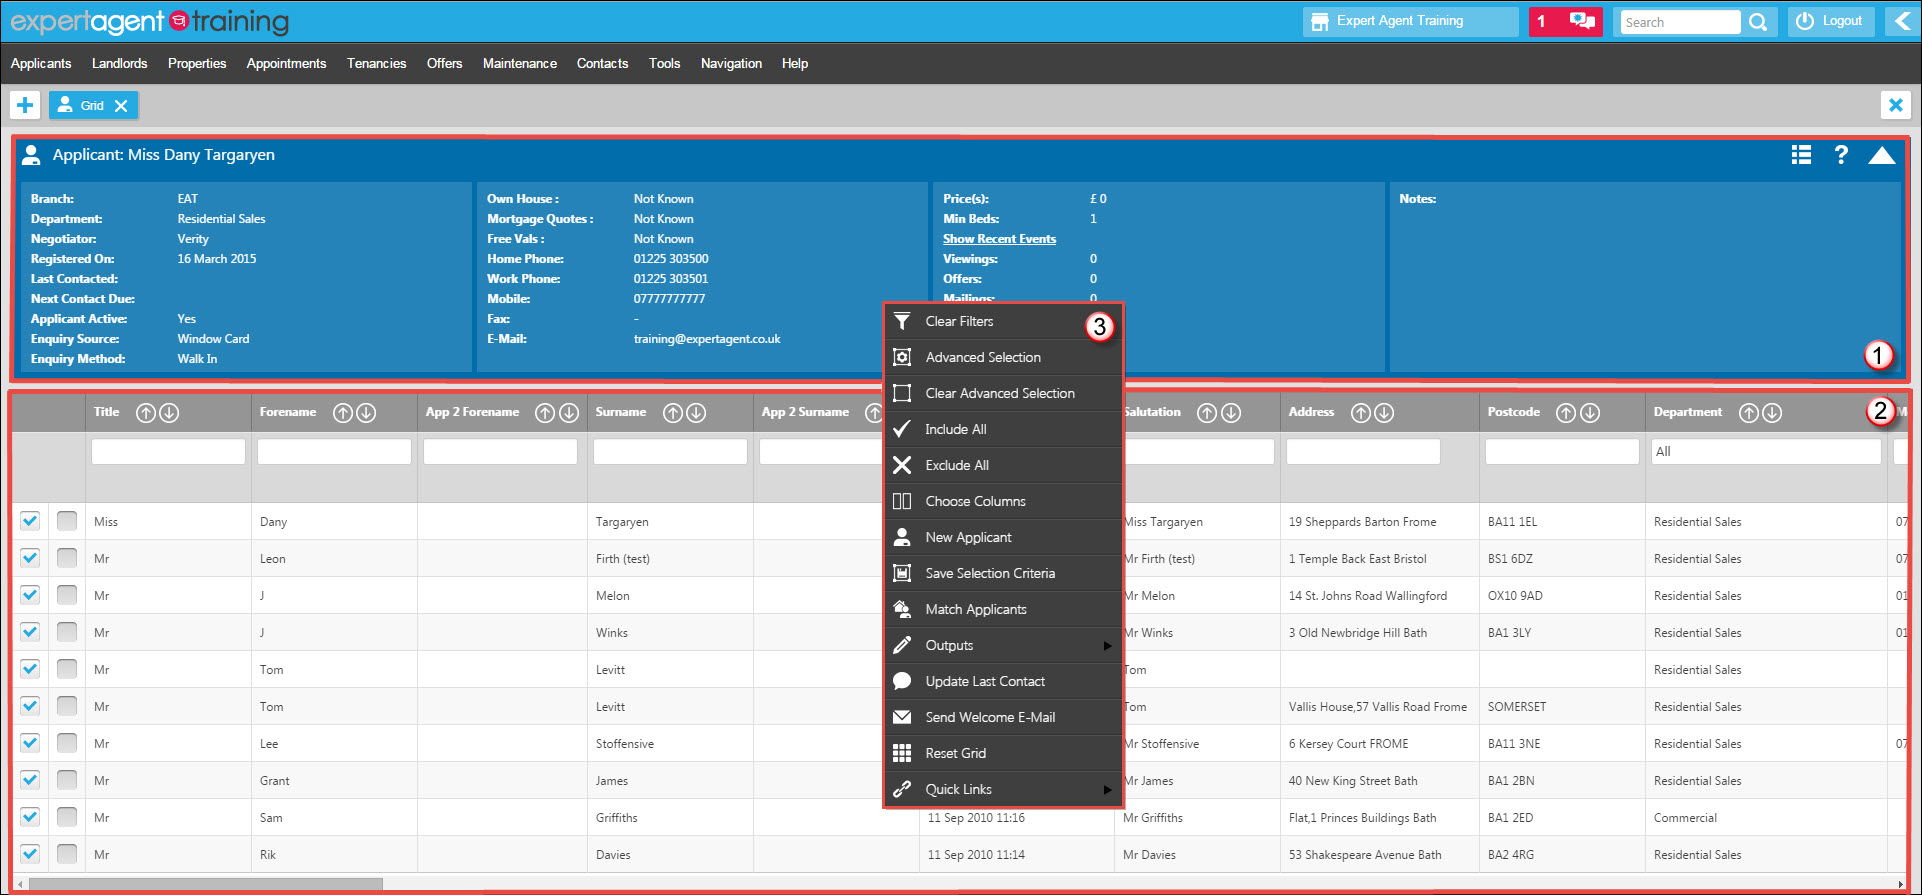
There are three sections to a Grid:
1. The Tool Tip
Keep focus of the record irrespective of the record you’re on.
As you hover over information in the grid section (section 2) the information in the information panel (section 1) changes.
2. The Grid Section
The grid section allows you to manipulate the records to display the selection you require.
The grid is used to sort, order and filter your records using the filter boxes at the top of each column.
3. The Action Menu
These are the work flows that’s can be accessed from any Grid or Form.
The Action Menu can be accessed in 2 ways:

More:
Filtering Grids
Filtering allows you to obtain the correct selection of records you require.
You can apply a filter to any grid. A grid can be filtered on a single column. E.g. only show me records that have been entered into the Sales Department.
A grid can be filtered on multiple columns at the same time. You are also able to make multiple selections per filter drop-down.
The example below shows sales only applicants in the BA postcode area:
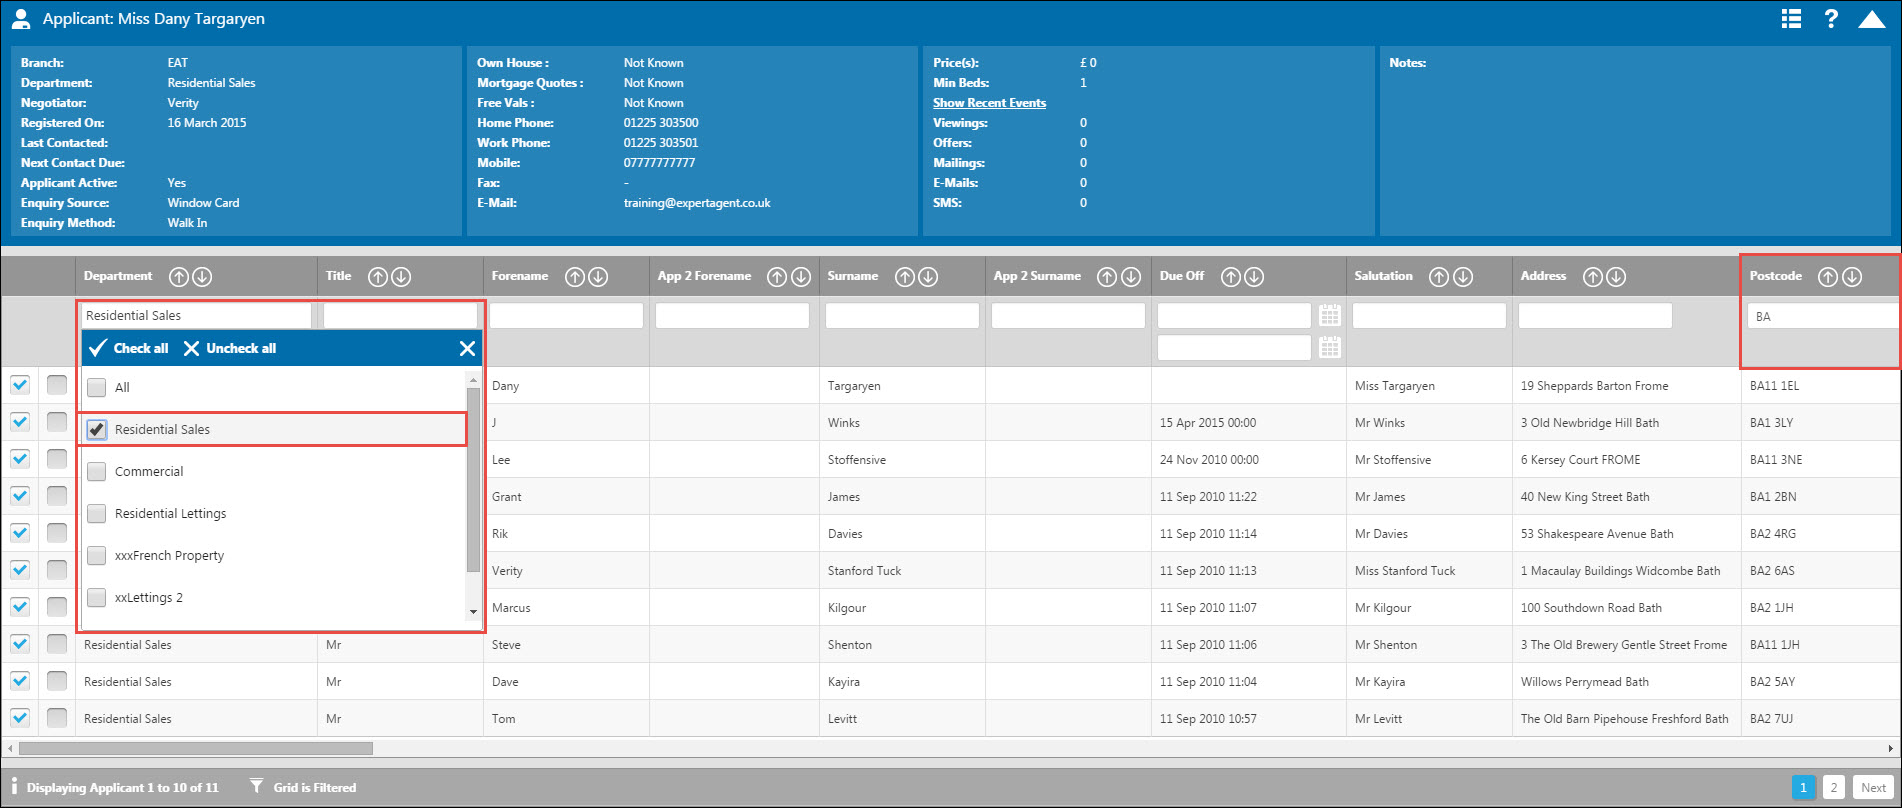
TIP!
Remember you can choose your columns so your columns are next to each other for an easier view. Ensure you clear your filters when you have finished working with the grid to ensure you are seeing all of your data on your next arrival to the grid.
Choose Columns - TRY OUR NEW COLUMN PICKER - Column Picker BETA
This option allows you to choose which columns you would like to display in your various grids. This is individual to your login so you can tailor your grids to suit your job role and the information you need to see.
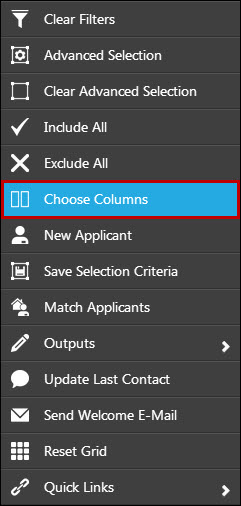
Right click to show your action menu and select “Choose Columns” to set up your choice of columns.
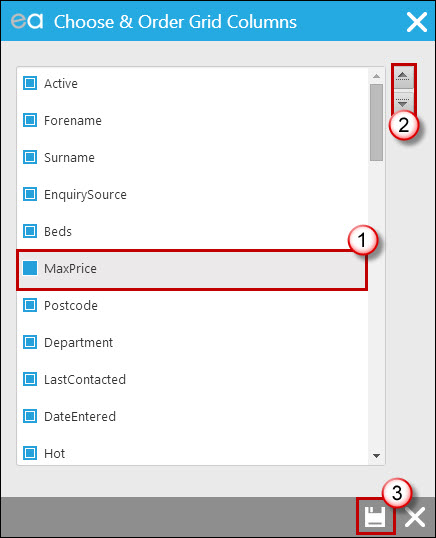
1. Tick the boxes you want to display in your grid.
2. Promote and demote the columns using the up and down arrows. Remember to do this for all of your grids – although it may seem time consuming now it will make using your grids a lot easier and quicker in the future.
3. Click Save.
Save Selection Criteria
Expert Agent has an extended Quick Link feature in the form of Saved Selections. These saved selections give you the ability to create and save your own quicklinks.
You are also able to edit your standard Quicklinks from the Grids Action Menu.
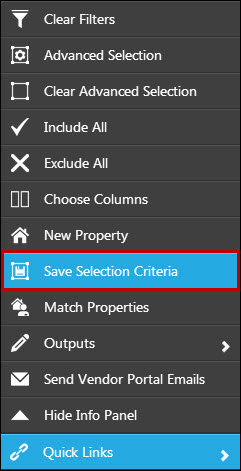
In order to start creating your own ‘Quick Links’, here on in will be referred to as ‘Saved Selections’, simply filter the grid to display the selection you require. In this example we will show all applicants currently living in the BA postcode area with a minimum of £250,000 to spend:
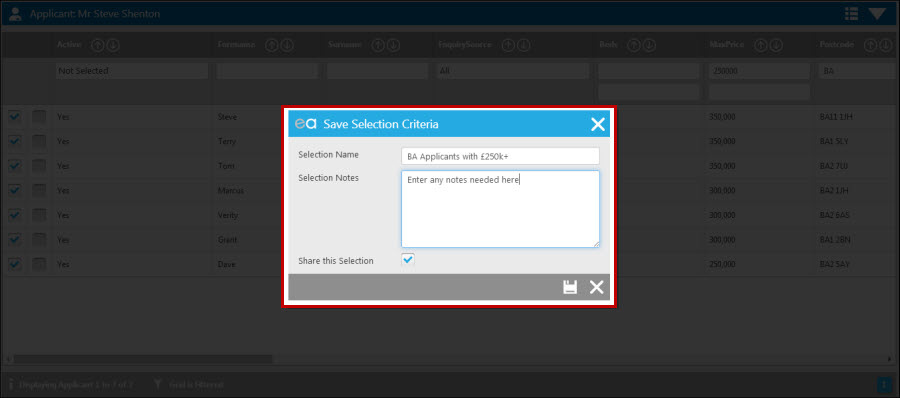
Enter the Selection Name you would like to save it as and any notes needed. The ‘Share this Selection’ tickbox will allow all users in your branch to view and use this saved selection.
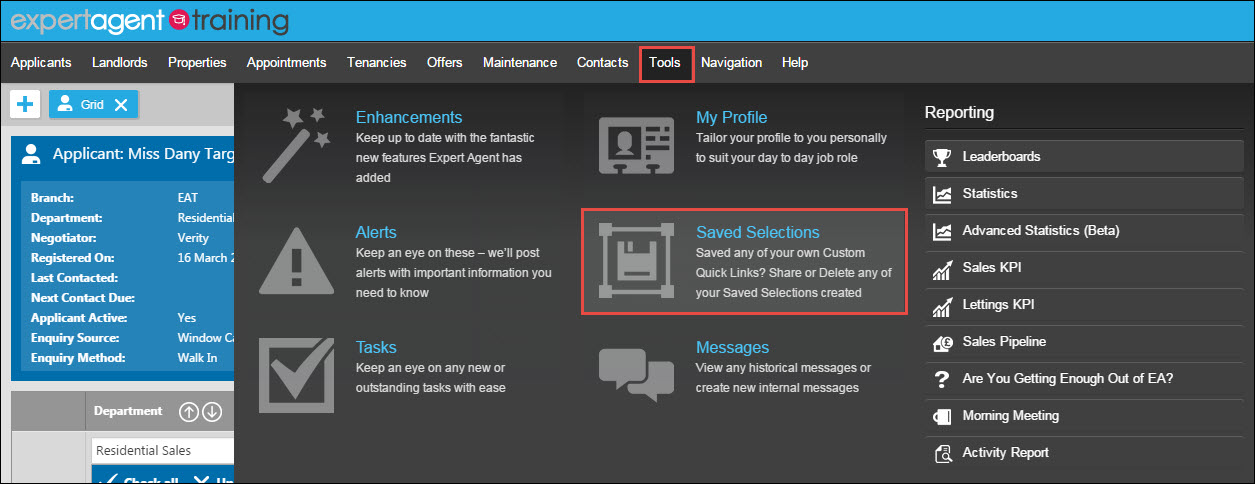
To review your businesses’ saved selections at any time, you can go to Tools in the top menu and select ‘Saved Selections’:
A screen will open showing all saved selections including details on who created them and when:
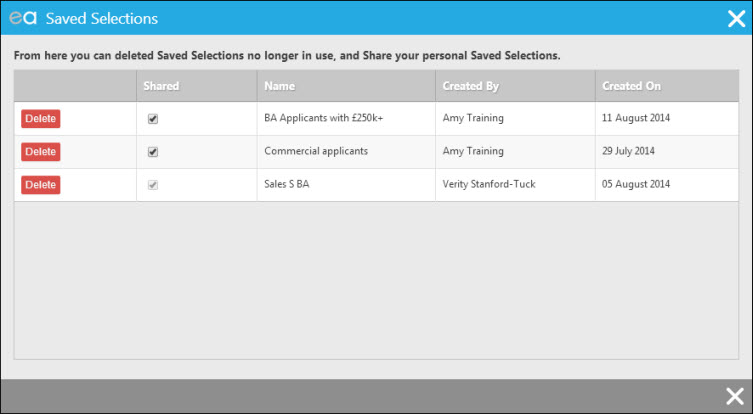
If you created the saved selection yourself, the share column will be active and you’ll be able to choose from here whether selections are available to others to use or not.
Tel: 01225 303500 | Email: account.managers@webskyltd.com
Terms of Business | Cookie Policy | Privacy Policy | ZPG Modern Slavery Statement
Designed by the Expert Agent Design Department
