 Login
Login

How do I add a Property as Price on Application?
If you're looking to advertise a property as Price on Application, you must still have a Numeric Price listed. Portals require this to tell them where a property should appear in a price ordered list, and Expert Agent uses it for matching purpouses.
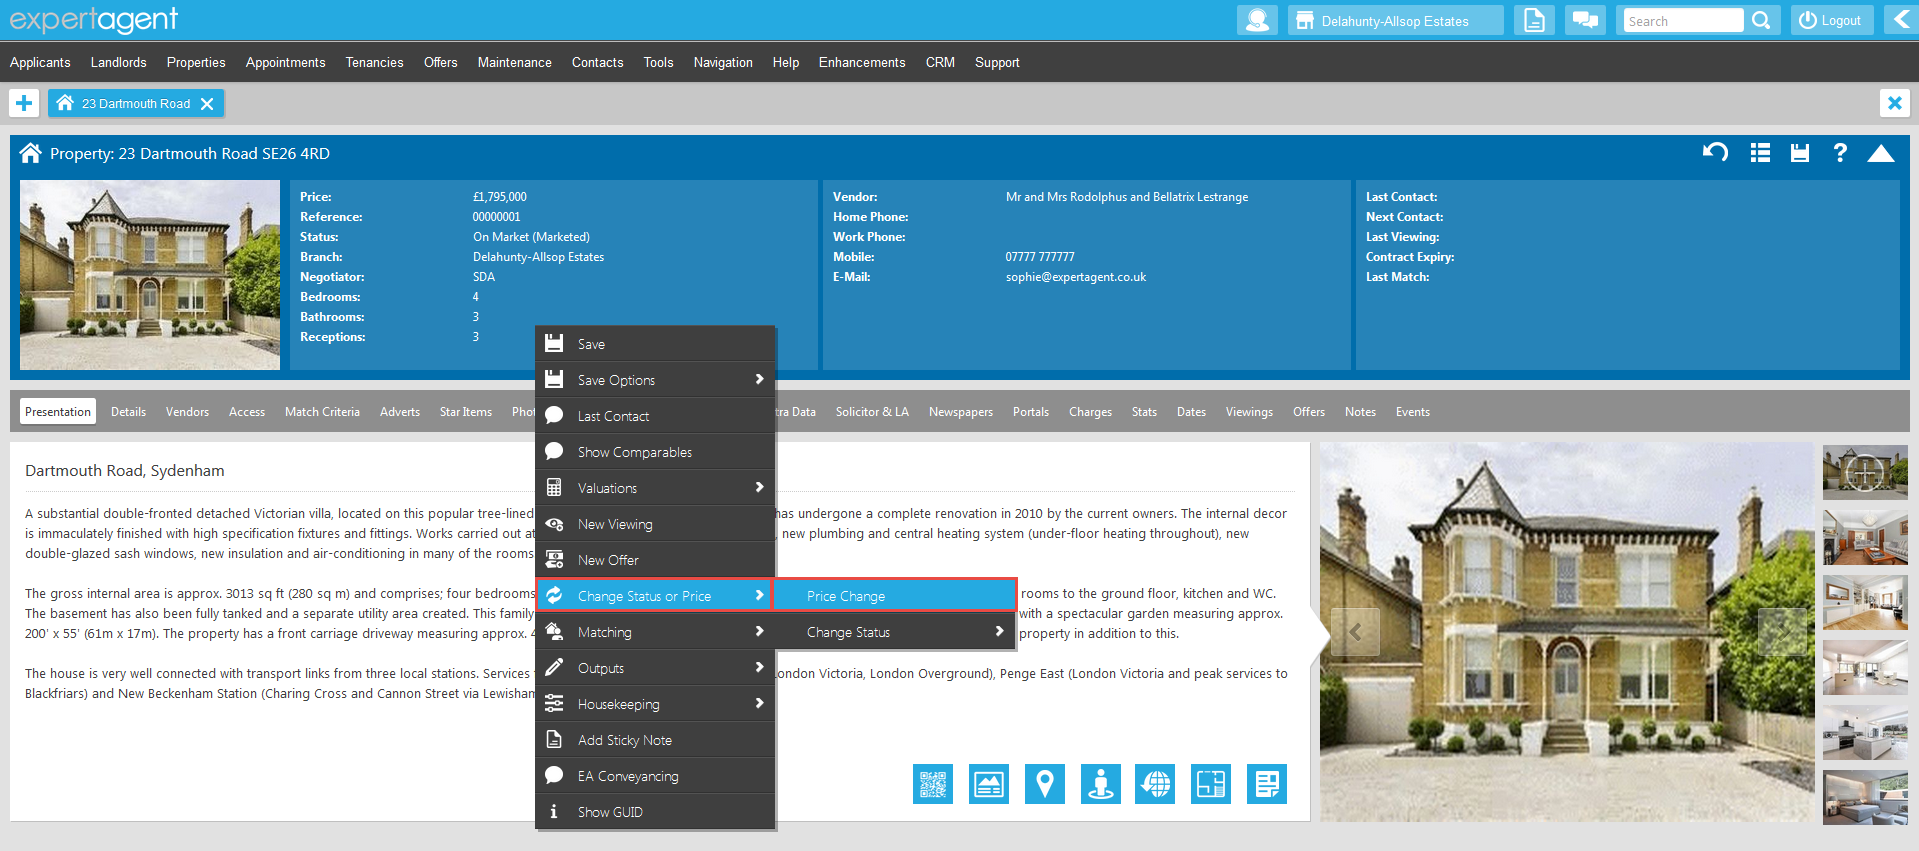
To set a property to display as Price on Application, right click on the property record, and select Change Status or Price > Price Change
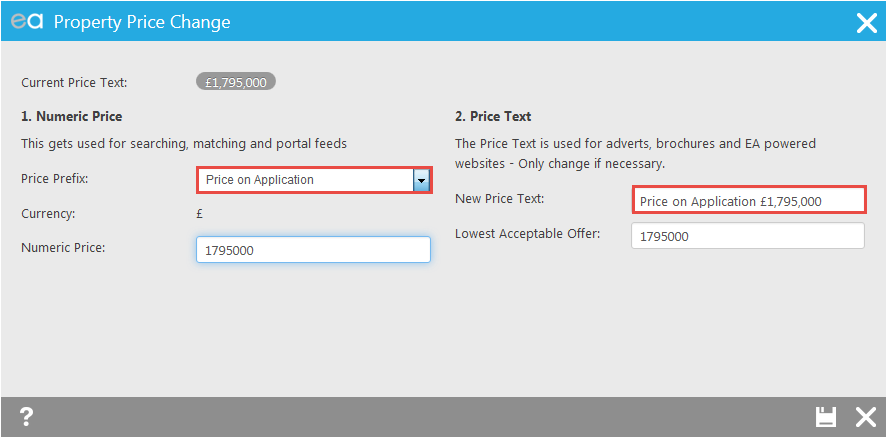
Set the Price Prefix to Price on Application, then in the New Price Text box, remove the details of the price after the Price on Application prefix.
SAVE
It is always advisable to check the property on your portals, to confirm how the price is displaying.
Property Action Menu
Due to the number of actions performed from a property record, the property action menu has a shorter main action menu with a number of sub-categories.
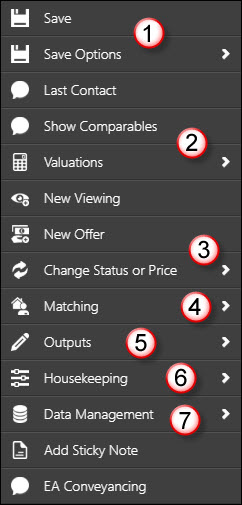
The menu you will see when you first right click will look like this (example shown is from a sales property record):
Save - saves any changes made to the record.
Save Options (1 on above image) - This contains
Save and Flag (saves any changes to the record and flags the record in red in your Navigation History) and
Revert (acts like an 'undo' button).
Last Contact - allows you to update contact dates, add notes, etc.
Valuations (2 on above image) - this opens a sub-menu from which you can book a valuation appointment and confirm details post-valuation. Both of these processes are covered in detail in Valuations & Market Appraisals.
New Viewing - this will take you in to the wizard for booking a viewing.
New Offer - this will take you in to the wizard for booking an offer.
Change Status or Price (3 on above image) - This contains
Change Price (this is the option used for editing everything to do with the advertised price of a property - the amount itself, the prefix, the price text ('paddock available separately', 'to include carpets' etc). There are several things to consider when setting the property price up - things that can affect the way a property looks on your site, portals and the way it matches. Have a look at this FAQ article When I do a Price Change, Why does a property have multiple prices?) and
Change Status (this is where you make status changes such as marking a property on the market. This is covered in Putting the property on the market. There is a manual status change option available from here which will display all statuses, regardless of the current property status).
Matching (4 on above image) - this opens a sub-menu from which you can open Match Processor or Quick Match. Both are explained in Simple property matching.
Letters/E-Mails/SMS (5 on above image) - this opens a sub-menu allowing you to use a pre-prepared template to contact the vendor, or to send them a text message, or to send a colleague a quick message attaching the record along with your message.
Housekeeping (6 on above image) - this opens a sub-menu with a number of options:
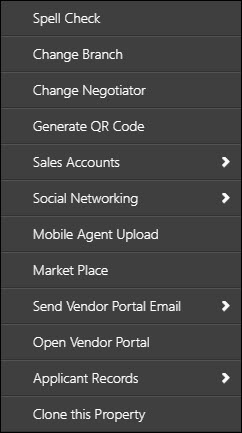
Spell Check - performs a spell check on that page of the record.
Change Branch - allows you to change the branch assigned to the property record.
Change Negotiator - allows you to change the negotiator assigned to the property record.
Generate QR Code - gives you a QR code to use when advertising the property.
(MultiList Options - this will only show if you are set up for MultiListing - details of this are in the Receiving and managing Multi-Listed properties section.)
Sales Accounts - this relates to the Charges tab of a property record where you can list charges for things like EPCs, advertising, etc. When you exchange an offer through Expert Agent it also applies the commission due to the Charges tab. The Accounts menu allows you to invoice for charges, create statements, and receive payments. Everything else is done from the Charges Tab itself.
Social Networking - allows you to post properties to Facebook and/or Twitter. For information on this see the Social Media section.
Mobile Agent Upload - this option allows Mobile Agent users to upload the XML file and/or floor plans and have Expert Agent map the details to the correct places in Expert Agent for you.
Market Place - opens the Expert Agent Market Place pop-up - see Expert Agent Market Place for more information on this.
Send Vendor Portal Email - You can send the Vendor Portal if this property is on the market. Vendor Portal Configuration
Open Vendor Portal - If you have previously sent the Vendor Portal you can open it from here.
Applicant Records - allows you to create an applicant record for your vendor (or Vendor 2 if you have a second Vendor) - the system will instantly transfer their details across for you.
Clone this Property - allows you to make a copy of the property record, should you need to.
Data Management (7 on above image) - Data Management if part of the GDPR release. This option contains
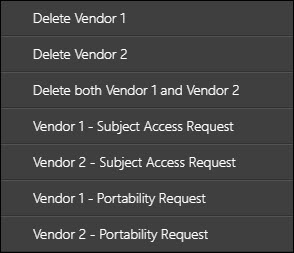
Delete Vendor 1 - GDPR Deletions
Delete Vendor 2 - GDPR Deletions
Delete both Vendor 1 and 2 - GDPR Deletions
Vendor 1 - Subject Access Request - GDPR Subject Access Request
Vendor 2 - Subject Access Request - GDPR Subject Access Request
Vendor 1 - Portability Request - GDPR Data Portability
Vendor 2 - Portability Request - GDPR Data Portability
Add Sticky Note - You can add a virtual sticky note to this record from here. Sticky Notes
Editing your page settings
It is advisable to check and edit where necessary your new page's settings.
To do this, click 'Settings' from the top of your page:

There are various options both on the left hand side of the screen and on the right hand side:

We recommend clicking in to each of these in turn and ensuring you are happy with the settings. It is also advisable to check how your profile picture is displaying back on the main page - in the example above, our logo does not quite correctly fit the box so we would need to edit the image to more suitable proportions and re-upload.
Building an audience for your page
There are a number of different ways you can let people know about your new Facebook page. Click 'Build Audience' at the top of the page and these will be listed:
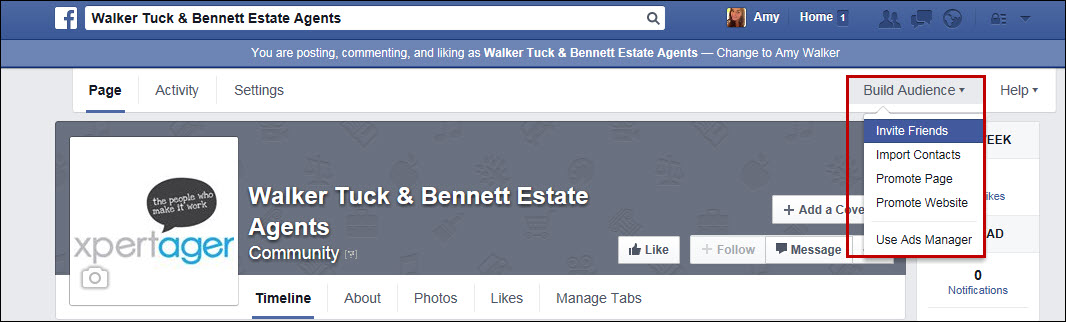
Invite Friends
Clicking on 'Invite Friends' will take you to a list of your friends with the option to invite them to like the page. This will be the friends associated with the account you are logged in as (most likely your personal account).
Import Contacts
There are various options available when you click on 'Import Contacts':

The most commonly used option we find is the top option - 'Upload contact list file'. We can give you a comma separated list of all of your vendors, applicants, lawyers, contractors etc. stored in Expert Agent with their email addresses for you to upload should you wish to. If you'd like a list, please log a support ticket.
Promote Page
Clicking on 'Promote Page' will take you to a similar looking screen to the one seen earlier in the set up wizard - allowing you to spend a certain amount of money per day on having Facebook promote your page to encourage likes:

There will be a preview pane on the left hand side of the screen so you can see what your ad would look like on various devices. On the right are options to configure your ad - your budget, whether the ad displays continuously or you specify a time frame, and so on.
Promote Website
This works in much a similar way to 'Promote Page' however directs traffic to your website as opposed to your Facebook page.

Creating a new page
You can create your business page from your own personal account, or create a new account. Facebook accounts are personal but pages (whilst owned by an account) can be administered by anyone that the account holder wants to have administrator rights.
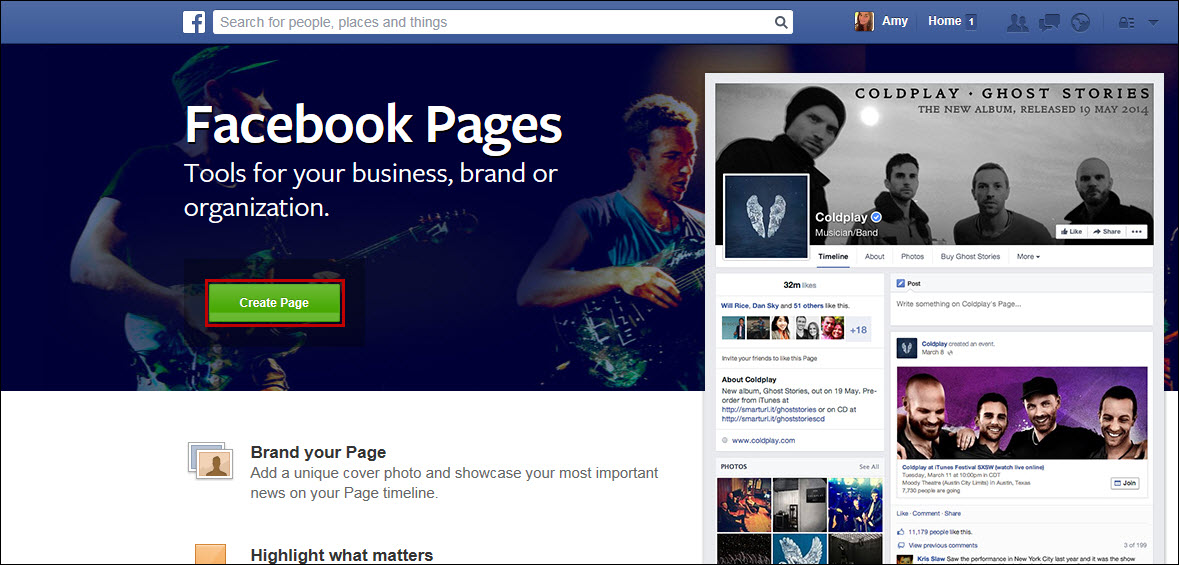
The easiest way to get started is to go to this web address:
https://www.facebook.com/about/pages
There will be a 'Create Page' button you can click on:
Options will appear asking you to classify your new page. Click on the relevant option (Local Business or Place has been used in the example below):

The following screen will appear:

- Classify your business - the most appropriate option in the list is likely to be 'Real Estate'.
- Enter the business details.
- Click 'Get Started'. You may wish to look at the Facebook Pages Terms before doing this, via the blue link above.
You will then be guided through a 4 step wizard to set up your page.
Step 1 - 'About'

1. Select a category for your business, write a brief description and enter your web address.
2. Choose a unique Facebook web address for your page.
3. Answer the questions at the bottom of the screen.
4. Click 'Save Info'.
Step 2 - Profile Picture

5. Choose to either import a logo/profile picture from your website or upload an image from your computer.
Step 3 - Add to Favourites

6. We recommend you add your new page to your favourites so that you can access it easily whenever you need to.
Step 4 - Reach More People

7. Step 4 is optional, and allows you to have your page promoted on Facebook (encouraging likes) for a specified daily cost/budget. If you want to do this, select your daily budget from the drop down and click 'Promote Page'. Otherwise, click 'Skip'.
You will then be taken to your new business page. The next thing to do is encourage people to 'Like' and 'Follow' your business page so that you can interact with them.
More:
Building an audience for your page
Tel: 01225 303500 | Email: account.managers@webskyltd.com
Terms of Business | Cookie Policy | Privacy Policy | ZPG Modern Slavery Statement
Designed by the Expert Agent Design Department
