 Login
Login


How can I order my team members in the order that I would like them to appear on the diary?
To order your team, hover over 'Tools' in the top menu, select 'My Profile' and click 'Configure my Team'.
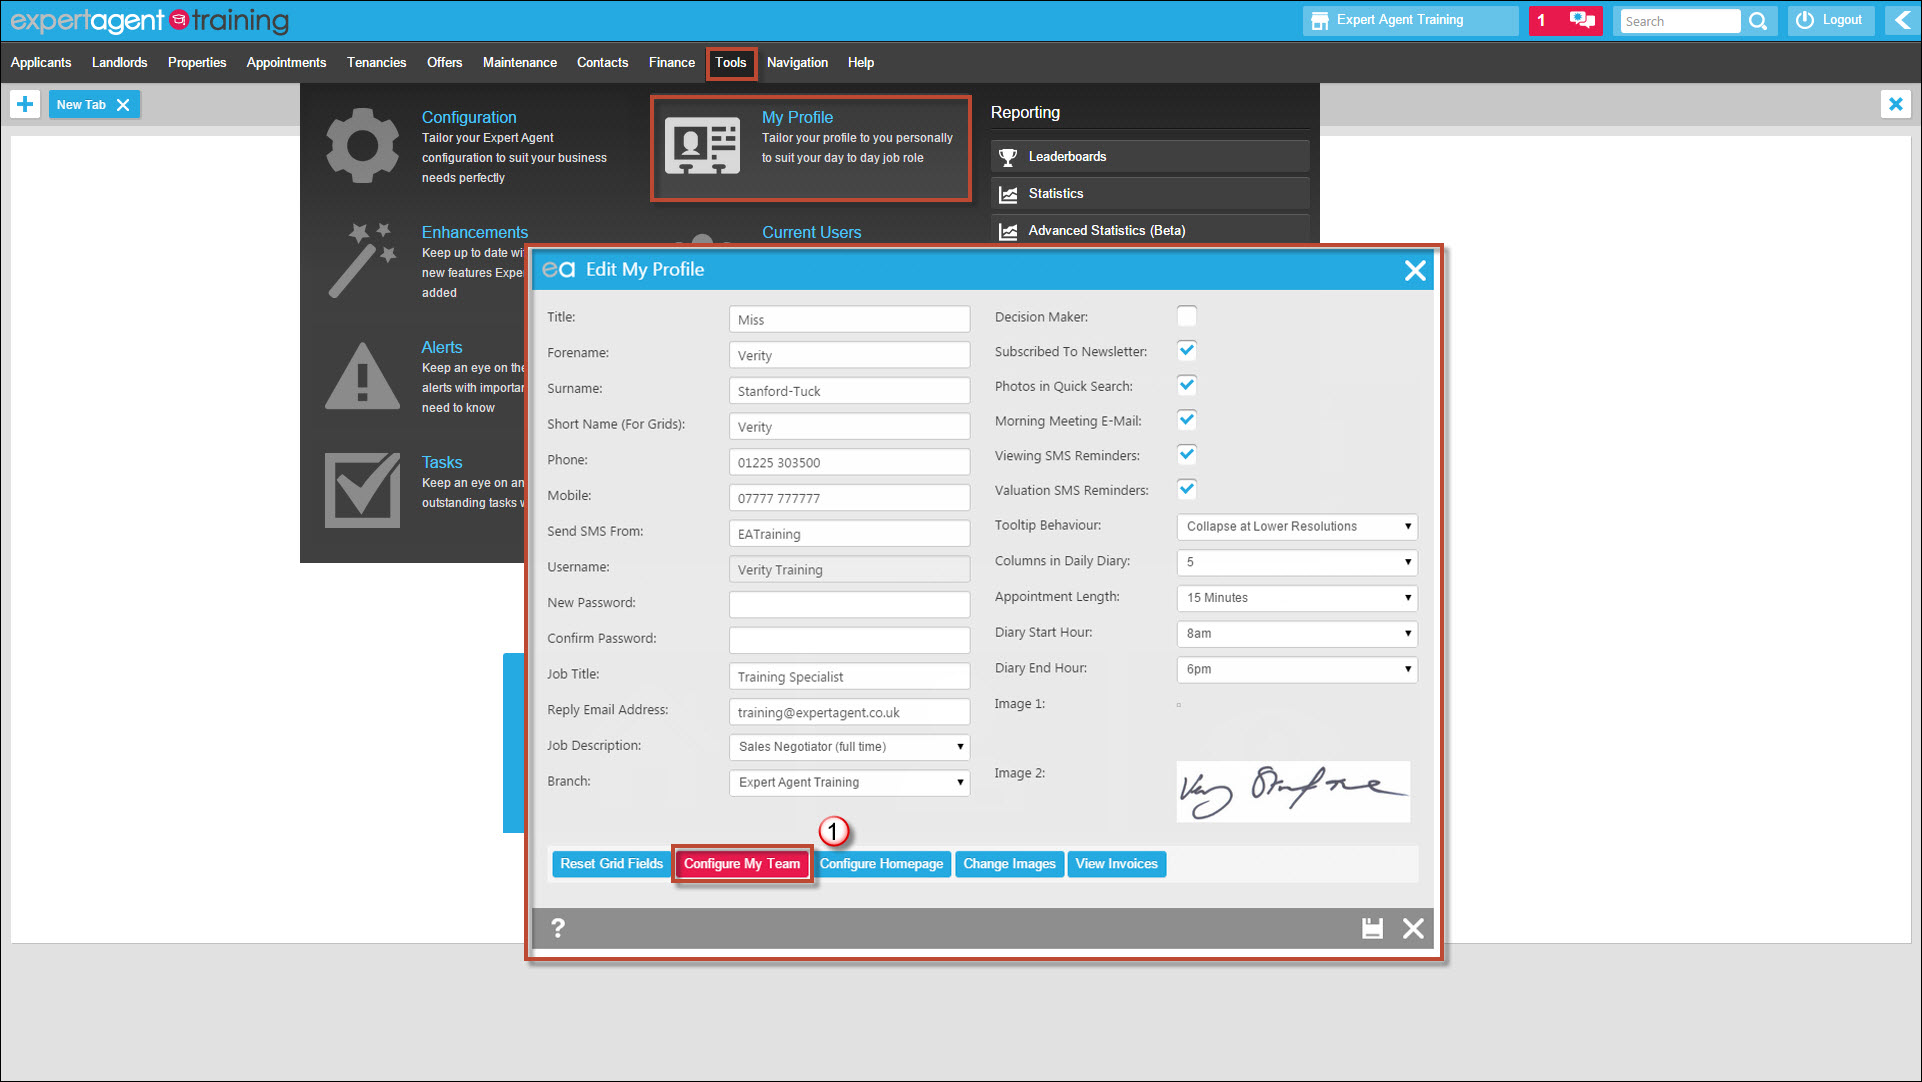
This is the same screen you would use to edit who is in your team.
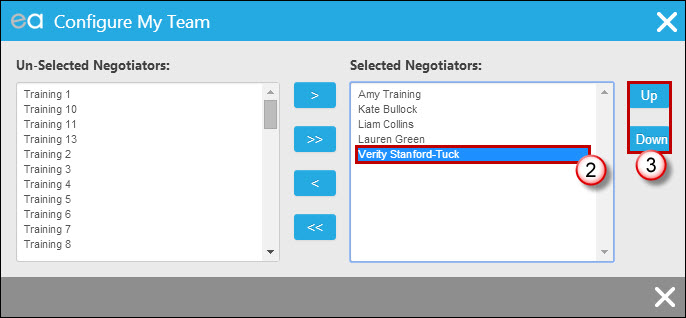
2. Click on the person in the list on the right hand side who you would like to move.
3. Press 'Up' or 'Down' as relevant until they are in the right place in the list.
Repeat this process until everybody is where you would like them to be in the list, at which point you can close the screen and click the save icon back on your profile.
How do I add a new staff member to team view in my diary?
Adding colleagues to your team view in the diary is done from your profile. You get to this by hovering over the 'Tools' option in the top menu. When your profile opens, you click 'Configure My Team':
The following window will open:
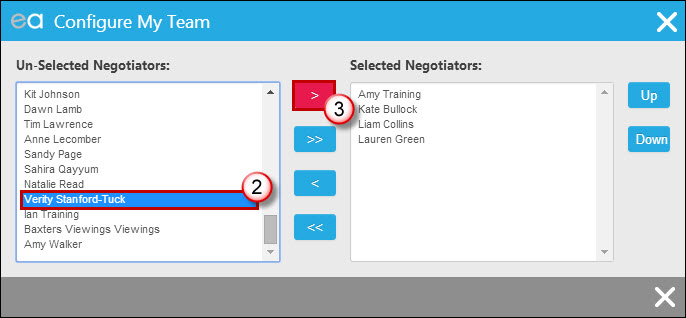
2. Click on the Staff member(s) you would like to add in the list on the left (hold the Ctrl key on your keyboard as you click if you need to select more than one person).
3. Use the single headed arrow to move all of the selected people over to the right hand side. You can then close this window and press the save icon on your staff profile.
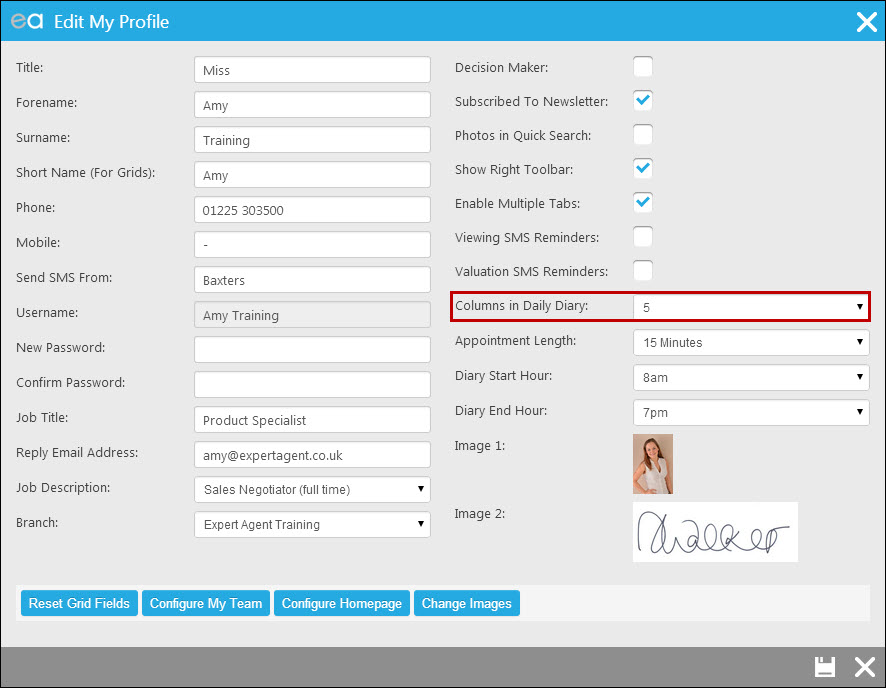
When you go back to your diary, you will now see more columns for the staff members you have selected - be sure to check the next page of the diary if they aren't showing on the first page. If you'd like to edit how many columns you have per page, you can do so from your profile:
How can I set up a recurring appointment?
To set up a recurring appointment you need to have booked the appointment into the diary on one instance first. You then click in to that appointment and set it to recur:
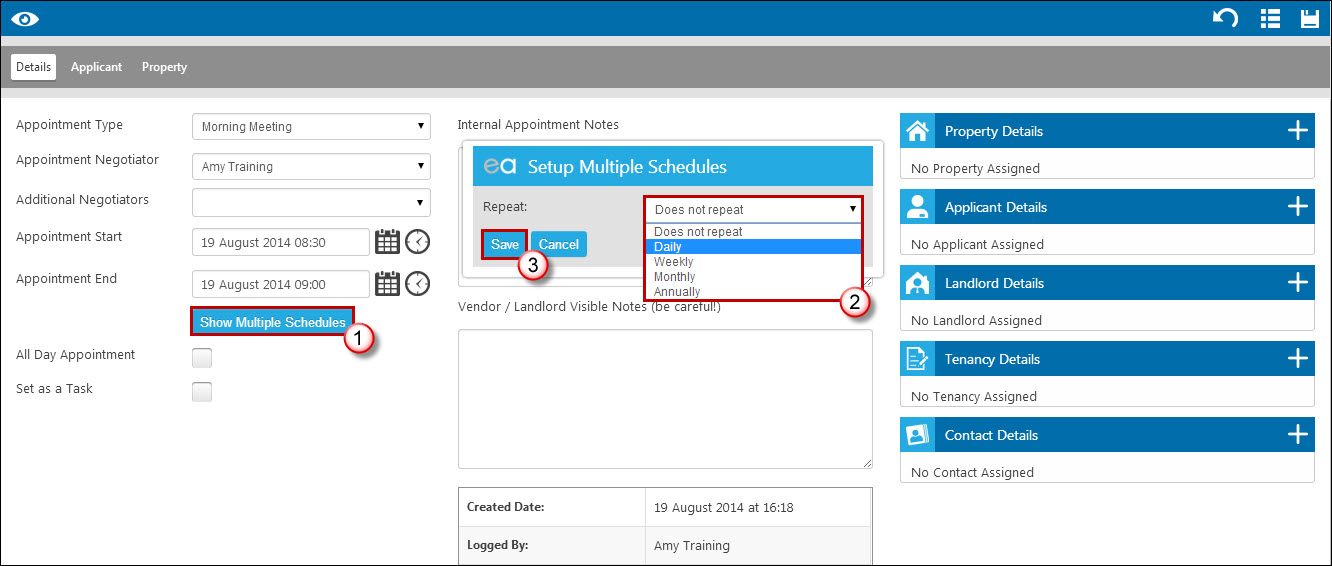
1. Click on 'Show Multiple Schedules'.
2. Select how frequently the appointment should repeat.
2. Click 'Save'.
Can I still use Windows XP?
No unfortunately not. Microsoft have ended support for XP (http://windows.microsoft.com/en-US/windows/end-support-help). As Microsoft no longer provide support for XP, we are unable to assist with any issues related to or caused by your version of windows.
Tel: 01225 303500 | Email: account.managers@webskyltd.com
Terms of Business | Cookie Policy | Privacy Policy | ZPG Modern Slavery Statement
Designed by the Expert Agent Design Department
