Multi-Listing Configuration
Before you can start making use of Multi-listing you will need to look at the configuration.

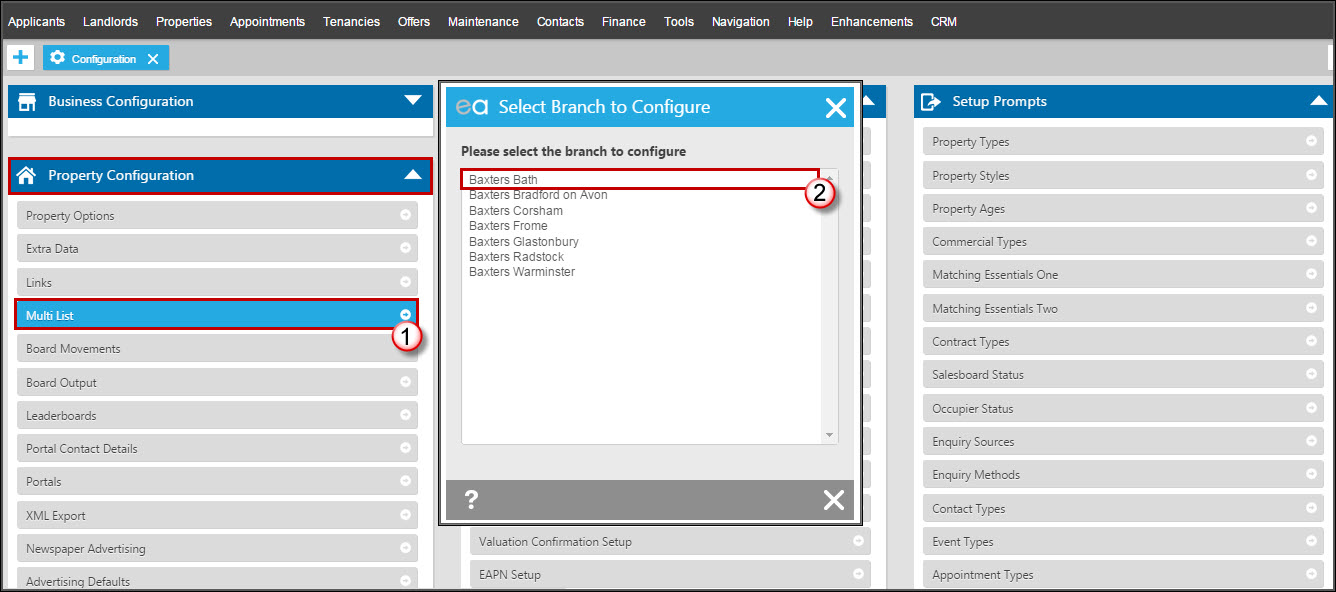
- Select the Multi-List option under Property Configuration.
- Choose the branch you want to setup.
If you are a Super User in a head office record of a group or multilist network, your own branches will appear in the list top right. If you want to multi-list to branches outside your own network, log a support ticket and tell us the branches you want to add. We will add them to your group list.
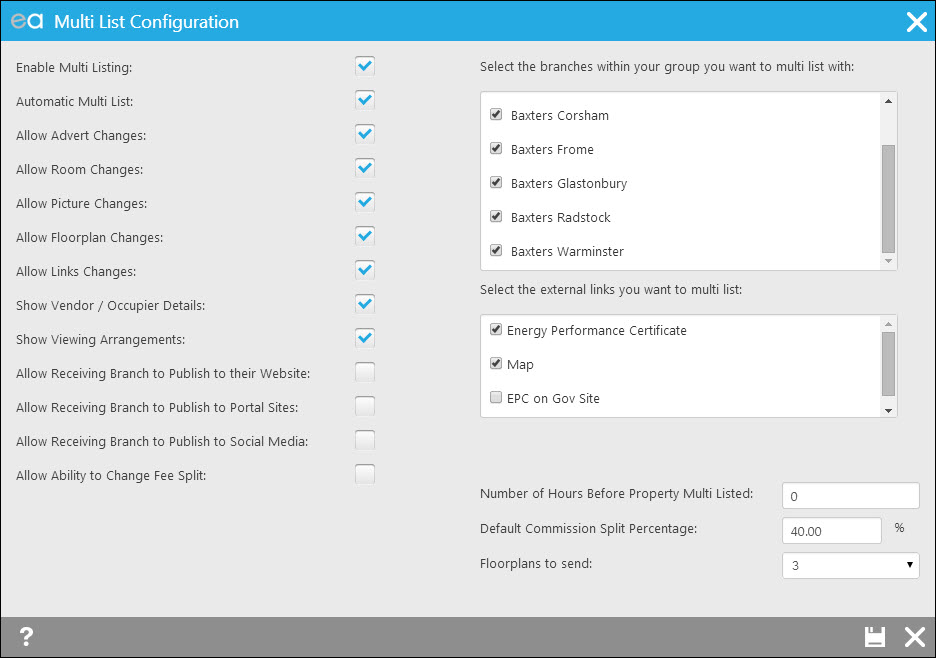
You then need to set up your multi-list permissions.

Allow automatic multi-list – this will offer all On Market and Marketed properties to the branches you’ve ticked in your network.
Default Number of Hours before Multi Listed – if you set Allow Automatic Multi List, a property will be offered to the branches you have ticked instantly unless you specify a number of hours delay here. You might want 48 hours to sell yourselves.
Floorplans to Send – specify how many of your floorplans you want to send.
Allow Advert Changes – tick this if you want to give receiving agents the option to change advert text (includes star items, advert heading etc.)
Allow Ability to Change Fee Split – this allows you to change the split every time you offer a property.
Select External Links - These are the extra items that can be added to Links in a property. You can choose to pass them or not as the case might be. The EPC gets passed automatically regardless.
Setting up Staff Permissions
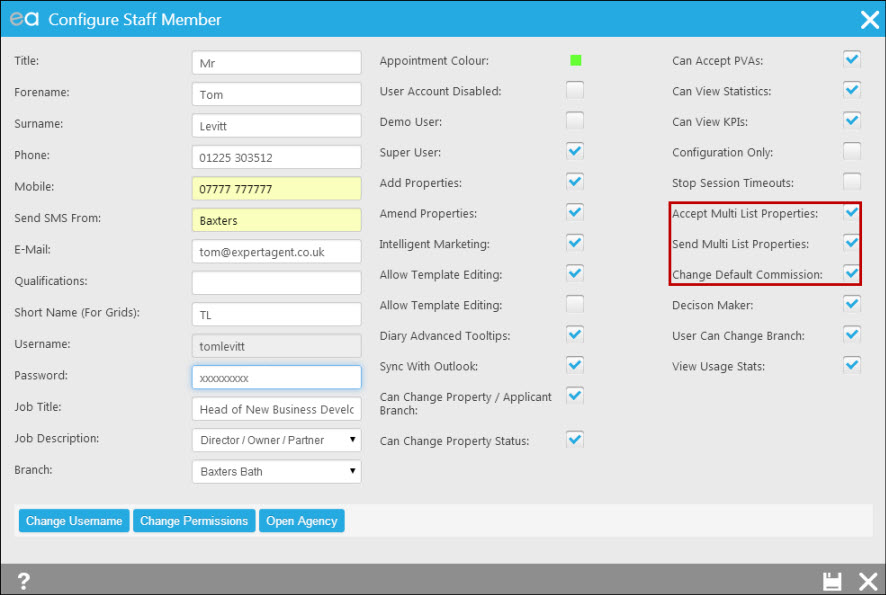
A Super User needs to set up one or more staff with the permissions necessary to send and receive multi-listed properties.
Hover over Tools in the top menu, select Configuration, go to Business Configuration and click into 'Agency Staff'.
Highlight the required member of staff and edit. The edit staff profile form below is displayed. You can then decide if this user is allowed to send and/or receive multi-listed properties. You can also allow this staff member to change the fee split on any property sent. If you have auto-multilist switched on then every new property is sent - effectively overwriting the 'Send Multi-List Properties' option for all staff.


 Login
Login

