Maintenance
Maintenance is a main menu item with a dashboard and grid (dashboard shown below):
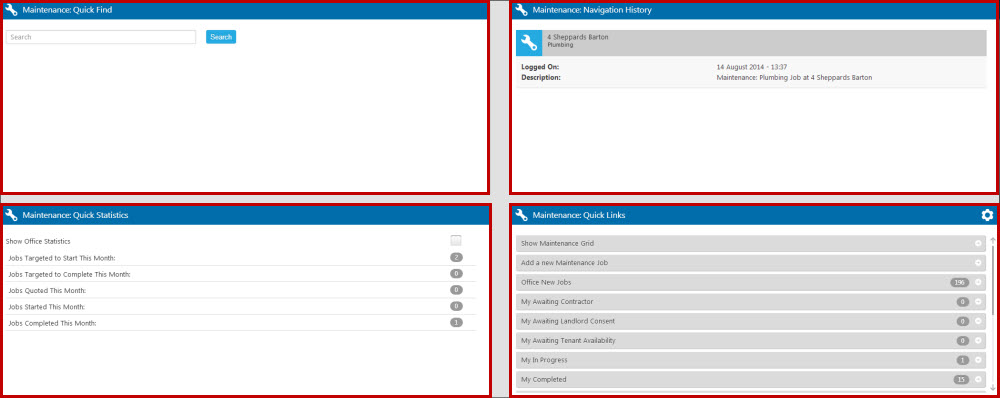
The maintenance dashboard has the same four main sections similar to the other dashboards:
- Quick Find - Shows the Top 50 records.
- Stats - Office or Personal – from 1st of the month.
- Navigation History - Top 20 recent records worked on – supplements the Navigation item in the main menu.
- My Quick Links - Configured by you – click “Edit” then choose the links you want to see from the 3 available sets – personal, office and group. Eg “Office Awaiting Contractor” etc. Your configured links show in the “my quick links” section.
Maintenance Grid
The maintenance grid works in the same way as all other Expert Agent grids and has the same three main elements:
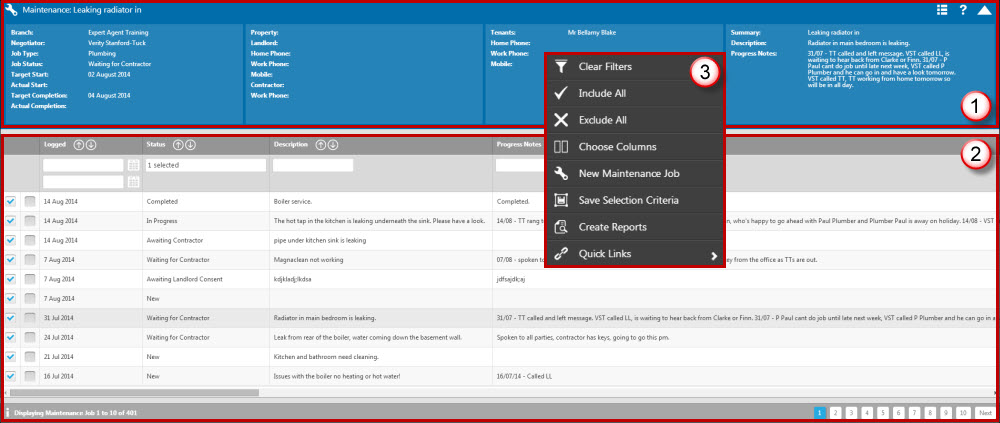
- The Information Panel
- The Grid Section
- The Action Menu
Adding a Maintenance Job
You are able to log a new maintenance job from various places in the system:
- From the Maintenance dropdown in the top menu.
- By right clicking when in the tenancy record.
- By right clicking when in a property record.
- By clicking the “Add a New Maintenance Job” link on the Maintenance dashboard.
- From the maintenance grid.
- From the Quick Search box in the top menu.
As it’s likely that a maintenance job will be reported by a landlord and/or a tenant you will probably find yourself starting this process from a tenancy record on most occasions.
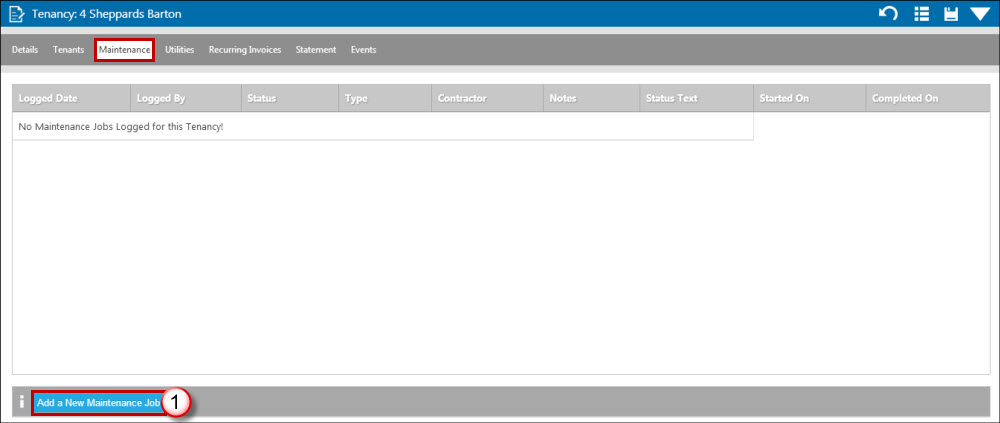
1. Go to the tenancy’s maintenance page tab and click ‘New Maintenance Job’.
The following form appears:
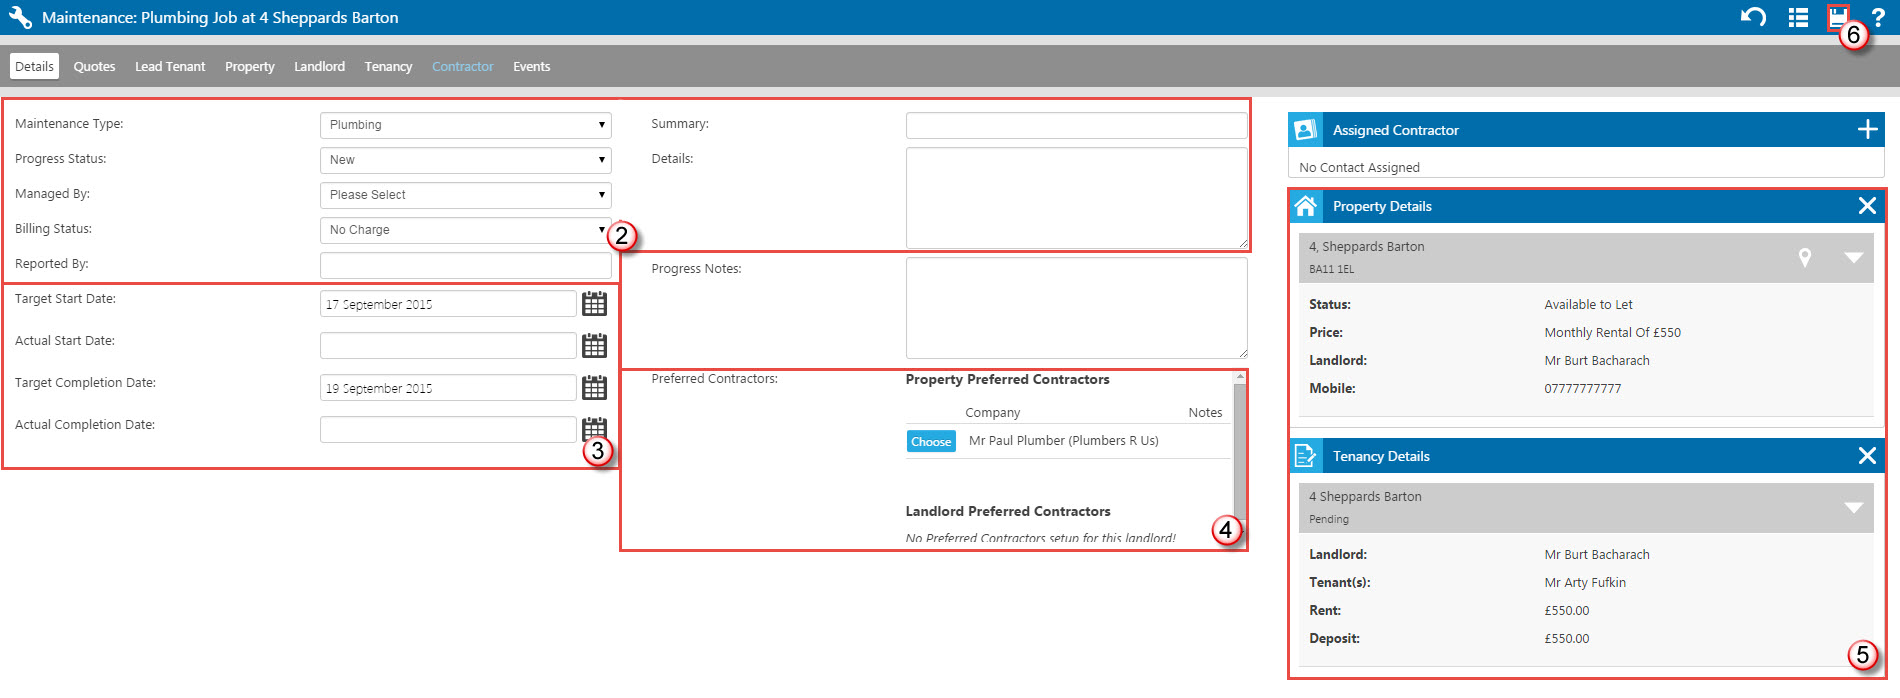
2. Select the maintenance type, progress status and billing status from the dropdowns, as well as providing a summary and details of the problem/work to be carried out.
3. Populate the target start dates and completion dates – unless logging this job in retrospect, you will need to come back and complete the actual dates later. These date fields are more useful for larger maintenance jobs but can still be used for small jobs.
4. Review the property preferred contractor and the landlord contractor, if assigned. These will be visible as long as the property/tenancy are attached to the maintenance log on the right (point 5) - they will be if you have come through the tenancy to log the new maintenance job.
If they are the same then simply click ‘Choose’ next to their details to assign them as the contractor for this task. If they are different then you will need to review the notes and decide which contractor to assign – you could even ask both for quotes and come back to assign a contractor to the job later.
5. Check the tenancy and the property are assigned - if they aren't, click on the plus symbol next to each heading and search for them using the standard ‘Select Property’ and ‘Select Tenancy’ screens.
6. Click on the save icon. The menu icon would allow you to perform additional actions such as undo changes or create letters.
Managing & Accepting Quotes
To record any quotes received for your maintenance job you need to open up the record in one of the usual ways (dashboard, grid, navigation history, quick search, and so on) and go to the ‘Quotes’ tab:
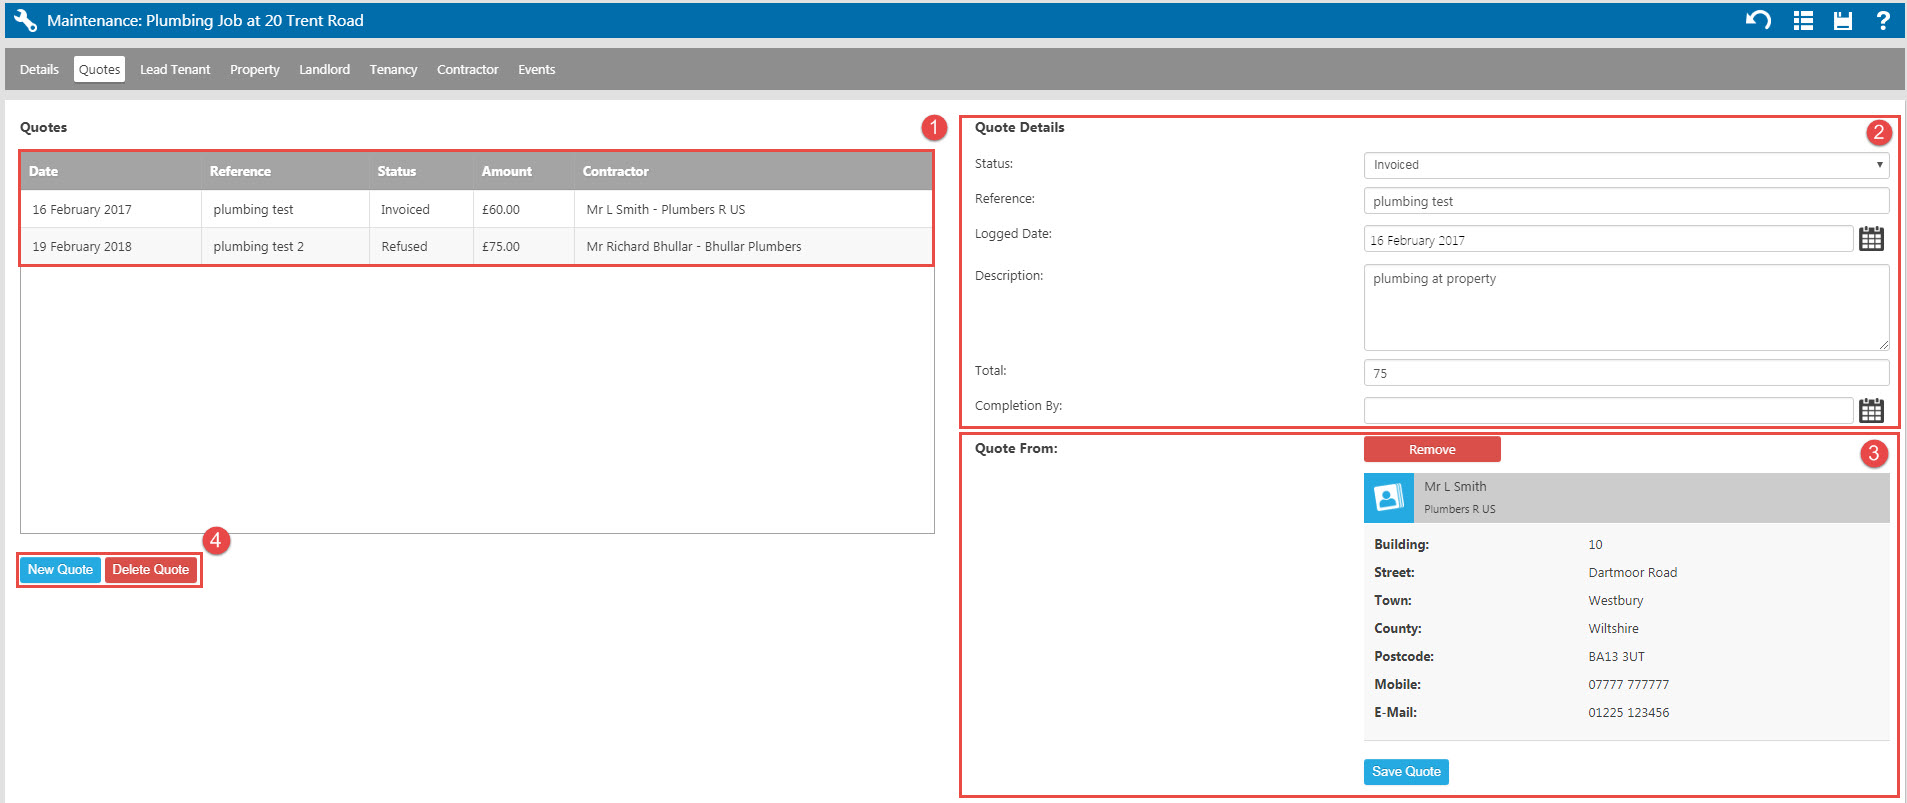
1. There will be a list of quotes on the left hand side. Any previous quotes will be listed here. All new quotes will join this list.
2. Assuming you need to enter a new quote, fill in the quote details on the right, including the quote status, date quote was received, a description, the total quote amount and when they have said they can complete the work by.
3. Assign a contractor to the quote – click ‘Choose’ and find them from your contacts list. Save the quote using the ‘Save Quote’ button.
4. If you need to add another quote click ‘New Quote’ and repeat the steps above. There is also a ‘Delete Quote’ button should you need.
Eventually, one of your received quotes will become an accepted quote, so you will need to record this on the maintenance job record:
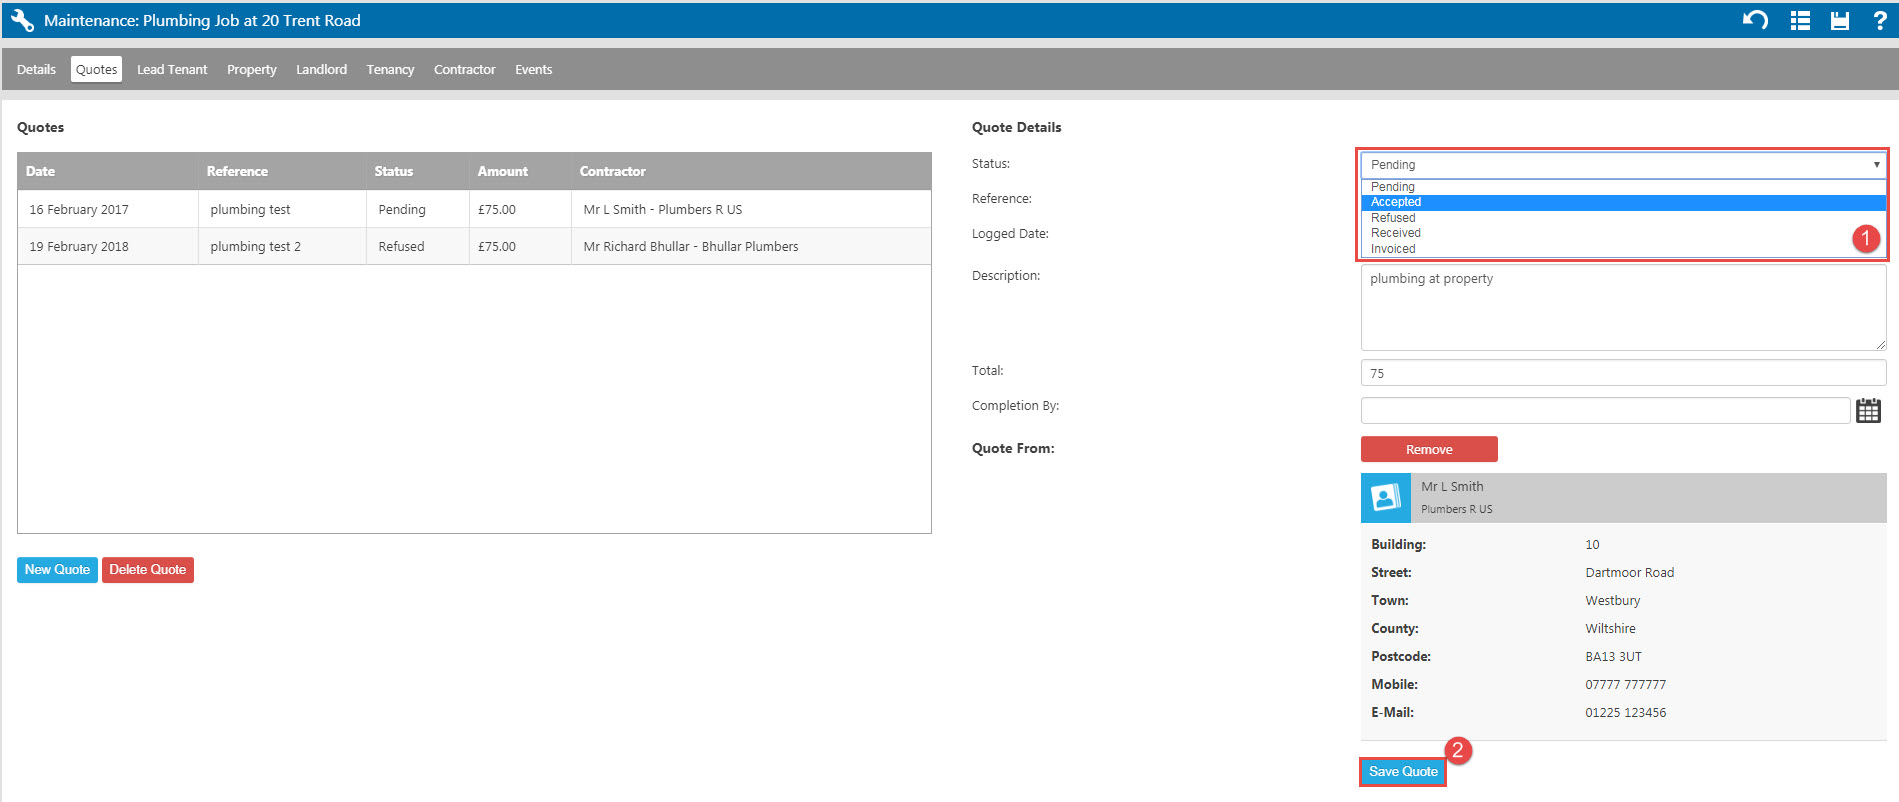
1. Click on the quote you would like to accept from the list down the left hand side of the page and change the status using the drop down on the right hand side to ‘accepted.’
2. Save your quote.
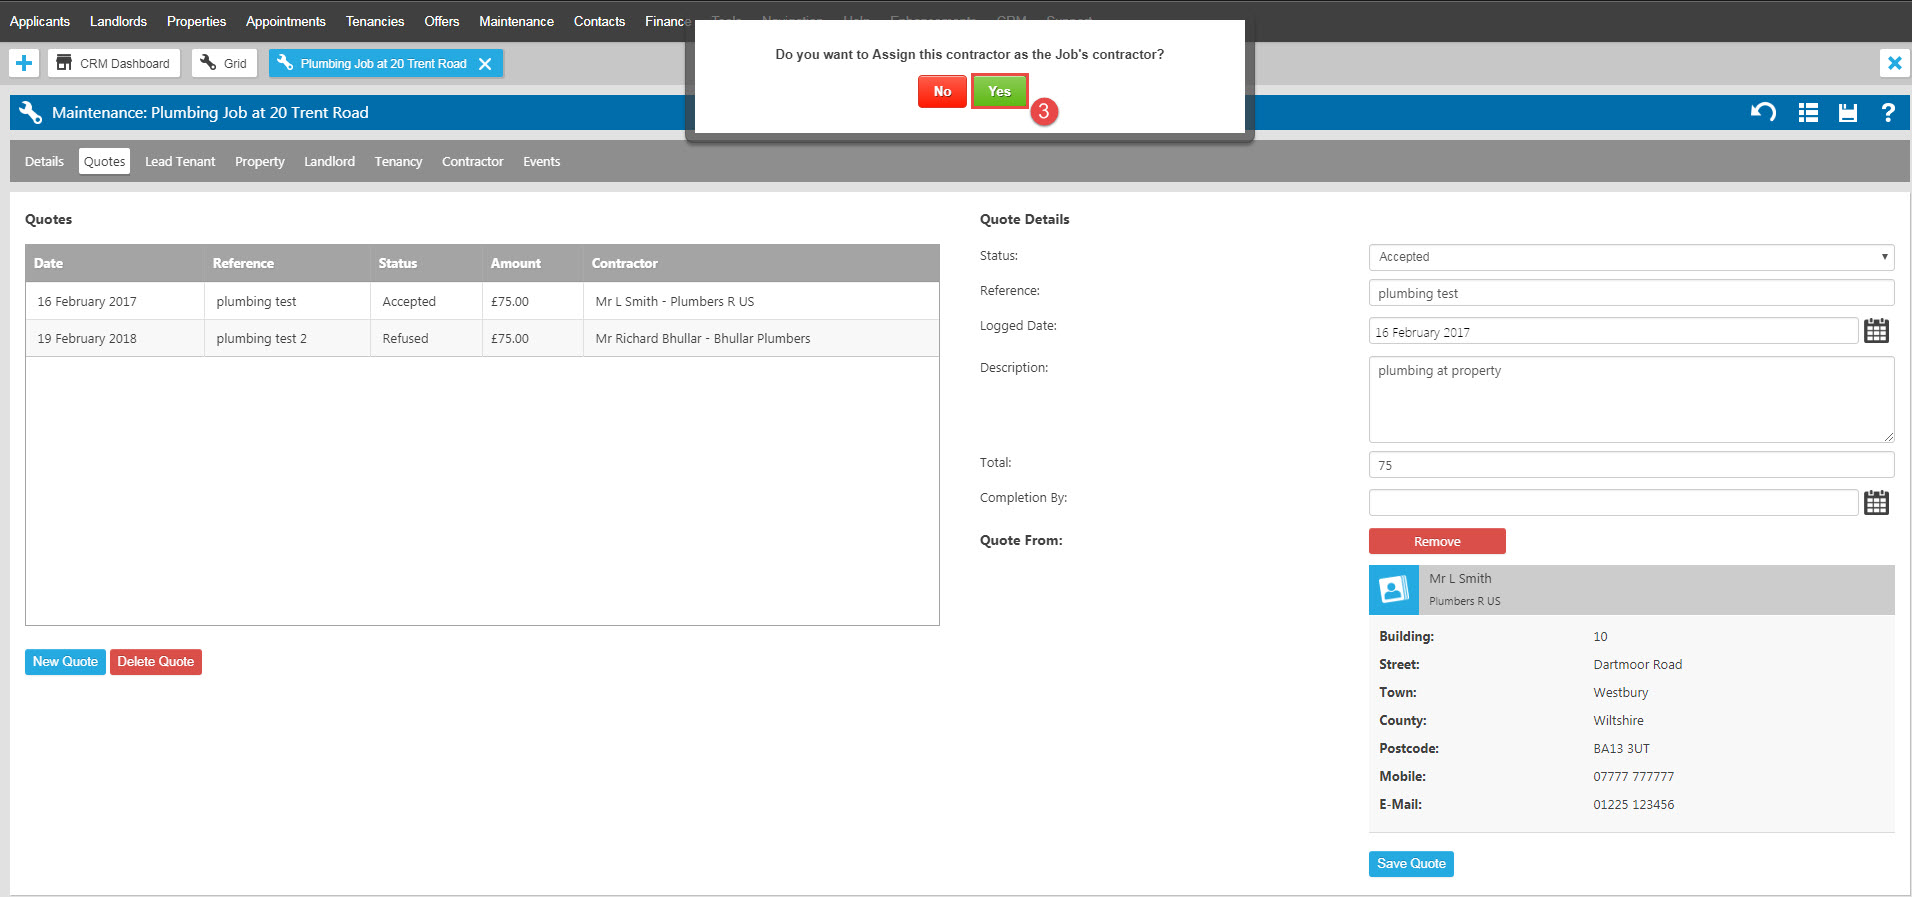
3. The system will ask if you would like to make this contractor the assigned contractor for the job, so if you haven’t done so already click 'Yes'.
If you have Financials enabled, you will gain an additional button at this point that would allow you to raise the purchase invoice directly from the maintenance record:
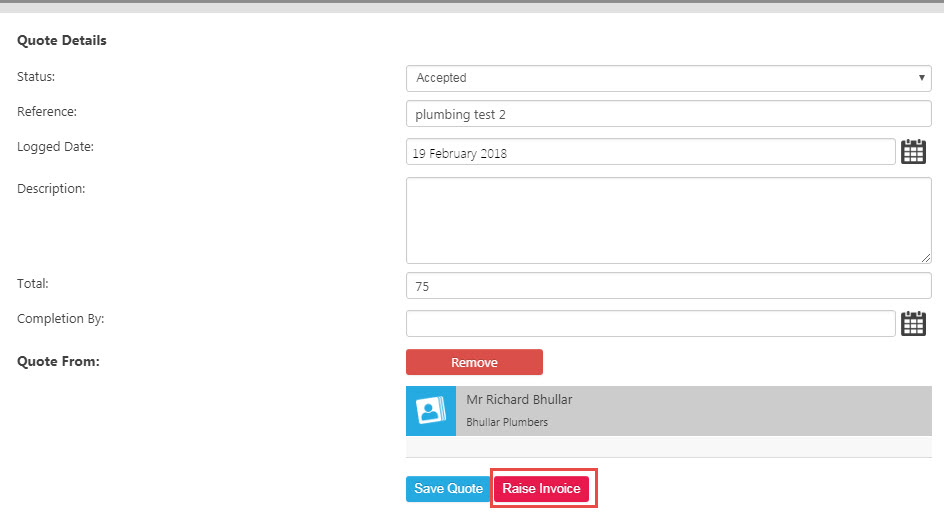
This works in much a similar way to raising a purchase invoice from any other screen - for more information on this, see the Purchase Invoices chapter.
You would then go back to the ‘Details’ tab and manage the rest of the process from there:
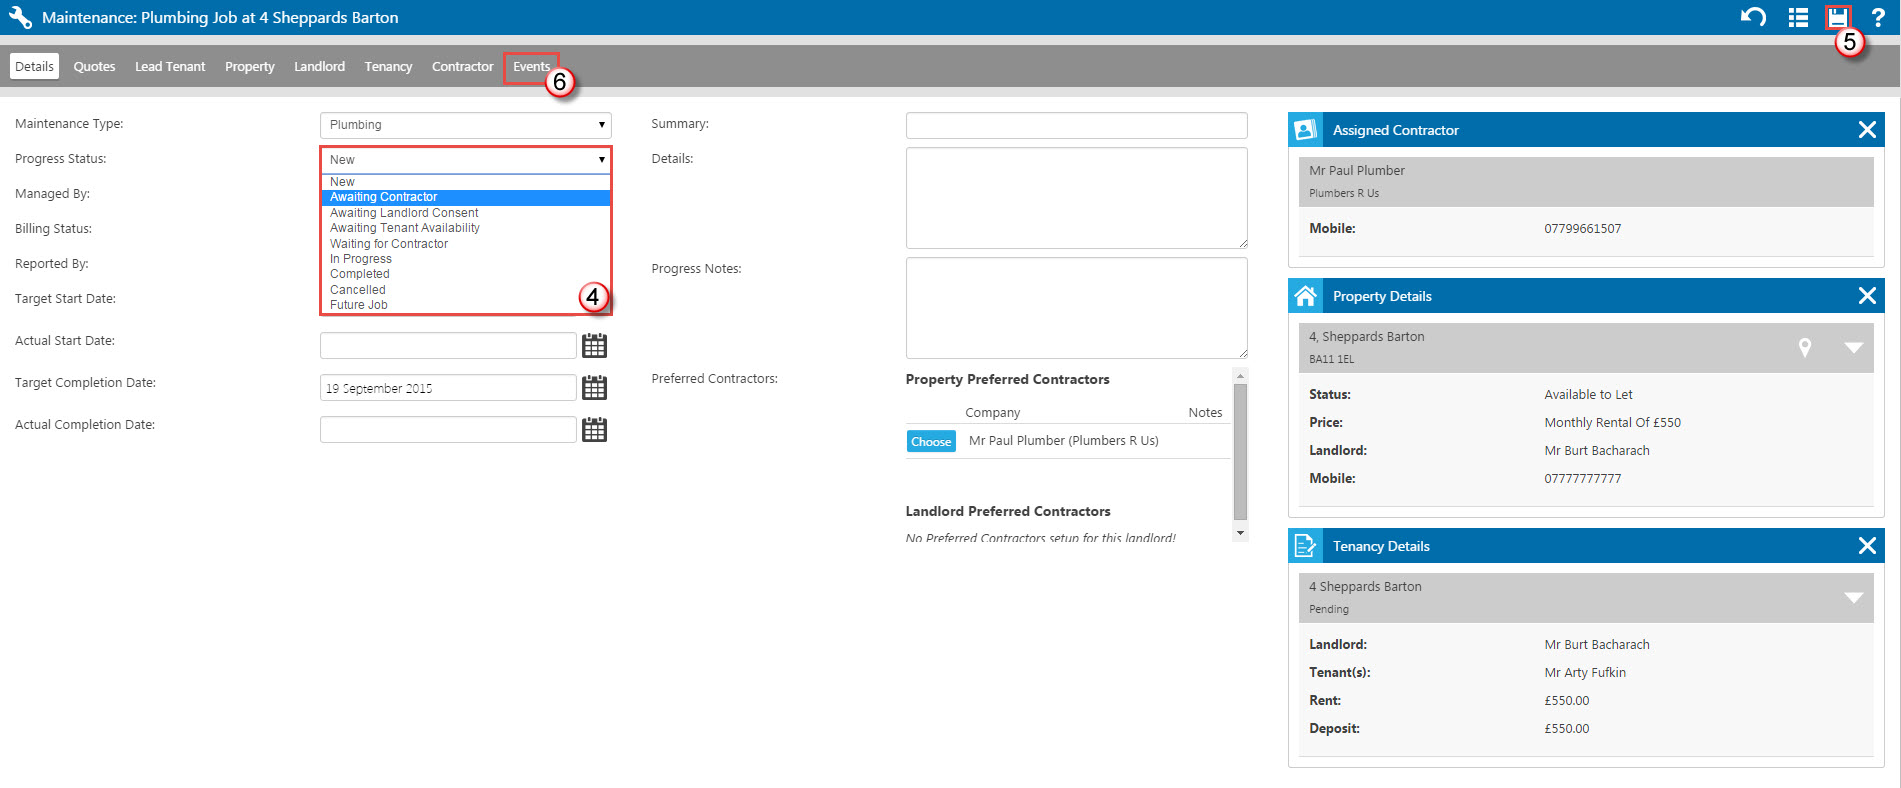
4. As the job progresses, you will need to keep the progress status updated – the status will eventually be ‘completed.’ Prior to this it may be ‘awaiting contractor,’ ‘in progress’ and so on. There are quick links for these statuses, so you can always keep an eye on the progress of a maintenance job. You may find that you do not need to use all of the status options, particularly for small jobs, so just use the statuses that are relevant to you and set your maintenance quick links accordingly.
5. Click the save icon to save changes.
6. Like many records in Expert Agent, you can log and track events by clicking into the events tab. Please note that you can also upload files through this tab such as completed job sheets etc.

 Login
Login

