Working with contacts
The Contacts grid is much the same as all others in the system. It has a Tooltip, Grid Section for searching, sorting, finding and reporting and an Action Menu.
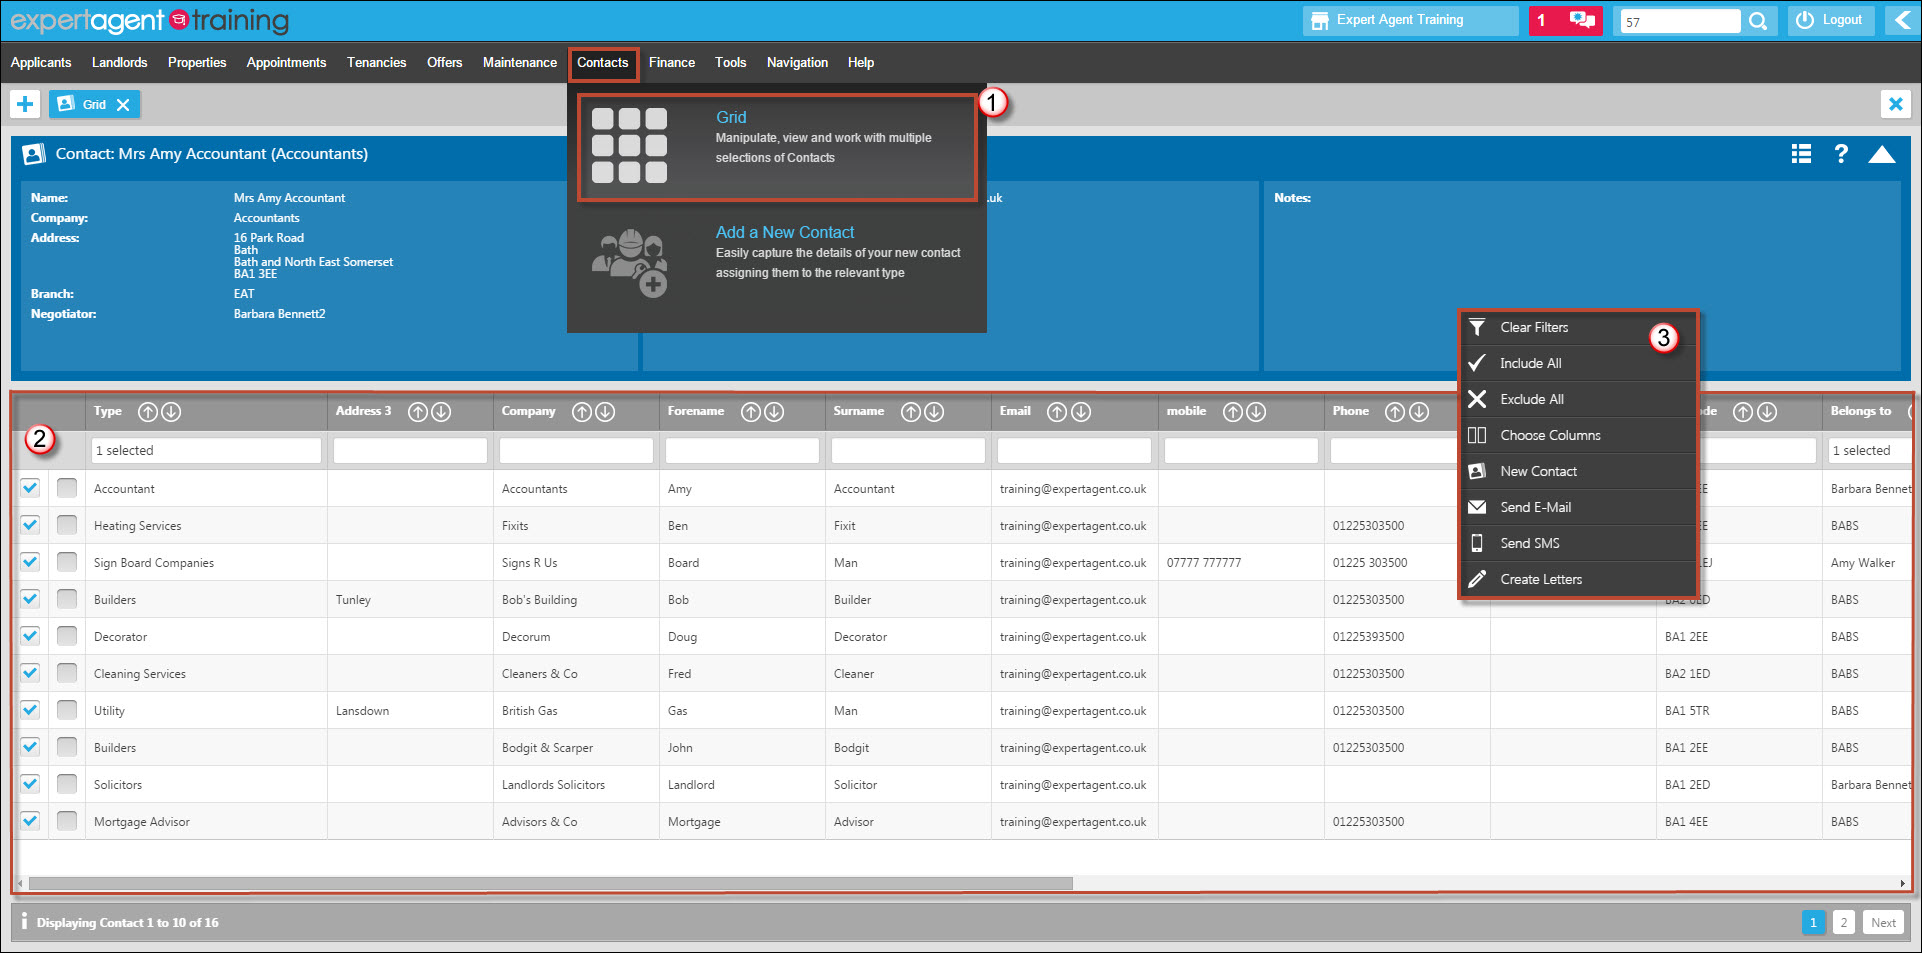
- Hover over 'Contacts' in the Top Menu and select the 'Grid' option.
- The grid section allows you do the standard searching and sorting of multiple records. You may find you use the 'Type' column regularly to filter on the various contact types.
- Right click to display the contact grids action menu.
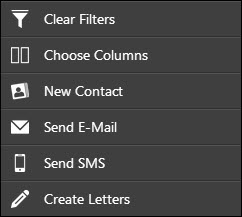
- Clear Filters - Clears any filters currently set on the grid.
- Choose Columns - Allows you to choose which columns display and the order in which they display.
- New Contact - Allows you to add a new contact.
- Send E-Mail - Sends an e-mail to all contacts currently selected in the grid (this is determined by the tick boxes on the left hand side of the grid).
- Send SMS - Sends an SMS to all contacts currently selected in the grid.
- Create Letters - Create a letter to print and send to all records currently selected in the grid.
The Contact Form
Once again the Contacts Form is much like any other within the system. It has the Tooltip, Form Tabs and Action Menu.
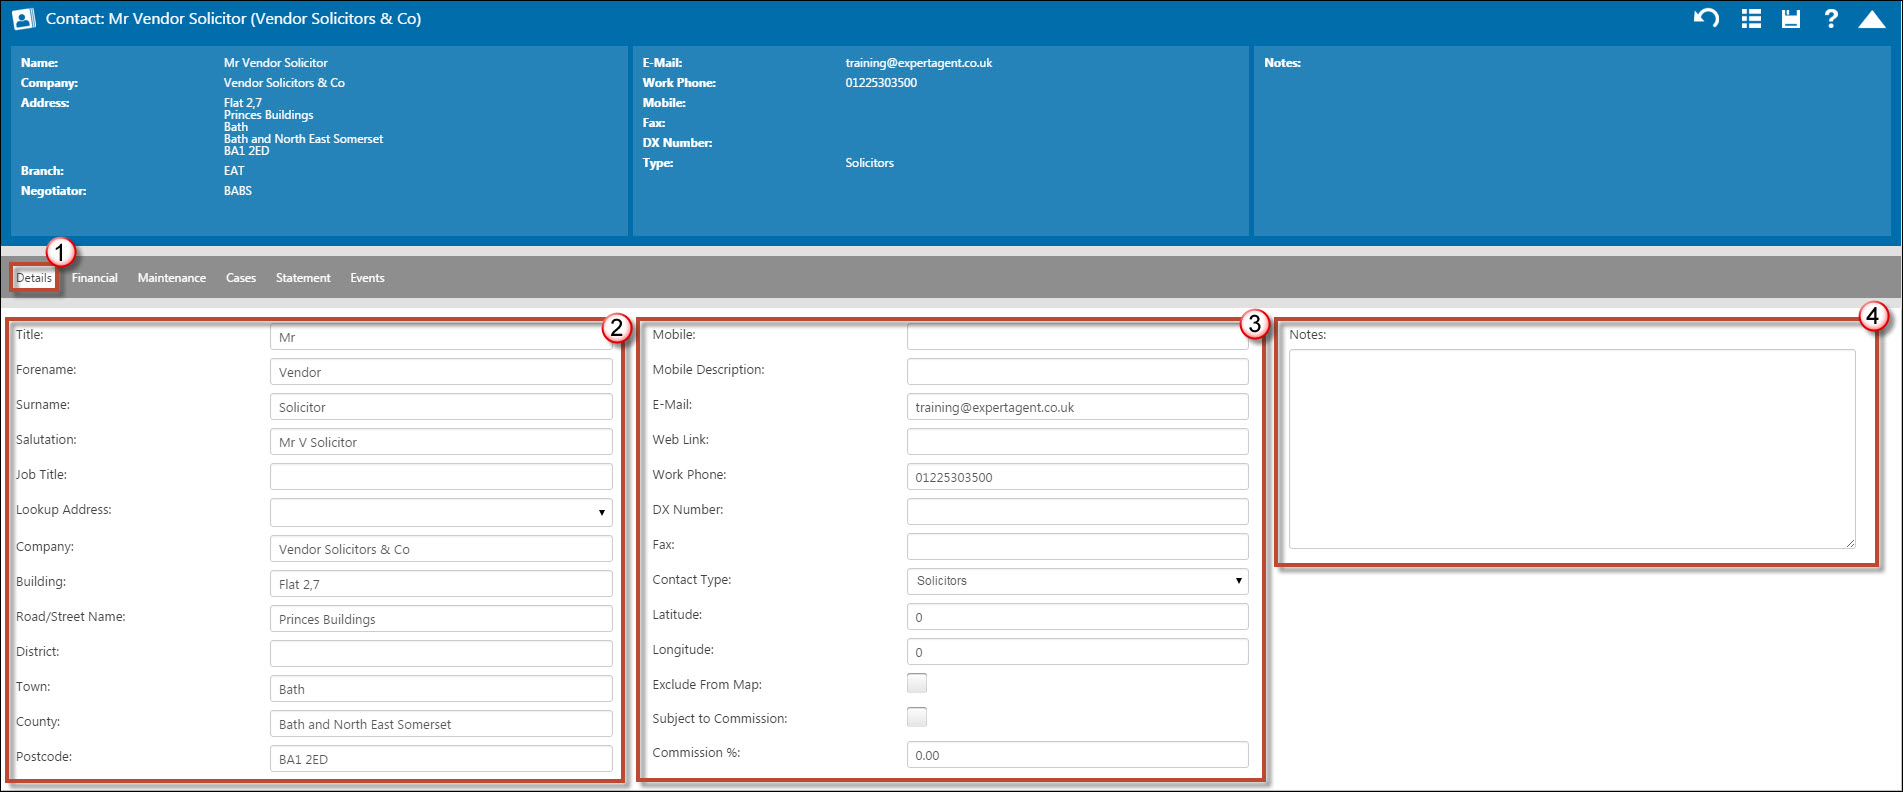
- Click into the 'Details' tab.
- Complete the name and address fields. Remember you have the postcode look-up facility.
- Enter/ Update the contact details for your contact. The 'Longitude, Latitude and Exclude from Map' options all relate to how the contact displays on the map. See the Contact Types section for more information on this. The commission section relates to lettings contractors. For more information see the Purchase Invoices section.
- Enter/ Update any relevant notes regarding your contact.

- Click into the 'Financial' tab.
- Enter or amend any bank details regarding your contact if needed.
- Confirm if they are registered for VAT and if so, what their standard VAT rate is. This is important if you are using Lettings Financials as it will preempt the default VAT rate when creating invoices for the contractor. See Purchase Invoices for more information.

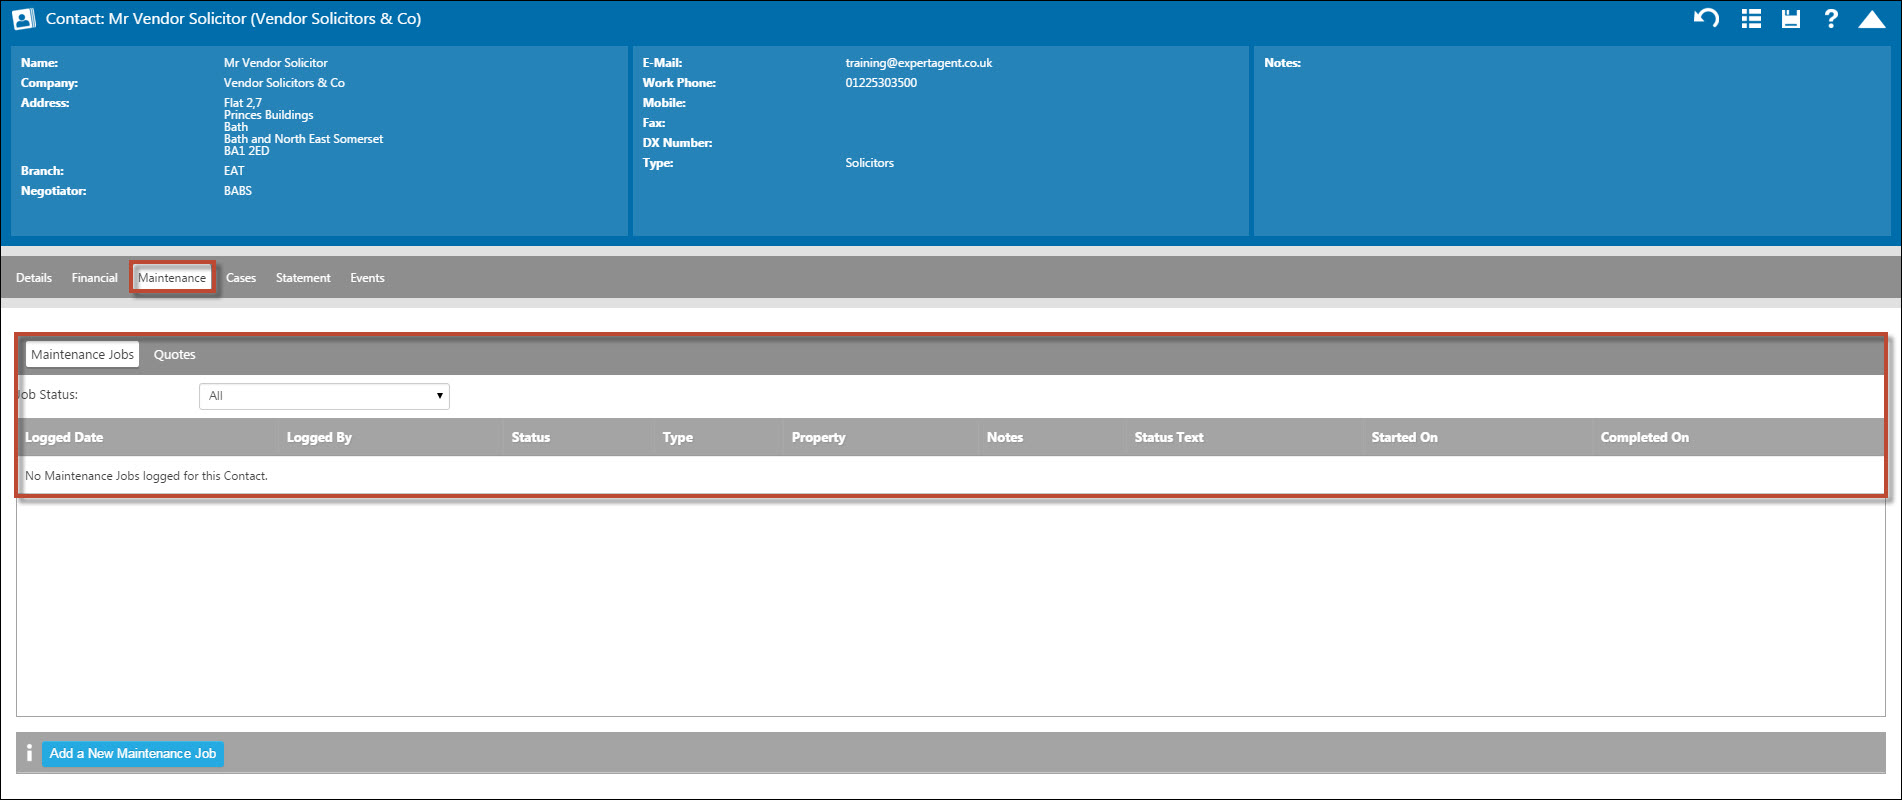
Click into the 'Maintenance' tab.
- Any maintenance jobs currently assigned to the contact will display in the grid. The 'Quotes' sub tab will display any quotes logged for this contact.
- Don't forget the save option if you have made any changes.
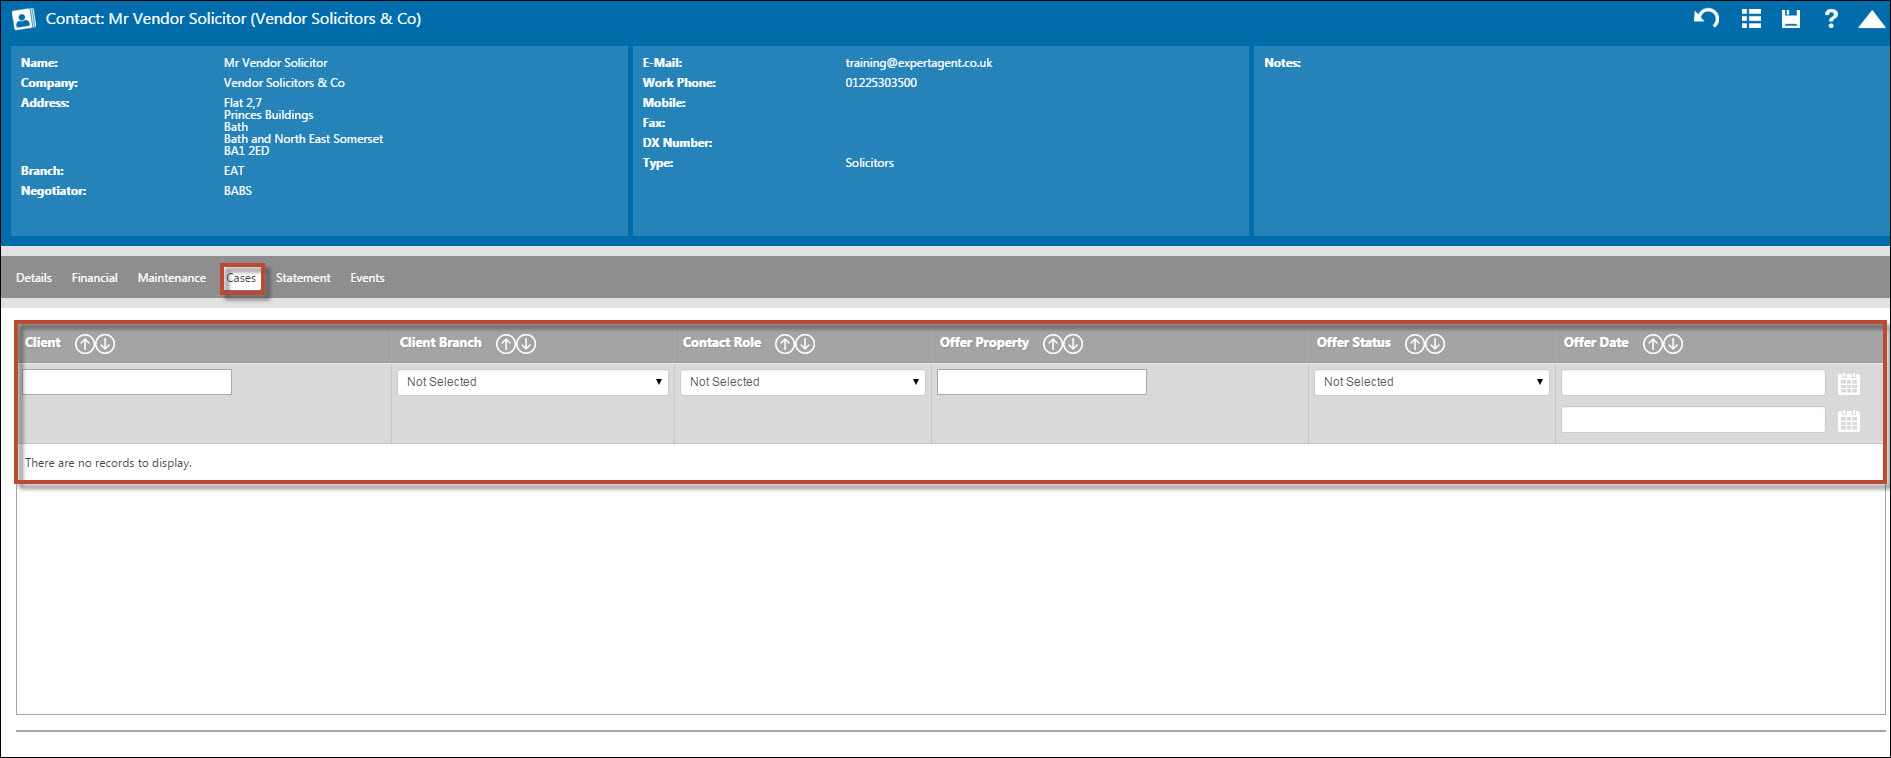
- Click in the the 'Cases' tab.
- The cases tab will display the information of any other record this particular contact has been assigned to, for example Maintenance Jobs, Offers, Tenancies etc.
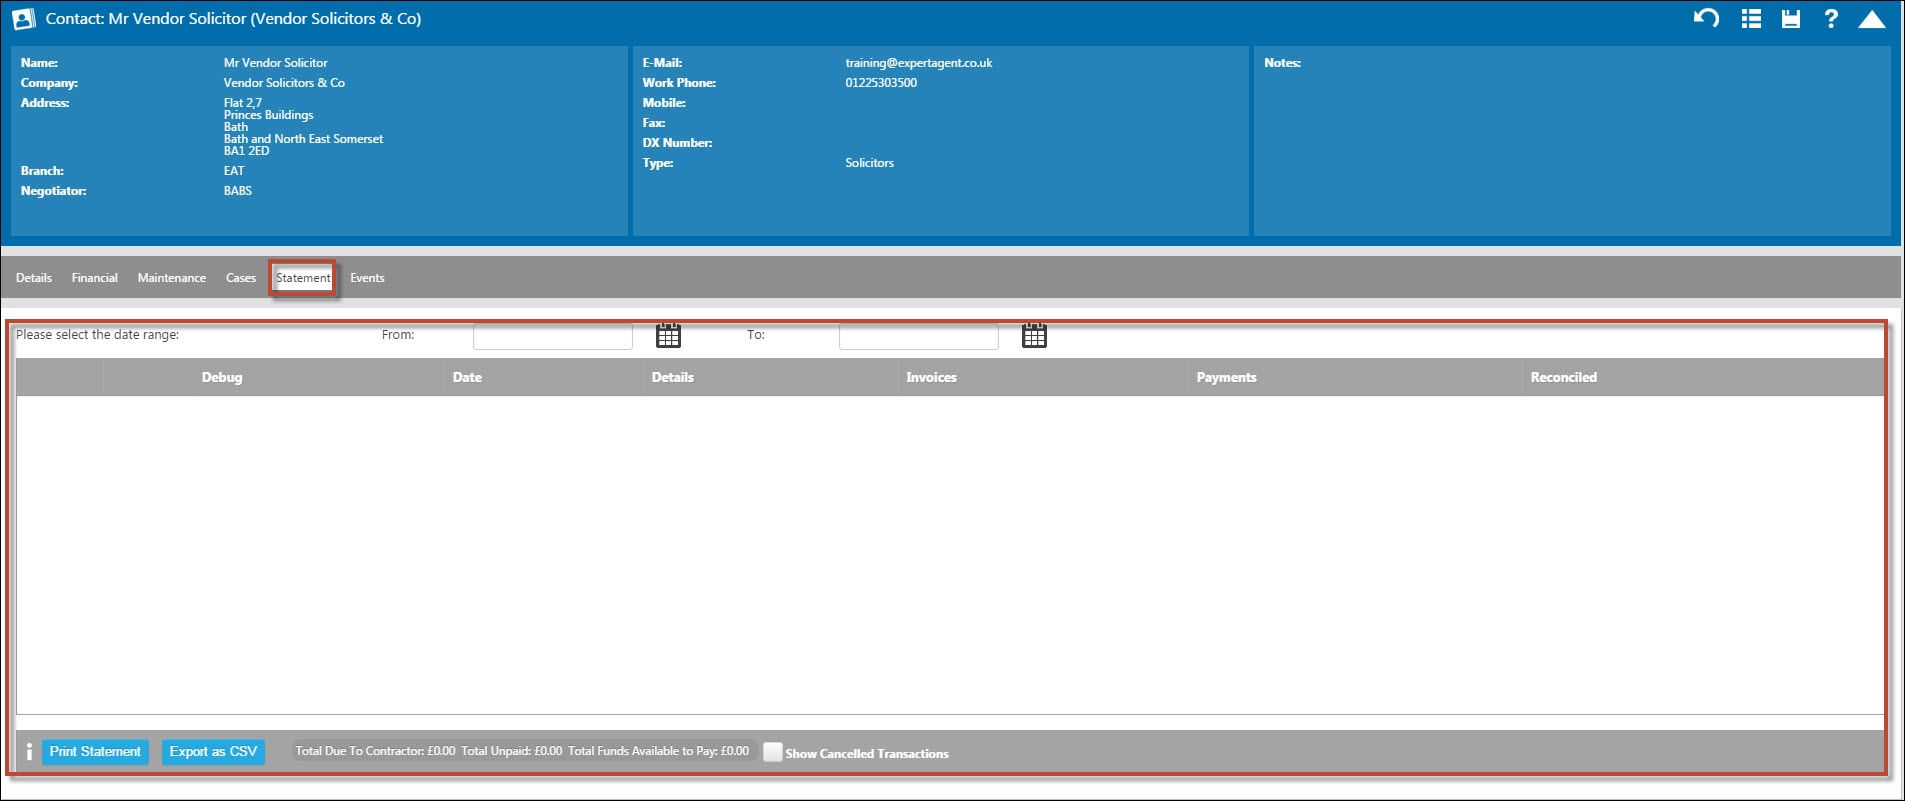
- Click into the 'Statements' tab.
- Select the date range you wish to produce the statement for. The statement will display in the grid below with totals at the bottom in the grey bar. You have the option to show the 'Cancelled Transactions' if you wish and the ability to run a statement or export it to CSV.
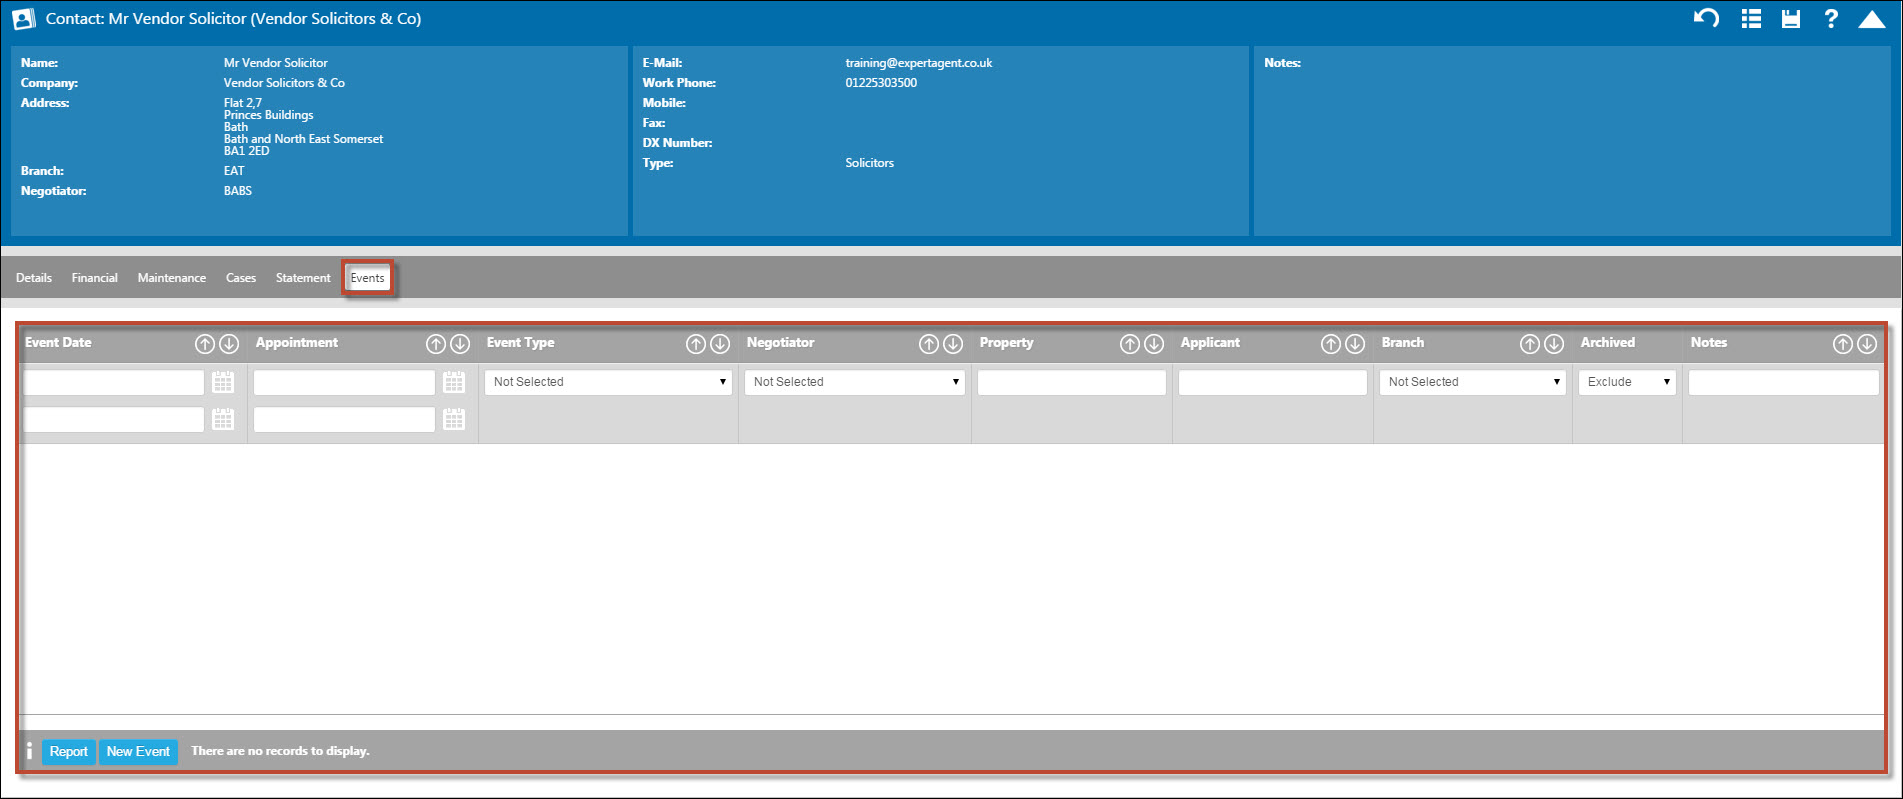
1. Click into the 'Events' Tab.
2. As with all events tabs in Expert Agent, you are able to see a record of all events on the contacts form. This includes any correspondence sent or any special notes or events added. You are able to sort and filter the events/ log entries as standard.
3. Report & New Event options allow you to either create a report on the selected records in the grid or add a new event/ note.
The Contact Form Action Menu
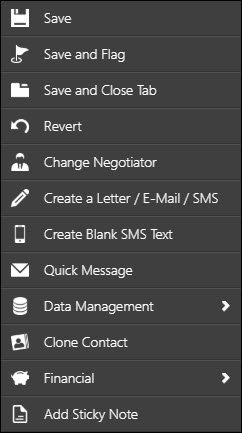
- Save - Ensure you save after making any changes to the form.
- Save & Flag - Will save the form in it's current state and flag the record in red at the top of your navigation history.
- Save & Close Tab - Will save the record and then close the tab.
- Revert - Will revert any changes you may have made.
- Change Negotiator - Allows you to change which negotiator the contact is assigned to.
- Create a Letter/ E-Mail/ SMS - Create any correspondence to send to your contact.
- Create Blank SMS Text - This option will open a blank SMS field for you to write a bespoke text message.
- Quick Message - You can send a quick message to anyone in your branch attaching this contact record to the message.
- Data Management - This gives you the option to delete the Contact Record. GDPR Deletions
- Clone Contact - Easily clones the contact to create a duplicate record. This would be helpful if you want to have your contact listed as a builder AND a joiner.
- Add a Sticky Note - This will allow you to add on a 'sticky note' to add on to the record. Helpful for adding on reminders or notes temporarily.
- Financial Cancel Transactions - This gives you the ability to cancel any transactions that may be against your contact. See Cancel Transactions for more information

 Login
Login

