Booking viewings
The next steps to consider are the viewing requests off the back of your match.
It’s easy to create, manage and record viewing appointments for both accompanied and unaccompanied viewings using Expert Agent’s appointment functionality.
Any viewing comments are logged against the respective applicant and property records automatically when feedback is placed in the viewing form, and you have the option of providing the vendor with access to the viewing notes and comments from applicant feedback – just some of the efficient and time-saving benefits of using our electronic diary.
Appointments dashboard
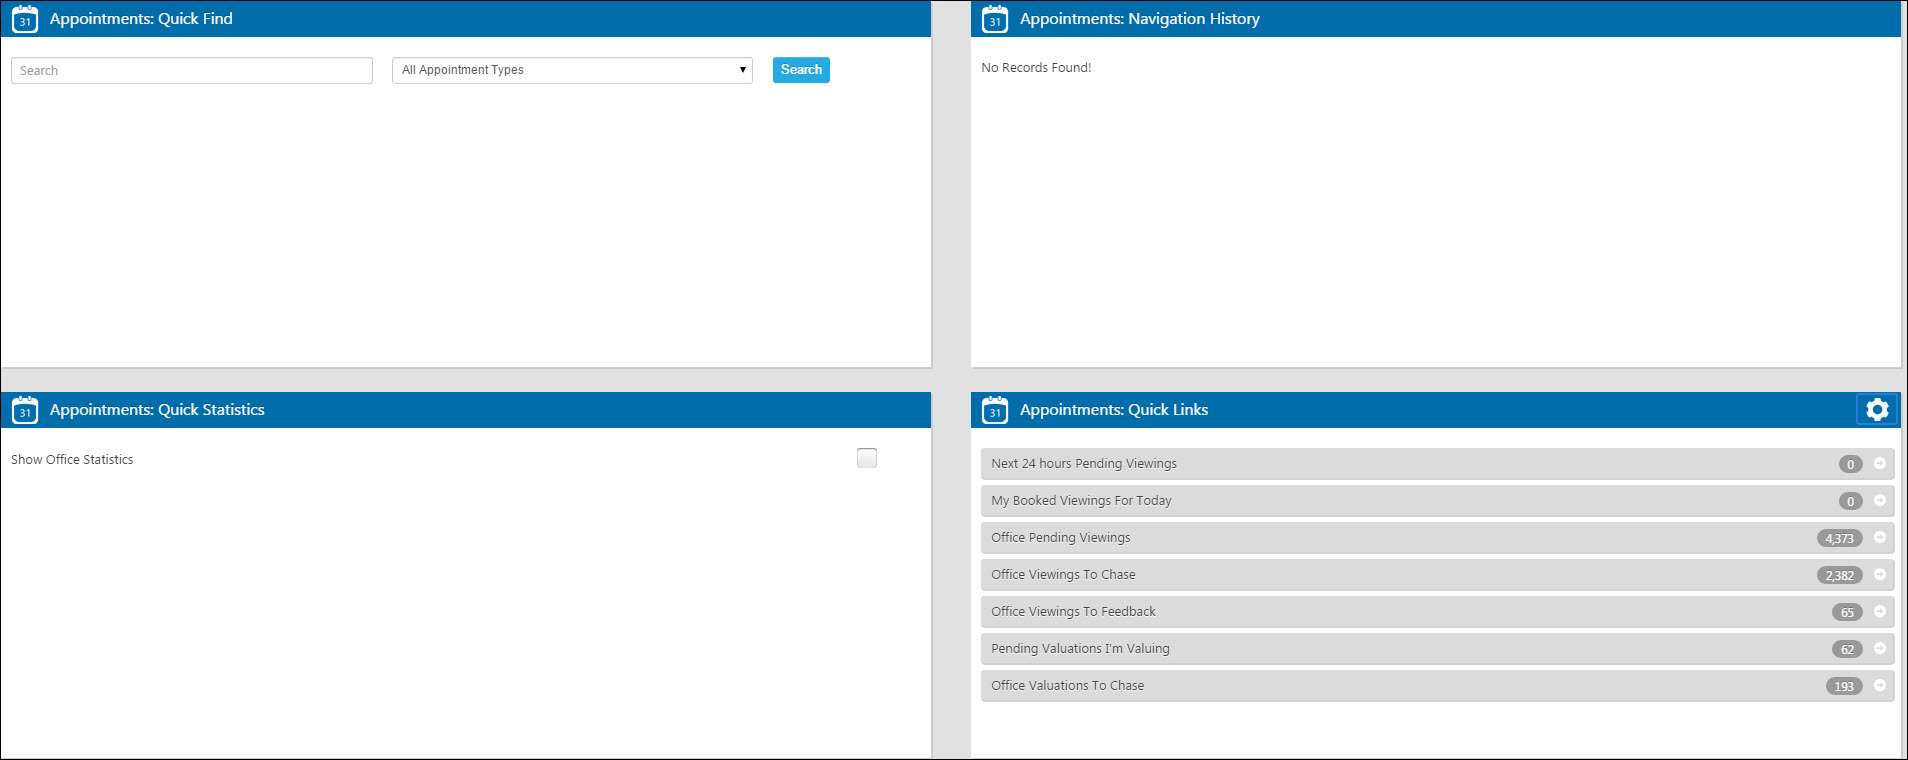
It’s important to set up your appointment dashboard so that you can manage your appointments and ensure that things are progressed correctly from here. Set up all of your quick links (click ‘Edit’ next to the section heading) for viewings that are ‘Pending’, ‘To Chase’ and ‘To Feedback’ – as usual there are the ‘My’, ‘Office’ or ‘Group’ options, so you can choose the links most relevant to you. (You can also set up Quicklinks from here for Valuations, Staff Holidays, Property Inspections and all other appointments).

As with all other aspects of Expert Agent, viewings can be added from various starting points:
Selecting ‘Add a New Appointment’ from the Appointments top menu
- From the appointments dashboard
- By right clicking when in a property record
- By right clicking when in an applicant record
- By right clicking in the diary
- From the viewings pod on your homepage
To add a single appointment for an applicant:

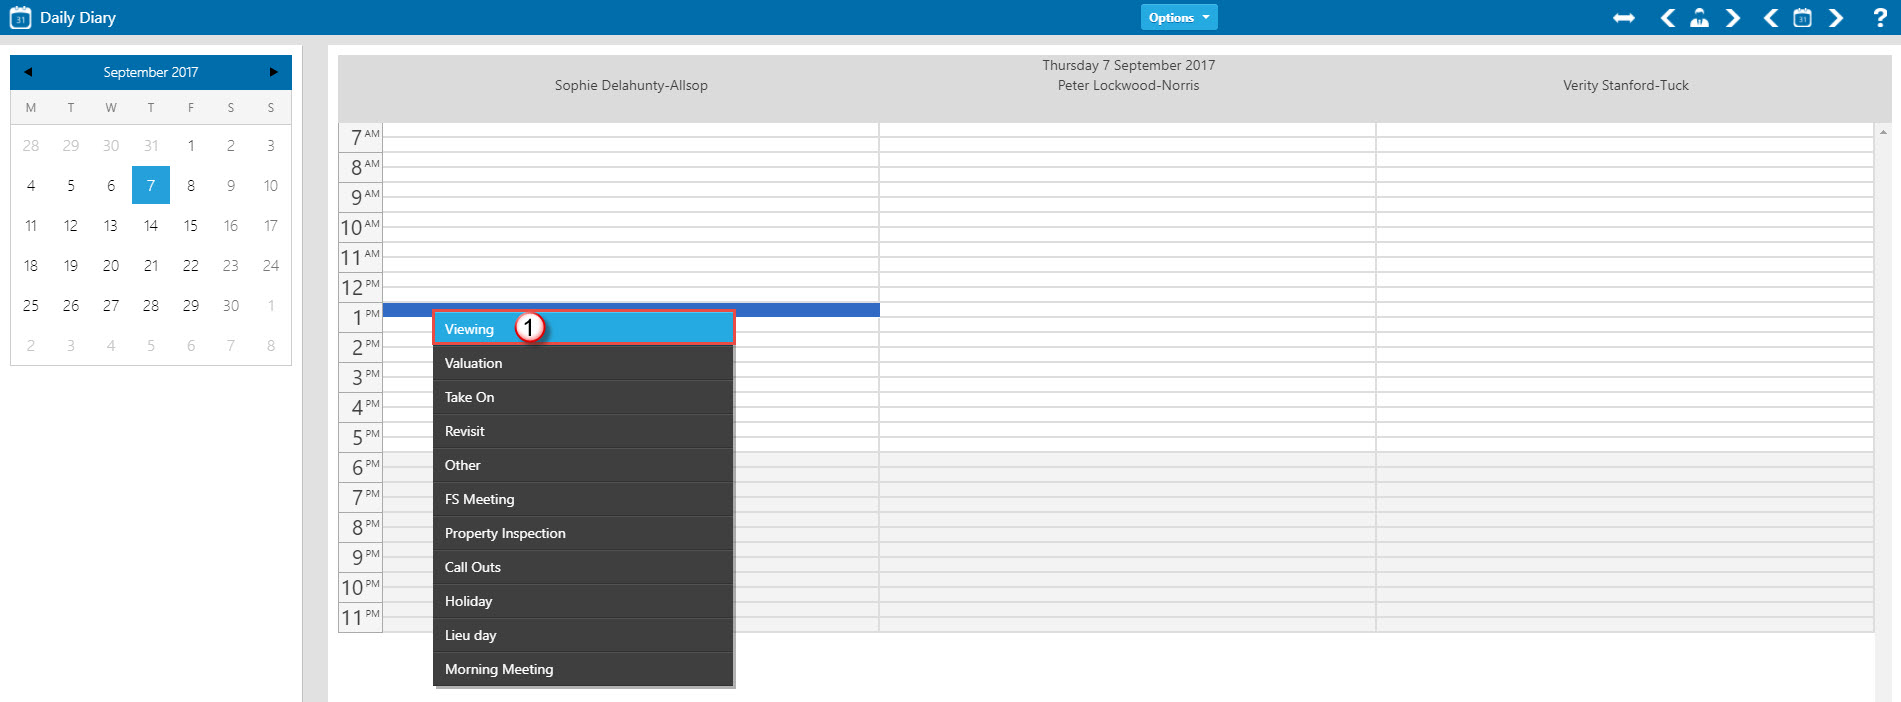
- Open your chosen diary view (Daily Diary shown above), right click on the diary and select ‘Viewing’ from the appointment type drop down.
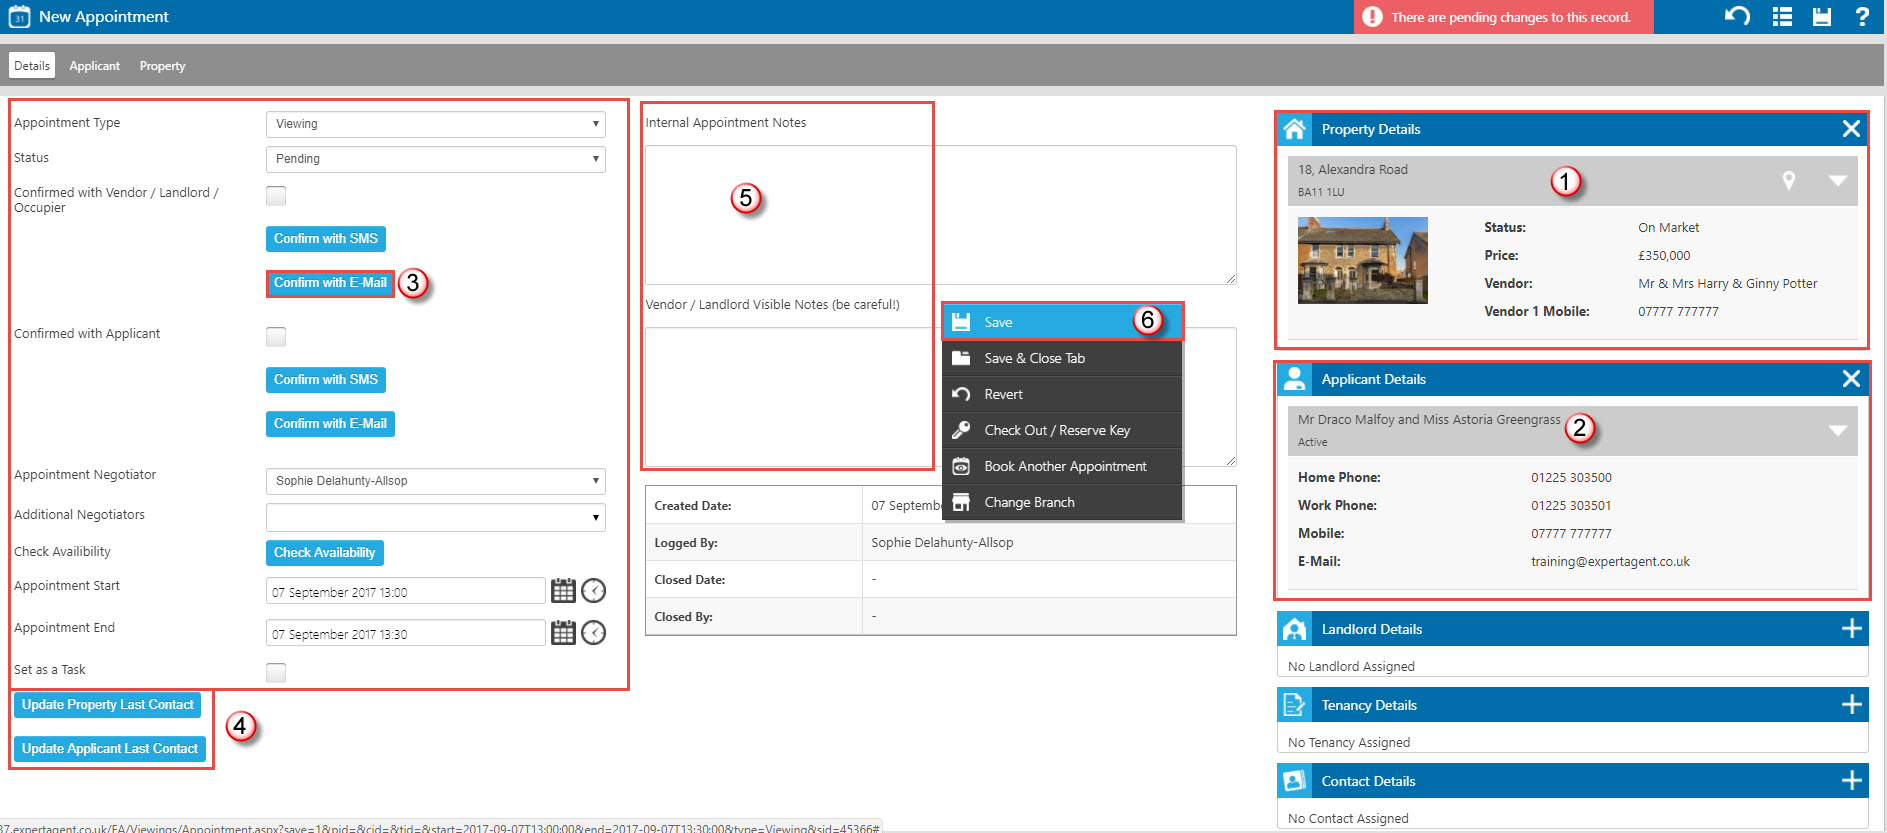
The viewings appointment details form will appear. This is as per the valuation form, with a few extra items:

- Click ‘+’ to assign the property – use the down arrow to expand the Property Details to show additional contact numbers, and Access notes. Remember to take heed of the viewing arrangements displayed to ensure you are adhering to any arrangements made with the vendor . (Viewing arrangements can be added on the ‘Access’ page tab in the property form).
- Click ‘+’ to select the applicant who is viewing the property.
- Check the appointment type, negotiator, start and end times are all correct. If you need to change the date or time, be sure to use the calendar and clock icons, rather than free typing in the box. If the viewing is unaccompanied then you can select ‘Unaccompanied’ as the appointment negotiator. There is also an option to add additional negotiators if you would like to. The viewing status when you add the viewing will be ‘pending’ – you have the option of creating letters, editing and sending quick texts or emails via the links to confirm your viewing from this screen. As soon as you have confirmed with both parties, tick the boxes and the viewing status will change to ‘confirmed’. If you need to set this as a task for yourself or a colleague, tick the 'Set as a Task' box and set the task date accordingly.
- If you want to record details of the conversation, you can Update Property/Applicant Last Contact from here. This will give you the option to adjust the Next Contact Due date, as well as the Applicant's Due Off date.
- Add relevant notes into the boxes – using the ‘Internal Appointment Notes’ box for private notes, and the ‘Vendor Visible Notes’ box for any information you’d like to share with the vendor.
- Right click and ‘Save’ or ‘Save & Close Tab’ when finished.
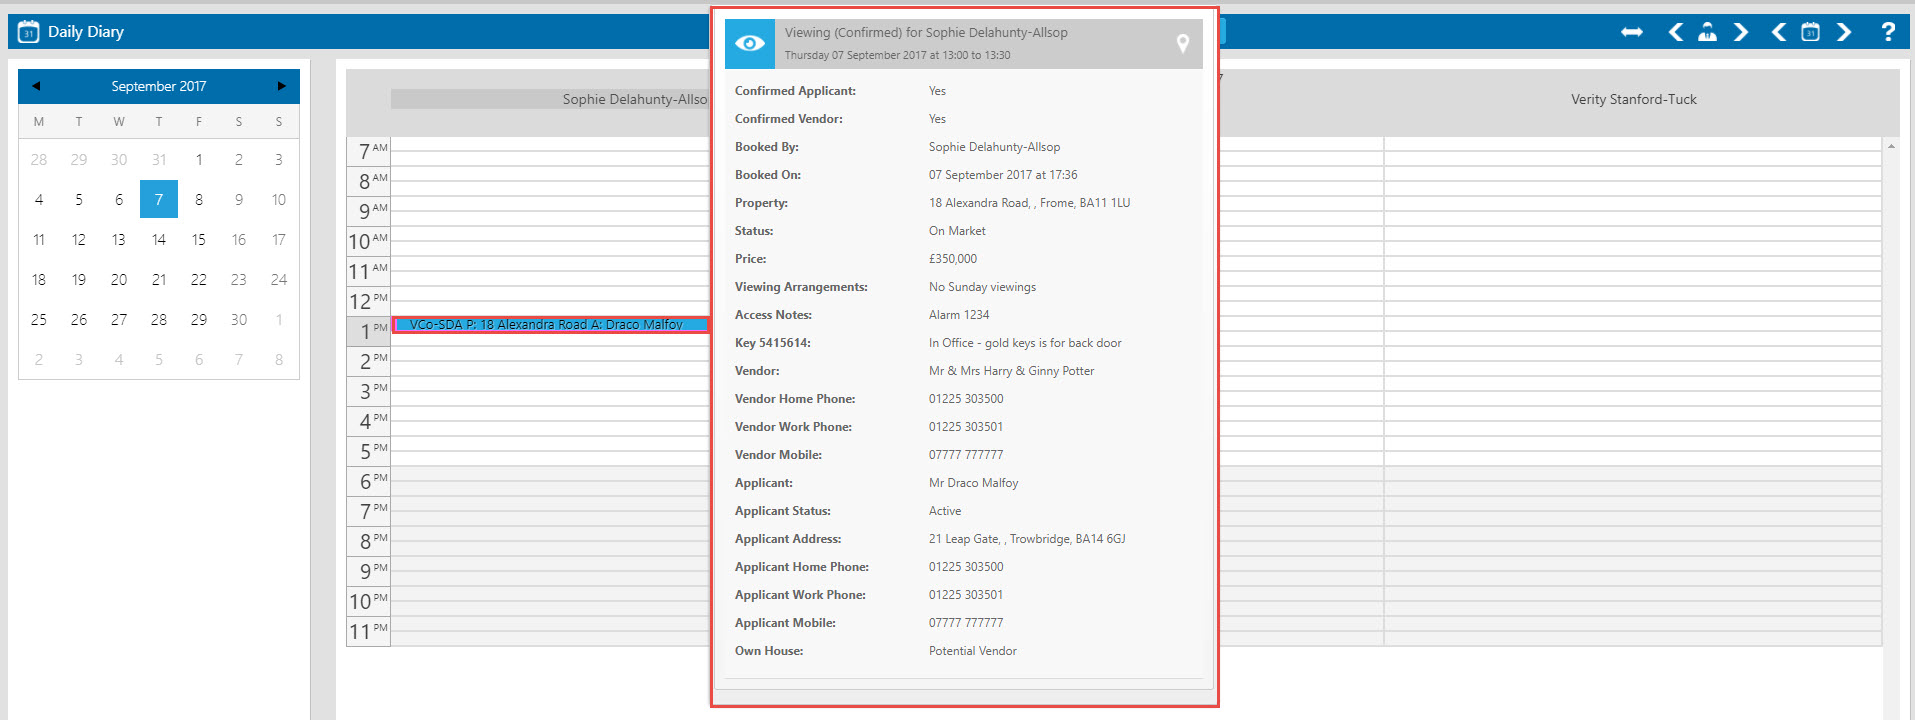
If only one of the parties has confirmed, and therefore you have saved the appointment having only ticked one of the boxes, the status will still be set to ‘pending’ and the appointment will show in the diary in red. Confirmed appointments show in blue – so it should be easy to spot pending viewings in your diary that need confirming.

To see a summary of information about appointments without clicking into them, simply hover over the appointment block in the diary.

 Login
Login

