Creating a Tenancy
Tenancies in Expert Agent connect properties and applicants, just like a tenancy agreement does on paper. Using Expert Agent to arrange the let of a property to a tenant involves the creation of a tenancy record, to which you add the property and then the applicant(s) who want to sign up.
You can create a tenancy record from a number of different places:
- From the Tenancies dropdown in the top menu.
- By clicking “Add a New Landlord” on the Tenancy Dashboard.
- By right clicking on the Tenancy Grid.
- From a Property Record.
- From an Applicant Record.
It is generally an applicant that initiates the process by confirming their intention to proceed, so whilst you can create the tenancy from all of these places you will probably find you are starting from the applicant record. When you’ve found your applicant’s record you need to create and add a tenancy to the property, then add the applicant into it.
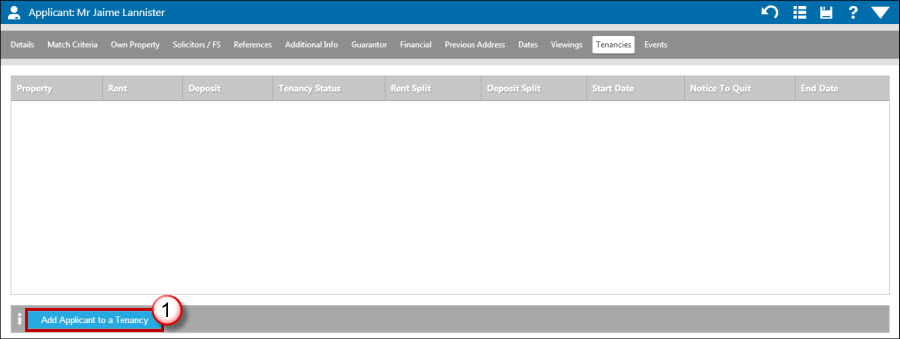
1. Click onto the ‘Tenancies’ page tab in the applicant record and click “Add App. to Tenancy.”
The tenancies page tab will show you any tenancies that the applicant is already part of, or have previously been part of, for your reference.
The “Add a New Tenant” form below is displayed:
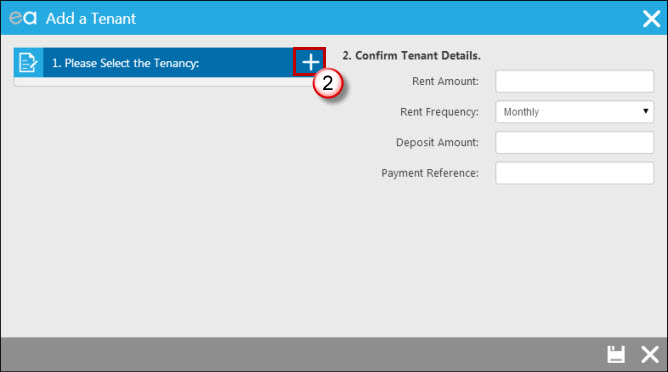
2. Click on the plus sign next to 'Please Select the Tenancy' and the following window opens:
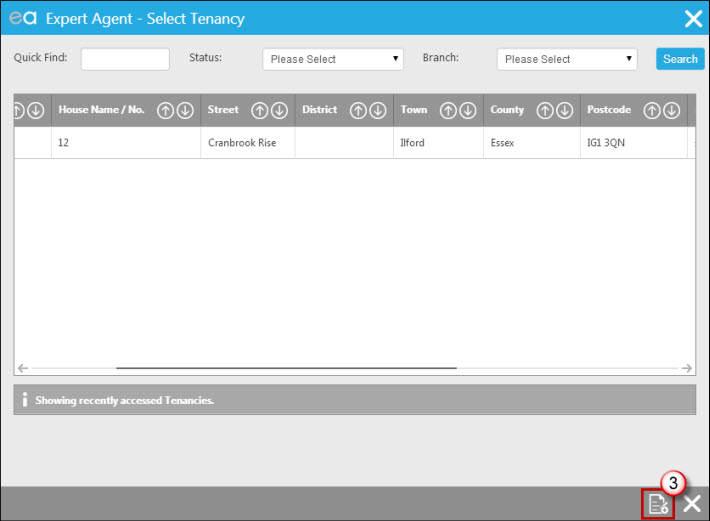
3. Click on the icon at the bottom of the screen to add a new tenancy (unless you've already created an available tenancy in anticipation of this transaction in which case you would just search for it using the quick find or select it from the list if it was showing).
This opens up the “New Tenancy” wizard. You can also get to this wizard from the property record, tenancy dashboard or tenancy grid.
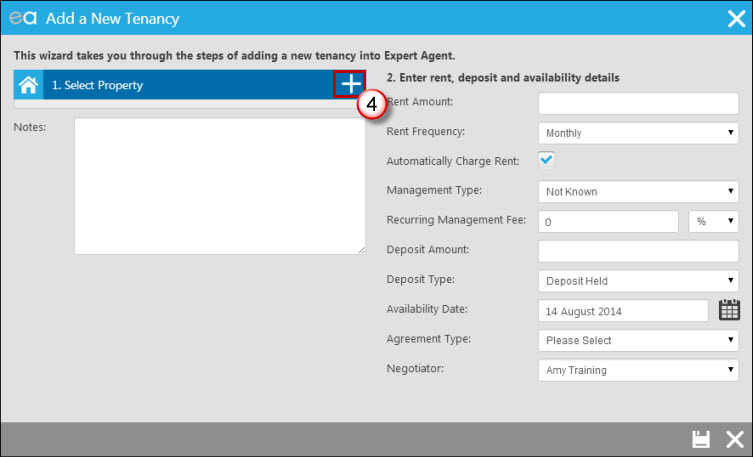
4. Click “Choose” to select the property that the new tenancy is referring to. The following screen will open:
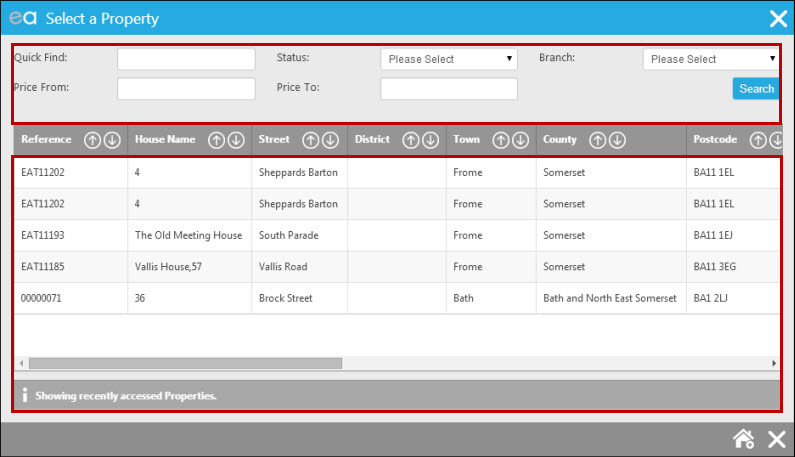
Choose your property either from your list of recently visited property records that appears, or by using the Quick Find at the top to search for the property. You can filter by status of “Available to Let” to make it easier to find what you are looking for. Once you have chosen your property you return to the “New Tenancy” wizard but with your property assigned, as below:
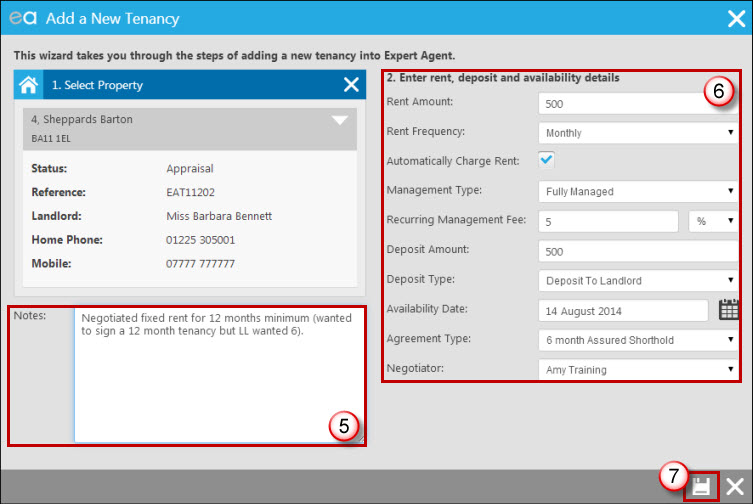
5. Enter notes if necessary. These will be saved on the tenancy’s Details page tab for your reference.
6. Fill in the rent, deposit and availability details. As part of this area you will also chose whether or not you wish to charge a management fee to the Landlord.
7. Save. If you have configured the Tenant Fees Act 2019 deposit warning, then the following message will appear. Please see The Tenant Fees Act 2019 for more information).

This takes you back to the “Add Tenant” form with the tenancy details now complete.
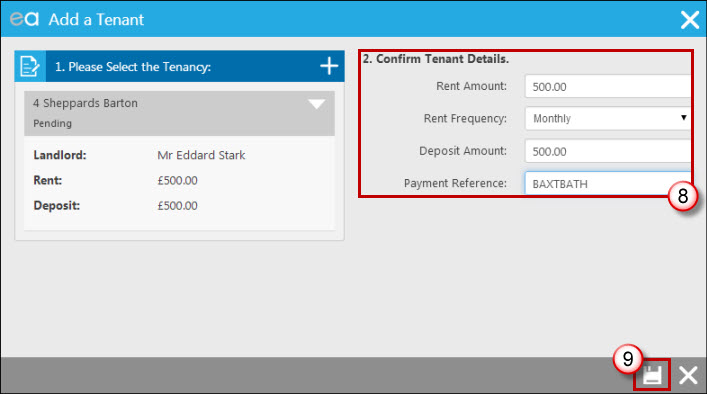
8. Enter the details for this tenant with regards to the amount of rent and the deposit they will be responsible for. For example, if there were two tenants moving into a property and equally splitting the rent, you would enter 50% of the total rent as the rent amount, and the same for the deposit amount. If they are the sole tenant then it will be the full rent and deposit amounts entered here, as per the above example.
9. Save.
Saving here takes you back to the applicant form, with a new ‘pending’ tenancy showing in the grid:
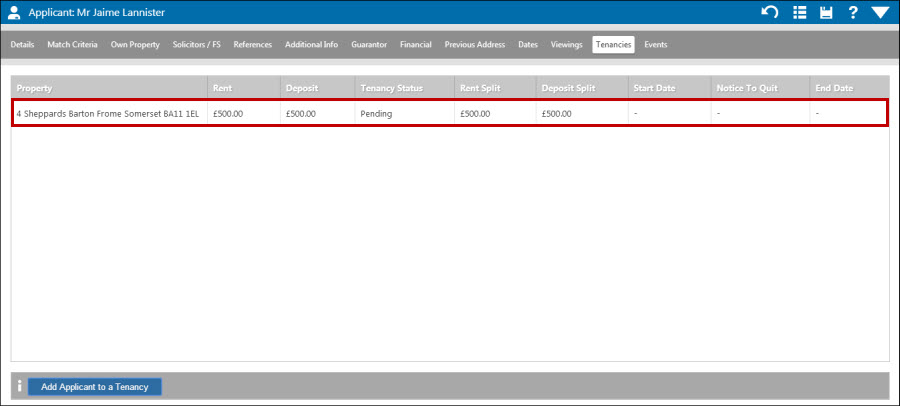
If you needed to add another applicant to this tenancy you could now find their applicant record and repeat this process.

 Login
Login

