Microsoft Word tips
We have compiled a list of the common actions in Microsoft Word that you will be using when creating your brochures. To view further tips and training on Word and other Office products please see the link to Microsoft online training below:
http://office.microsoft.com/en-gb/support/microsoft-office-2003-2007-2010-training-FX010056500.aspx
Shortcuts
- CRTL + A - Selects all the contents on the page. This can be helpful when wanting to change the font/style or colour of the whole document.
- CRTL + B - Makes the selected/highlighted text Bold. This allows you to accentuate certain bits of text, for example the Advert Header or Price.
- CTRL + C - Copy the selected text onto your clipboard.
- CRTL + I - Makes the highlighted text Italic.
- CRTL + U - Underlines the highlighted text.
- CRTL + V - Allows you to paste what is in your clipboard into the document. You will be using this on a regular basis when pasting EA merge codes into your document.
- CTRL + X - Cut the selected text out of the document.
- CTRL + Z - Undo your last action - very helpful when creating brochures to quickly undo an action.
Please see here for more information on Keyboard Shortcuts: https://support.microsoft.com/en-us/kb/290938
Text Wrapping
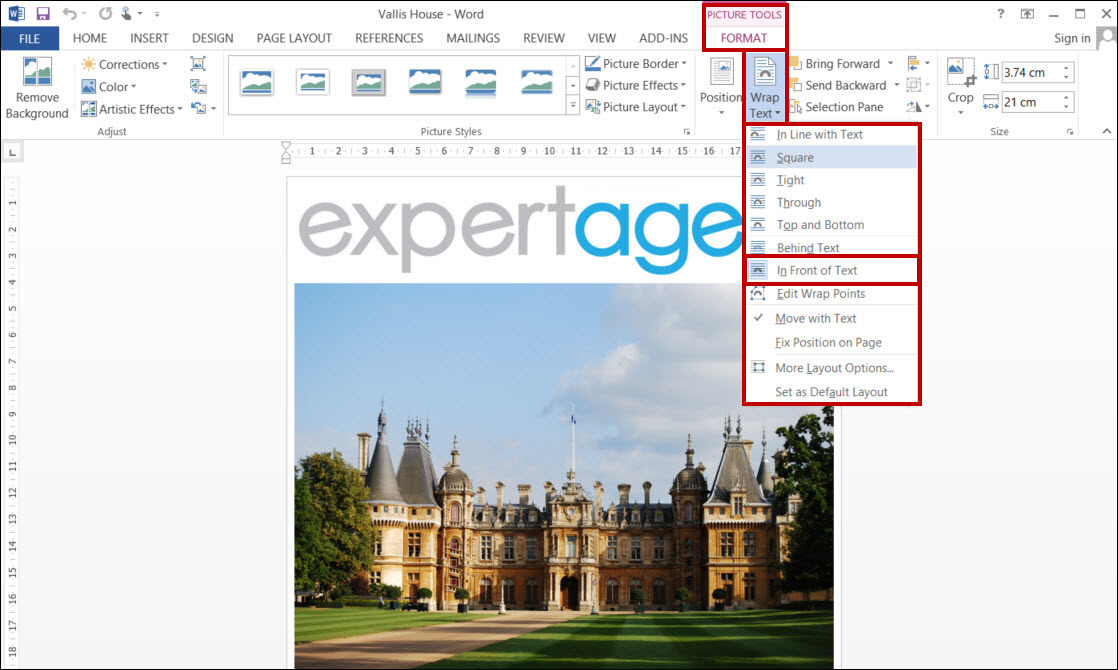
Text wrapping is a helpful tool to be aware of when creating your brochures. When you first add an image into your document it may place your image “in line with the text”. This makes the image very inflexible in where you want to place it. Setting the Wrap Text to “In Front of Text” allows you to move your image around more freely.
This can be found under “Picture Tools” when the image is selected and “Wrap Text”, shown below:
Aligning to Page
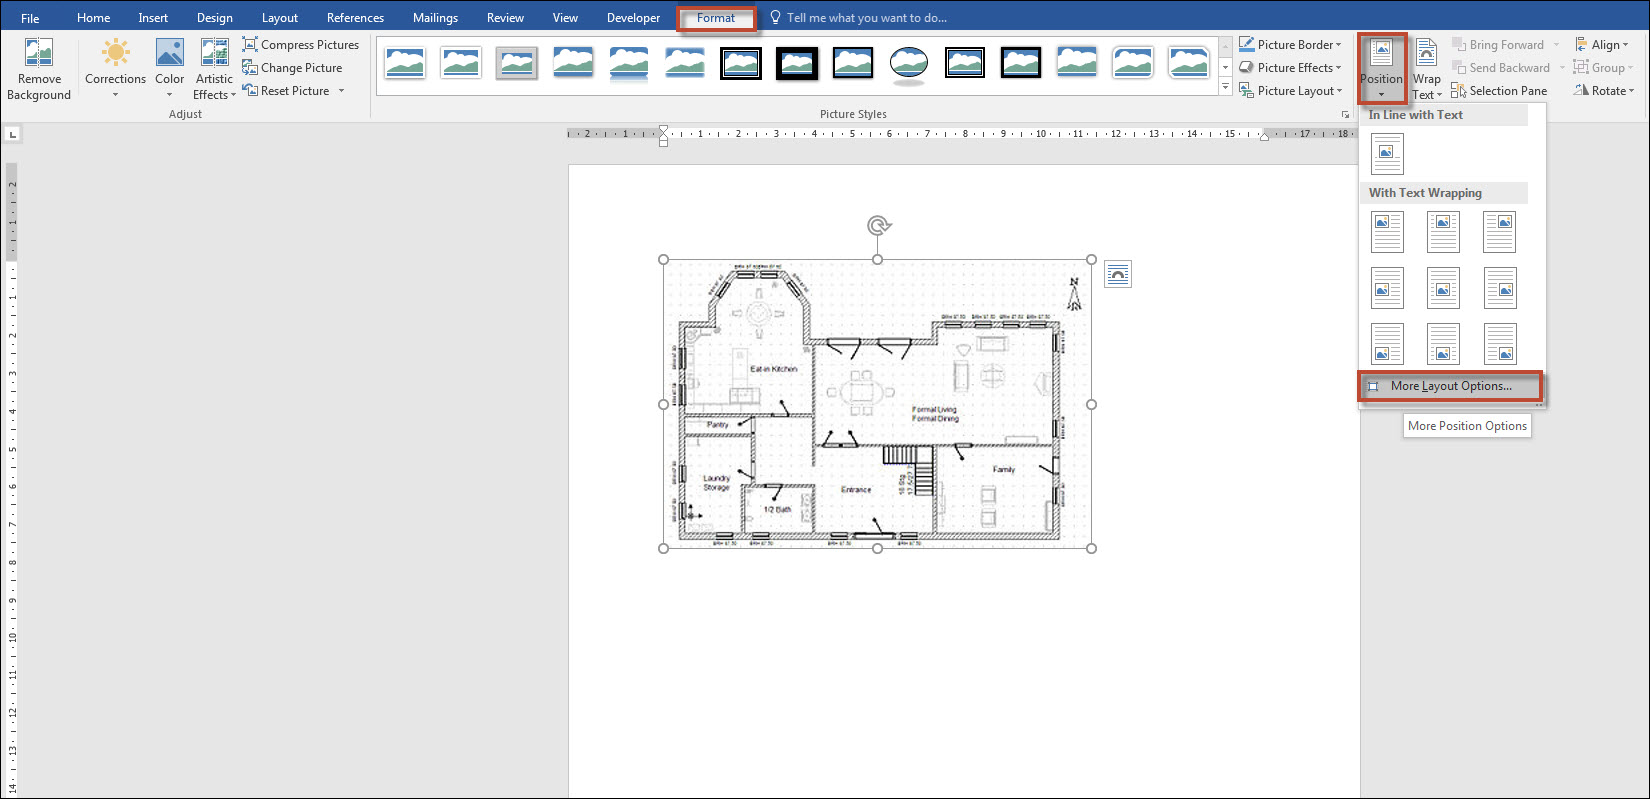
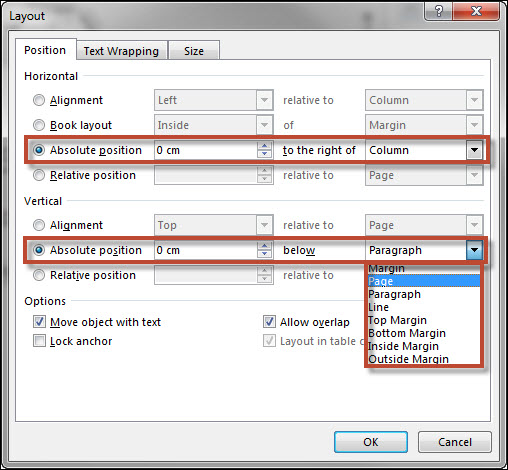
It is always best to align all images and text boxes to page to make sure if anything is deleted during the Editing process of Brochures that everything stays where you want it.
Borders
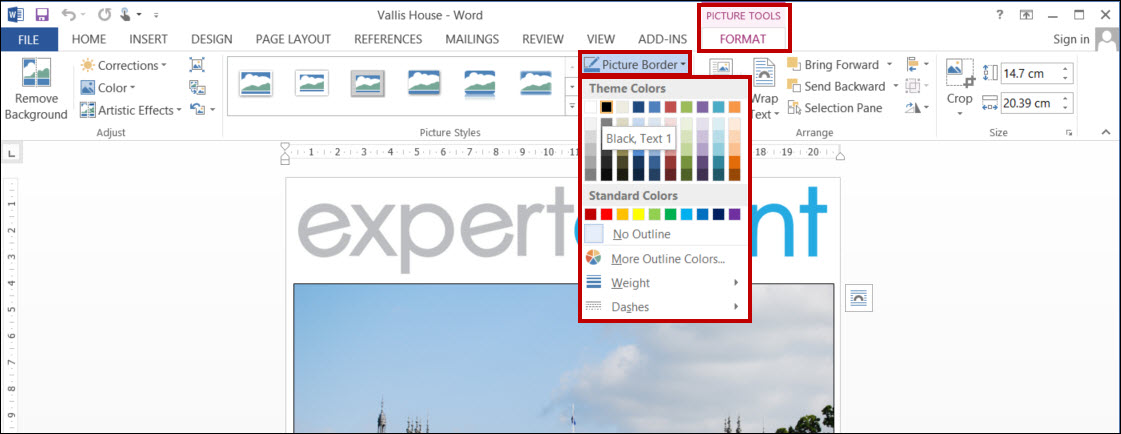
Another useful feature is the Borders option - a nice way to finish off the image and emphasize it. This can be achieved by using the Picture Border option, shown below:
Using Text Boxes
You may want to insert a text box into your document to draw attention to specific text or to have the ability to easily move text around within a document. Text boxes are basically treated the same as shapes, so you can add the same type of effects to them, and you can even change their shape. If you want, you can format the text inside the text box as WordArt, allowing you to apply 3-D effects and transformations to the text itself. This will also stop your text pushing any other elements of your template out as it is confined to the area of the box.
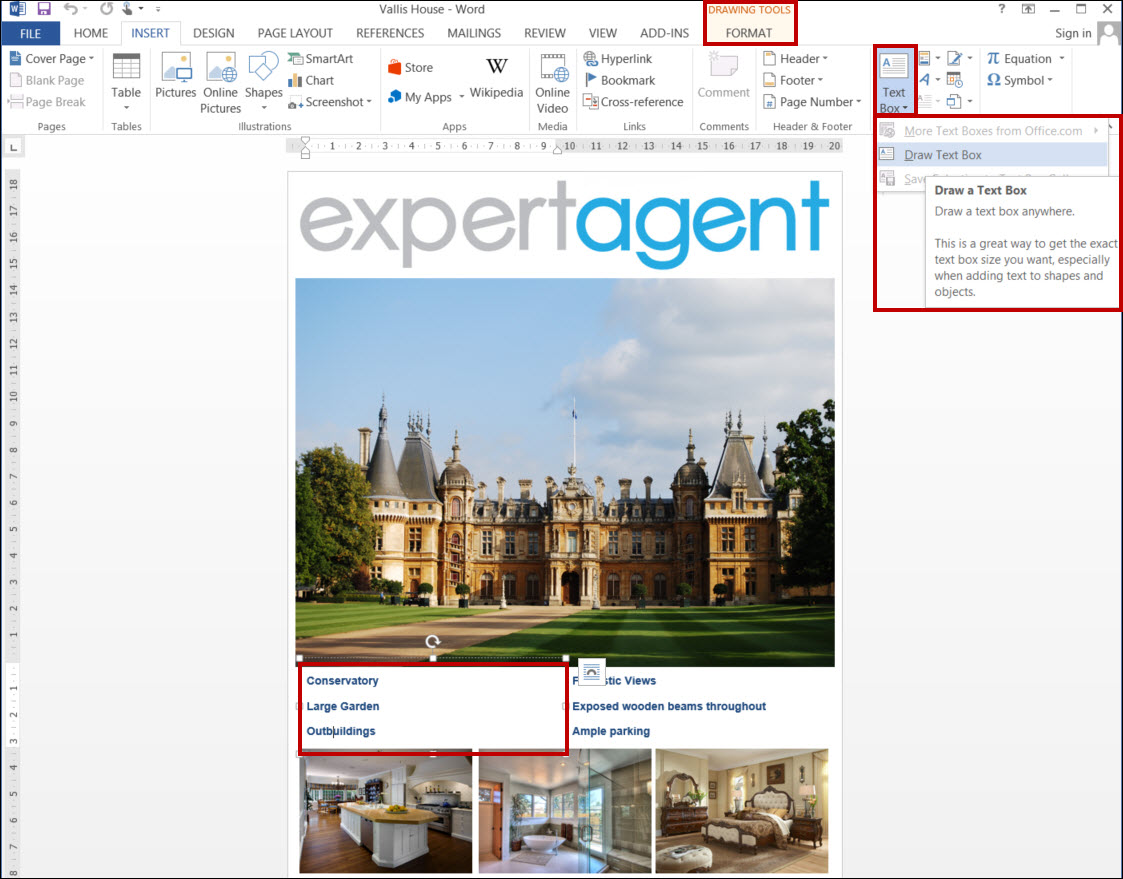
You do not have to have a visible text box. You can opt to have no outline which will still allow you to benefit from the features of the Text Box but the outline will not be visible. This is fantastic for adding your adverts, room details etc.
Using Tables
Tables can be a very helpful tool to use especially when adding star items. For example, you want to display 6 star items: you can set up a two column three row table to insert your star items in to. This way, your star items should be perfectly aligned. Shown below:
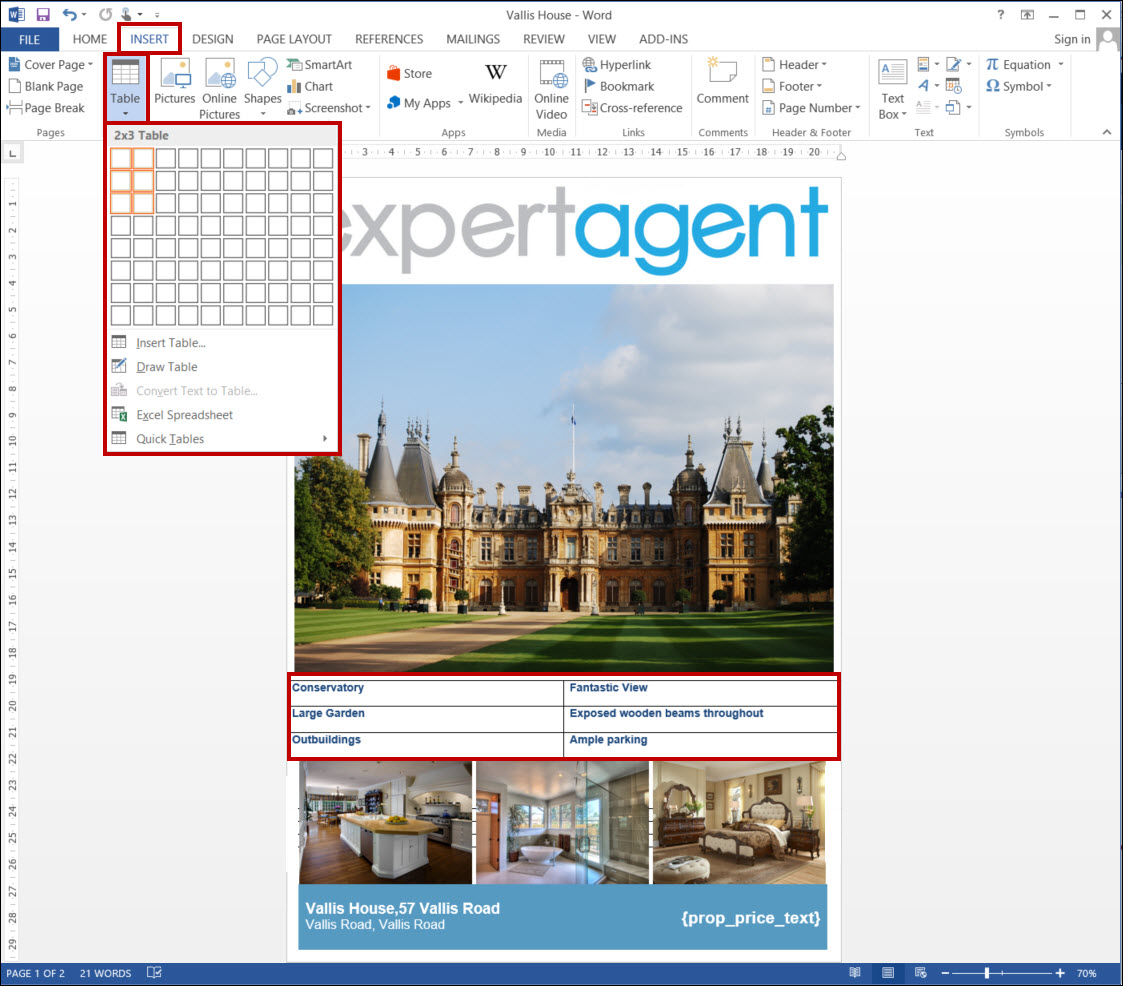
Again, as with text boxes, the lines of the table don’t have to be visible.
Using Page Breaks
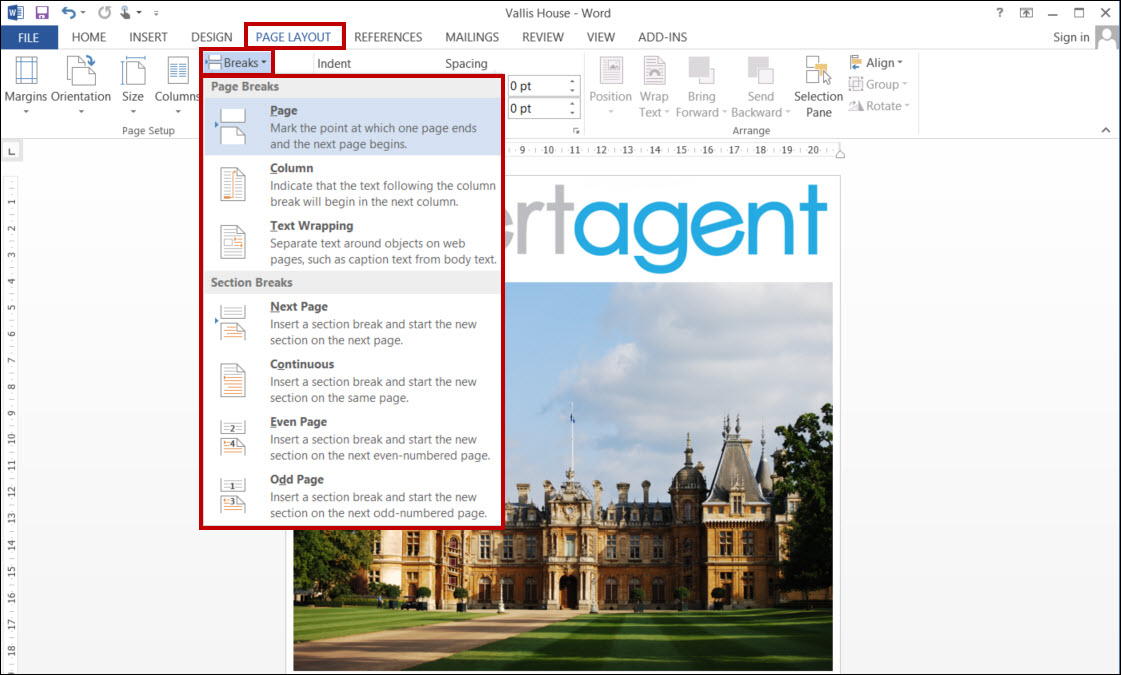
Word has several different types of breaks that you can add to your document to change the layout and pagination. Each type of break serves a different purpose and will affect the document in different ways. Page breaks move text to a new page before reaching the end of a page, whilst section breaks create a barrier between parts of the document for formatting purposes. Column breaks split text in columns at a specific point.
To insert a break, place the insertion point where you want the break to appear. Select the Page Layout tab. Click the Breaks command. Shown below:
Using Columns
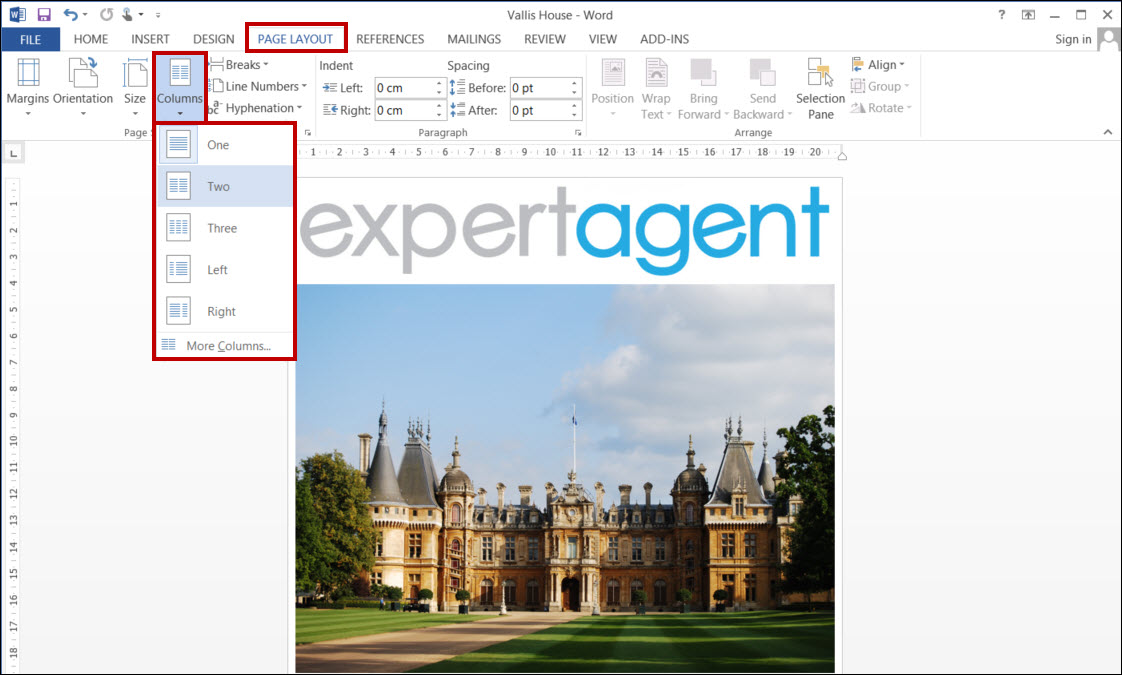
Columns can be very useful when creating brochures as they can help accommodate room details, displaying them in columns in a visually more pleasing way. Click the Page Layout tab and then the Columns command. Choose how many columns you would like to insert.
Setting up your Margins
You may need to think about setting up your margins in your Word document. Some agents have a white border around the brochure, others will have it right at the edge. If you do want to print to the edge it is worth noting that some printers will not do this. In this case, we would recommend at least 5mm margins.
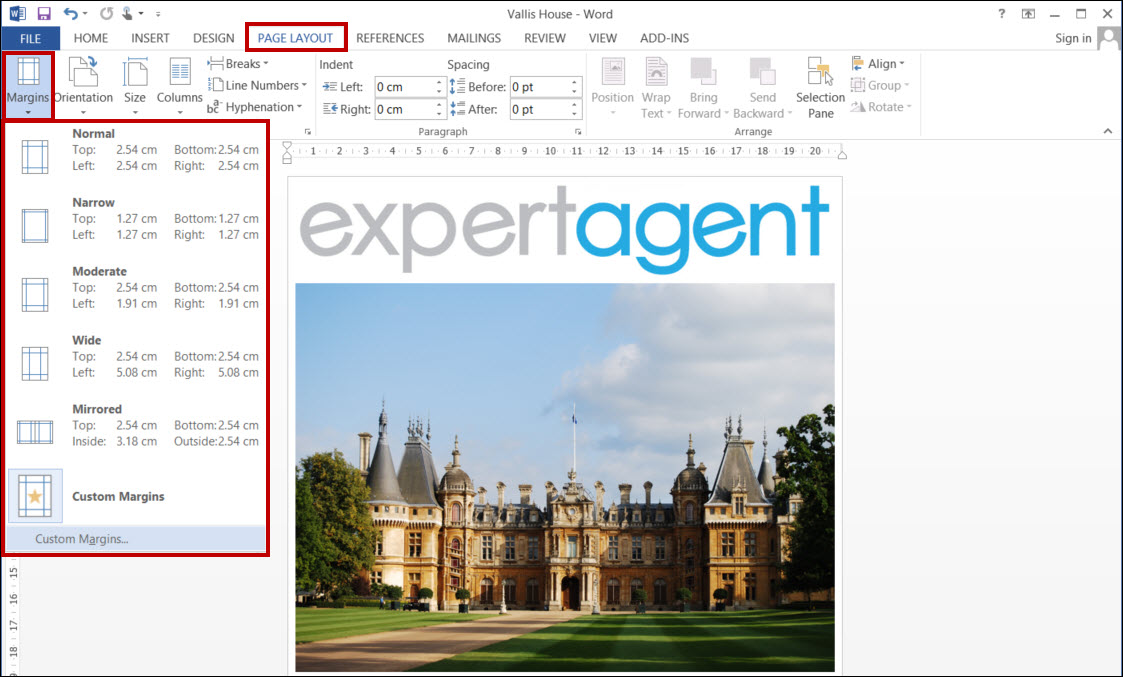
If you would like to change the margins from the default settings click into the Page Layout tab and the Margins command. You will have some standard options available or you can customize your margins so they are set specifically to your requirements. Shown below:
Using your own colours
Word has a set of default colours, however, from your designer (if you have one) you may get the RGB for your own Logo colours to use on your brochures. These will need to be created and the numbers kept somewhere because you cannot create and save your own colours. When you close down Word they will no longer be there for you to select the next time you use Word. You will need to create them again.
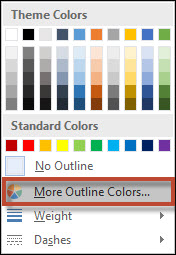
From anywhere you can change colour (Font colour, board colour, shape colour etc) select the More Colours option.
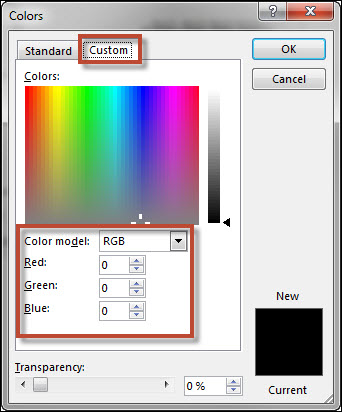
You will need to click into the Custom tab. From here you can set the RGB (there are other colour models but RGB is generally the most widely used). Once you press Save it will stay on your Recently used colours until you close word.

 Login
Login

