Processing a Batch Match
Having selected the records you would like to send, you will need to right click and send your match using one of the various output methods available.
Sending Matches by E-mail
E-mails are free to send, arrive with your applicant almost instantly and have become most people’s preferred way of receiving property details.
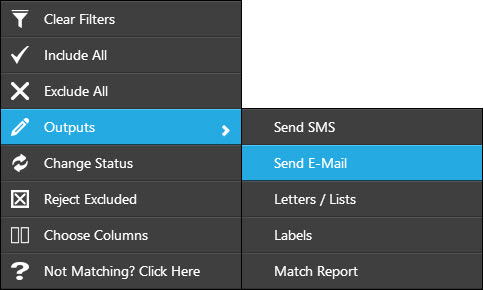
- Right click and select the 'Send E-mail' option. The match e-mail text then appears for you to preview:
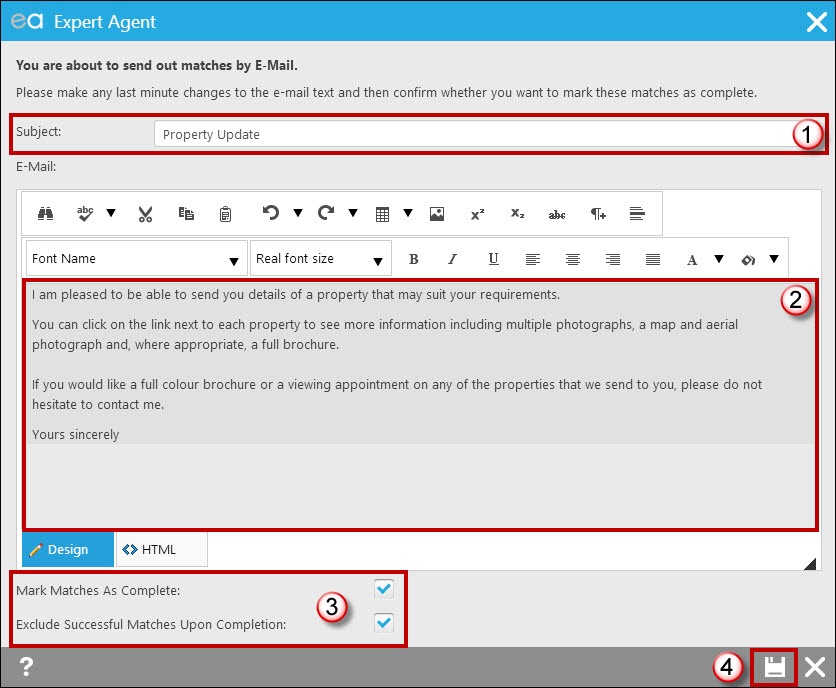
- Give your e-mail a suitable subject – bear in mind who you selected from your grid; so if you selected all of Mr Smith’s results you could put ‘Property Update for Mr Smith’ whereas if you selected all of Barbara’s applicants you could ‘Property Update from Barbara at Baxters’ and so on.
- Edit the match e-mail content if needed.
- Decide whether to mark your matches as complete automatically, and whether to exclude successful matches upon completion from the grid, again automatically. As discussed earlier in the module, for e-mail and SMS matching you would probably want to tick both of these options. Again as discussed earlier you may find that you don’t have the option from this screen to mark matches as complete.
- Click the save option to send the e-mail.

Sending Matches by SMS
Before trying to send matches by text you will need to ensure you have a positive SMS credit balance. Each property sent to an applicant by SMS will use one text message credit, provided the total number of characters in the message is 160 characters or less – remember we advise that the SMS advert you write is no more than 50 characters to help with this.
Text messages will be sent to all of the selected applicants in your match processor grid that have a mobile number in their applicant record and have a tick in the ‘Send Text Messages’ tick box on the applicant details tab.
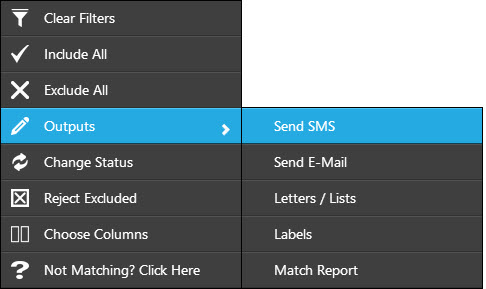
- Right click and select the 'Send SMS' option.
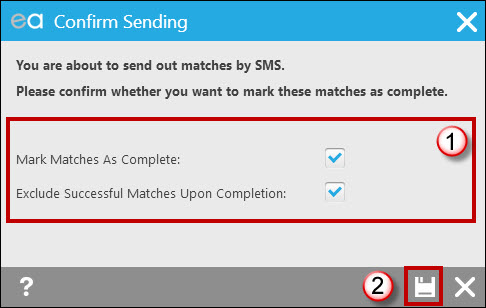
- Again, decide whether to mark your matches as complete automatically (if you can), and whether to exclude successful matches upon completion from the grid.
- Click the save option to send the text message. A message will display confirming how many SMS could be sent, as below.

Here’s an example of a match SMS:
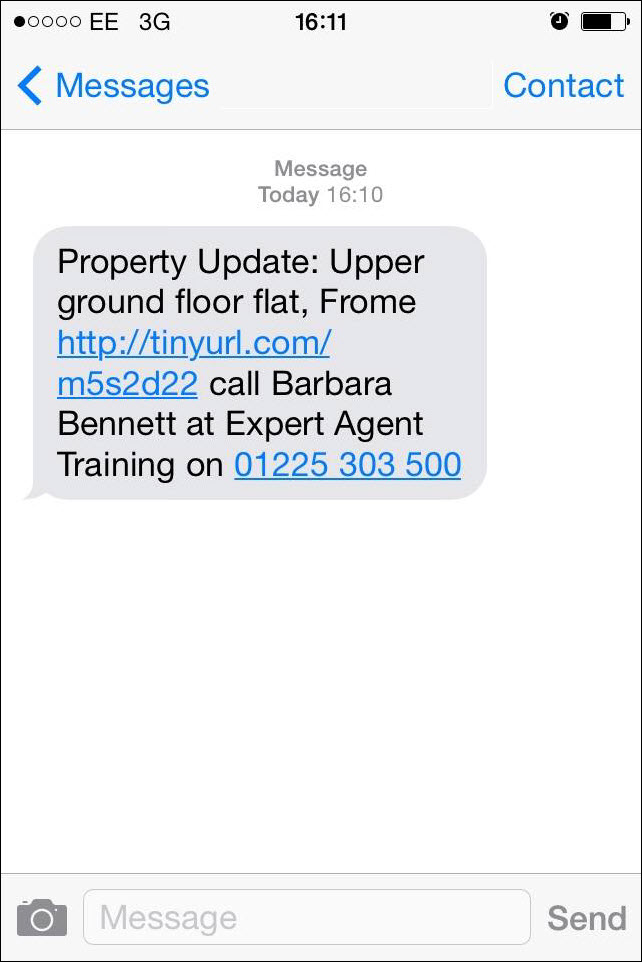
If you click on the URL provided in the text on a smart phone, it loads all of the property information for you:

Sending Matches by Post
The majority of our agents try to send as many matches as possible by e-mail or SMS due to the cost of printing and posting matches. Any matches that need to be sent by post will first need their status changed to ‘OK to post.’
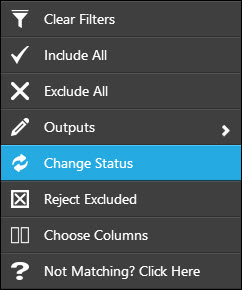
To do this right click and select the 'Change Status' option.
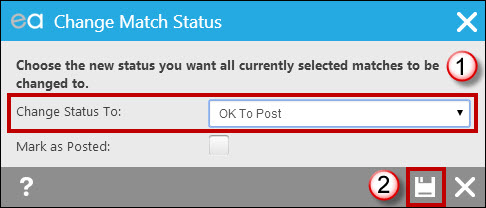
- Change the match status to ‘OK to Post’ from the dropdown.
- Click the save option. A message will display confirming the status change, as below.

You can then either prepare the postal matches straight away or come back to it when you have time, but anybody reviewing the Outstanding Matches will know that those match results are being processed.
If you need to do a final sense check on these matches, do so before you print off the letters & lists. Remember to simply take the ticks out of the boxes that you don’t wish to send and remember to right click and “Reject Excluded.”
Preparing letters and lists to post
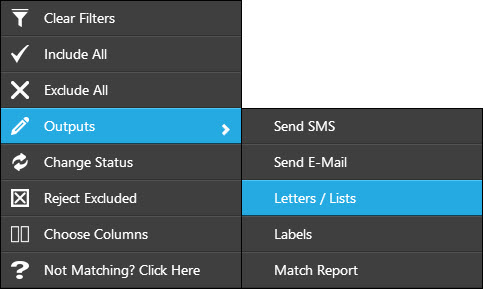
- Right click and select the 'Letters/ Lists' option.
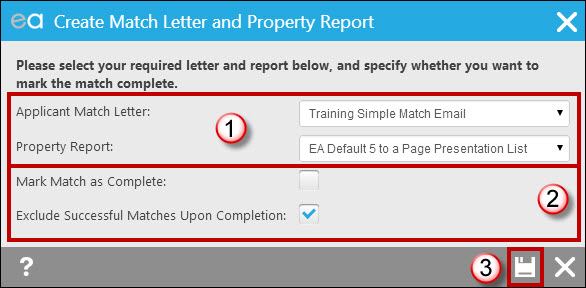
- Select your applicant match letter from the drop down.
- Select the report you would like to accompany your covering letter, such as a 5 properties to a page summary report.
- Decide whether to mark your matches as complete (if you can) and whether to exclude successful matches upon completion. Our recommendation is that you don’t tick ‘mark match as complete’ so that you can check your letters and reports print successfully before the results disappear, but to leave ‘exclude successful matches upon completion’ ticked so that when you do manually mark the status as complete they are removed automatically for you.
- Click the save option to create and print your letters and reports.
Creating labels
To create your postage labels you need to make sure that the results you would like to print labels for are ticked in the boxes down the left hand side of the grid, that the applicant has a tick in ‘send post’ on their profile and that the match status is either ‘pending’ or ‘OK to post.’
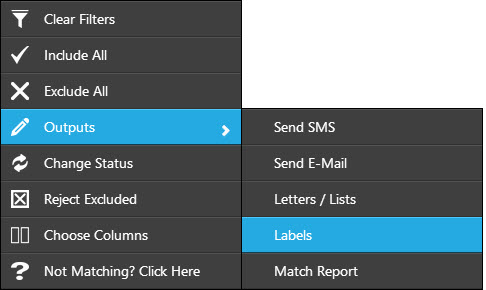
Right click on the grid and select the 'Labels' option.
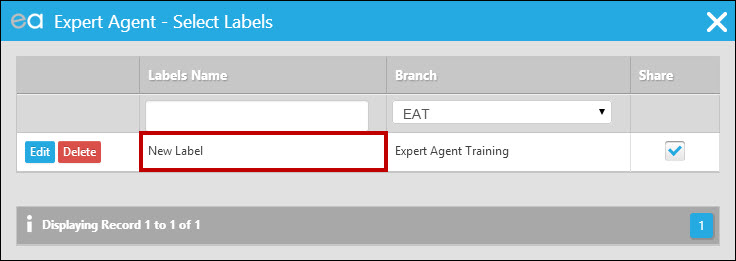
If you haven’t set your labels up already, click ‘Edit’ on the left hand side to do so. Click ‘New Label’ to generate your labels.
A preview of the labels will open and you will notice they are displayed in alphabetical order, based on applicant surname. Labels and match reports both print in this way regardless of how you have your results ordered in the grid; this is to help you match up applicants with their results/reports more easily. Once you have loaded your printer with labels, click ‘Print’ at the top of the preview. The labels will then print and the following pop up will appear:
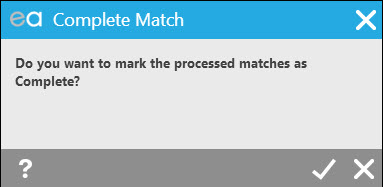
It’s a good idea to click ‘X’ here so that you can mark the match as complete manually and note that it was posted. Clicking ‘X’ will return you to the grid.

Right click on the grid and select the 'Change Status' option.
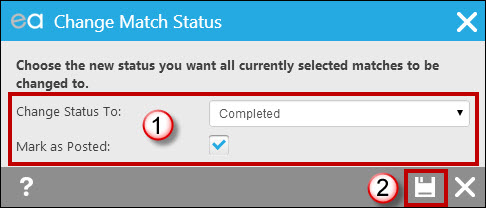
- Change the status to ‘Completed’ in the first drop down. Tick ‘Mark as Posted.’
- Click the save option.
The system will confirm that the status changes are complete:

Click ‘OK’ to return to your match grid. Your match grid should now be blank as all of your matches have now been sent using one of the methods.

 Login
Login

