Filtering Grids
Filtering allows you to obtain the correct selection of records you require.
You can apply a filter to any grid. A grid can be filtered on a single column. E.g. only show me records that have been entered into the Sales Department.
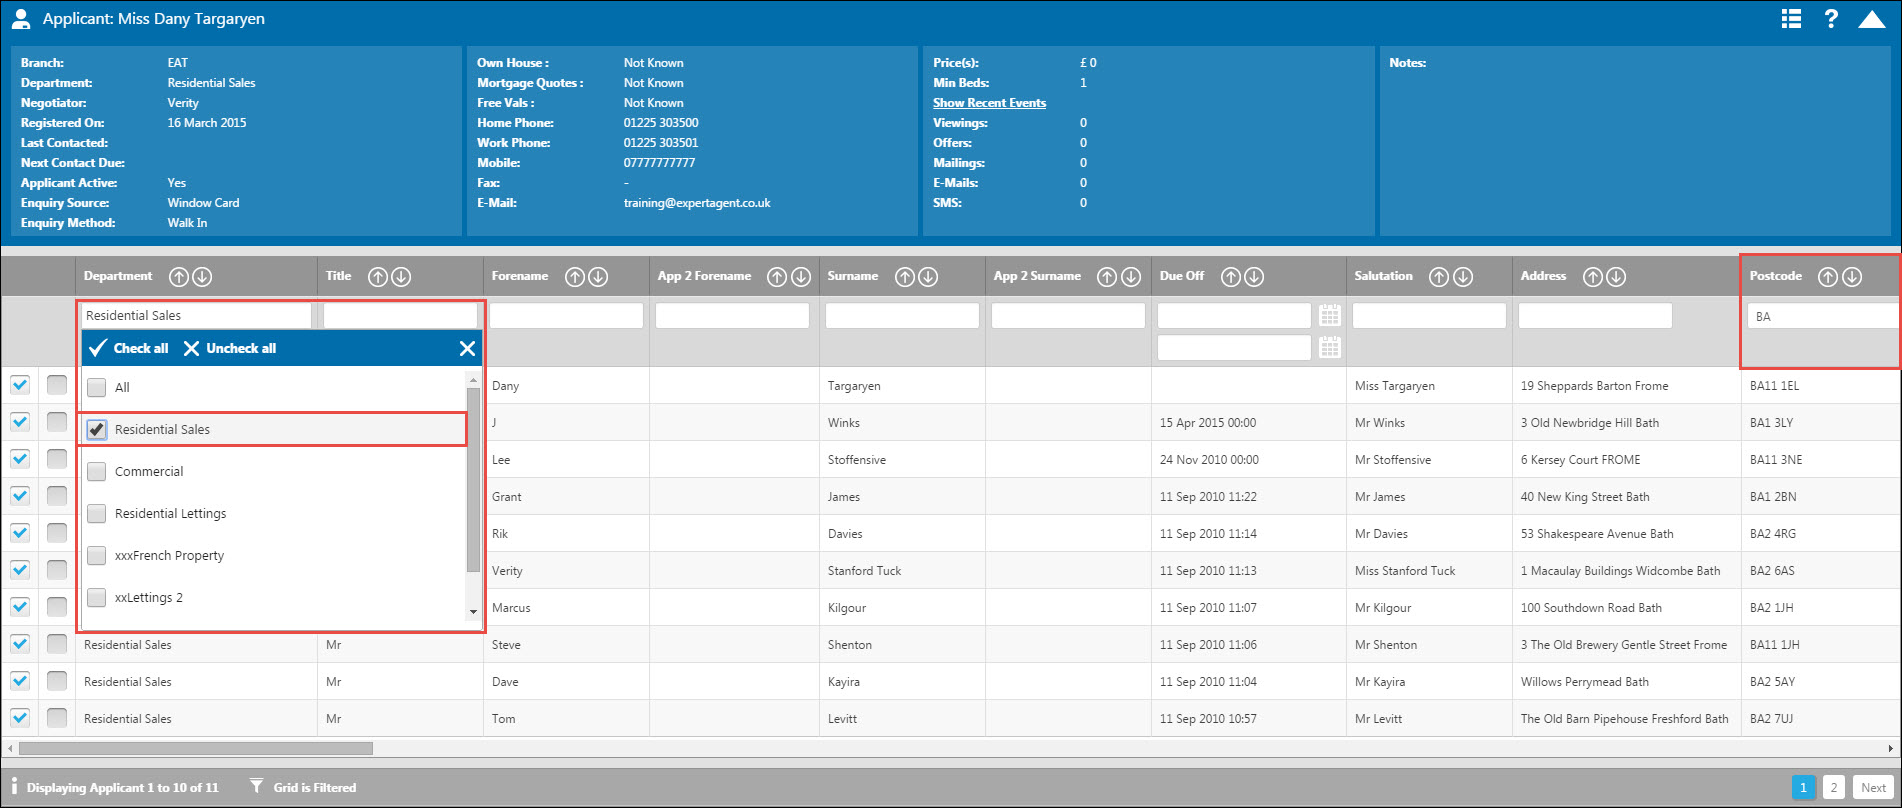
A grid can be filtered on multiple columns at the same time. You are also able to make multiple selections per filter drop-down.
The example below shows sales only applicants in the BA postcode area:
TIP!
Remember you can choose your columns so your columns are next to each other for an easier view. Ensure you clear your filters when you have finished working with the grid to ensure you are seeing all of your data on your next arrival to the grid.
Choose Columns - TRY OUR NEW COLUMN PICKER - Column Picker BETA
This option allows you to choose which columns you would like to display in your various grids. This is individual to your login so you can tailor your grids to suit your job role and the information you need to see.
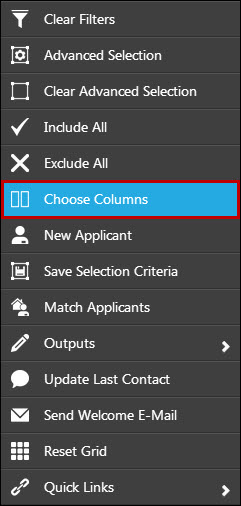
Right click to show your action menu and select “Choose Columns” to set up your choice of columns.
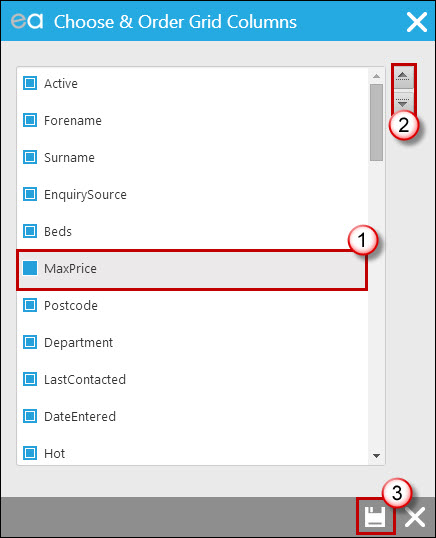
1. Tick the boxes you want to display in your grid.
2. Promote and demote the columns using the up and down arrows. Remember to do this for all of your grids – although it may seem time consuming now it will make using your grids a lot easier and quicker in the future.
3. Click Save.
Save Selection Criteria
Expert Agent has an extended Quick Link feature in the form of Saved Selections. These saved selections give you the ability to create and save your own quicklinks.
You are also able to edit your standard Quicklinks from the Grids Action Menu.
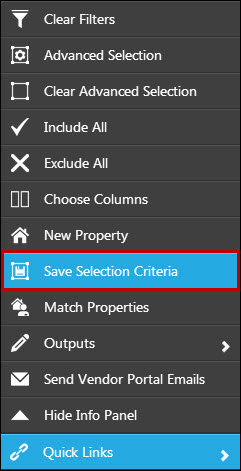
In order to start creating your own ‘Quick Links’, here on in will be referred to as ‘Saved Selections’, simply filter the grid to display the selection you require. In this example we will show all applicants currently living in the BA postcode area with a minimum of £250,000 to spend:
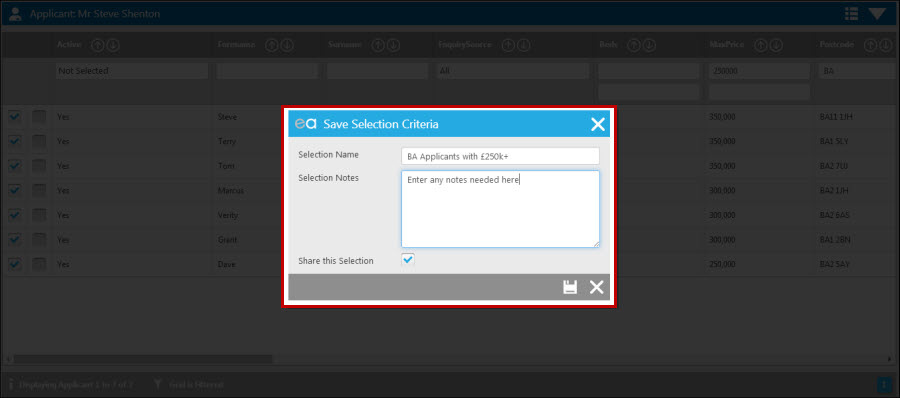
Enter the Selection Name you would like to save it as and any notes needed. The ‘Share this Selection’ tickbox will allow all users in your branch to view and use this saved selection.
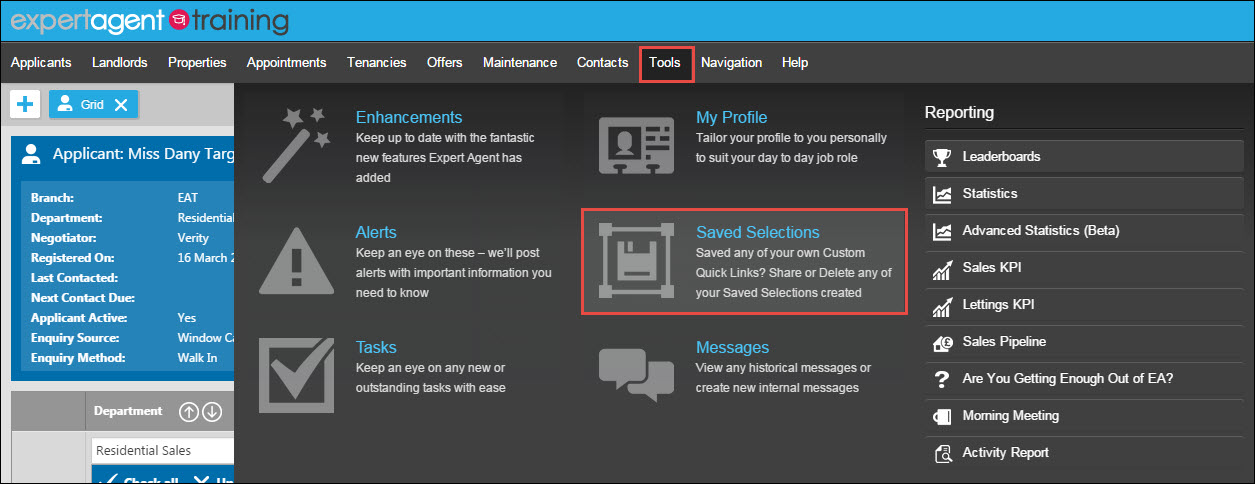
To review your businesses’ saved selections at any time, you can go to Tools in the top menu and select ‘Saved Selections’:
A screen will open showing all saved selections including details on who created them and when:
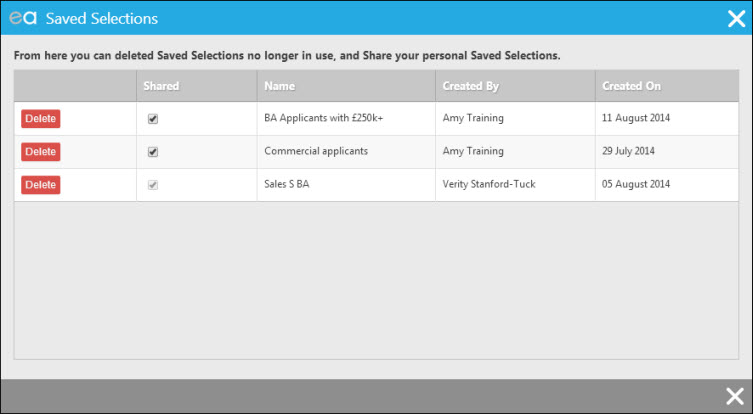
If you created the saved selection yourself, the share column will be active and you’ll be able to choose from here whether selections are available to others to use or not.

 Login
Login

