Tenant Portal Configuration
Tenant Portal allows you to interact with your tenants via a login that you give them when they either apply for a tenancy or move in to a property.
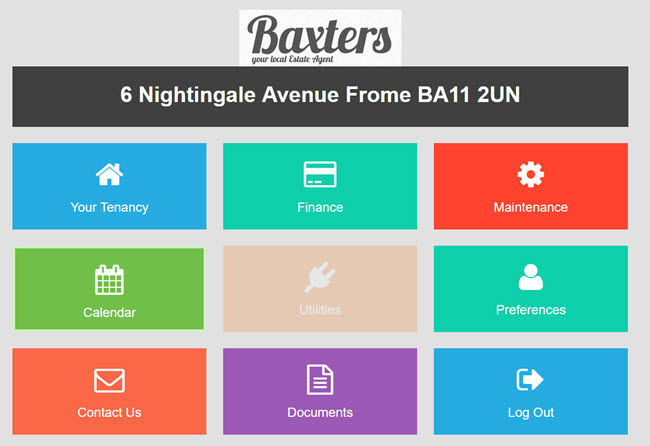
It provides them with information relevant to their tenancy - particularly key dates and their financial statements and it can form the basis of an automated application form.
We launched Tenant Portal (Beta) in June 2016 but have great plans for it. Please help us to develop it!
Log a bug / Enhancement Request
What is Tenant Portal?
Watch the Tenant Portal Video
Using Tenant Portal
To get started with Tenant Portal, we recommend you set up a dummy property, create a tenancy and add a fake tenant with your email address. In the Tenancy record, right click and choose Manage Application Process (1) and confirm that you want the invitation email sending by ticking the required tenants (2) clicking the paper plane button (3)
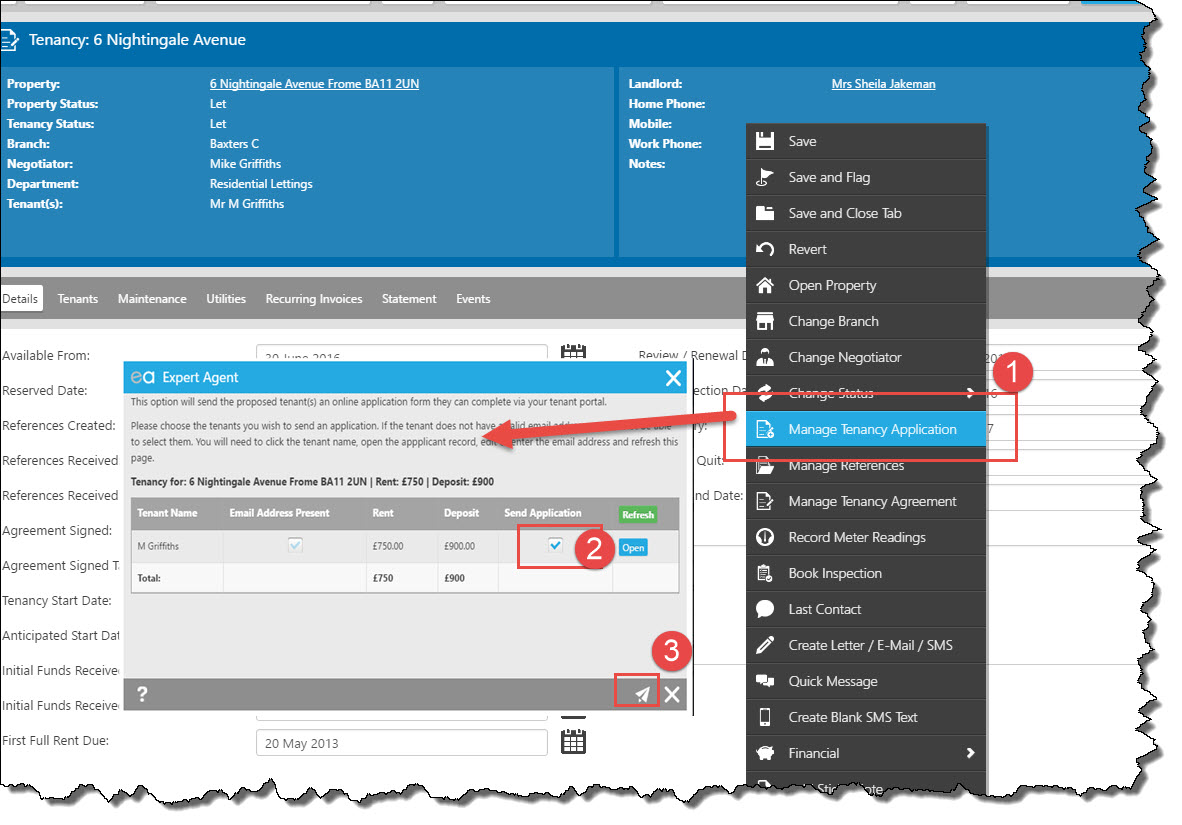
The tenant is sent the Tenant Portal Application Email (read how to configure this in the Configuring section below). Follow the link in the email and Log into Tenant Portal.
Once the pending tenancy is a lice tenancy, the Manage Tenancy Application option changes to be Manage Tenant Portal (note 01.07.16 - this wasn't working - the label stays the same). The functionality is the same as above but it is the Tenant Portal Email rather than the Tenant Portal Application Email that gets sent.
You can also trigger the email and see the original user name in the tenant portal tab on an applicant record. Whichever approach you take, any password changes made by the tenant are replaced with a new (complicated) password.
On receipt of the invitation email, log in to tenant portal and have a play around! You can change lots of settings - as explained in the next section.
Configuring Tenant Portal
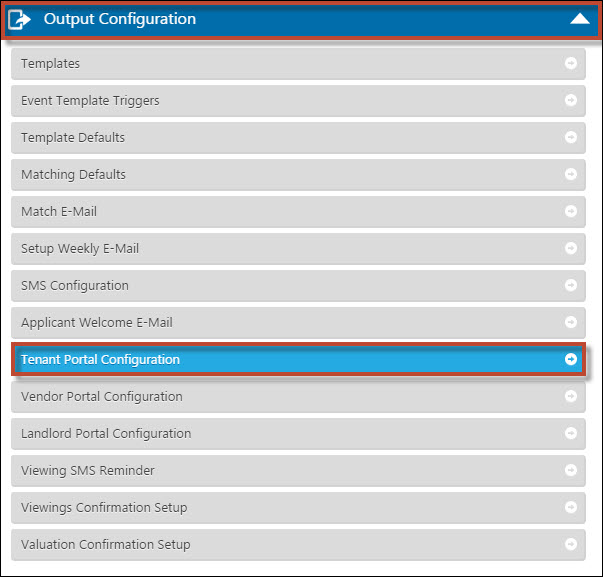
The Tenant Portal Configuration is located under the Output Configuration Option.
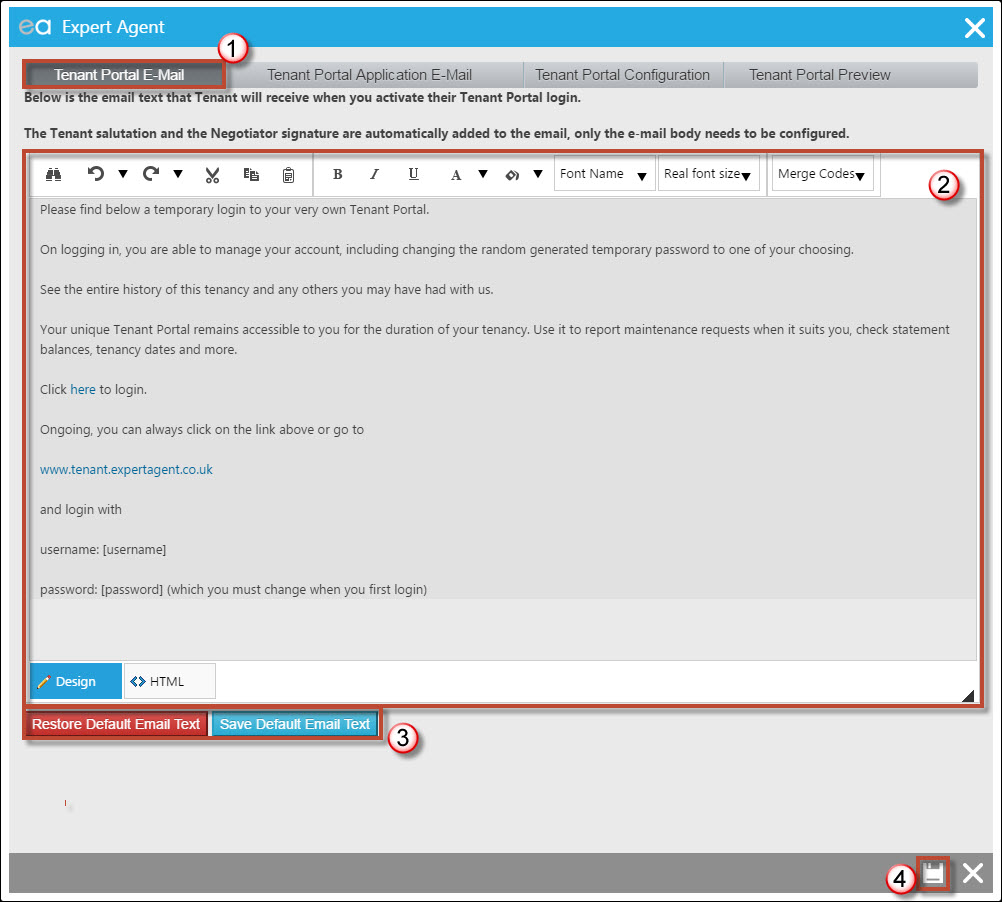
1) The Tenant Portal E-Mail tab
2) This will allow you to change the default body of the email that is sent to a Tenant in a live Tenancy. The usual HTML design aspects are all here, you can change the default font and size, add images if necessary. The link to the Tenant Portal Login is in the text and this will create a Username and temporary password for the Tenant.
3) This can be saved as Default Email Text or you can restore to our default if needed.
4) Press Save.
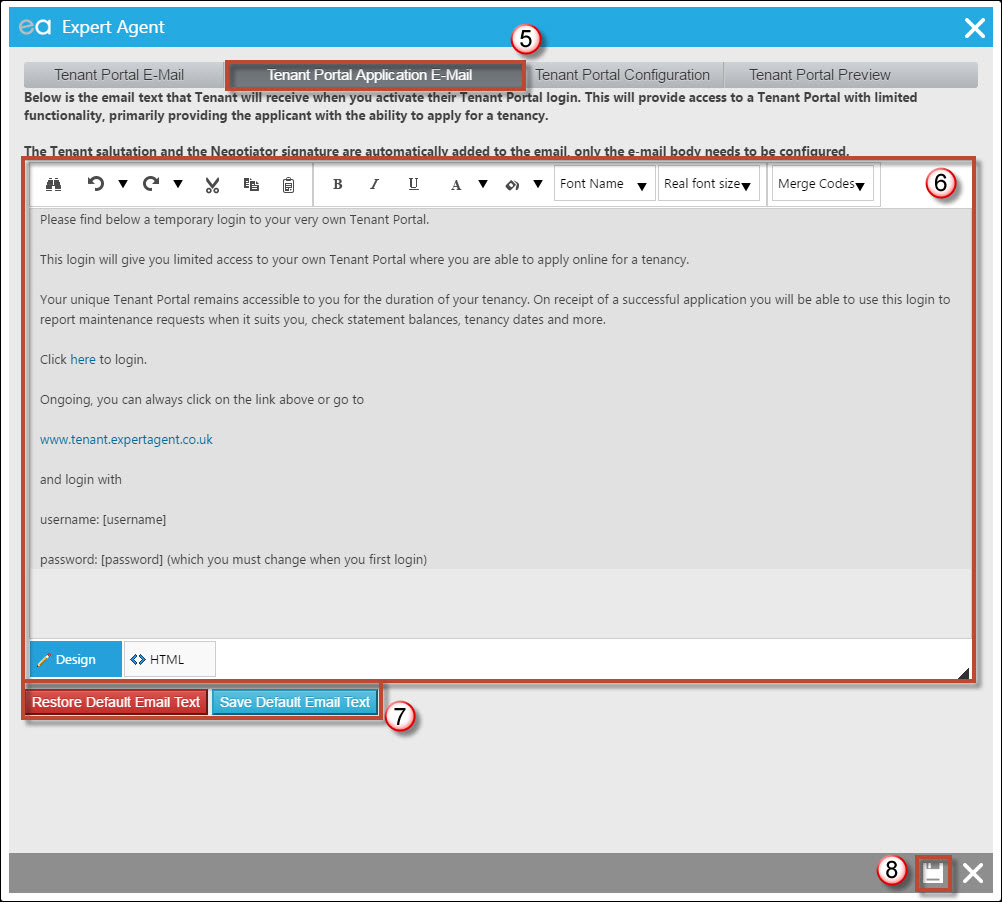
5) The Tenant Portal Applicant E-Mail tab
6) This is the default text for the email sent to a Tenancy added to a Pending Tenancy. The Applicant has to be added to the Pending Tenancy for the email to be sent.
7) Again you can save as the default email text or restore our default text.
8) Press Save.
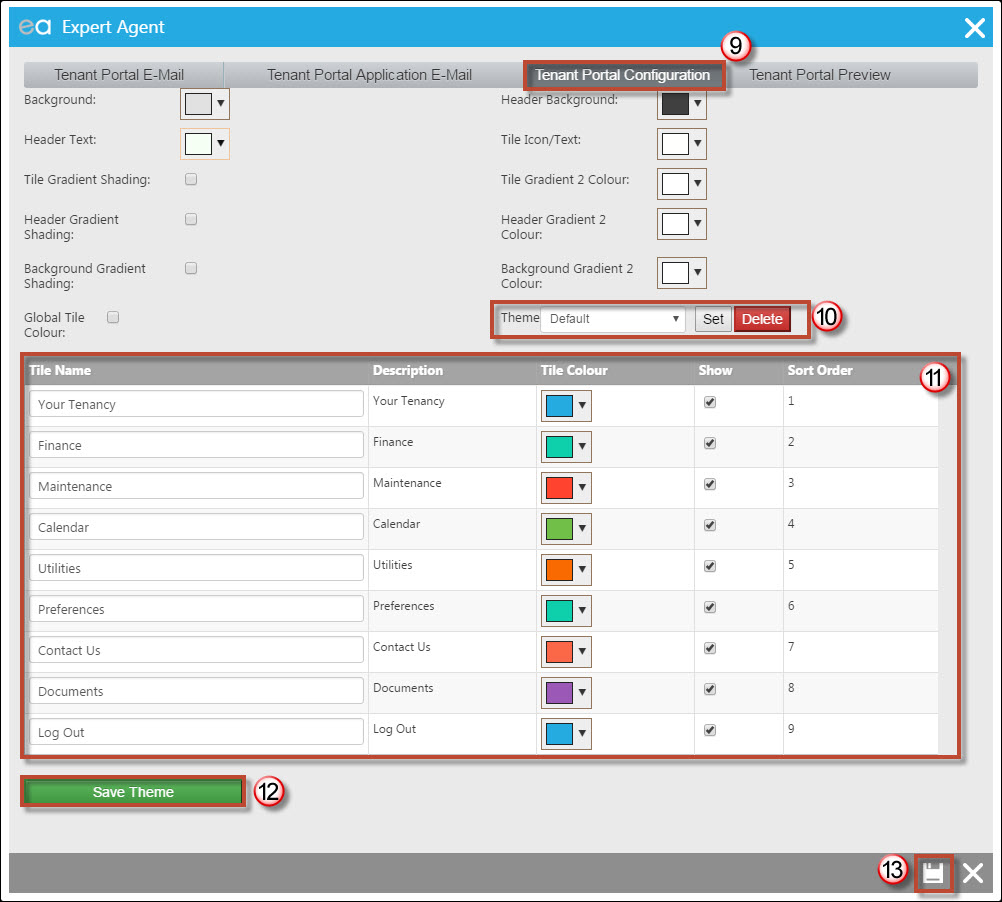
9) The Tenant Portal Configuration tab
10) You can change all of these colours to be in line with our own branding. The Default Theme is one we have created for you but you can create your own and Set it.
11) These are the boxes that will appear on the Tenant Portal once the Tenant has logged in. You can remove them if not needed or change the name of them, and the colour of the tiles. You can also move them around as well by clicking on the name and dragging it up or down.
12) Here is where you can Save your own Theme.
13) Press Save.
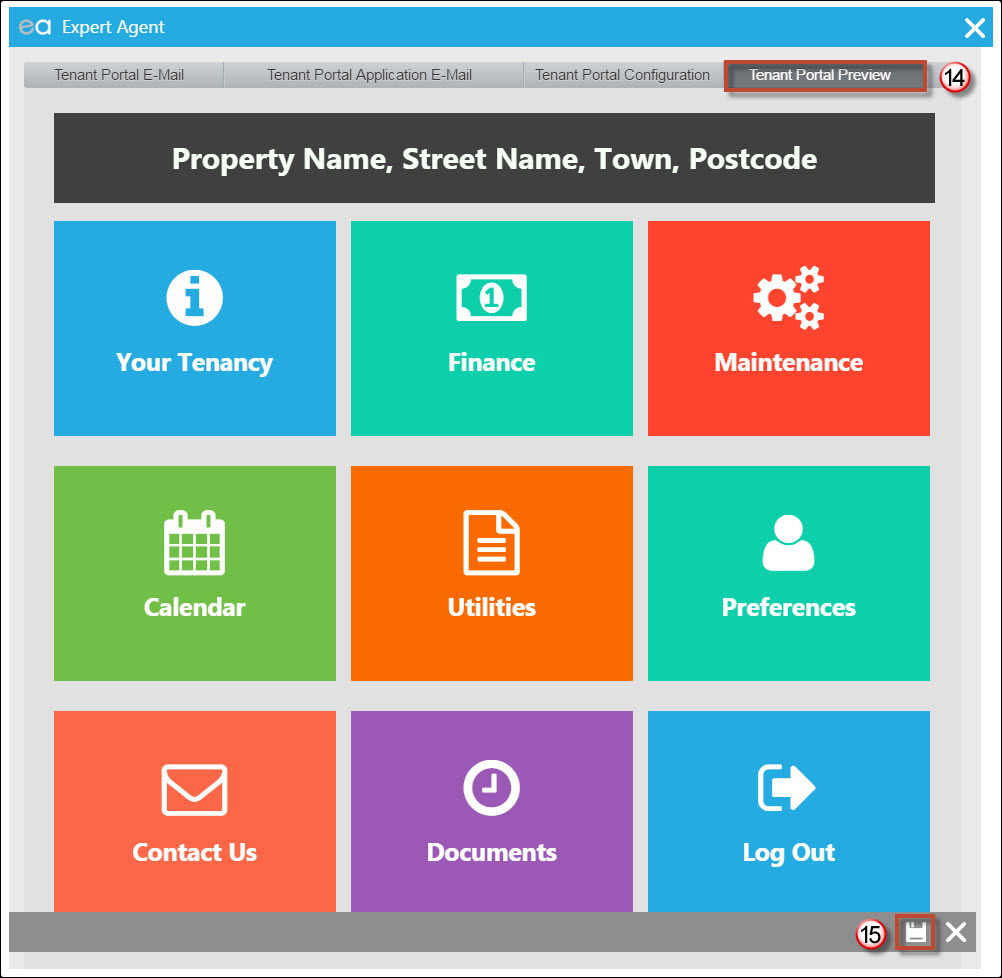
14) The Tenant Portal Preview tab
This is a preview of what your own portal will look like for the Tenant once they have logged in. If they are in a Pending Tenancy they will not see as many options here, if they are in a Let Tenancy they will see all the options that you have ticked on the previous tab.
15) Press Save.

 Login
Login

