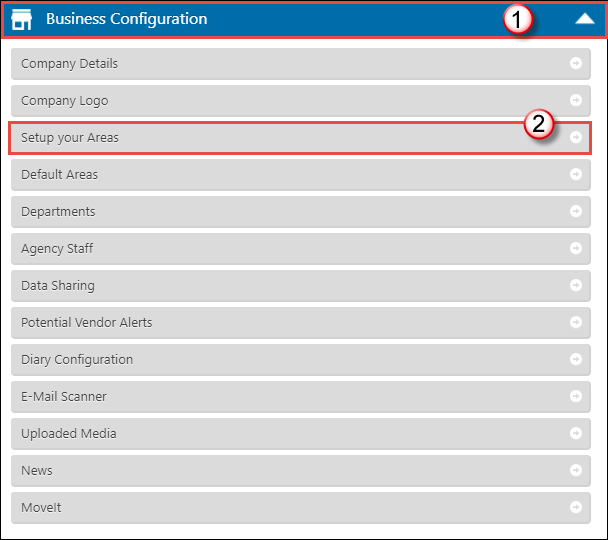
Set up your Areas

Planning your Areas
We recommend planning your areas on paper first as it is far easier to edit than on the system.
Areas are structured into three tiers: Regions, Districts and Locations.
You can have multiple Regions, which in turn can have multiple Districts but the most important thing to note is that you MUST have LOCATIONS. When you go out and do a valuation you say the property is in xxxxx location.
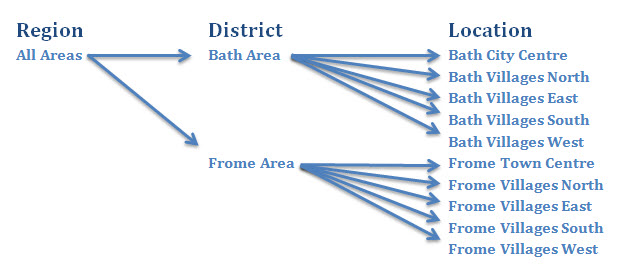
You set these up to suit your area and your business needs. For example, Expert Agent Training, our fictitious agency has fictitious offices in Bath and Frome.
There are various ways in which you can set these up. However, you may want to consider one of the examples below:
Version 1
This version shows quite a detailed setup of areas starting with the offices broken down in the Regions tier splitting down into Districts and the Locations showing individual towns and villages.

Version 2 (recommended)
This version is a slightly more basic way of setting up your areas. The offices are grouped together in Regions and then only spilt down in the Districts tier. The locations are simply broken down into City/Town centre and then villages North, East, South & West.

Inputting your areas
The best way to plan your areas is to jot them down on paper first as it is far easier to edit on paper than within the system. Our advice is to keep it simple and remember that you MUST go down to LOCATIONS.

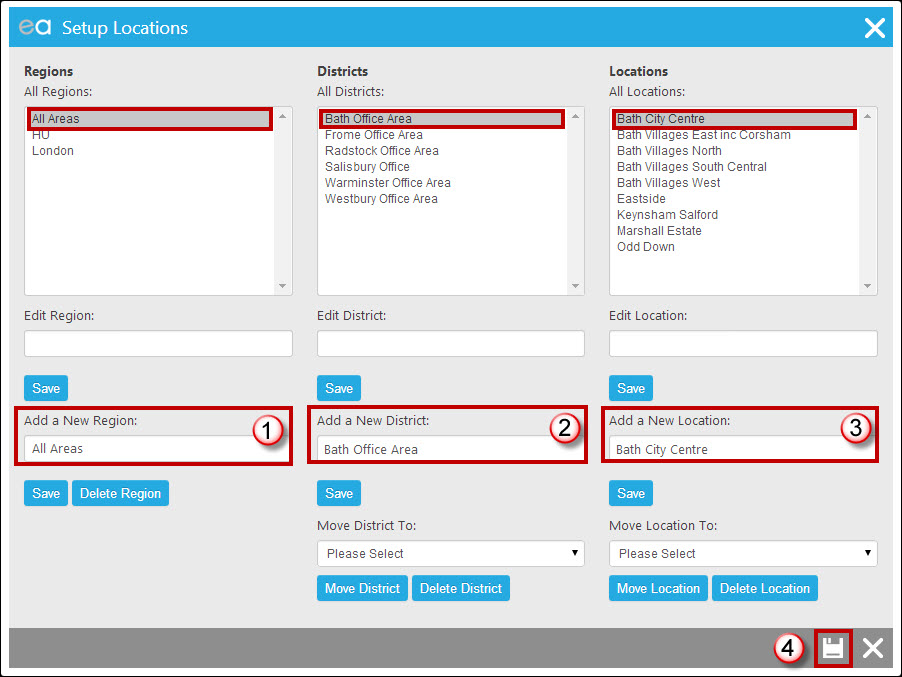
Ensure you always have the previous tier highlighted when adding the next level down. i.e. if you are adding the “Bath Office” District you must ensure you have the “All Areas” region highlighted. Similarly, if you are adding the “Bath City Centre” Location you must ensure you have the “Bath Office” District highlighted.
Note: You can move Districts and Locations up but you cannot move them down.
- Add new Region – highlight the Region.
- Add new District – highlight the District.
- Add new Location.
- Save

 Login
Login

