Photos Tab
The photos tab is where you upload and manage your property photographs:
(N.B. As images on the photo tab can be deleted (they are not subject to the Can Amend Properties staff permission) PLEASE do not upload any non marketing images such as inventory checks or inspection photos. We advice these to be added to the Events tab as the Events are compliant and cannot be deleted. You will not want any non marketing images on the Photos tab as this will go to Portals and Websites.)

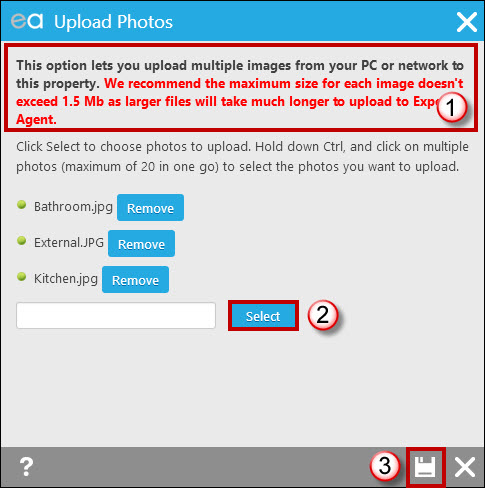
1. Click on the ‘Add Photos’ button to start selecting which images you would like to upload. The following window will open:

- The warning in red at the top of the screen states that you need to bear in mind the image size – we recommend each image doesn’t exceed 1.5mb.
- Click ‘Select’ to access files saved on your computer and choose photos to upload (you can choose a maximum of 20 photographs in one go by holding down the ‘Ctrl’ key and clicking on multiple photos).
- Click the 'Save' option to upload files.
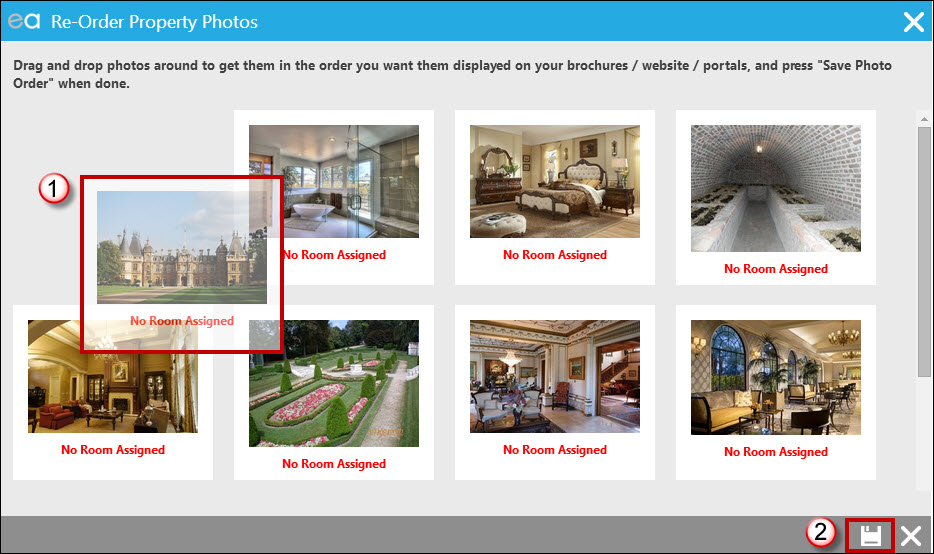
By clicking the upload button the images will upload and display in a way that you can visually reorder the images and assign rooms.

- Click and drag the images into the desired place.
- Ensure you save your changes.

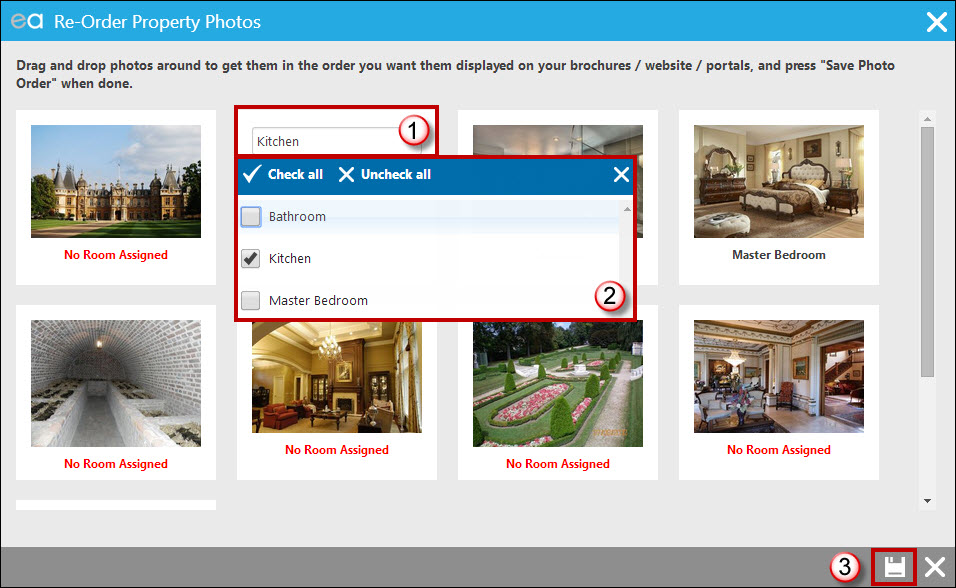
- Click on any image you wish to assign the room to.
- Tick the relevant box to assign the room. Please note you must have entered the rooms in order to assign them.
- Save
OR:

- If you would like to manually re-order your images, use the up and down arrows to order accordingly.
- It is good practice to rename your photographs, so that they are easier for you to work with and so that applicants see the correct photograph names online.
- Enter any notes needed for each photo.
- The ‘Save Notes’, ‘Delete’, 'Add Photos' and 'Re-Order Photo' buttons are at the bottom of the screen for you to save any changes made or remove an image.

 Login
Login

