Inserting Data from EA
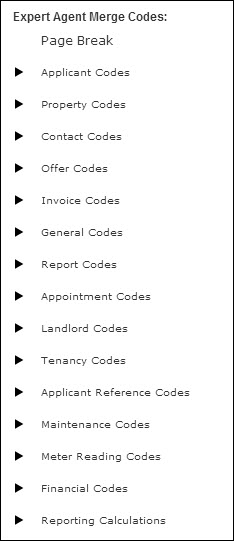
When you get to a point where you want to bring in some information from Expert Agent (for example names, addresses, fees etc.) There is a list of merge codes on the right hand side, this displays a tree view list of the merge fields grouped by merge field type.
To insert a field, just click the > to the left of the section the field is located in and select the required merge field.

Clicking the merge field from the list will insert it into the document at the point the current cursor is flashing.
For example, the code: [contact_address1] is replaced with the Contacts first line of address when the document is merged. In essence, the merge is just a clever 'find and replace'.
Just like 'Find and Replace', if you spell one of the elements wrongly it will not work. So, please be careful not to delete part of one of the merge codes – it is really easy to accidentally remove the final bracket whilst editing!
Note that the Page Break is the first item in the Field List if you need it.
Inserting Photos and Floorplans
Sadly you cannot simply insert and display a property photo as you would in Microsoft Word. Instead you have to insert a merge field using the standard field list tool. All of the property photo fields are available in 3 versions - large, medium and small. You can set the width of the photos in the Setup section of the letter. Just insert the codes and the photo fields are 'replaced' by the photos at merge time. This is very much a case of editing and re-editing by trial and error.
Use the centre, left and right justify options to arrange your photos.
TIP - Tables are particularly useful for arranging photos.
Inserting Tables
You can insert tables. They are very useful for formatting list of 'star items' or adding 2 pictures next to each other.
Inserting Graphics
You can upload and insert your letterhead and other graphics then integrate them so that Expert Agent letters are printed on plain paper.
Your company has its own graphics upload area on the Expert Agent servers. To upload to this area our experience suggests that .gif files give better quality results.
To upload your graphics, click on the image manager button in the Editor Toolbar.
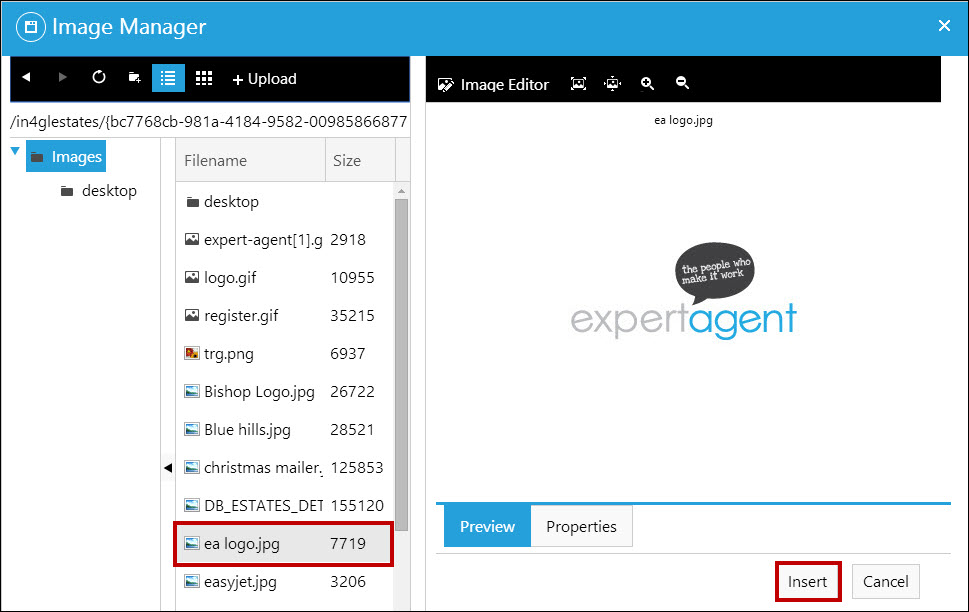
 This is the Image Manager
Clicking 'Image Manager' displays the form below. It has 2 tabs – upload and browse. Start with Upload. Choose the required file on your hard drive or network. This image is then added to your graphic upload area. You will then be able to choose the image in the browse tab on the same form as below. Click on Insert to bring the graphic into your document.

Click on the image and select the properties tab to set the image properties. Adjust the size accordingly. Use the Constrain tick box to ensure that the image does not get stretched.
You can do a lot more with your imported graphics if you are prepared to invest the time to learn HTML.
Saving your Letter
When you have finished your letter, scroll to the bottom of the form and click the 'Insert' button. This will save your changes.
Click the X in the top right of the Window to close the Letter Editor and return to your list of templates. 'Save & Close' on the first form and then finally 'Save'.
More:

 Login
Login

