Adding a contact
You are able to add a new contact when assigning a contact to a record or directly from the 'Contacts' option in the Top Menu.
We will look at both of these options.
Adding a Contact from the Top Menu

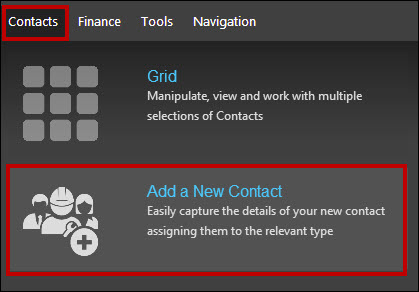
Hover over 'Contacts' in the Top Menu and select 'Add a New Contact'.

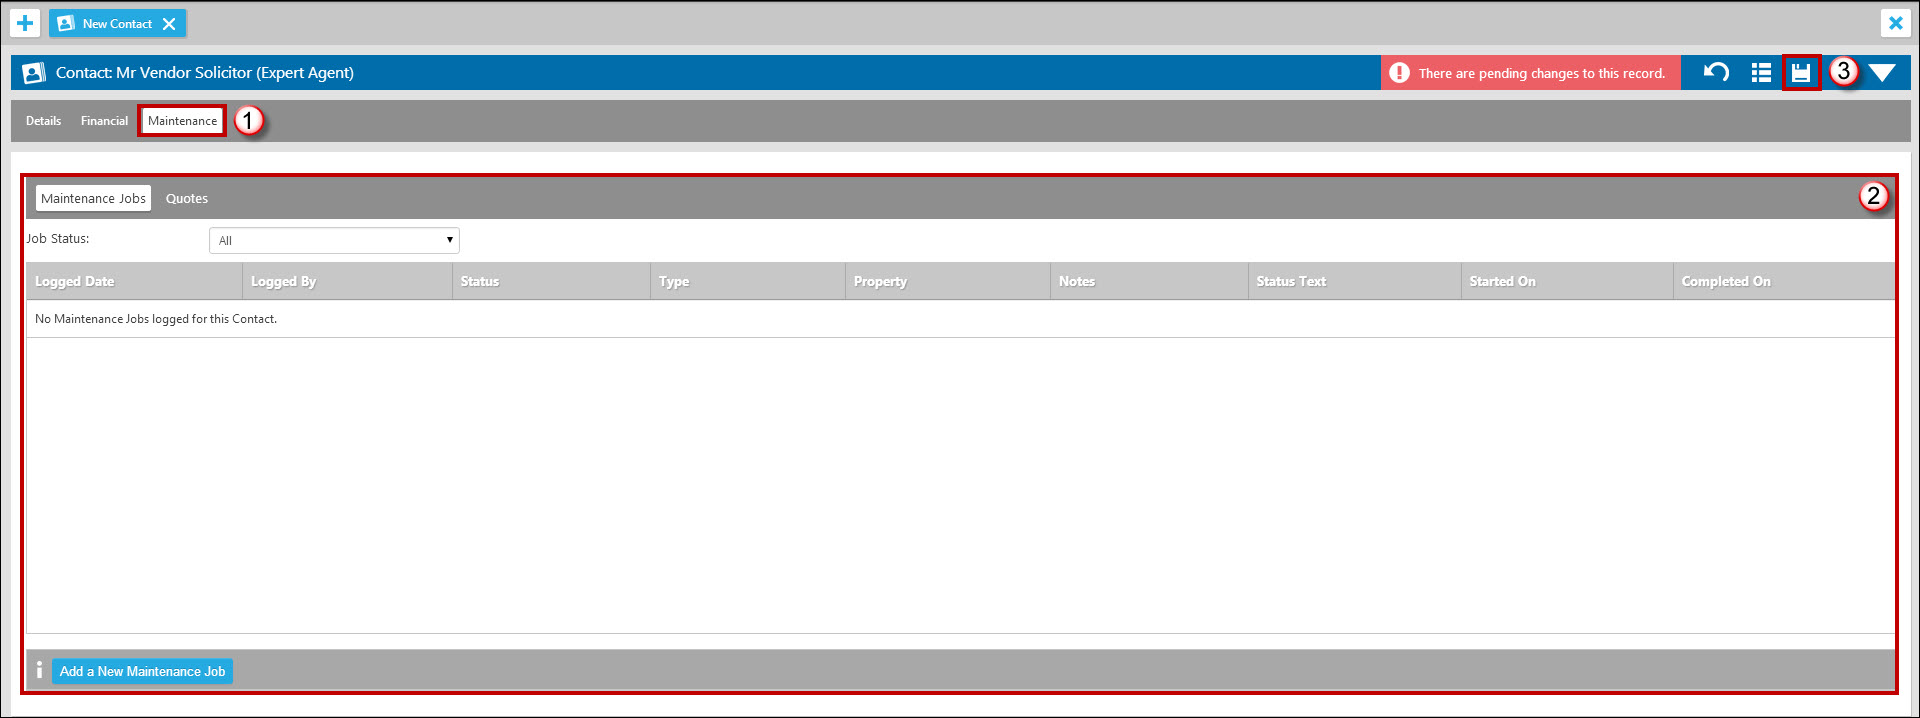
This will open the new form for your contact. There are 3 tabs to address - Details, Financial and Maintenance.
- Ensure you are viewing the 'Details' tab.
- Complete the name and address fields. Remember you have the postcode look-up facility.
- Enter the contact details for your new contact. The 'Longitude, Latitude and Exclude from Map' options all relate to how the contact displays on the map. See the Contact Types section for more information on this. The commission section relates to lettings contractors. For more information see the Purchase Invoices section.
- Enter any relevant notes regarding your new contact.

- Click into the 'Financial' tab.
- Enter any bank details regarding your new contact if needed.
- Confirm if they are registered for VAT and if so what their standard VAT rate is. This is important if you are using Lettings Financials as it will preempt the default VAT rate when creating invoices for the contractor. See Purchase Invoices for more information on this.

- Click into the 'Maintenance' tab.
- Any maintenance jobs currently assigned to the contact will display in the grid. As this is a new contact it will be unlikely to display anything although you do have the option to Add a New Maintenance Job' from here. The 'Quotes' sub tab will display any quotes logged for this contact.
- Don't forget to save your new contact.
Adding a New Contact from a record
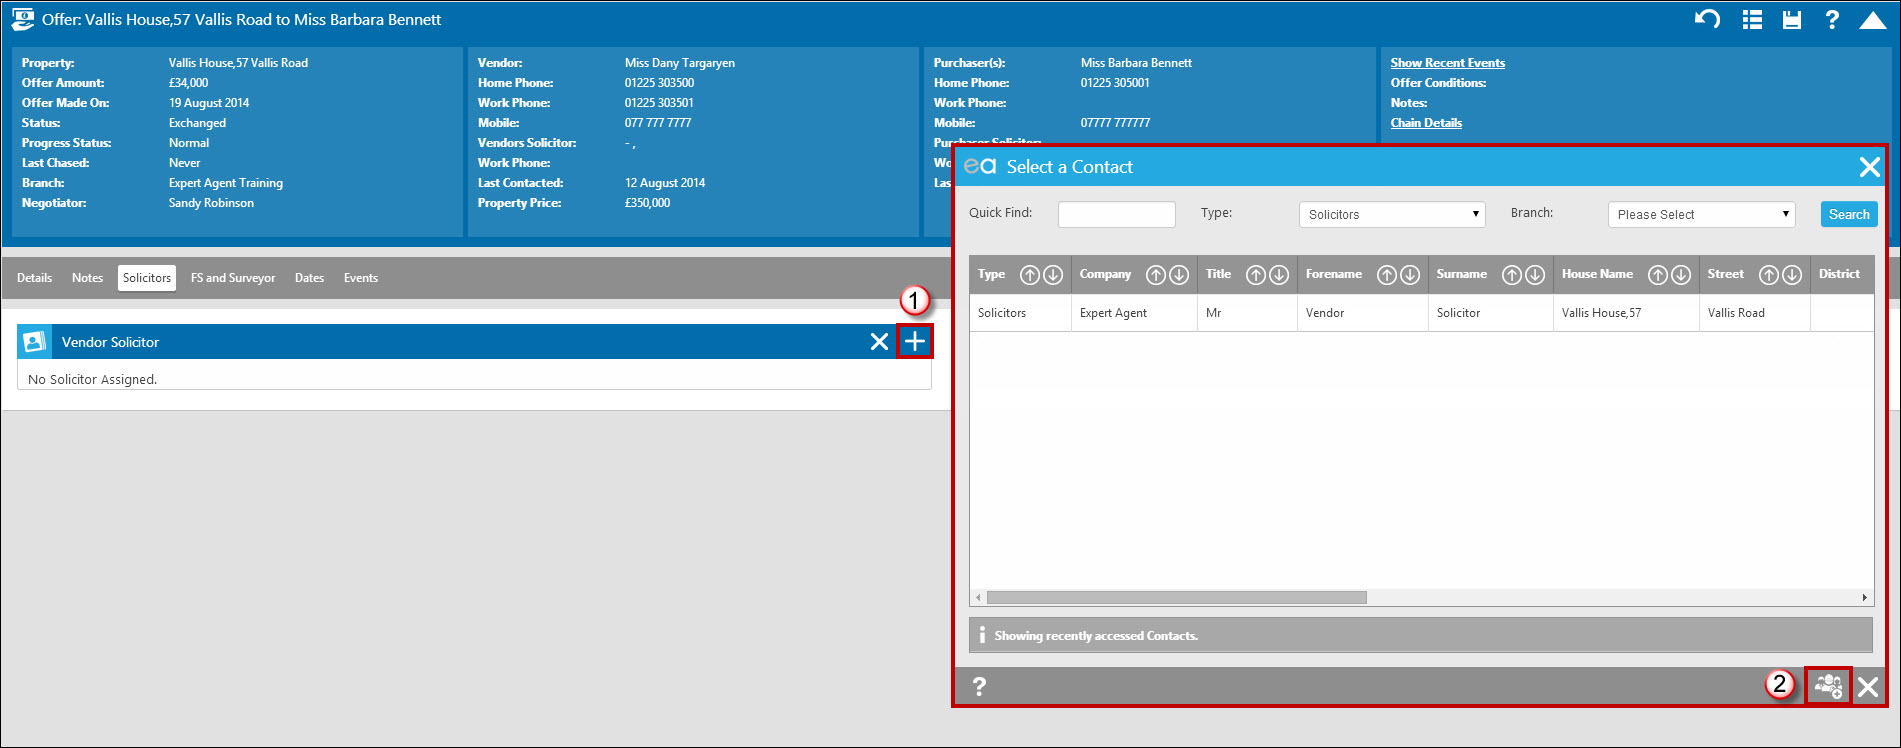
In addition to adding a new contact from the Contacts option in the Top Menu, you are also able to add a new contact from the record you wish to assign the new contact too. In this example we are going to add a new solicitor contact into the system via the Offer record.

- Click into the 'Solicitors' tab on the Offer form (remember you can do this for any different record types in the system) and select the '+' option.
- This will present the screen where you can search for any existing contacts or add a new one. Click the new contact icon.

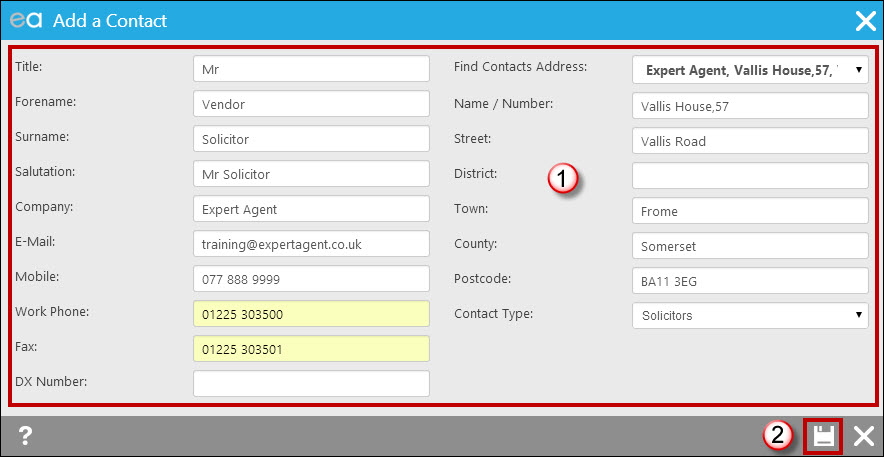
- Complete the new contact form. Ensure you are assigning the relevant 'Contact Type'
- Click the save icon.
If you would like to add any additional 'Contact Types' please see the Contact Types section within Configuration. Please note you need to be a Super User to access configuration.

 Login
Login

