Personalising your Dashboards
Dashboards are a fantastic way of finding singular records and getting a snapshot of related activity.

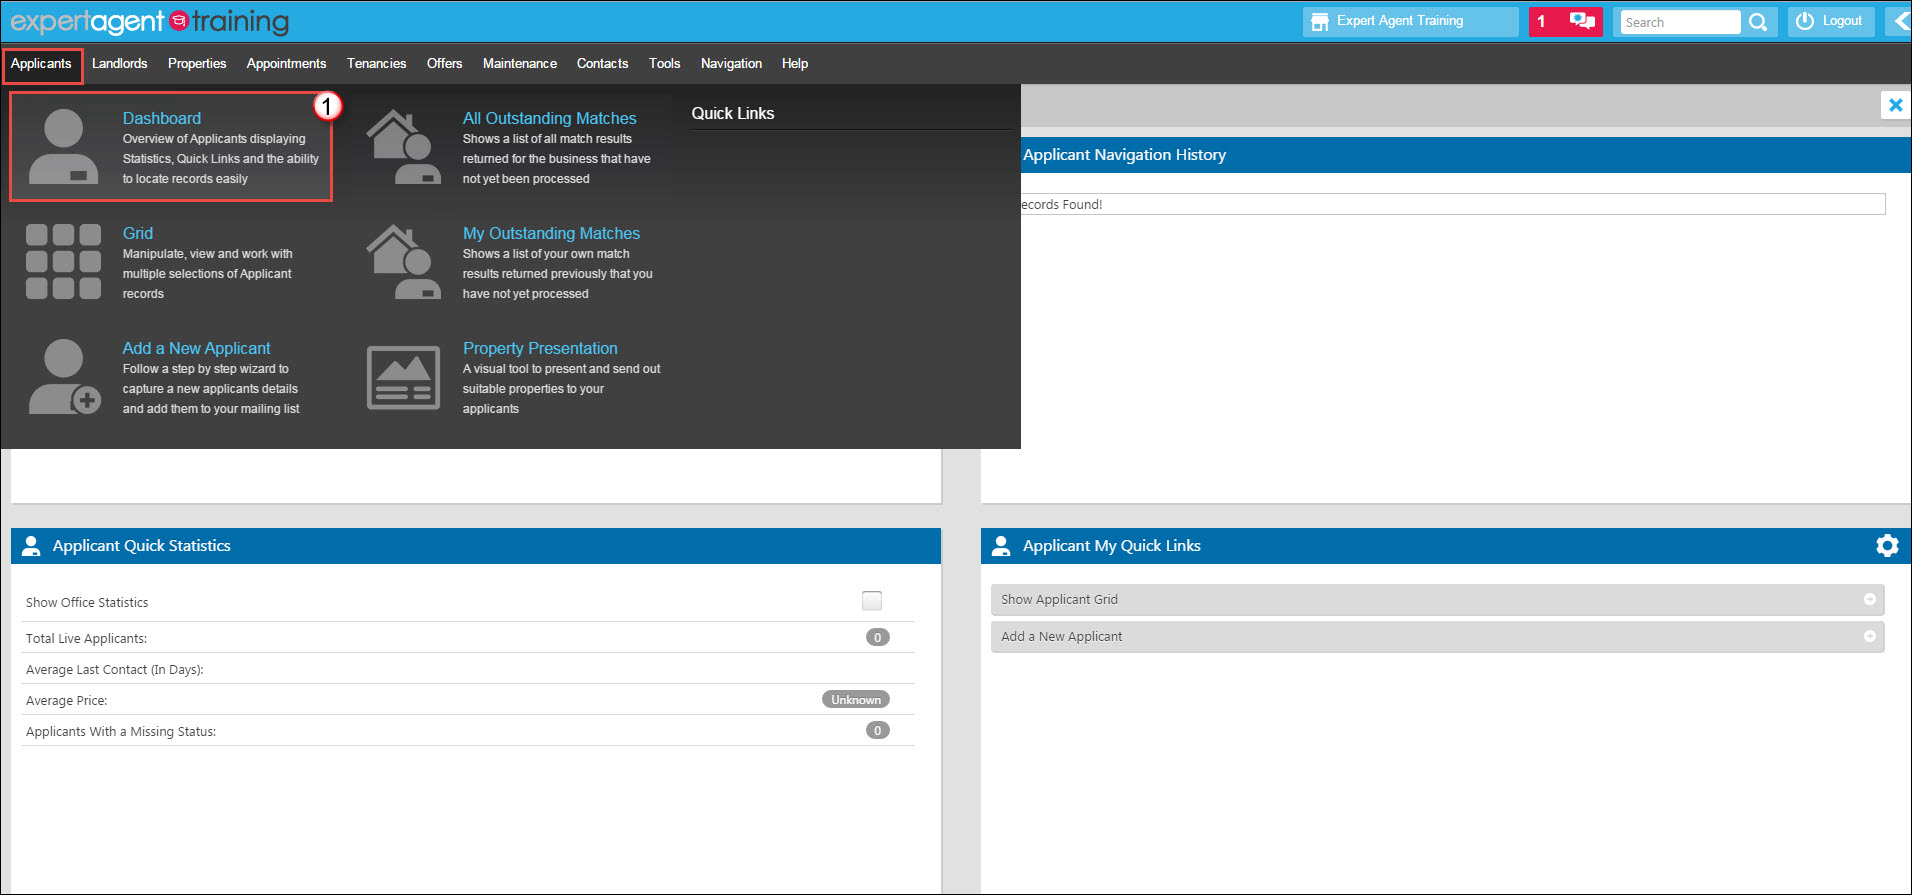
1. In order to access any dashboard, hover over the applicable section in the top menu (in this example we are using Applicants) and select the Dashboard option.
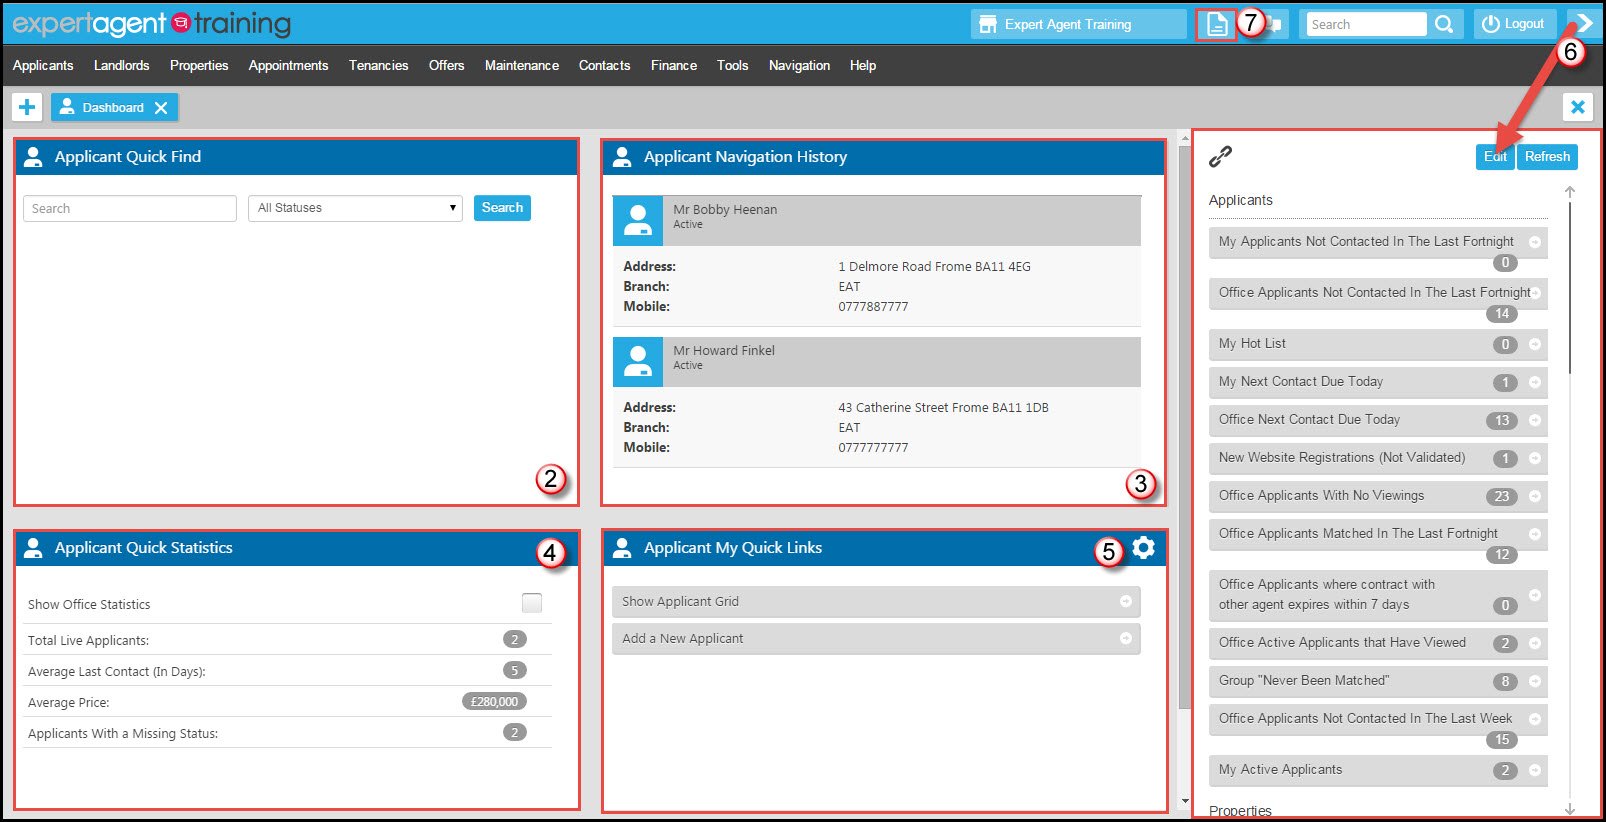
The 5 main sections of any Dashboard are:

2. Quick Find
This will show the top 50 records. You can search on both Active and Inactive applicants.
3. Navigation History
This shows up to 20 records recently worked on. This supplements the Navigation item in the top menu.
4. Quick Statistics
This will show your office or personal statistics from the 1st of the month.
5. My Quick Links
These are configured by you – click “Edit” then choose the links you want to see. There are three sets – personal, office and group. e.g. “My Hot Applicants”. Your configured links show in the “my quick links” section. It is very important you ensure you set these up. This is where the system goes from being a clever website you are placing your data into to a proactive content management system. This is one of the first things you should setup when using Expert Agent.
6. Right Tool Bar
This is configured by you to suit your individual needs. The right toolbar is an extension on “My Quick Links” and can be opened by clicking on the arrow button to expand the Tool Bar to display your quick links from anywhere within the system.
7. Sticky Note Dashboard
This button will direct you to the sticky note dashboard where you can add in your own sticky notes onto various forms throughout expert agent as reminders or extra information.
Saved Selections
Expert Agent has an extended Quick Link feature in the form of Saved Selections. These saved selections give you the ability to create and save your own quicklinks. The Saved Selections feature is covered in the following Grids section of this chapter.

 Login
Login

