 Login
Login


The areas this property is located is not displaying in the location list?
If an area is not displaying in the locations drop down it is more than likely because it has not been added to your configuration.
In order to add/ delete or amend any of your areas, you will need a super user to access Tools> Configuration> Business Configuration> Areas. This screen will give you the option to add new areas or delete/ amend existing ones.
For more information on areas please see the Set up your Areas chapter.
How do you send a mass email to all Potential Vendors?
Firstly you need to make sure you have template editing rights set. In order to do this a super user will need to go to Tools> Configuration> Business Configuration> Agency Staff and ensure the allow template editing box is selected.
The best way to achieve the email flyer is to create the flyer as a new HTML template. Within any record or from the grid right click and select ‘Create a Letter’.
Click on the ‘New’ option and a blank template will appear - make sure you give it a name. With the flyer artwork in an image format (jpg etc..) you can upload it to Image Manager in the template edit window.
Simply insert this image into your new template, paying attention to margins etc. and click ‘Save’.
Back at the Properties Grid, you will need to filter your grid to display the relevant records. In this example you would set the Status filter to 'Potential Vendor'.
Once this has been achieved you can right click and select ‘Send Email’.
Select your new template from the list and it will be emailed to ALL properties in the grid results at that time.
How do I add a new property to EA?
There are 5 ways to enter a new property:
1. From the Properties dropdown list on the Top Menu
Hover over Properties in the top menu and select ‘Add a New Property’ from the drop down.
2. From the Property Dashboard
Use the ‘Add a New Property’ link found in the Quick Links section.
3. From the Property Grid
By right clicking and selecting the ‘New Property’ option.
4. From an Applicant Record
By right clicking and selecting the ‘Create Property’ option.
5. From the Weekly Diary
When booking an appointment (for example a valuation), click ‘Choose’ to assign the property, then use the ‘New Property’ button to add the property details.
For full information on adding property records please see the Booking the appointment and fact finding chapter which covers each page of the new property wizard in detail.
What is the difference between tasks and messages?
The main difference between tasks and messages is that messages are always due now – tasks can be set in advance of action being required (so they act more like reminders).
Messages are sent either by right clicking in a record and selecting 'Quick Message', or by clicking into the message icon at the top of Expert Agent:
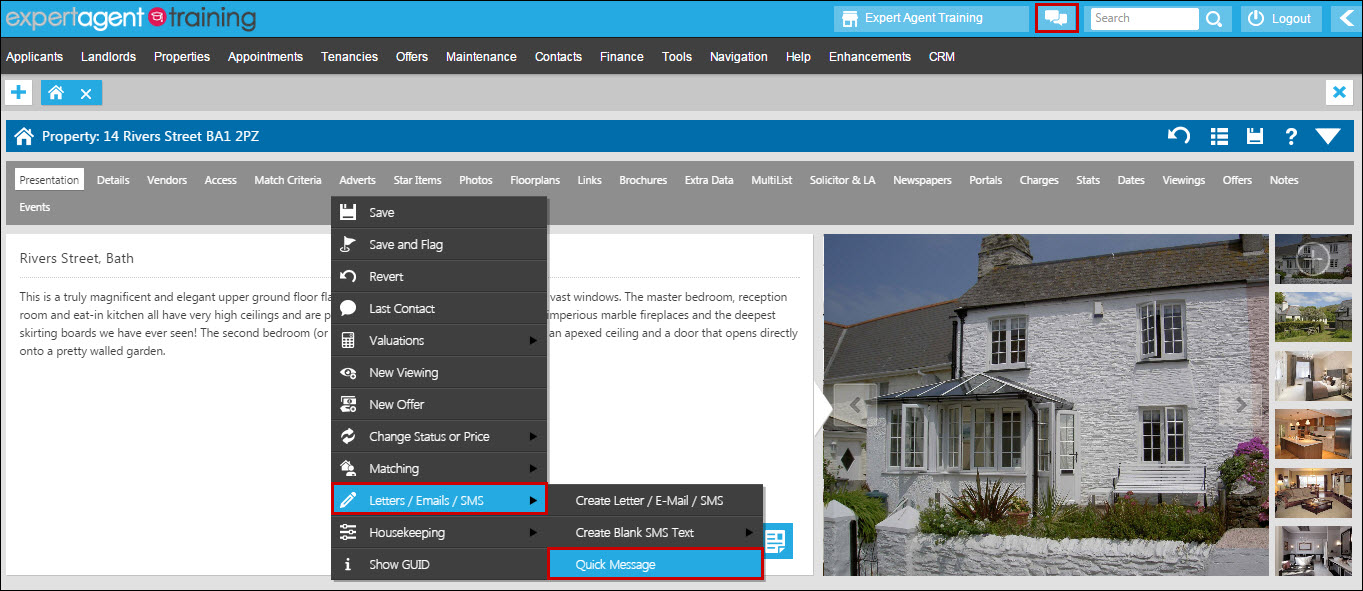
You will read new messages by clicking on the message symbol also.
If you have a new task, it will be visible via the tasks pod on the homepage or on the tasks grid. For more information on these see the How do I work with tasks? FAQ.
Tel: 01225 303500 | Email: account.managers@webskyltd.com
Terms of Business | Cookie Policy | Privacy Policy | ZPG Modern Slavery Statement
Designed by the Expert Agent Design Department
