 Login
Login


How do I resend the Welcome Email
The Welcome Email can be resent from the Applicant Grid. If you want to resend it, or you didnt send it when you added the applicant into Expert Agent, you need to filter on that applicant in the Applicant Grid.
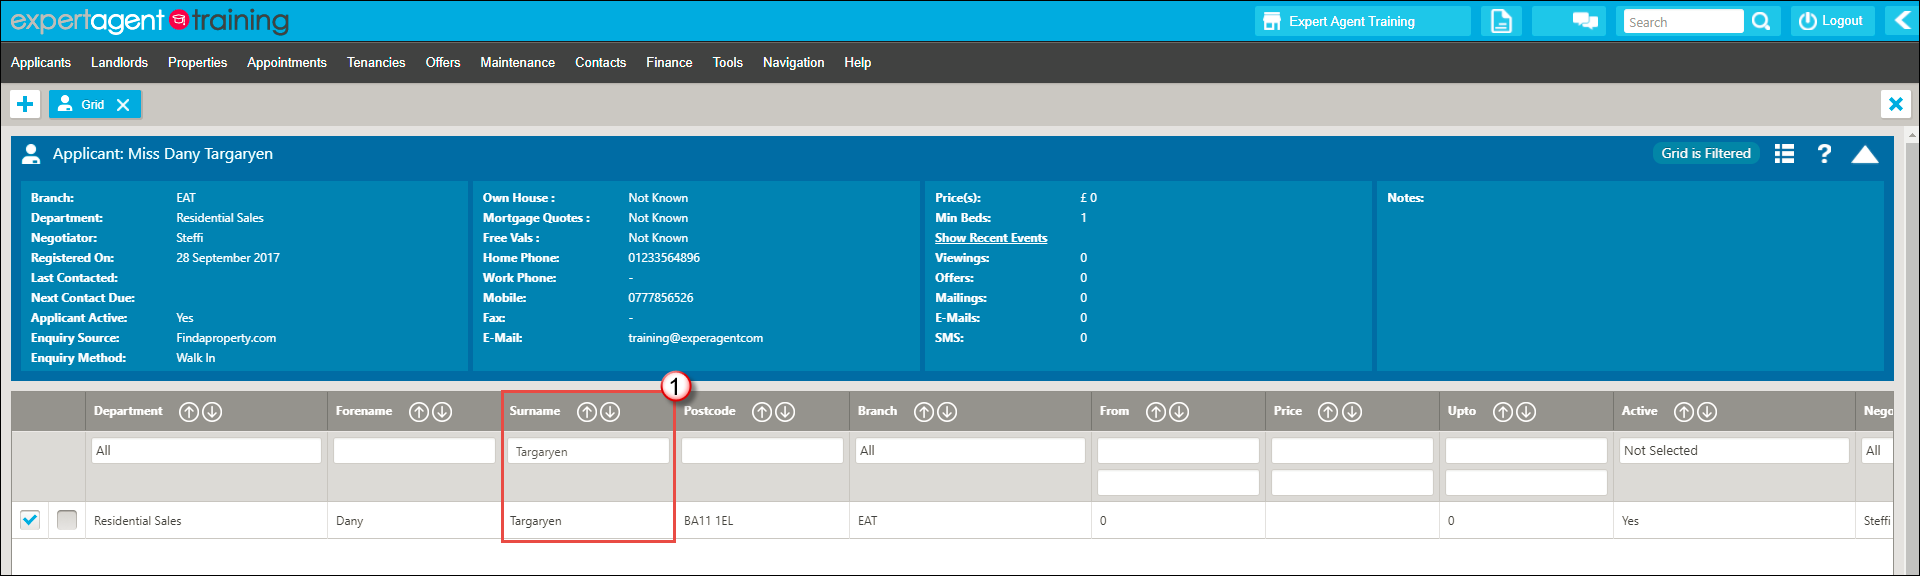
1. Either filter using the surname column.
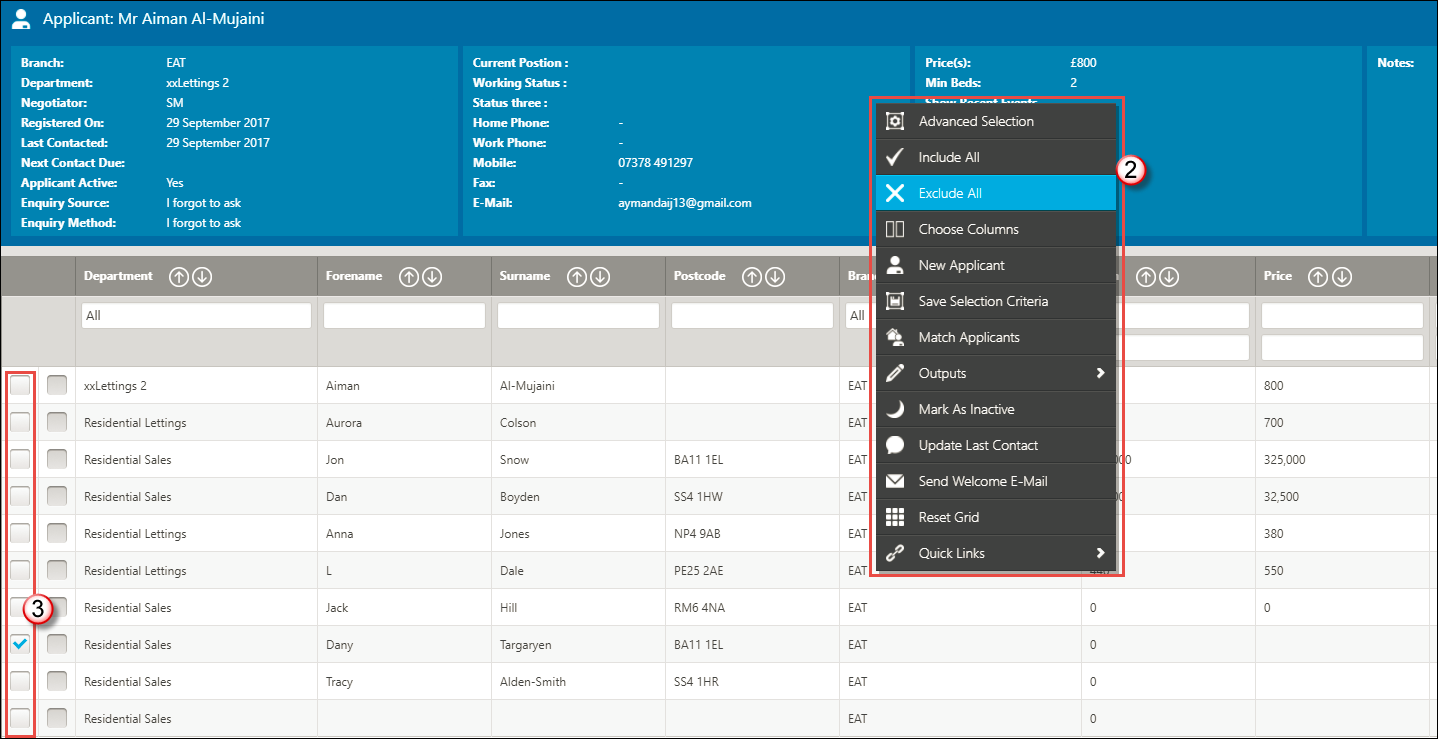
2. Or Right Click, Exclude All.
3. Make sure the Applicant you wish to resend the Welcome Email to is ticked.
You may need to do a combination of both of these if you have an applicant with a surname the same as another one.
Once you have your Applicant in the Grid (either the only one showing, or the only one ticked)...
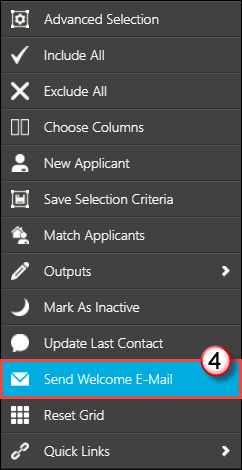
4. Right Click on the Grid -> Send Welcome E-Mail.
This will not give you the chance to change the text. It will send the email from the Applicant Negotiator.
Some people ask us what happens when an Administrator adds the applicant into the system and sends the Welcome Email. In that case, the Welcome Email will come from the Administrator. The work around for this to to NOT send the Welcome email at the time of adding the Applicant in.
Once the Applicant is added into the system, the Administrator can change Negotiator on the Applicant record (they will need to have the correct permissions set - Agency Staff).
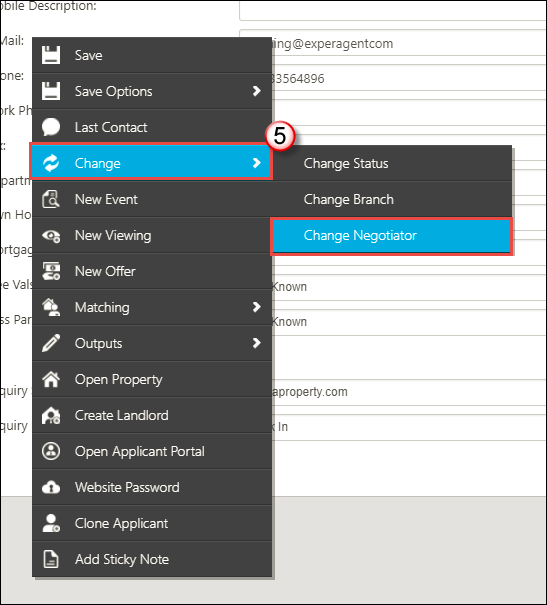
5. On the Applicant Record - Right Click -> Change -> Change Negotiator. You can either chose from you Team or from your Office.
Press Save and then follow steps 1 - 4 above.
What happens when I forget my Password?
If you forget your Expert Agent password, unfortunately, we cannot give it to you, as we do not store them within our system. This is not to be difficult, this is a security measure to make sure your data is secure.
You will need to contact your Branch Super User in order for them to change it in order for you to get logged in. Please then remember to go to your Staff Profile (Personalising your Staff Profile) to set yourself a new password.
(If you are unsure who your Branch Super user is, please do give us a call 01225 303500)
PayProp Export
If you need an export from Expert Agent then please request this via a Support Ticket or via email to This email address is being protected from spambots. You need JavaScript enabled to view it.
Export Price: £100 + VAT
Files Included: Tenancies.csv, Properties.csv, Beneficiaries (Landlords.csv)
Content per file (based on the naming convention from PayProp):
Tenancies:
- First Name
- Last Name
- Business Name
- Passport No
- Driving Licence
- Email Address
- Mobile Number
- Phone Number
- Fax Number
- Notify Email (Send Email)
- Notify SMS (Send SMS)
- Address 1
- Address 2
- Address 3
- City (Town)
- County
- Postal code
- Account Name (Bank)
- Bank Name
- Sort Code (Bank)
- Branch Name (Bank)
- Account Number (Bank)
Properties
- Property Name (Reference)
- Responsible Agent (Agency Branch Name)
- Responsible User (Negotiator Name)
- Monthly Payment Required (Rent)
- Listed From (Instructed on)
- Address 1
- Address 2
- Address 3
- City (Town)
- County
- Postal Code
- Country
Beneficiaries (Landlords)
- First Name
- Last Name
- Business Name
- VAT Number
- Email Address
- Mobile Number
- Phone Number
- Fax Number
- Notify Email (Send Email)
- Notify SMS (Send SMS)
- Address 1
- Address 2
- Address 3
- City (Town)
- County
- Postal Code
- Country
- Account Name (Bank)
- Bank Name
- Sort Code (Bank)
- Branch Name (Bank)
- Account Number (Bank)
These are all based on the Tenancy having a Status of Let and the Management Type being Fully Managed.
Additional columns that are not listed and show as blank in the CSV are entered at PayProp’s end.
How Do I Re-Use Key Numbers?
Within Expert Agent, if you try to use a Key Number that is already in use, it will alert you.
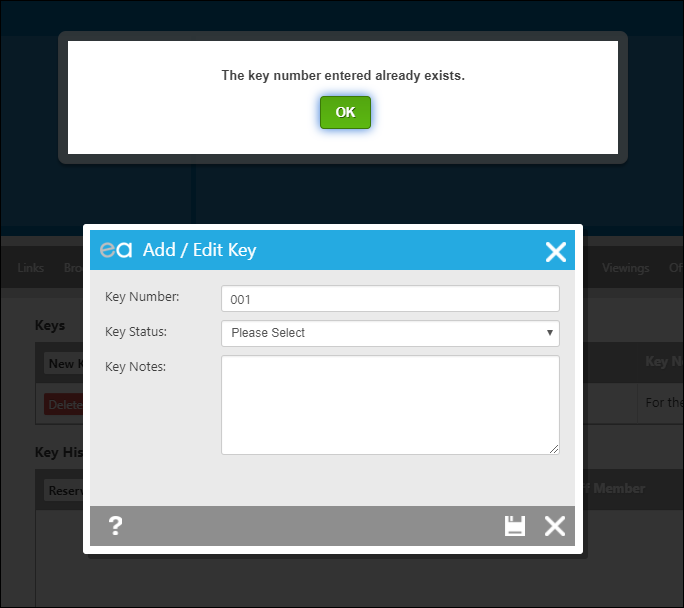
However you can still press OK and add in the same key number.
If you wish to re-use Key numbers but not get that alert, keep key numbers unique, or keep the old key history (so not deleting the key record from the property), follow the steps below:
For this example we will be using a Completed Property and doing a Key Handover
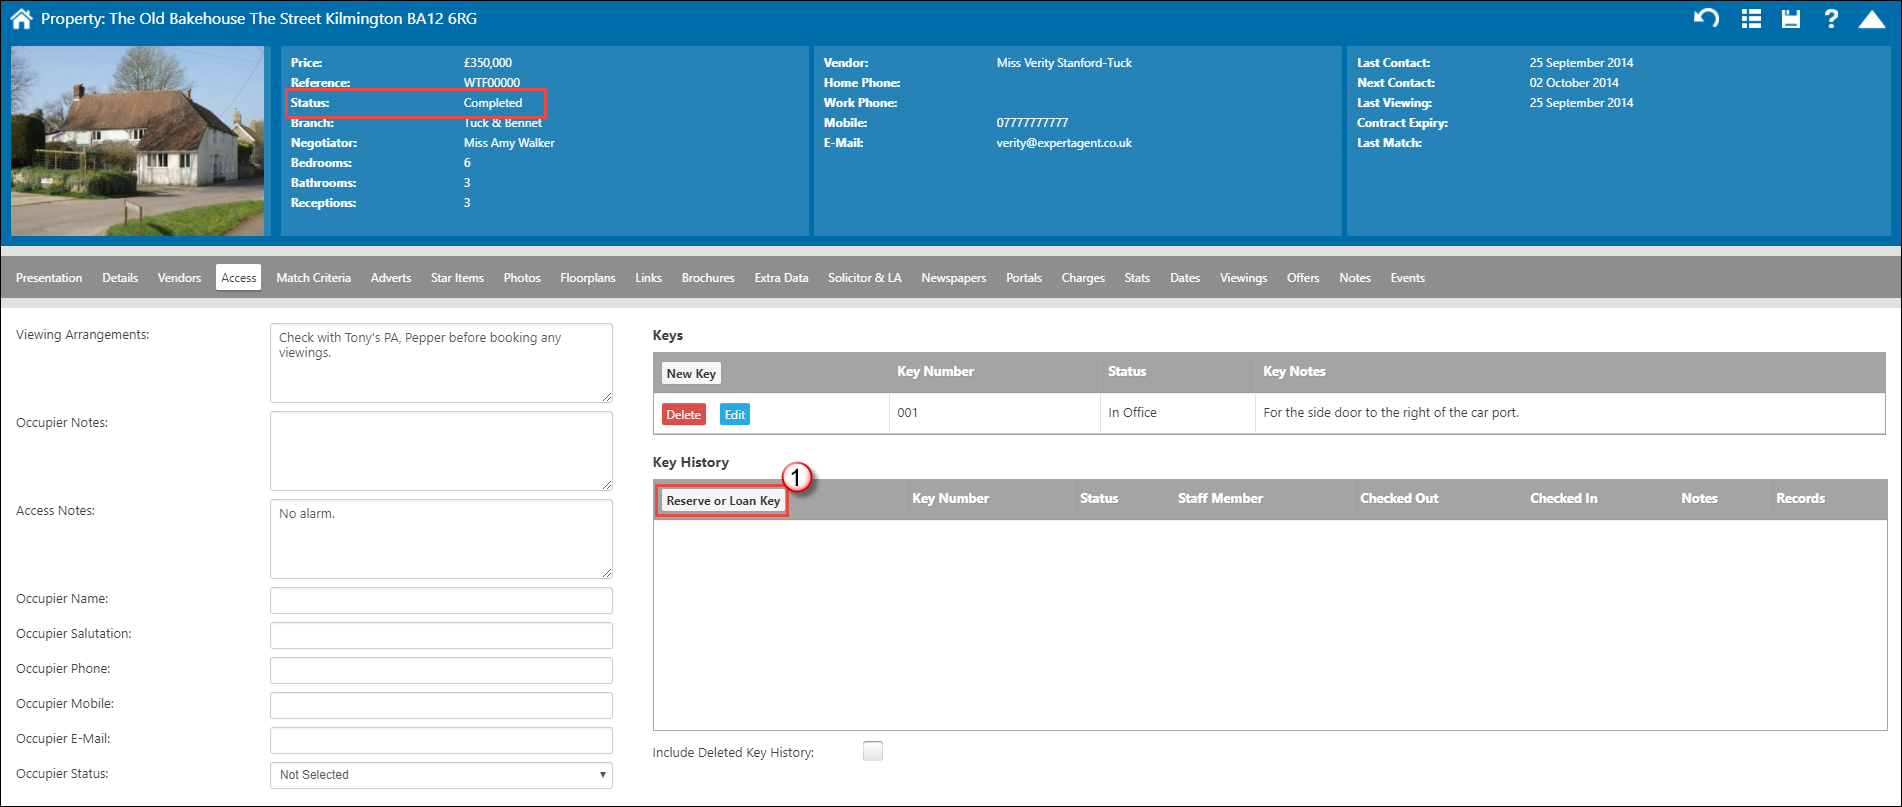
1. On the Access tab of the Property record, click "Reserve of Loan Key".
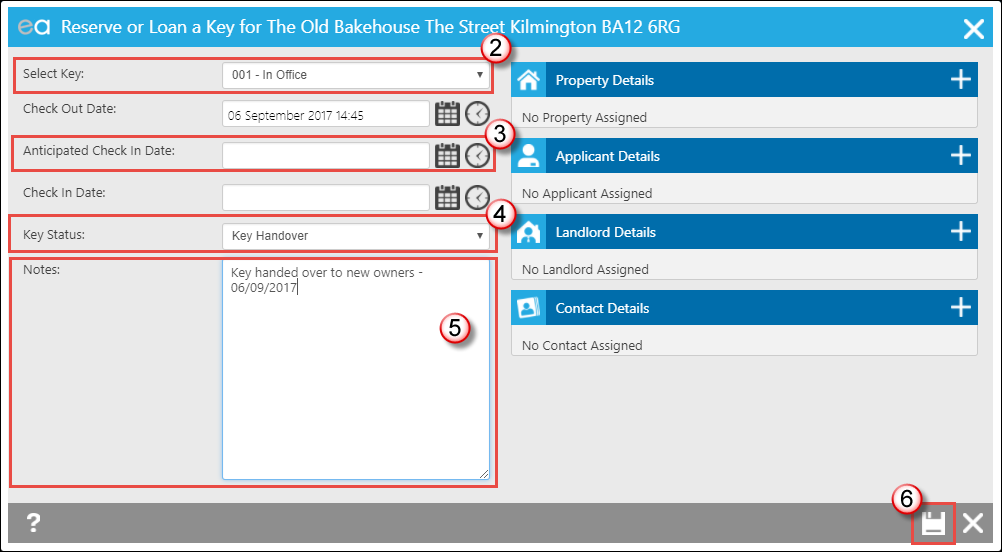
2. If you have multiple keys added to the property, select which set you wish to handover here.
3. Remove the Anticipated Check In Date from this field (simply highlight and press delete) otherwise it will appear as an Overdue Key on your Key Grid (Accessing the key grid).
4. Select the Key Status (we're using Key Handover).
5. In the Notes box, we have put why we have done the key handover and when.
6. Press Save.
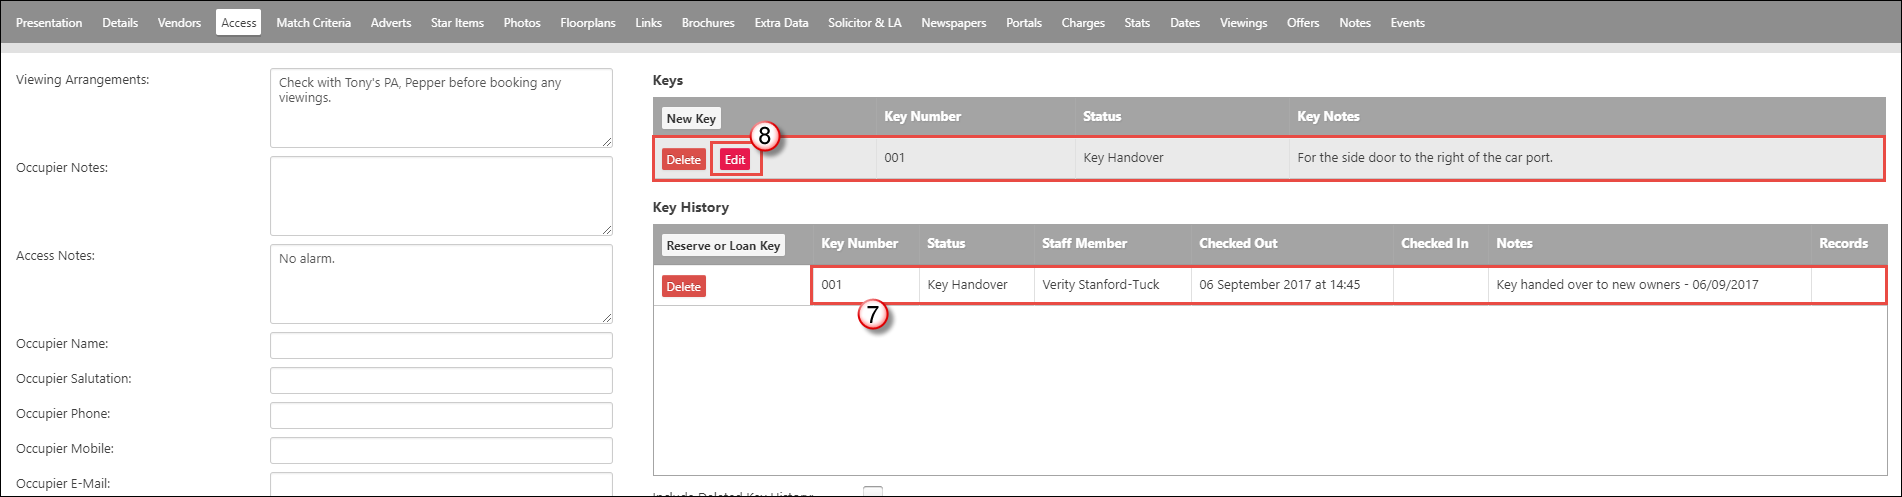
7. The key is still listed in the Key History section but note the key status.
8. The Key Number is still 001, so we need to click "Edit".
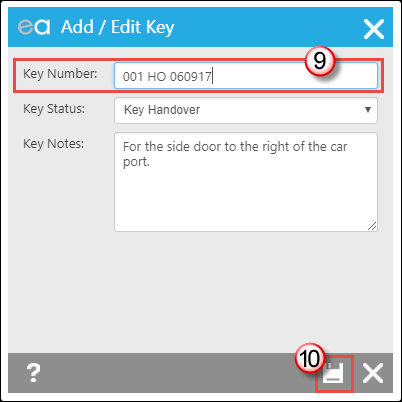
9. Change the Key Number here to something unique. I have used the code HO for Handover and the date. This key number will never need to be used again.
10. Press Save.
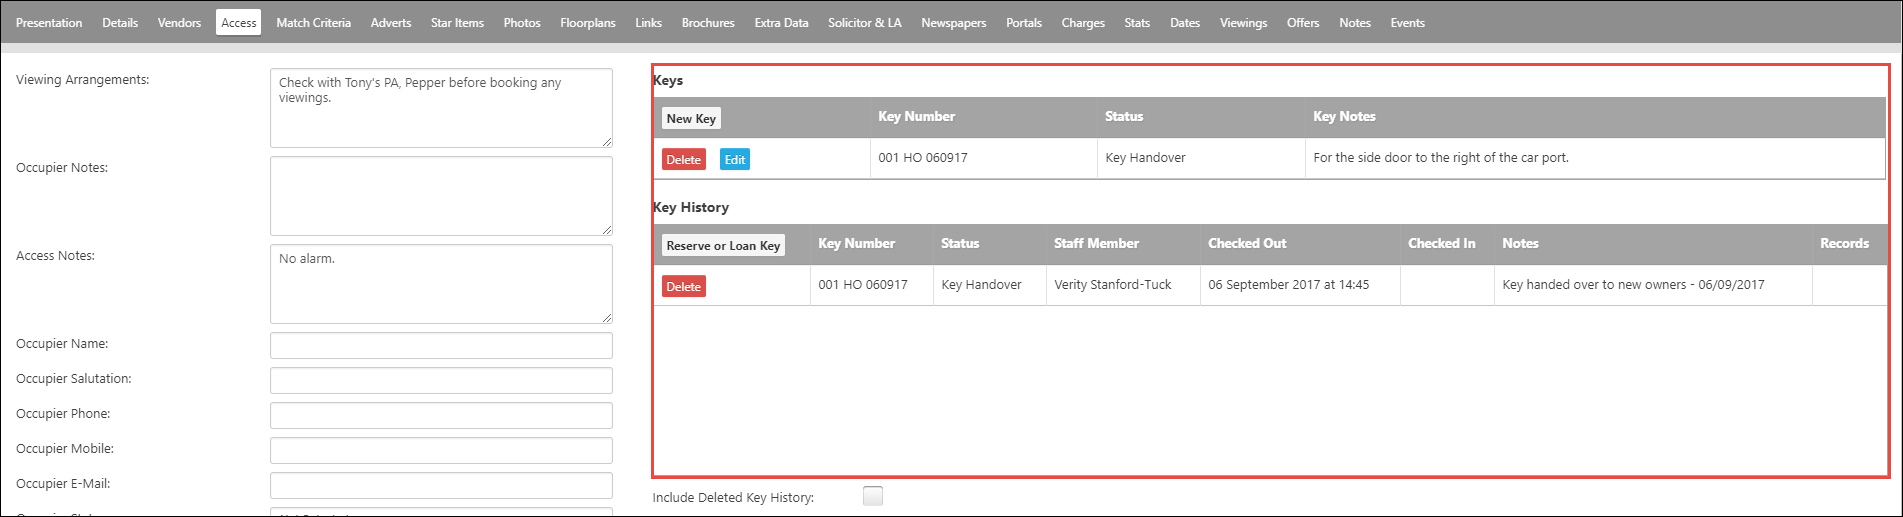
The new number is now showing on the key section of the Property record, leaving key number 001 free to use again on a different property.
Tel: 01225 303500 | Email: account.managers@webskyltd.com
Terms of Business | Cookie Policy | Privacy Policy | ZPG Modern Slavery Statement
Designed by the Expert Agent Design Department
