 Login
Login


Where has the Tenancy Deposit Reference gone?
The deposit reference is now found on the tenant tab of the Tenancy Record rather than the Details tab of the Tenancy Record, The reason for this is the tenancy may have more than one tenant who has paid their own share of the deposit so when you register their deposits individually, you can enter their relevant deposit reference information separately.
There is an additional column appearing in the tenants tab, alongside the deposit which will display the deposit reference number. This ensures that all information relating to a specific tenant such as their name, rent amount, deposit amount etc, that makes up the tenancy, is found in one place.
You can enter or edit the deposit reference by clicking on the edit button alongside the tenants name in the tenants tab of the tenancy record.
Why can I no longer charge a fixed management fee automatically?
Automatic recurring management fees are created based on rent receipts and not on the rent charge. If you were to receive a partial rent payment, the system would have charged the landlord the fixed management fee. When you receive another partial payment, the system would again charge the landlord the fixed management fee. To prevent duplication, this function has been disabled and will only allow for you to set up management fees as a percentage.
If you need to charge a fixed management fee, this will need to be set up as a Recurring Invoices - Ideally from the tenancy record as you then get the option to stop the invoice charging when the tenancy ends so that the Landlord is not charged when the property is vacant.
Please note that you will need to amend tenancies that have been set up with a fixed fee for the management fee as the automatically created management invoice will not be created when rent is received.
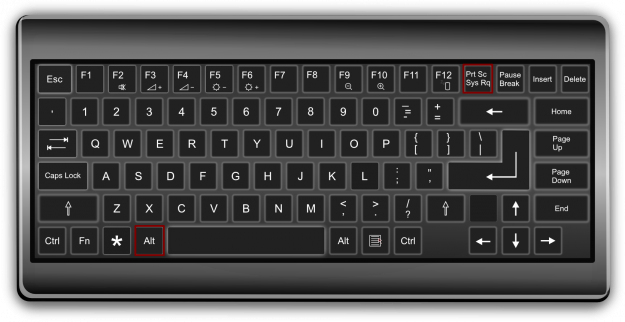
How do I take a screenshot?
Go to the area that you are having an issue with, once there press Alt and Print Screen (maybe written as Prt Sc) on your Keyboard for a PC, or Command + Shift = 3 on a Mac.
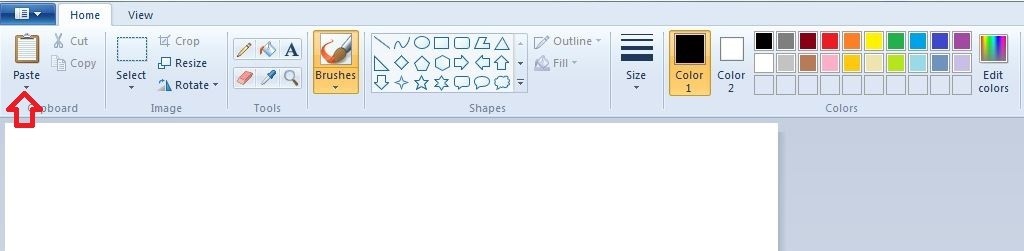
Once this has been done, open Paint on your Computer and click into Paste (You can find Paint by searching on the Start Menu).
After the image has been pasted then click on File -> Save As -> Give it a name -> Save as .jpg

At the very end of creating a new Ticket you have the ability to attach files, here is where you can attached your newly created Screenshot after explaining the issue.
How do I create Brochure Templates on a Mac?
Where possible we recommend you use a PC to create your brochure templates. However, we do know that sometimes this isn't possible.
If you are using a Mac to create your brochure templates you will need to be using Office 365 as this is the only version of Word that will work on a Mac using WordLink.
The problem with a Mac is that the option to "Link To File" for Image Merge codes doesnt exists. Below will show you the work around for this when using a Mac (we do still ask you to always use Word for Mac, rather than Pages).
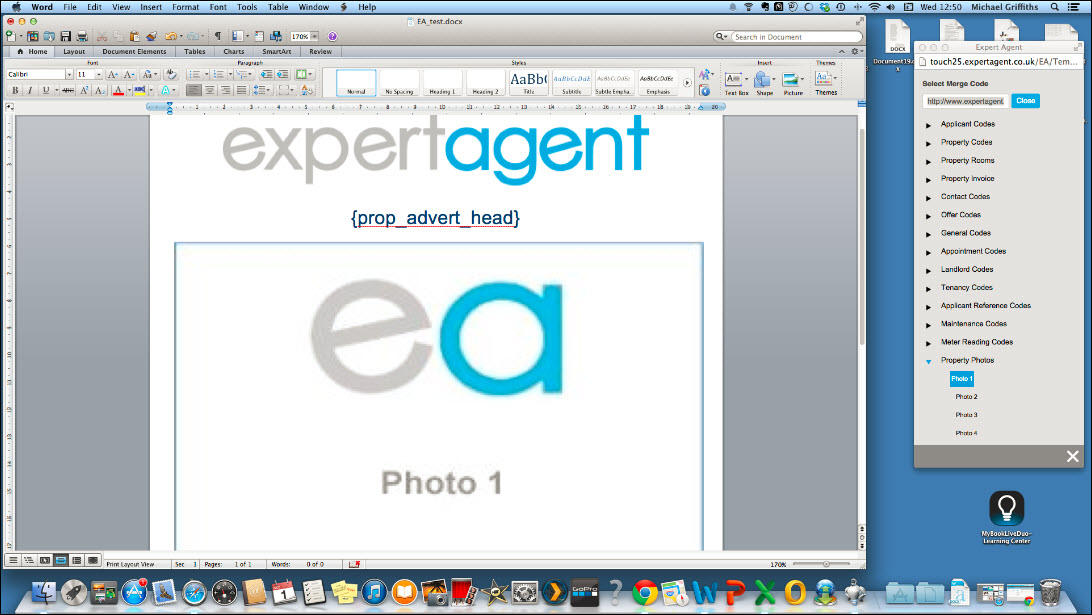
To insert an image into a Brochure on a Mac you need to first insert a text box.

1) From the Insert menu, select the "Field" option.
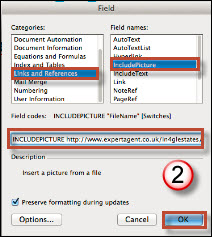
2) From the window that opens you will need to select "Link and References" and "IncludePicture". Once select you will need to paste the image merge code (URL) into the box at the bottom after the INCLUDEPICTURE text.
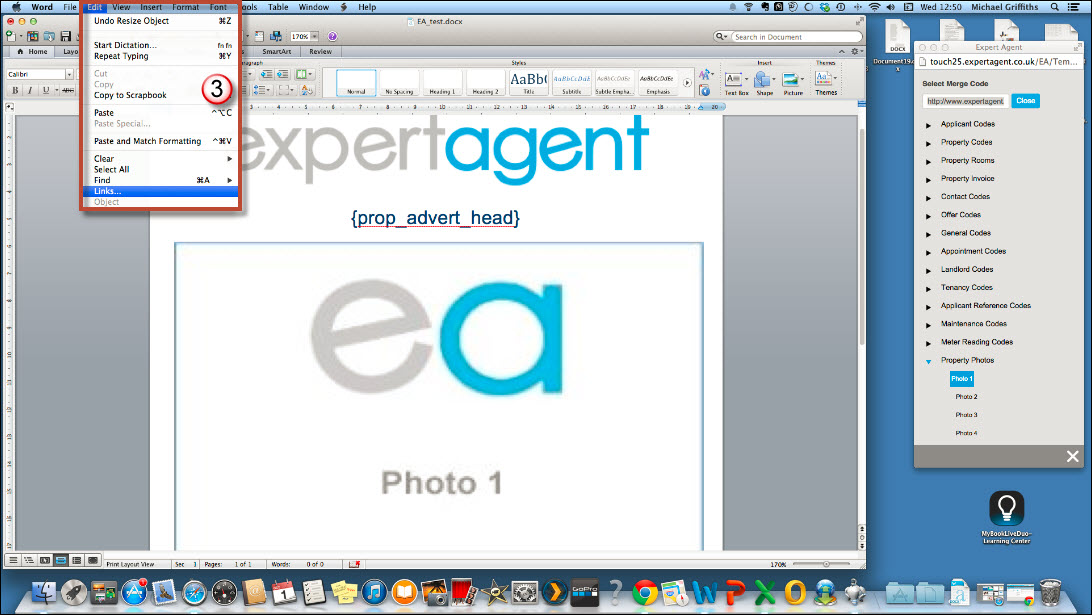
3) Once the required images have been inserted you will need to make these links dynamic, from the Edit menu select "Links..."
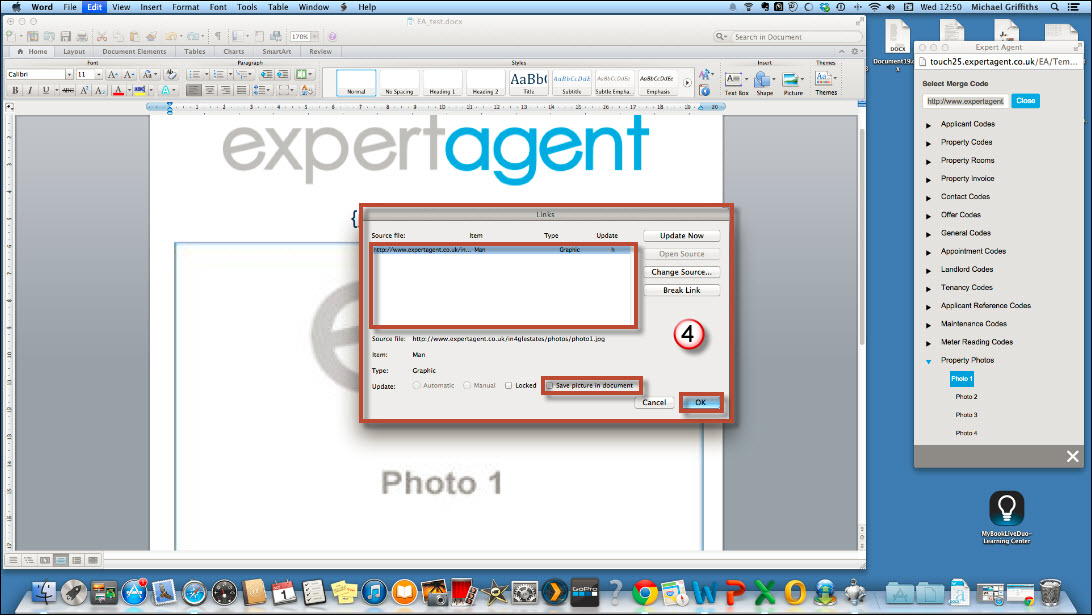
4) This will then open this window, for each link listed in the top box, you will need to uncheck the "Save Picture in Document" box.
5) Once you have unchecked this option for all images, you will be able to format them.
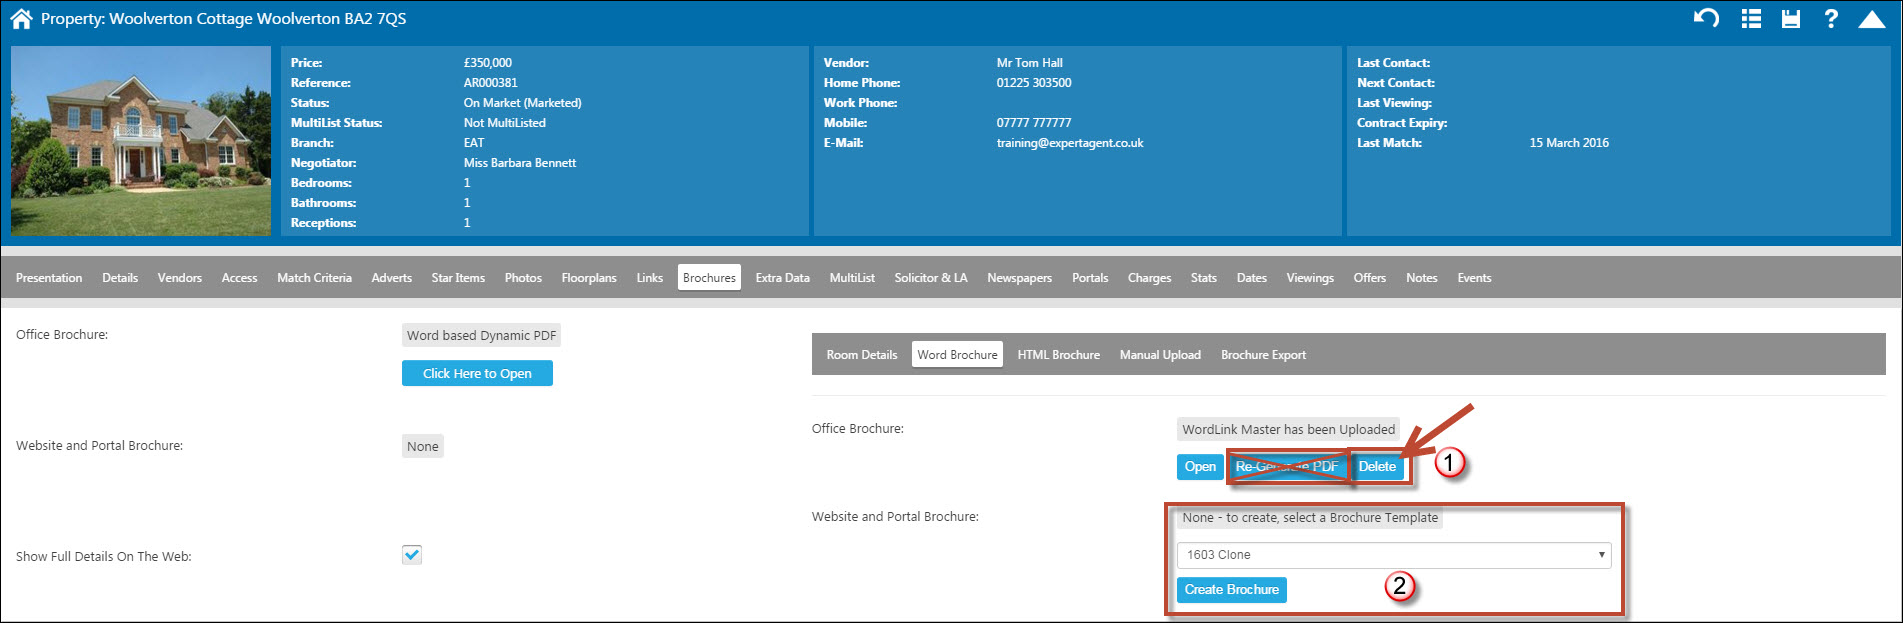
N.B. Please note that when using a Mac to create your Brochures the Re-Generate button will not work. You will need to Delete the Brochure and generate again.
Tel: 01225 303500 | Email: account.managers@webskyltd.com
Terms of Business | Cookie Policy | Privacy Policy | ZPG Modern Slavery Statement
Designed by the Expert Agent Design Department
