 Login
Login

How do I add in Other Agent Referral Viewings?
Adding in a viewing with a referral from another Agent (in this example we'll use Seeff) works very similarly to adding in a standard viewing.
Adding The Viewing
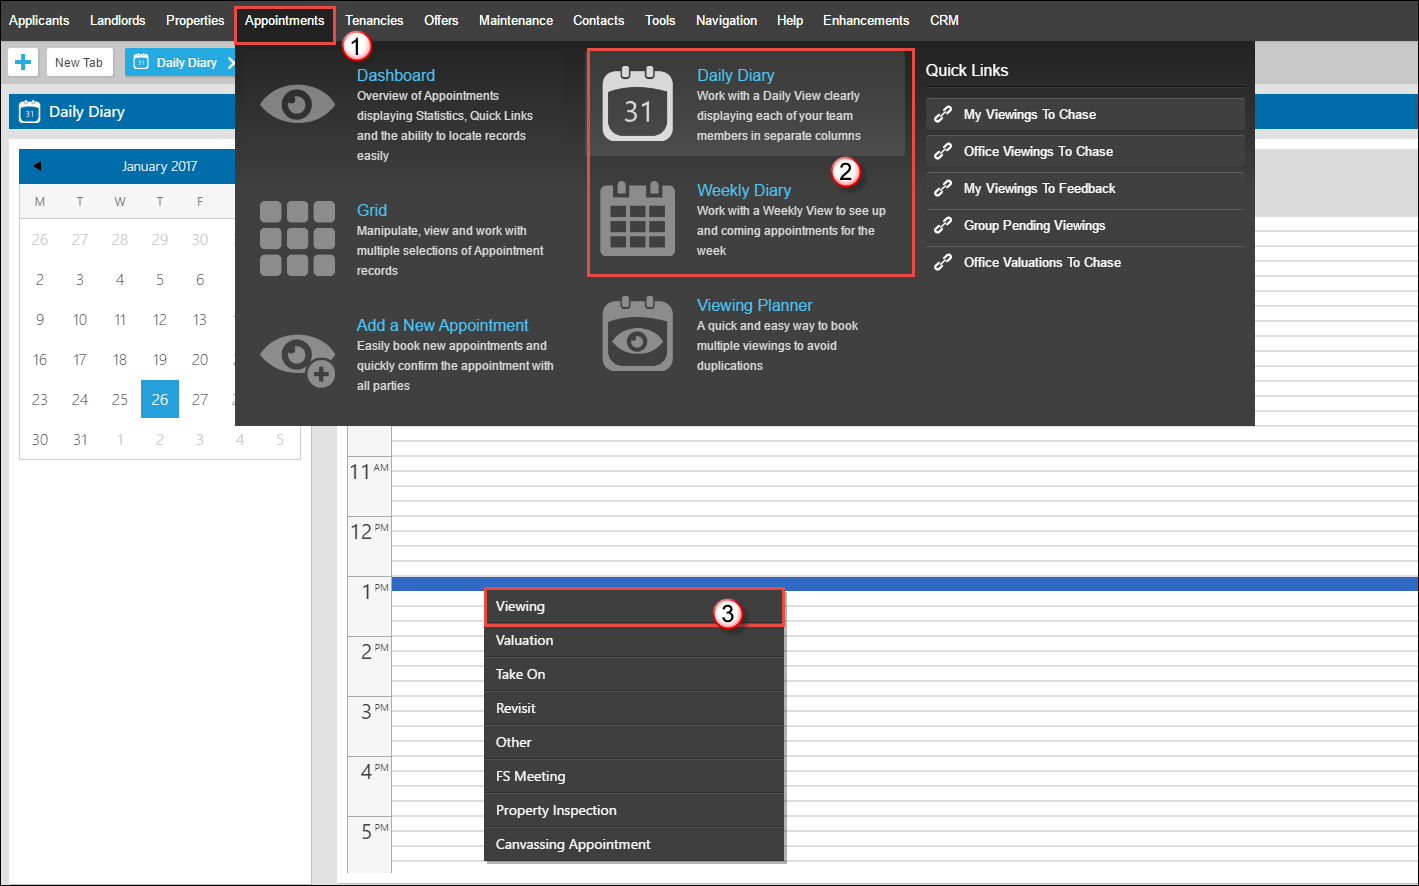
1) Hover over Appointments in the top menu.
2) Select your preferred diary view (I am using Daily)
3) Right click on the desired time and select Viewing from the drop down.
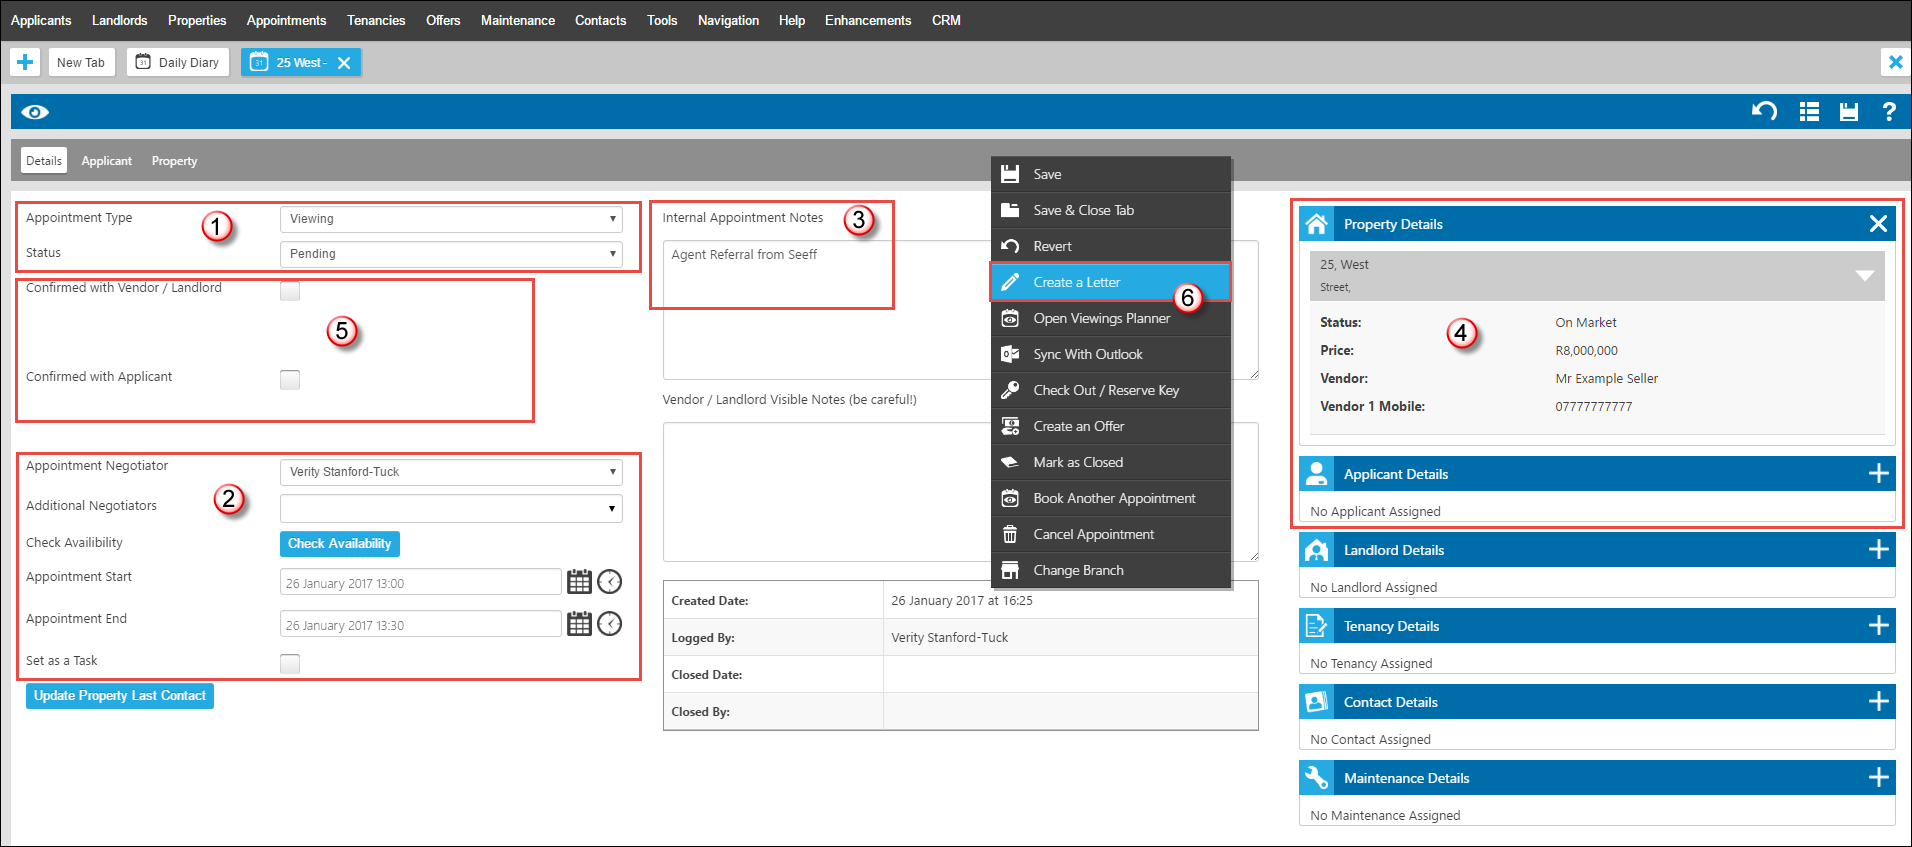
1) Double check the Appointment Type. The status will be Pending as we haven't yet confirmed it with anyone.
2) Check the appointment details here. Assigning the correct Negotiator, any other Additional Negotiators (if needed - remember you can select more than one). "Check Availability" will only work if there are any conflicting appointments. Check the start and end times and set a task if desired or needed.
3) In the "Internal Appointment Notes" add in who the referral was from for your notes, you can also add in here which Agent from which company and their contact details so you can get in touch with them for the Feedback (see below).
4) We have selected a property (remember you can add this viewing in from the property record first) by clicking on the + and searching for our desired property.
5) Note we do not have the option to send those standard quick confirmation emails here. There will not be unless you add an Applicant (buyer) in. We don't want to do that, so if you want to send a confirmation email to the Vendor (seller) see the next point
6) Right Click and Create a Letter (this option will only appear once you have saved the record so remember to do that first).
Once you have sent the letter then you can set the Status to "Confirmed" and Right Click -> Save & Close Tab.
It will now be in your diary (or which ever Agent you selected as Negotiator's diary) and we can move on to chasing that viewing once it has happened.
Chasing The Viewing

1) I am accessing my "Viewings to Chase" quicklink from the Right Hand Tool Bar. Remember you can have this set up on your Appointments Dashboard (Hover over Appointments -> Dashboard -> QuickLinks is the bottom right hand pod).
2) Scroll down to the Appointments section and click on the Office Viewings to Chase (you can use "My" exclusively if desired)
3) Hovering over the appointments listed in the grid, check the "Feedback" section of the Tool Tip. I can see this is my appointment.
4) Click on the appointment from the list.
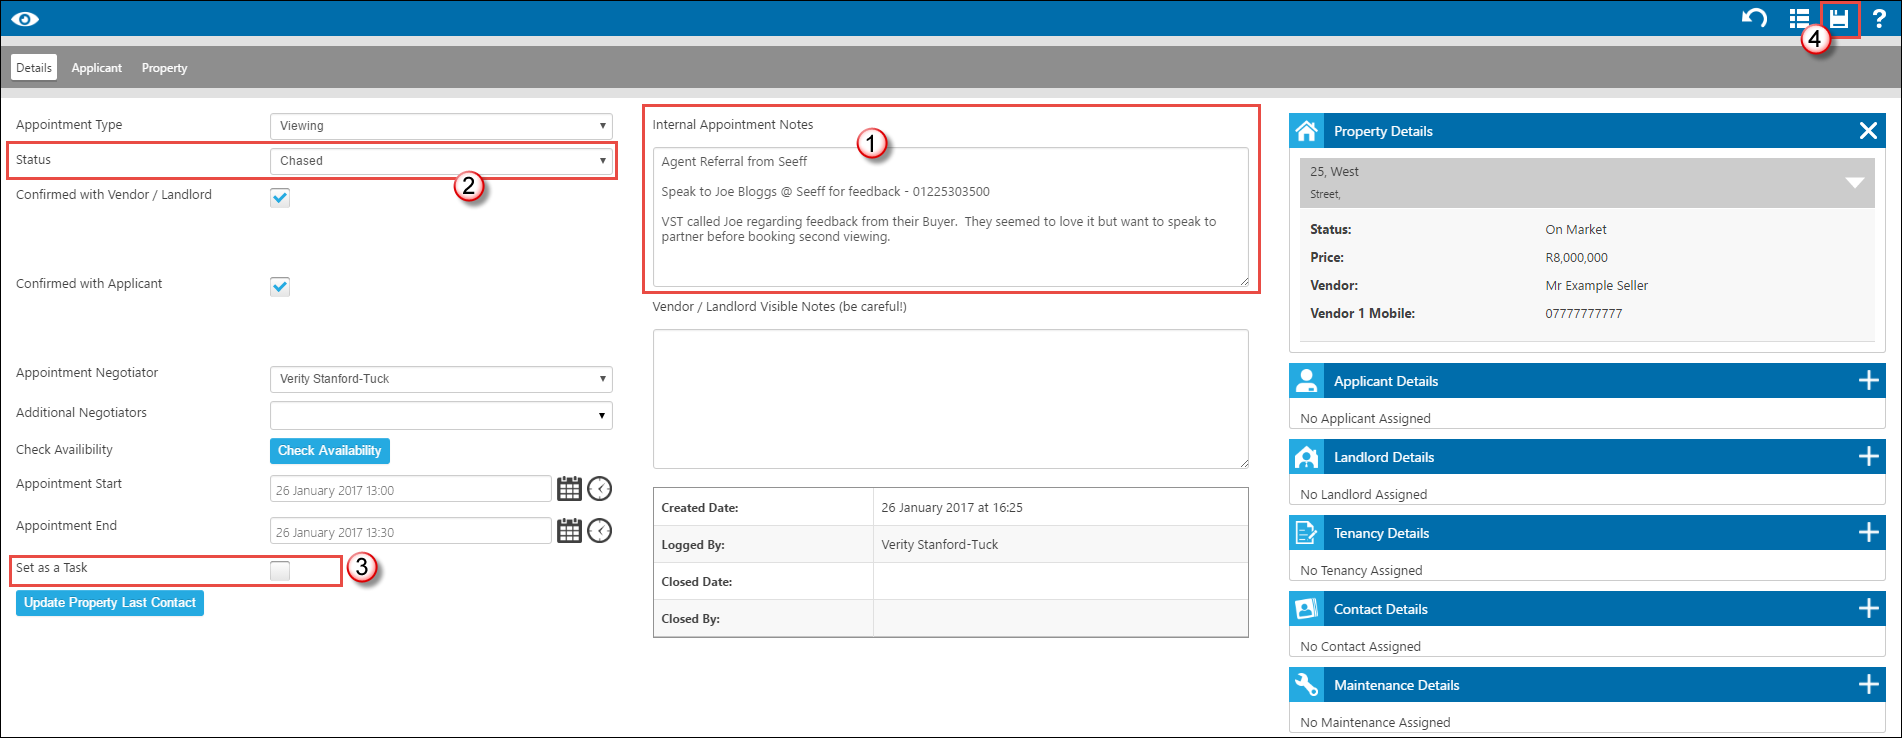
1) Look in the Internal Appointment Notes. If you are chasing this for someone else they may have added in the contact details of who to speak to regarding feedback. Once you have spoken to them, add the Feedback into the box.
2) Set the status of the viewing to Chased.
3) Remember you can set tasks, they will appear on the Task pod of your Homepage (as well as Tools -> Task Grid).
4) Save the Appointment (you can Right Click and Save & Close Tab as well).
You can then follow this appointment through just like any other, using the relevant Quicklinks if needed.
