 Login
Login


Why can't I see the lettings finance functions and how can I add them?
Expert Agent has some excellent functions that can help you as agents manage your client accounting needs. These are not automatically available to all users - but all you need to do is ask for them, show us that you've done some training so you won't get in a terrible mess and then let us help you to set up your configuration properly.
1. TRAINING
Everyone involved with Lettings Finance at your end needs to do our Lettings Intro Training and Finance Training and pass the tests at the end - details here.
If other members of staff have finance functions but you do not then you will need a Super User to change the permission set within your profile - Changing Financial Permissions.
2. GET SOME DATA LOADED
Often businesses are getting Lettings Finance switched on after they've used Lettings Workflow for a while. If that's the case, you'll have your Landlords, Properties and Tenancies already entered. If you are starting both elements from scratch, you'll need to add at least one applicant, landlord, property and tenancy for a tenancy that you currently manage. You'll need to make sure the tenancy is filled out with rents, deposits and dates. However we recommend that preferably you have all of your current fully managed and rent collection tenancies entered into Expert Agent before moving onto step three in order for us to assist you fully.
3. COMPLETE THE CONFIGURATION QUESTIONNAIRE
Following the training, please complete the Financial Configuration Questionnaire at the bottom of this article (click here to jump to it.) This questionnaire is designed to assist us in acquiring the information needed for your configuration. This will ensure that your lettings financials are set up correctly from the start. By not correctly configuring the financials, you may charge VAT even if you’re not VAT registered, not have an accurate opening bank balance as well as potentially finding discrepancies between your actual bank account and what’s on Expert Agent, too late. Investing the time initially is key to ensure that you can confidentially start using the finances so we’d be grateful if you could provide us with as much information as possible. One of the financial specialists will review your document before contacting you to arrange a config review.
4. CONFIG REVIEW
We can only do this once we can see that you've completed steps 1,2 and 3 above. We'll book this as an online meeting. One of our finance team will be booked to spend anything between 5 and 30 minutes logged into your data. We will go through all aspects of Financial Config, look at Financial default values, opening balances and advise on how to make sure that your current tenancies are set up properly. At the end of the review, we'll flick the switch that turns on Lettings Finance in your live data.
5. ALL SET!
That's it - you are set up and ready to start using Expert Agent for Lettings Finance! We strongly recommend doing a few end to end dummy transactions in training mode before you start making postings in your live data to ensure you are confident before you get started.
CLICK HERE TO ACCESS THE CONFIGURATION QUESTIONNAIRE
(Please complete as explained in step 3 above.)
How do I add multiple Tenants onto a Tenancy?
There will be the occasion where you need to add multiple tenants onto a Tenancy.
The video linked below will help you with this process:
Why is my Property not showing on Rightmove/Zoopla (or not showing correctly)?
If a property is not showing on Rightmove, Zoopla (or any other portal) or is not showing correctly the Portals tab of the property will tell you why. There is also a QuickLink that will help you identify the properties that are failing to appear on the Portals. (See end of FAQ).
On the Portals Tab you will see the Portals you feed to and if any of them have failed, it will say "Failed". Hovering over the wording will give you an explanation why it has failed.
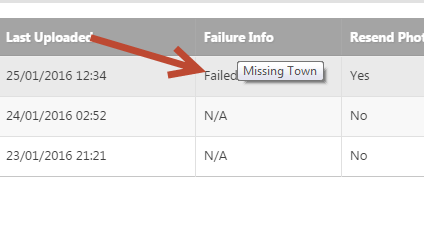
In this example the Town on the property address is missing.
Add the town (or whatever is missing) to the property and Save. You're property will be displaying correctly in a few minutes. With the other portals it will be overnight.
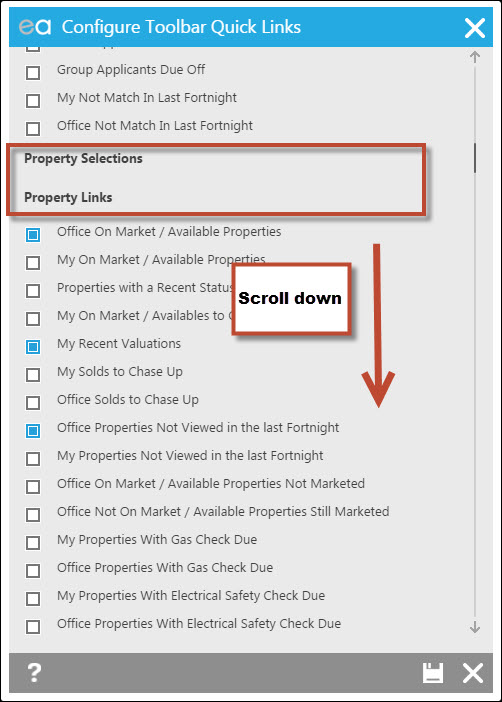
The QuickLink can be added either to the Properties Dashboard (which will then appear on the Properties QuickLink pod on your Homepage, Properties Drop Down or the Action Menu of the Properties Grid), or it can be added to your Right Hand Tool Bar.
From the Right Hand Tool Bar click the "Edit" button and scroll down to the Properties section.
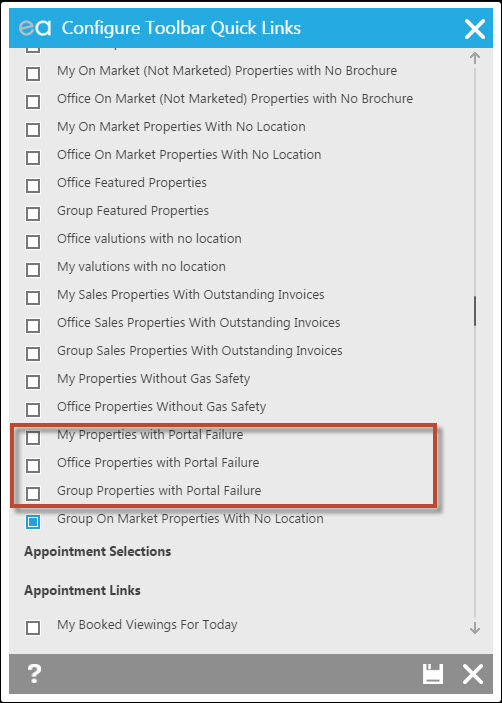
At the bottom of the Properties section you will find the three QuickLinks (My, Office and Group).
How do I do Full Screen on a Mac?
When using a PC, we recommend you press F11 to maximise the Google Chrome screen to reduce the amount of unused space on your browser. Some of the menus can get cut off it you are viewing EA on a low resolution and not full screened.
To do this on a Mac the short cut is Shift + Command + F.
Tel: 01225 303500 | Email: account.managers@webskyltd.com
Terms of Business | Cookie Policy | Privacy Policy | ZPG Modern Slavery Statement
Designed by the Expert Agent Design Department
