 Login
Login

Data Entry Help
Once you have completed the quiz and you have been moved into your Live Branch (see Training Account vs Live Account if unsure), you can get started on your Data Entry.
Data Entry will be to add all of your existing properties onto Expert Agent ready for your live roll out (dates to be confirmed per office).
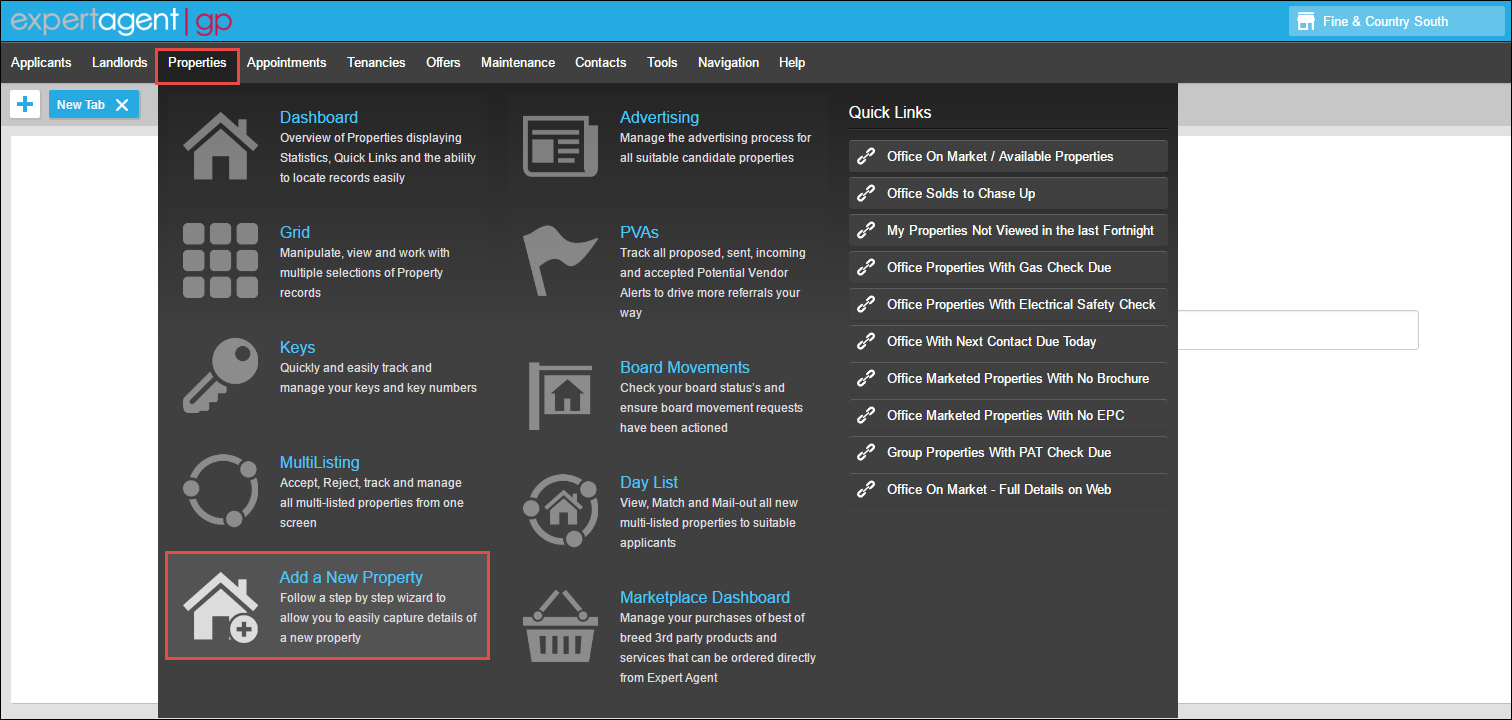
When doing Data Entry it is best to start from the Property option in the Top Menu and select "Add a New Property"
Details Tab
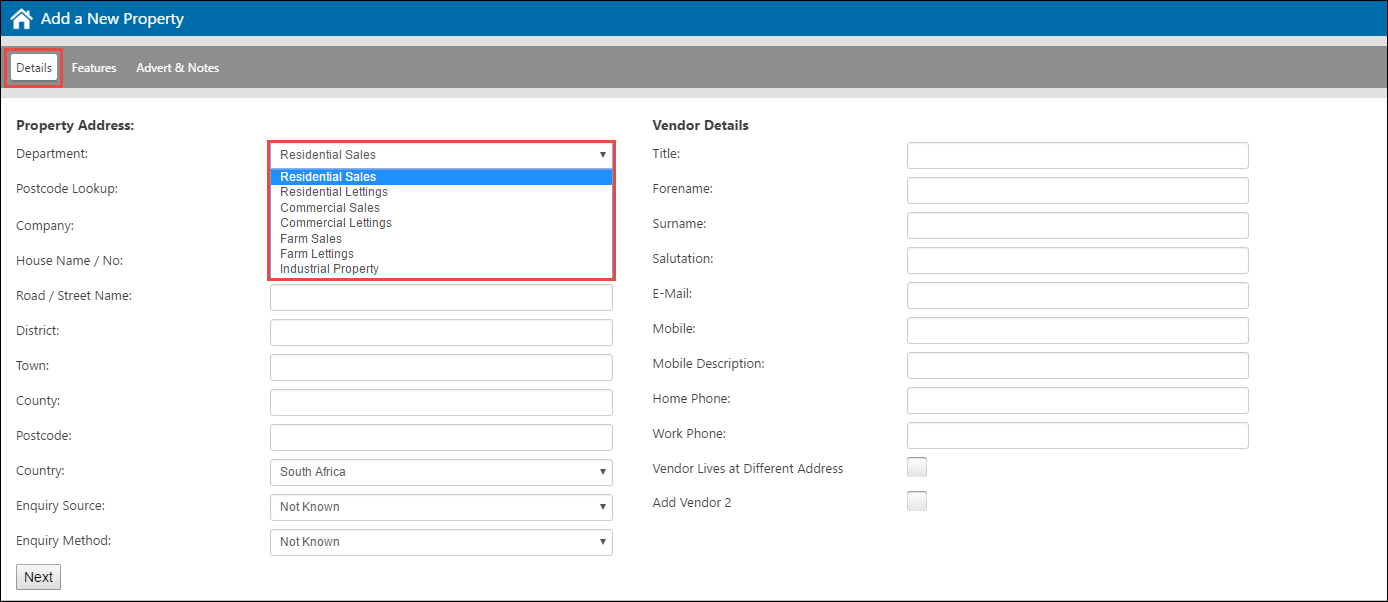
Don't forget to check which department you are adding to. You can always change this on the property record later on if you have made a mistake but it is always best to check it now so that you can capture the correct information on the wizard.
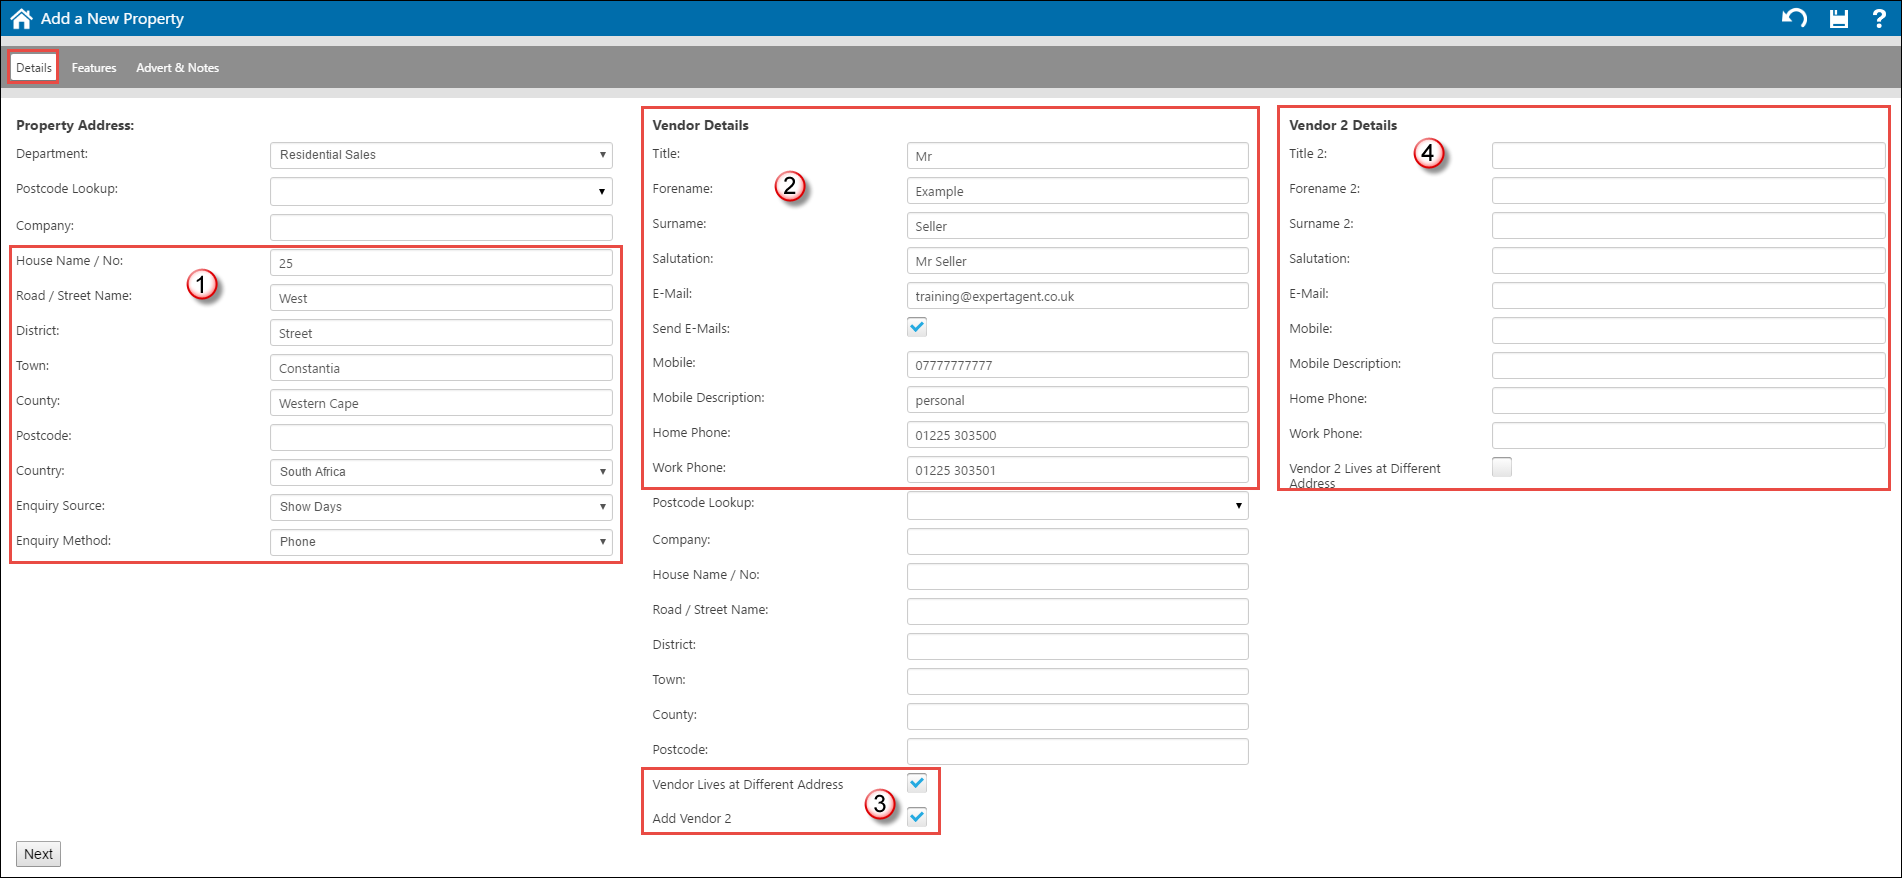
1) Once you have selected the correct deparmtnet (it defaults to Residential Sales), then you can start filling in the Property address here. Remember the Enquiry Source and Method as well.
2) Filling in the owner details here (Landlord for Lettings, Vendor for Sales - see South African Terminology if unsure).
3) If the owner lives at a different address (more likely for Rentals) then tick this box and fill in the address fields. Also tick "Add Vendor/Landlord 2" if needed.
4) Fill these Vendor/Landlord details in here if needed.
Press the "Next" button at the bottom or click on to the Features Tab.
Features Tab
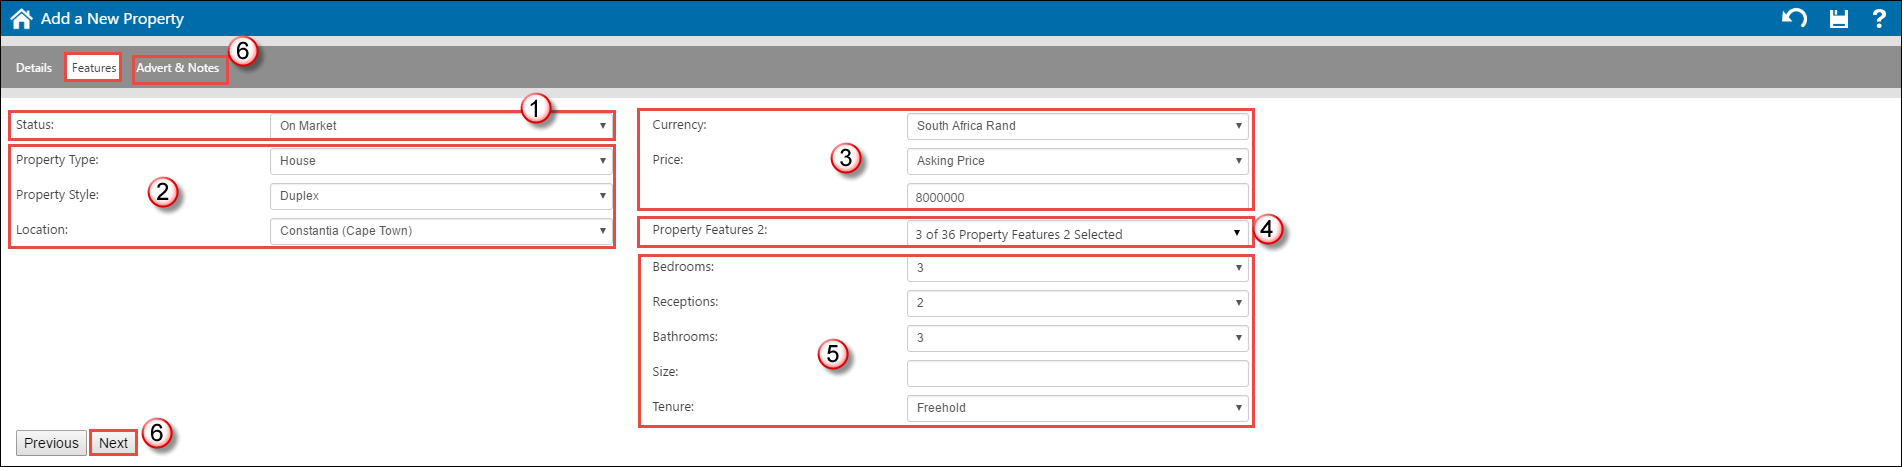
1) Make sure that the Status is set to ON MARKET, this is very important when doing data entry otherwise they will not go online once you go live.
2) Set the Property Type, Style and Location. Remember once you click into Location you can type the first couple of letters of your Location to find the correct one.
3) The currency is set to Rand but you can change the Price Prefix and add in the price the property is marketed at.
4) Remember to tick as many as applicable of the Property Features 2 on a PROPERTY (you tick as few as possible, if at all, on an Applicant record). These are your Lifestyle options for the Property.
5) Add in Bedrooms, Receptions, Bathrooms, Size (if needed) and Tenure.
6) Press "Next" or "Adverts & Notes"
Adverts & Notes Tab
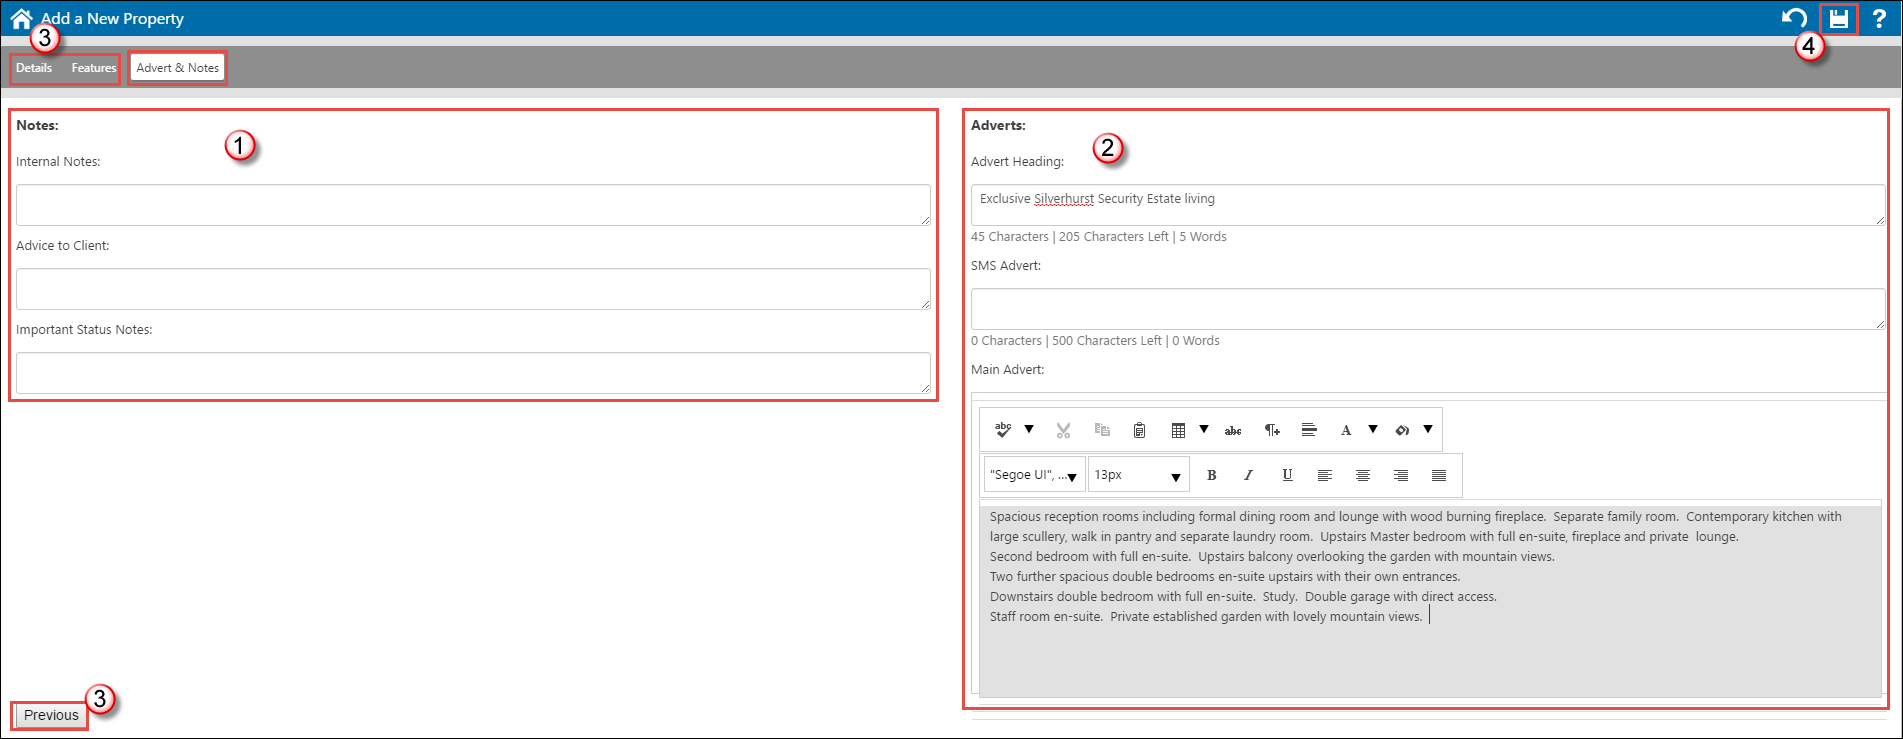
1) You can add any notes in this section if needed.
2) This is where you can add in your advert text. Advert Header is for the strap line above the main paragraph about the property that appears on Property 24. You do not need to worry about SMS Advert so move onto the Main Advert. You can type directly into this field or copy and paste. If you are copying and pasting please remember to copy into Notepad first to strip out any hidden style coding that Microsoft Word (or any other programs) may add onto the text. N.B Private Property have a character limit of 2000
3) If you have forgotten anything you can always go back by pressing "Previous" or selecting the relevant tabs from the top.
4) Once happy press the Save icon and you will have created your property
The Property
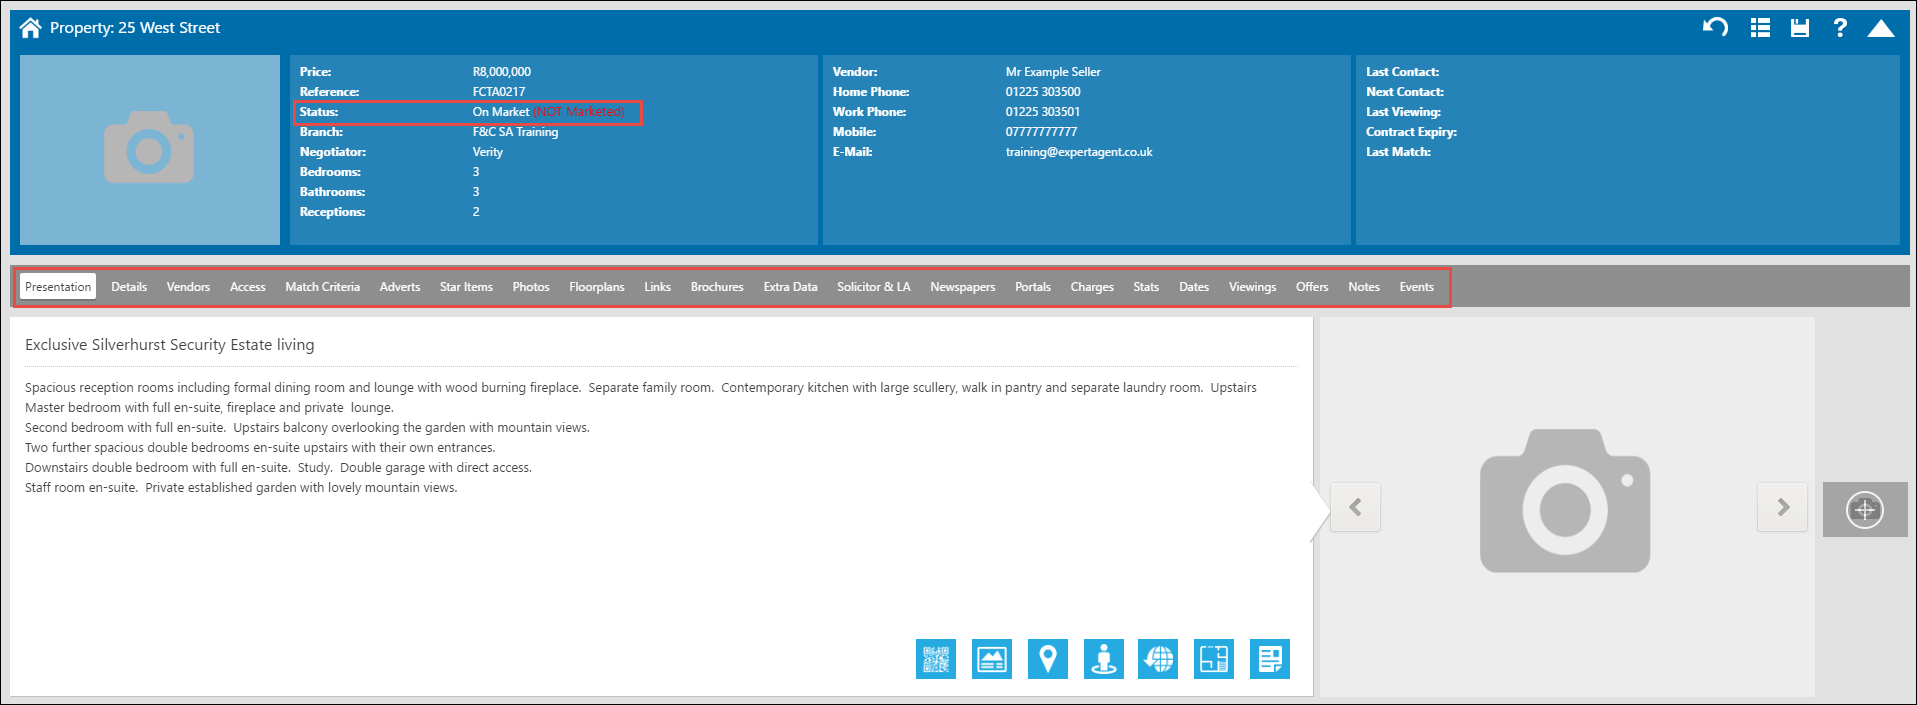
Please note it does say on the Status at the top in the blue bar "On Market (Not Marketed)". This is because we have not yet marketed it.
You can now go through all the tabs of the property making sure all the relevant information. This is covered on Market & Workflows (please see the video for more information).
N.B The Extra Data tab is so important for your feed to Property 24.
Once you have done everything for Marketing (including going back to the Presentation tab to set the Streetview correctly) you can now go to the Details tab to set the Marketing options (as this property is already On the Market - just Not Marketed).
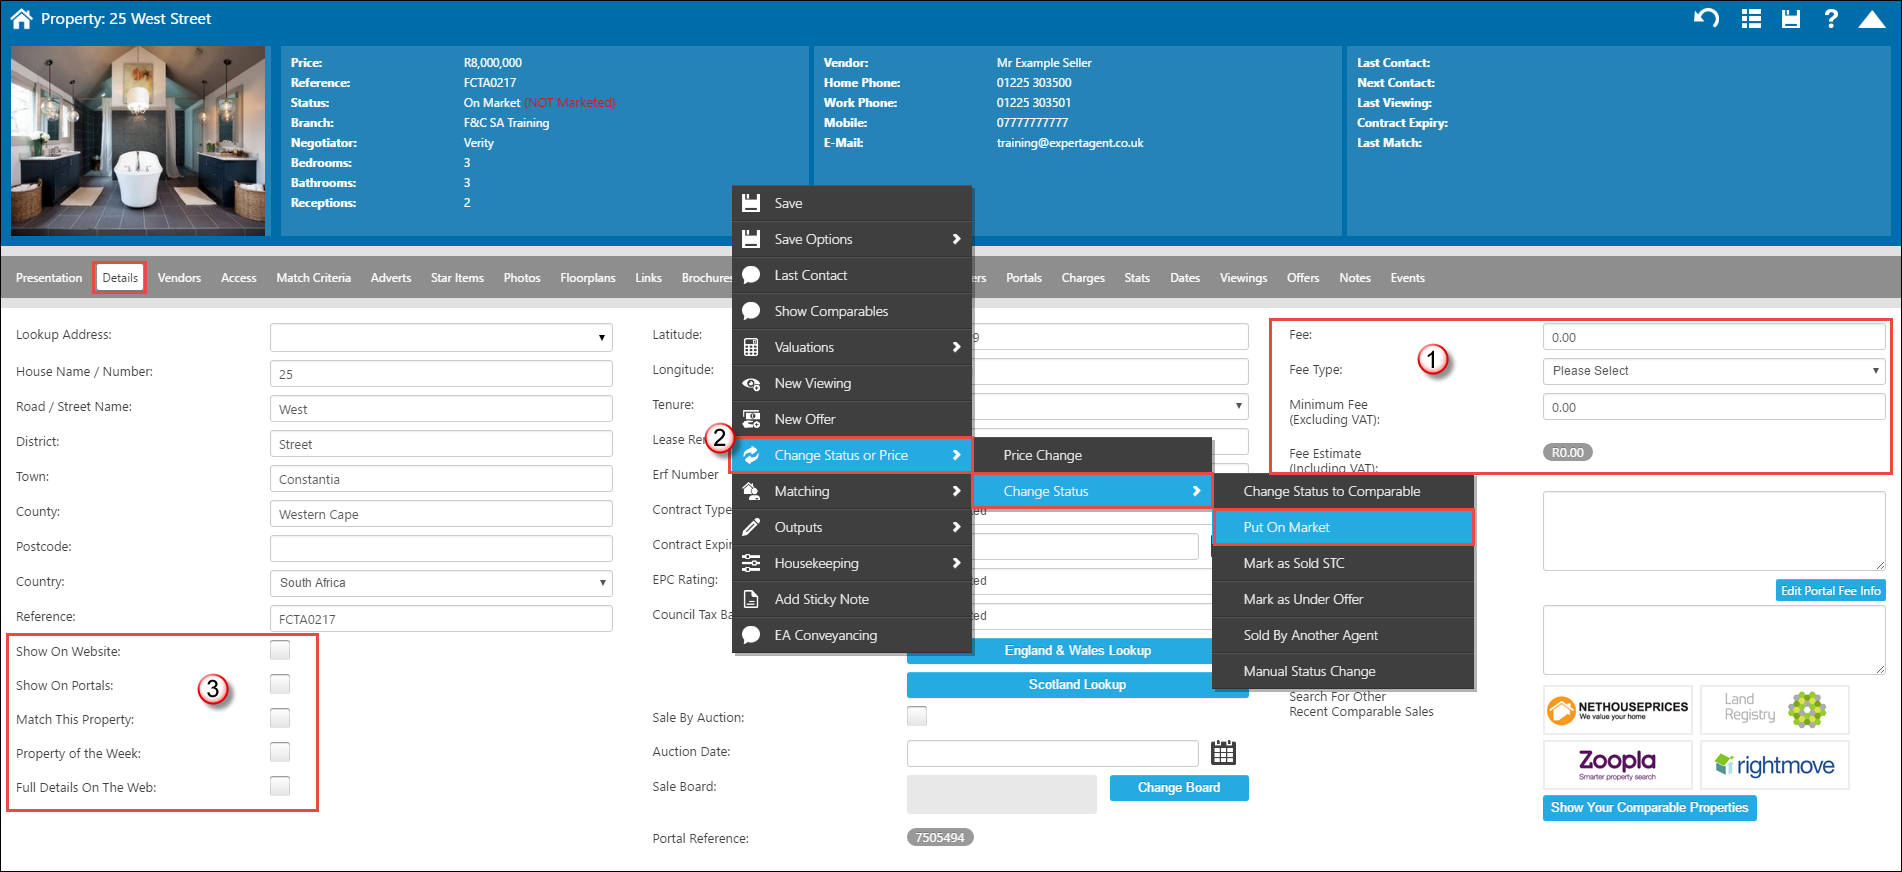
1) Make sure you add in the Fee details as you will not be doing the Valuation Process on this property.
2) You can either Right Click -> Change Status Or Price -> Change Status -> Put On Market/Market Available To Let or
3) Tick the Marketing Details from here. Either of those will get you to the same point. Going through the action menu will make sure you have added in the Mandate Type from the Events Tab and give the option of ticking the boxes. Ticking the boxes in the bottom Left hand corner will allow the property to be marketed.
a) Show on Website is for your Fine & Country website
b) Show on Portals is for Property 24, Private Property etc
c) Match This Property is so you can match it out to Buyers/Renters
d) Property of the Week is not relevant to you (only if you have an Expert Agent website which you don't)
e) Full Details On The Web will allow customers to view the property brochure and the individual rooms you added onto the property from the Brochures tab.
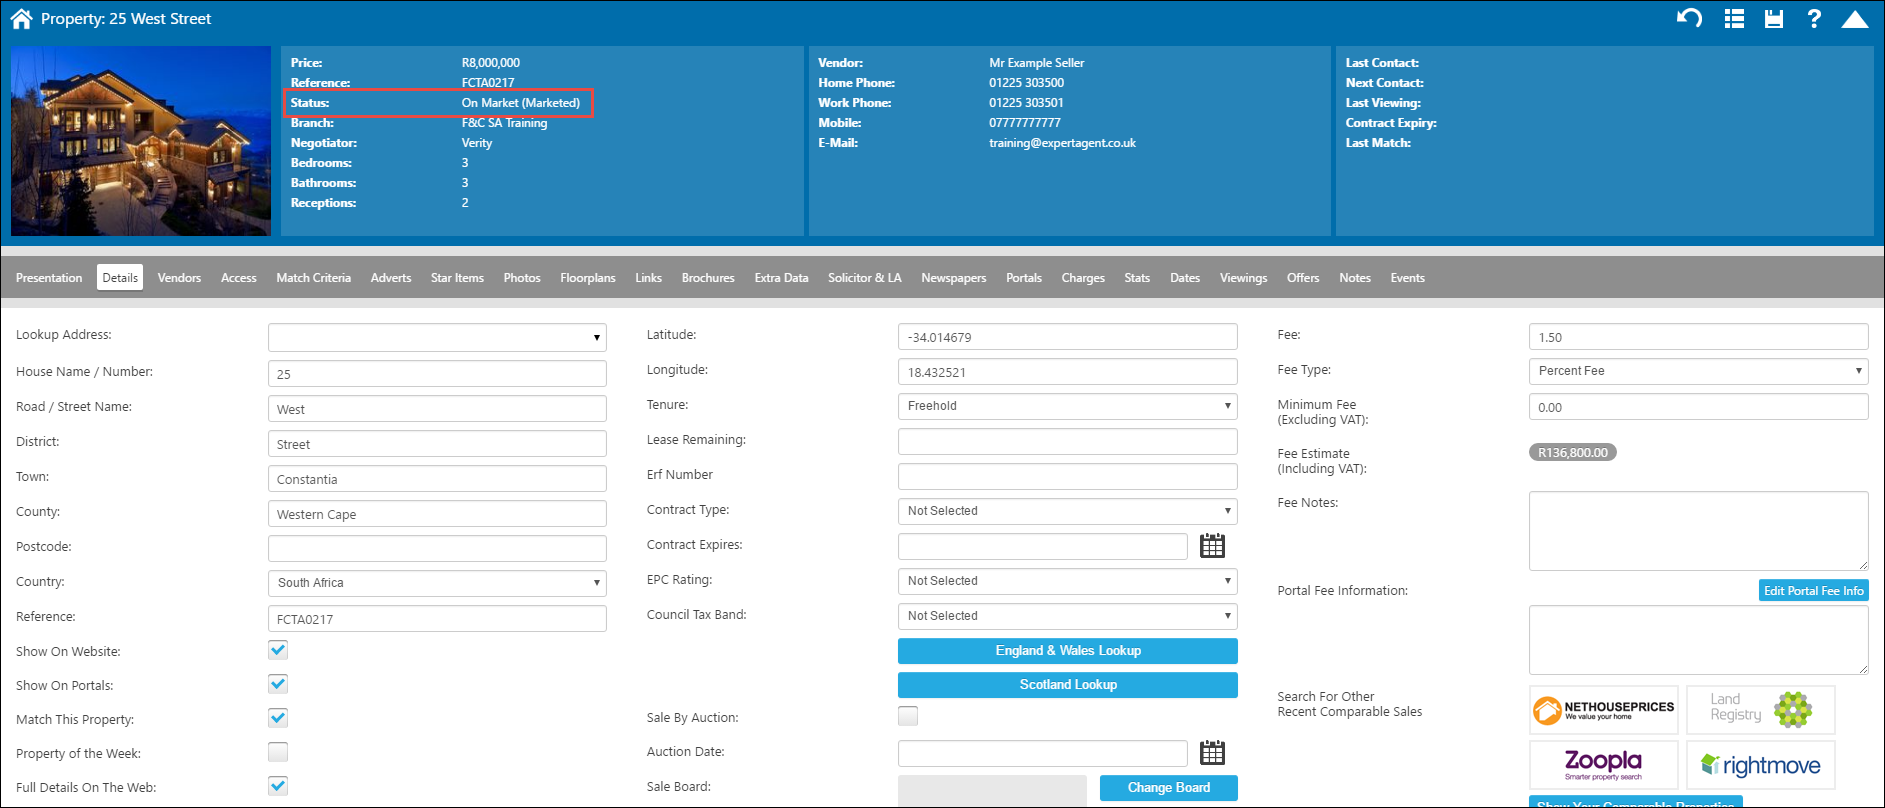
The Fee Details are filled in, the Marketing Details ticked and now the Property is "On Market (Marketed)" and will go live onto Portals and your website once your office goes live.
Tel: 01225 303500 | Email: account.managers@webskyltd.com
Terms of Business | Cookie Policy | Privacy Policy | ZPG Modern Slavery Statement
Designed by the Expert Agent Design Department
