 Login
Login

Handling New Applicant Enquiries via Property Presenter.
Property Presenter is a great new feature, released in Expert Agent Touch's September 2014 launch.
It has been built to fulfill several roles:
1. Provide a Touch Screen, Interactive property presentation for visiting applicants - helping to lure them back to your offices
2. Provide an easy way to send specific properties in response to an applicant enquiry without doing a full applicant registration (but still getting enough to disarm a fee dispute or appease a vendor demanding evidence of progress)
3. Provide an attractive screen saver / carousel for your unused PCs and office window screens.
Getting Started
You can get to Property Presenter in 3 ways:
1. From the Applicants section of the top menu
2. From an Applicant record's Tools Menu. Just Right-click or 2-finger-touch.
We'll assume (at least to start with) that you've accessed it from the Top Menu. You are processing a new enquiry. You hope to register the applicant.
The Property Selection Form is displayed as below:
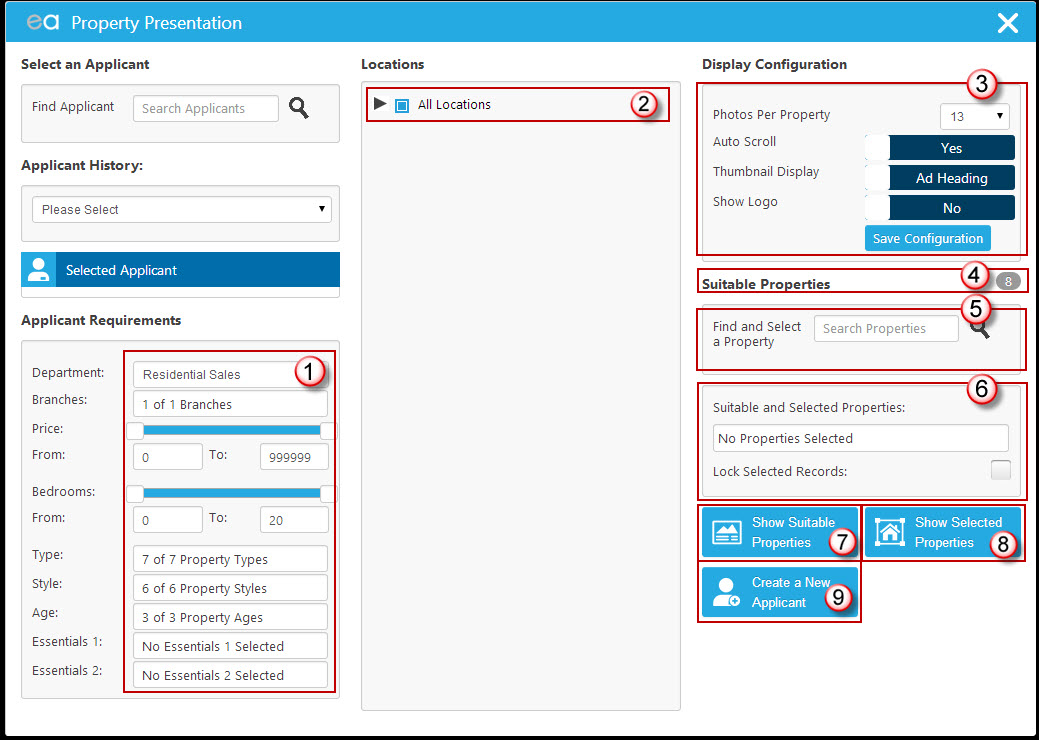
If you'd accessed this from the applicant record, the applicant name and details would be pre-populated in the appropriate box, top left. In this case, we haven't got that far - we're just starting to process an enquiry that could lead to a registration.
Follow the steps below:
1. set up the required accommodation and prices using the price sliders and the popup menus that appear when you click type, style etc.
2. Your default locations are already ticked - click the locations section to expand a normal locations tree view and choose suitable areas.
3. The panel top right allows you to configure the way that Property Presenter displays properties.
- You can set a maximum number of photos per property (the lower the number, the faster it will load - particularly on an iPad or tablet which have low RAM capacity - 0.5gb or 1gb compared to a PC's 2,4 or 8gb).
- Auto Scroll - this will change images automatically if you pause for more than a few seconds.
- Thumbnail Display - lets you choose whether it shows the full address or the advert heading at the bottom of the screen
- Show Logo - determines whether your company logo entered into EA in Configuration, displays in the top left hand corner of the screen.
4. The total number of suitable properties is displayed and updated dynamically - every time you change prices or accommodation.
We now need to consider the diifference between "Suitable" and "selected" properties.
Suitable Properties have been chosen by EA based on price, accommodation etc.
If you click on Suitable and Selected Properties (6), you'll see a pick list of properties with a checkbox next to them. If you tick any, they change from being just suitable to being selected. You can do this in the Visual Presenter stage later.
Selected Properties have been Selected by you (or you and the applicant together). Selected Properties can also include properties that weren't considered Suitable by EA. That's where step 5 comes in!
5. Find & Select Property allows you to put in an address, partial address, postcode etc and select a property. You would use this when you have an enquirer (notice the word enquire, not applicant) on the phone and you want to send a specific property.
Lock Selected Records (6) above, stops the Visual Presenter being able to tick and select properties.
So, in our example above, EA has found 4 suitable properties. To see them, we have 2 choices -
Non Visual
click the Suitable and Selected box (6) and see the properties in a list as below. Suitable ones are unticked, Selected ones are ticked. There's a check/uncheck all option. If your enquiry is a general one, you'd probably tick all of them. Any that are ticked change from being suitable to selected. If the enquiry is specifically for one or two properties, you'd leave the suitable properties unticked.
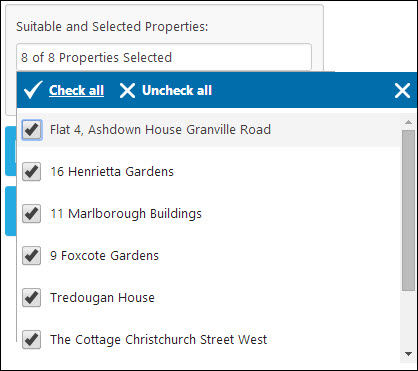
If EA has missed a property or you just want to add a specific one to suit the enquiry, click into find & select a property (5) and input a partial address. If you click on the displayed property record, it is automatically selected
You will now have a list of Selected properties
When ready, move on to the Create Applicant section below to find out how to send the out.
Visual
Select either Show Suitable Properties to show the ones that EA has chosen or choose Show Selected Properties to show the ones you've chosen or added to the selection.
Either way, you get the Visual Presenter form shown below:
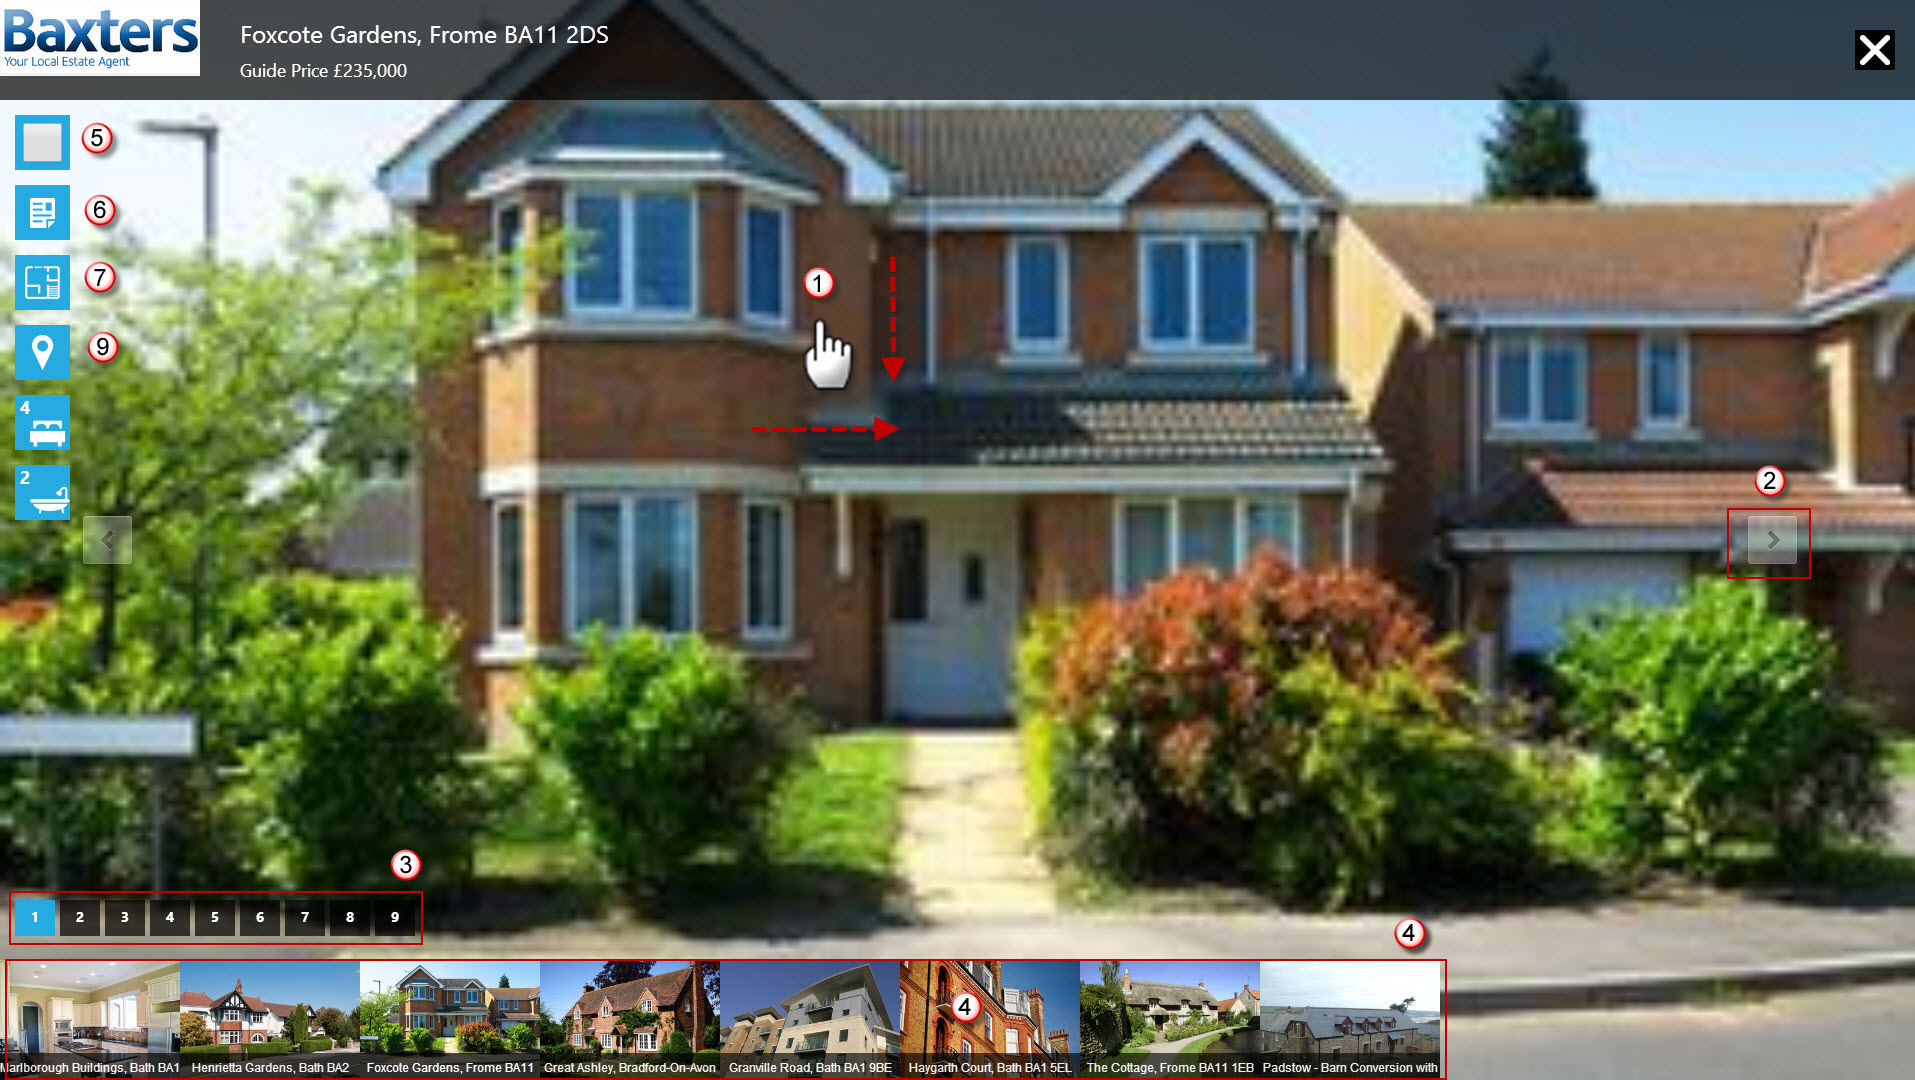
Visual Property Presenter is built for touch screens.
- If you've got one: swipe up and down to move between properties (1)
- Drag left and right to scroll through each property's photos (1). The number of photos displayed is determined by the Photos per Property setting on the page that calls Visual Presenter
If you don't have a touch screen, click between a property's photos using the left and right buttons. The number of photos is shown on the left (3)
- To move between the properties without a touch screen or to jump to a specific property with one, choose the property in the scrolling list at the bottom of Visual Presenter (4).
You then get further options on the left
- If your applicant likes the look of a property, select it by clicking in the box top left (5). The property is now in the selected list rather than just the suitable list
- There's button to show your full brochure (6), a button to show a floorplan (7) and a button to show a map / Google Streetview (9)
When you've presented enough, click the X in the top right hand corner to close the Browser tab. You revert back to the Property Presenter Selection form where you came from.
At that form, press Create a New Applicant (9).
The form below is displayed:
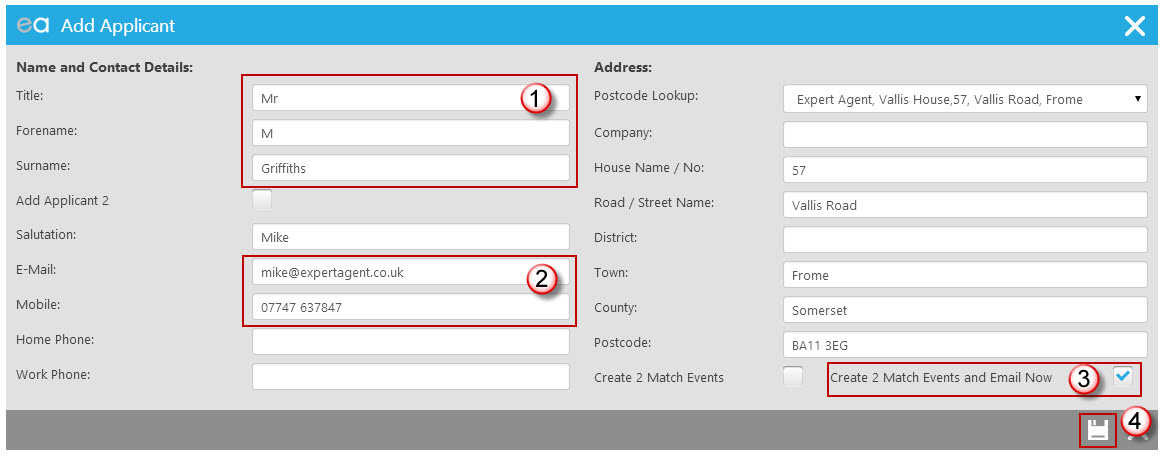
The only compulsory fields are the name section (1) and the email and a phone number (2)
However, there's a postcode lookup if you want to do the job properly.
Finally, decide what you want to do with the selected properties. There's a tick box to merely create events. However, the example above highlights the more likely option - Create X Events and Email Now.
Click Save (4) when ready
The form below is displayed:
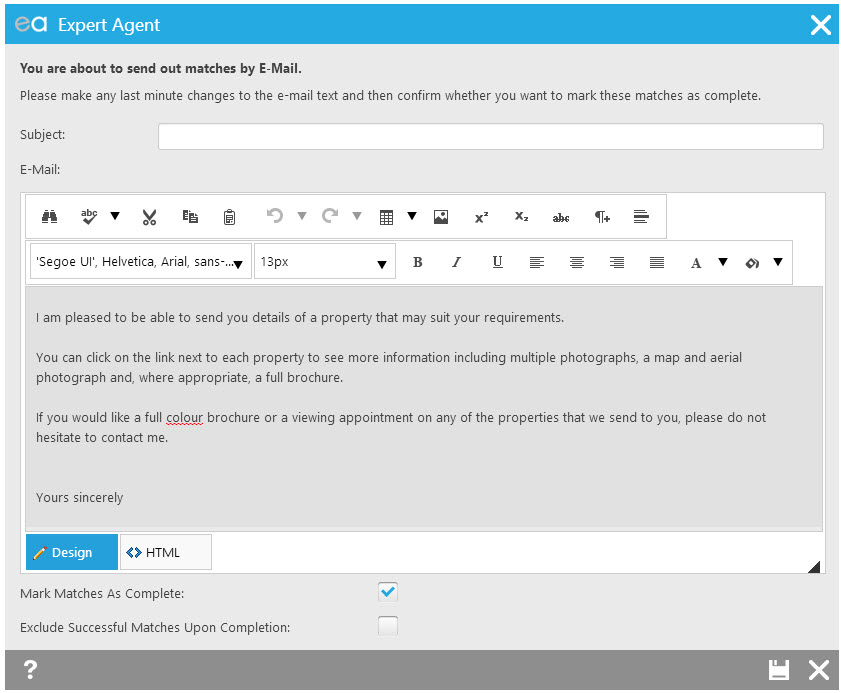
Change the subject (if you leave it blank it will be "Your Property Requirements") and change the text as required. You can change the default text in Configure. Unless you want to chase the Matches in Outstanding Matches, leave the mark Matches as Complete option ticked.
Click on Save.
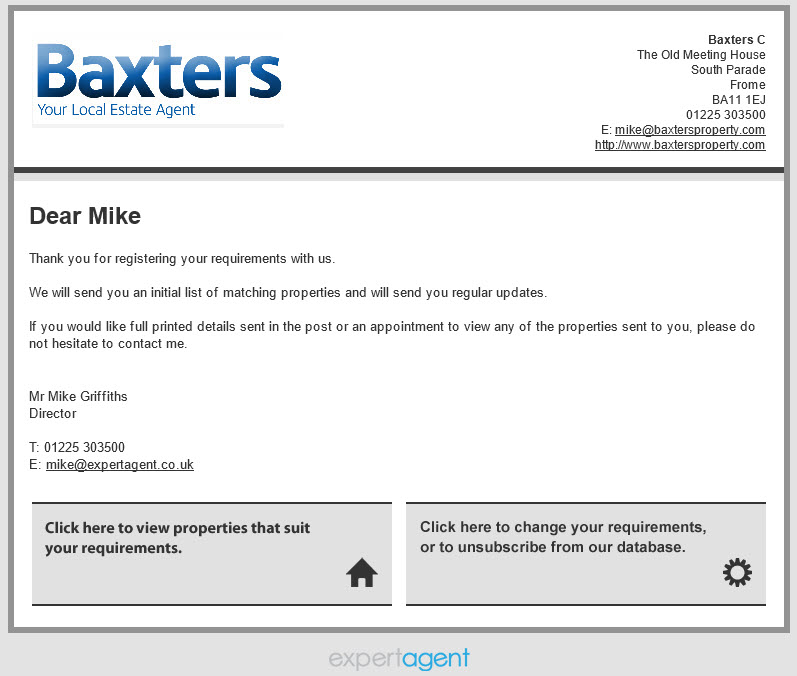
The welcome email gets sent with a link to suitable properties as below:
Welcome Email
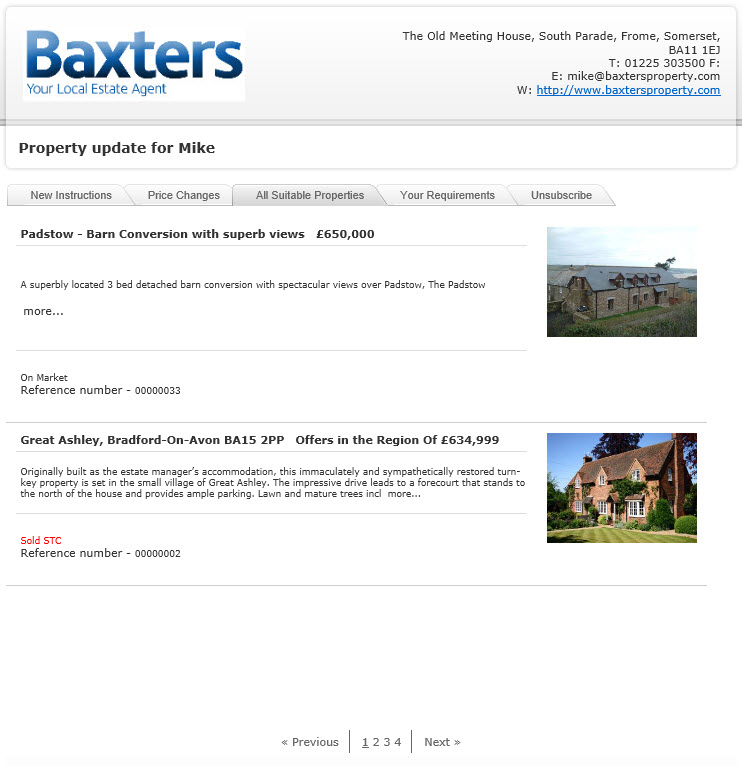
Clicking through to Property List:
Tel: 01225 303500 | Email: account.managers@webskyltd.com
Terms of Business | Cookie Policy | Privacy Policy | ZPG Modern Slavery Statement
Designed by the Expert Agent Design Department
