 Login
Login

How do I Export a Report to CSV?
If you need your report in a CSV format rather than PDF, this is possible, you will just need to ensure you have a suitable template set up beforehand. This type of report is useful for extracting information so it can be worked with in programs like Excel, and also be imported into most 3rd party softwares if needed. You need to be a Superuser to create the report template, but once its set up, any user can run the report from the system.
We'll break this guide down into two sections:
Creating the Report
In exactly the same way as your PDF reports, reports in CSV are made up of 3 separate elements which when combined, make a single report. The report must contain all 3 elements in order for it to work correctly. The "Header" The "Content" and The "Footer".
Step One: Creating your Template Content/Body
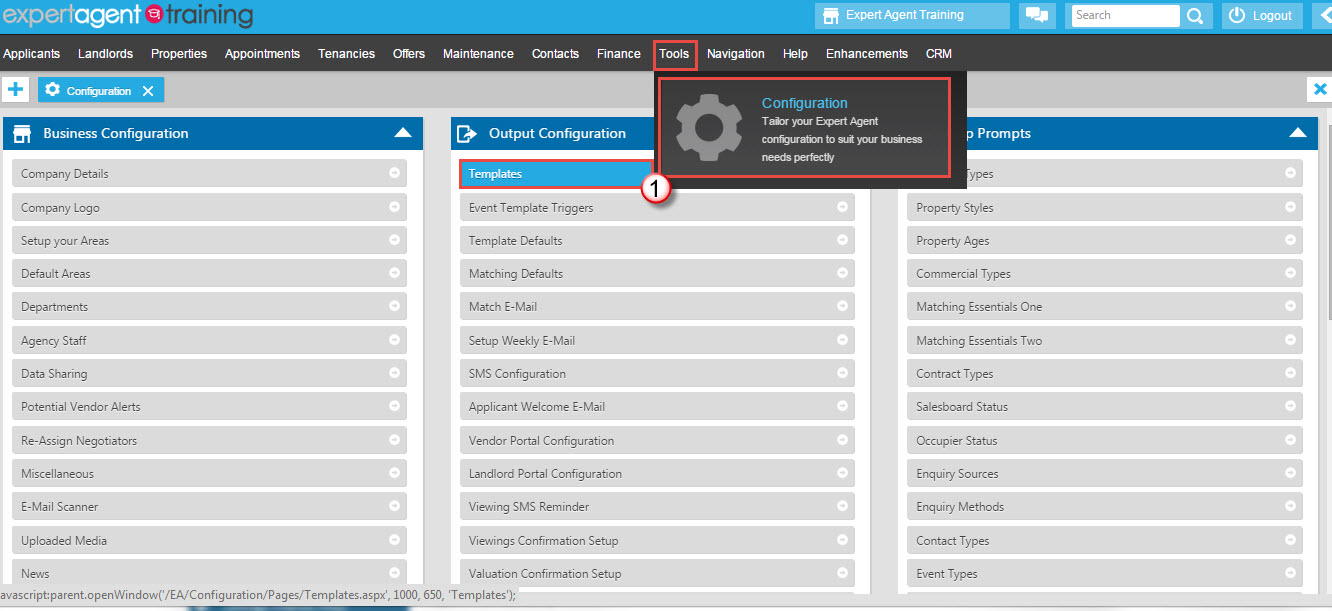
Hover over 'Tools' in the top menu, select 'Configuration' and locate 'Templates' under the Output Configuration heading.
You can either set up your own report, or you can see if one of our default reports sounds like it may be suitable and make a few small edits to it, but we will look at creating one from scratch.
From the 'Our Letters' tab, click on the plus symbol at the bottom of the screen.
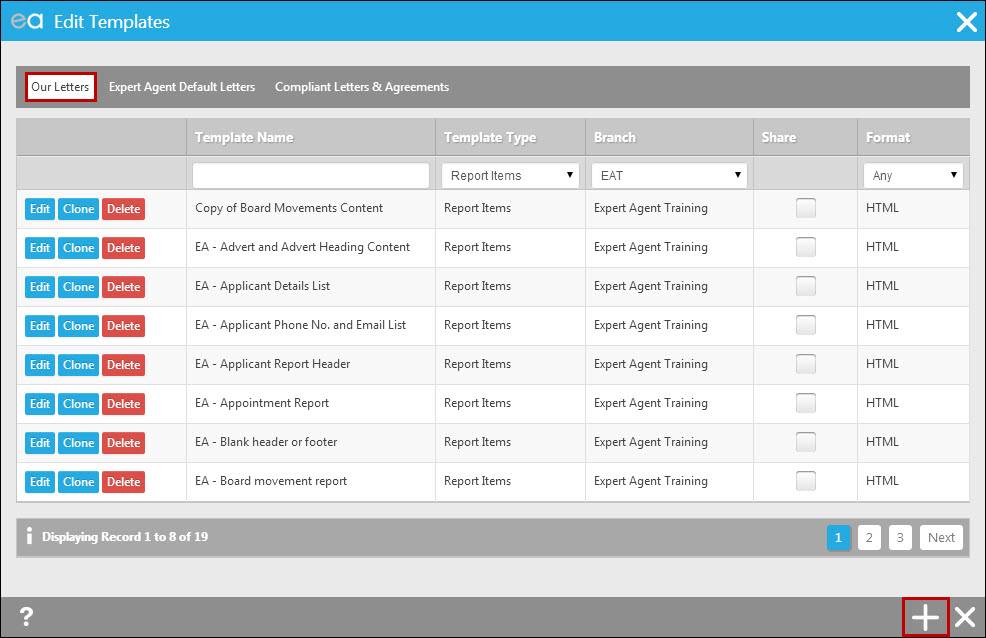
The following window will open:
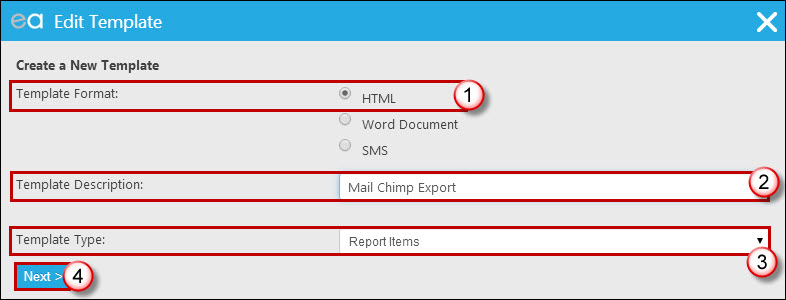
- Choose 'HTML' as the template format.
- Give the report a name.
- Ensure the Template Type is set to be Report Items.
- Click 'Next'.
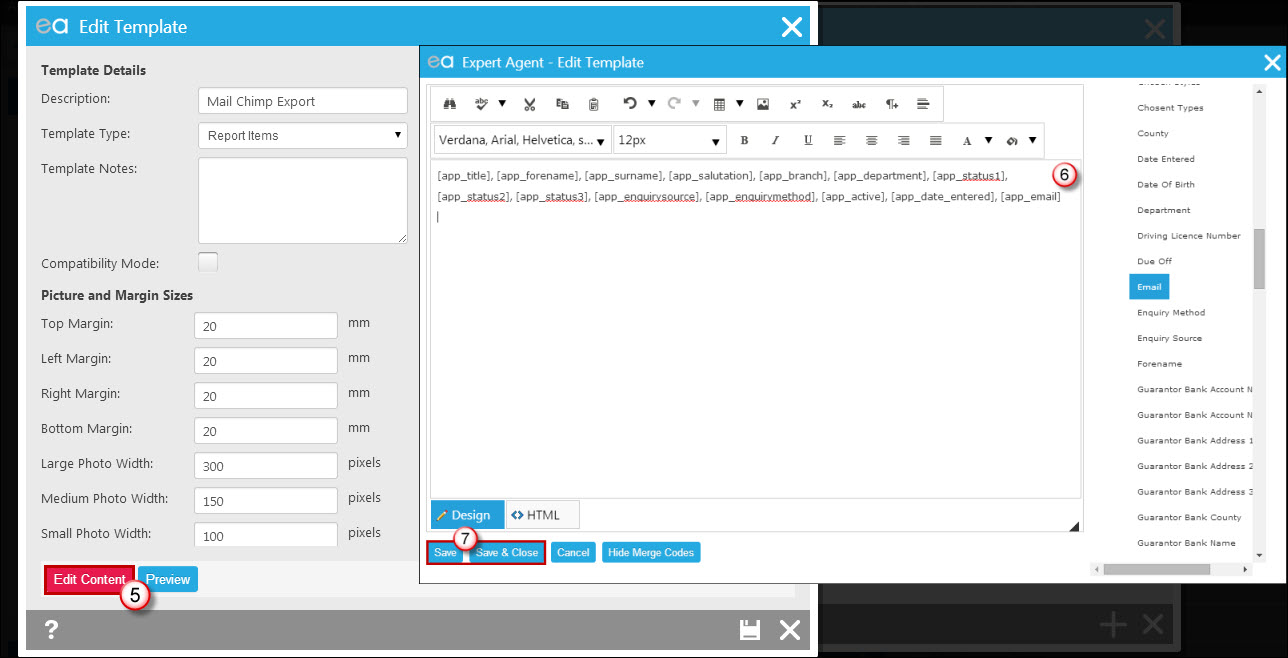
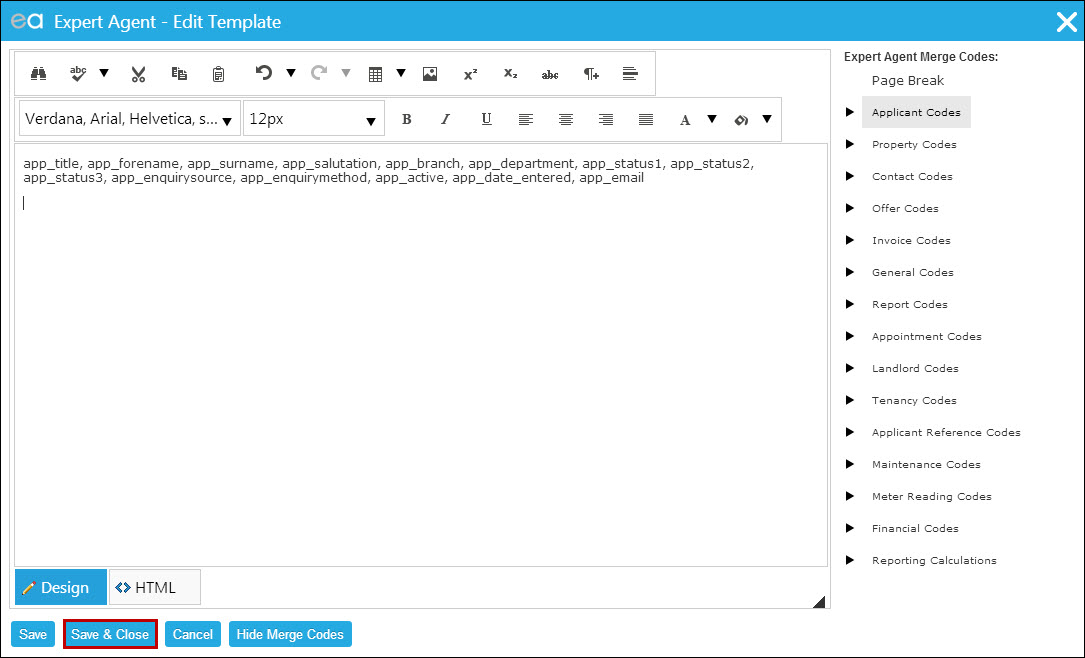
5. You will now be able to edit the template and add the content/merge codes you need by clicking the edit content button.
6. Creating the file for CSV is quite simple, all you need to do is add the merge code in quotation marks then separate with a comma. The quotation marks define the cell and the comma acts as a “forward to the next cell”. Pressing enter at the end is a must, as the next group of data it pulls will be in the next row.

7. Click save and close when you are happy.
Step Two: Creating your Header & Footer
In most cases you won’t need a header or a footer, but the system requires these for the report. So in this circumstance, we have a blank template that can be cloned from the EA default templates for you to use. If you decide you do need a header row, you will still need to clone the blank header/footer to use for your footer.

If you do need to have a header row in your resultant .csv file with the field names in, copy and paste the merge fields that you entered into your report into Notepad:
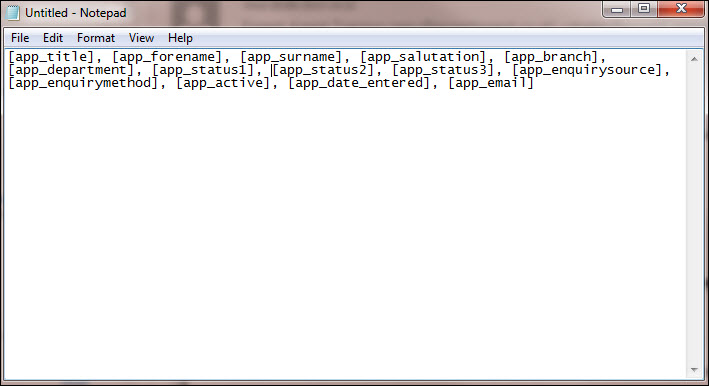
And take the brackets off of each code - so [app_title] for example becomes app_title. You can then create another report item as you did in step one – maybe call it “Export Header”, and paste the text in from Notepad:
Step Three: Creating the Report
Now you have all three elements to your report, you can create the report itself from the gridview. Hover over the relevant menu (applicants, landlords, properties etc) where you would like to run the report from and select grid.
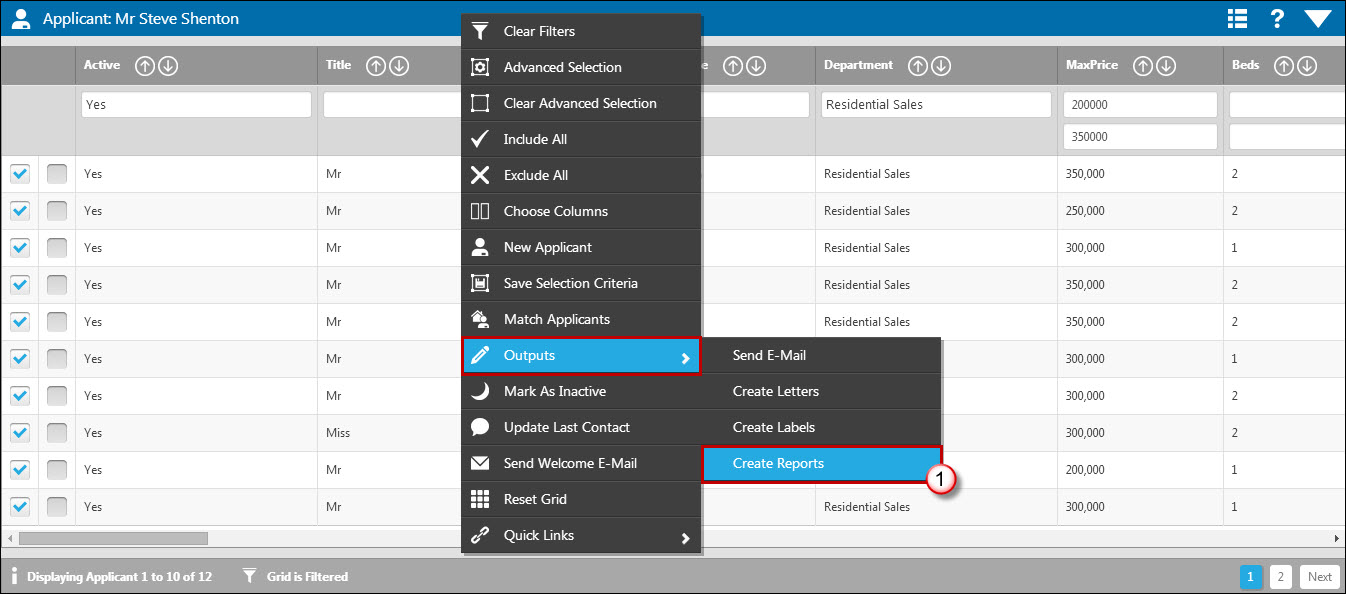
- Right click from the grid, hover over Outputs and select Create Reports.

2. Click Create a New Report
3. You will now be on the new report window, Give the report a name, then add the Cloned blank header or footer templates to the header template and footer template (or your custom Header if you created one), add your newly created report to the content template. The report type should be corrected already as it auto fills from the grid you’ve selected. Records per page has been set to “9999999”, by doing this, the list will continue without breaks, so make sure this has been typed.
4. Save when you are happy.
Running the Report
Now your template is set up, running your report is really easy.
Step One: Exporting your Report
Apply any filters to the grid that you need, for example, if your report is for exporting applicants which you would do this from the Applicant Grid, you might choose to filter the grid by “Active Applicants” “YES”. This will show only active applicants and only the listed results will be on the report. Or alternatively, user a pre-filtered grid - A Quicklink. See here for more help on Filtering Grids
When you have finished filtering, right click from the grid, hover over Outputs and select Create Reports.
Find and select your report in the list (you just need to click the text, you don’t need to click the edit button, the edit is only for making changes to the reports design),

When the report has been clicked, it will open a window, just press save to run the report.

Step Two: Saving the report to CSV
When the report has been saved, it will open in a print screen window. If you close the print preview window using the cancel button:

You will see the text behind.
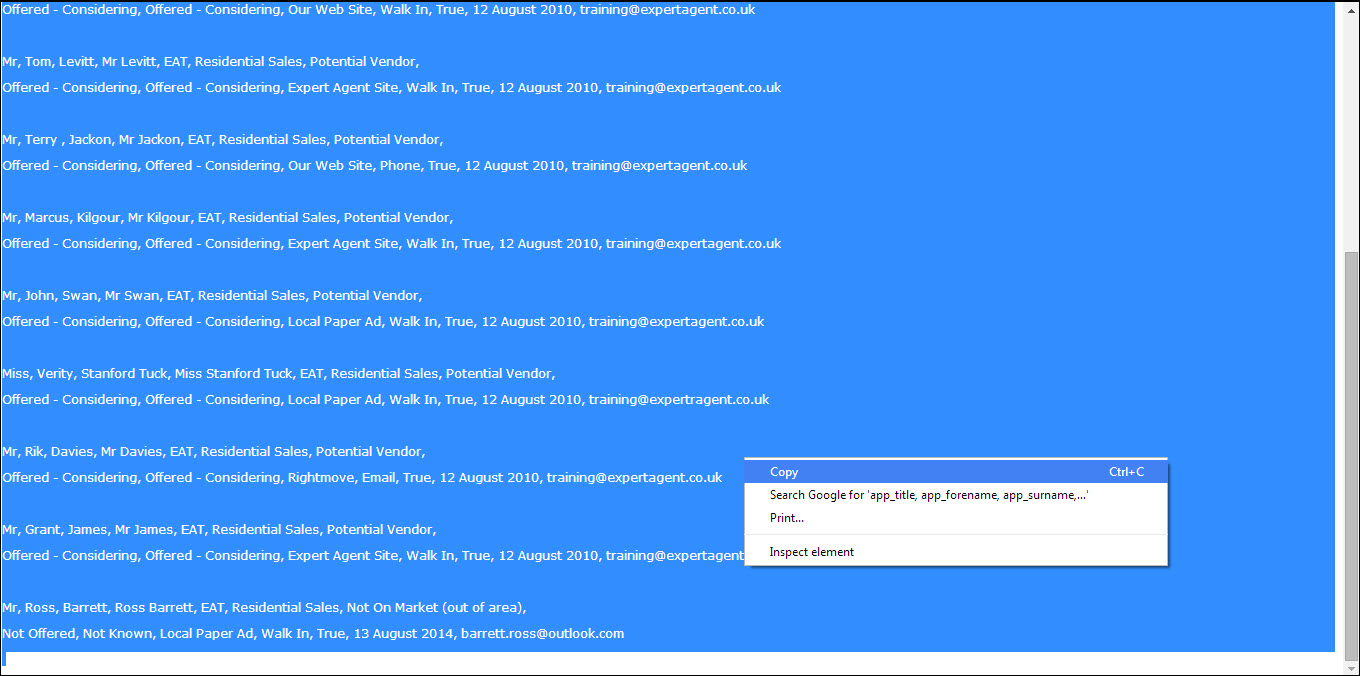
Copy all of the text by highlighting or press CTRL & A on the keyboard. Then right click copy, or CTRL & C.
With all the text copied, open Notepad on windows, paste the text into Notepad.

Once the text is in the Notepad,
- select File
- Save as and pick where you would like your report saved
- Give the report a name, for example “My Export.csv”
- Save
The most important part is adding the .csv at the end, this will change the file type, so excel and other applications can open it!
After saving, your export has been completed. If you locate the file in the folder you saved it, you will see it as a CSV file and you can now open the file in excel and view the export information in CSV format.
If you need any help or get stuck in the process, please log a ticket via Expert Agent including the name of the report you have created.
Tip of the Day
Stuck with how to use a particular function?
Each Expert Agent page has a question mark in the corner.
Click this to go straight to the relevant manual page

System Status
Expert Agent systems are operating normally.
No incidents with Expert Agent.
System Access
Support
Website Powering
Website Hosting
Brochures/Letters
Portals
SMS
Emails
No problems Service degradation Service outage
eSigning in Expert Agent
Expert Agent has added integration with PropertyFile, allowing you to create letters for eSignature within your existing Expert Agent software. There is no additional cost to use the functionality, it is included in your subscription.
Enabling PropertyFile for Expert Agent
Launching your PropertyFile Configuration
Configuring your Esigning Emails
Setting up your Word templates for eSigning
Tel: 01225 303500 | Email: account.managers@webskyltd.com
Terms of Business | Cookie Policy | Privacy Policy | ZPG Modern Slavery Statement
Designed by the Expert Agent Design Department
