 Login
Login


How Do I Insert New Logos Into My Templates
If you need to update any of your logos in your templates (Letters and Brochures) there is a short video that will show you how to do this. It was made when a lot of Agents moved over to OnThe Market but the principle is the same for all logos.
Click Here for the video tutorial
How do I manage HMO's within Expert Agent?
There are three options that we would recommend when dealing with HMO's within Expert Agent.
1) If you have a joint and several AST – (you advertise the property as a whole and move tenants in on one tenancy agreement)
Then add one property, create one tenancy and add the individual applicants to that tenancy. You can still set them up with their individual rent amounts, dates etc but they will run on one tenancy and all tenants will ultimately be liable for any unpaid rent.
2) If you have individual agreements per tenant and you advertise each room separately
If you want to advertise the "properties" (rooms) individually you can set each room up as a separate property. You can then create one tenancy on the "property" (room) with one applicant added. This will work best from a finance point of view if you want to be able to separate finances per room and create separate remittance advice's for the landlord for each "property" (room).
3) Setting up a master property for Marketing
The other option here (alongside your individual properties per room for advertising - Option 2) is that you can set up a master property that you create the tenancies against. You can then create separate tenancies for each applicant but all on one property record so they are all kept together. You can have multiple tenancies running at the same time on one property. From a finance point of view this will be easier for paying invoices for the landlord and will work best if the landlord wants to keep all the finances together for the property as a whole (see the rents etc from each room on one remittance).
How To Create an Email Template
When you create a Word letter within Expert Agent and then send it via email, the system assigns an Email Template to it. This is the body of the email (the Word document becomes a PDF attachment).
The standard email body is:
I have attached a letter that we have produced for you today.
Regards
[ negotiator_signature ]
[ negotiator_email ]
[ negotiator_phone ]
This this feature, you can create unlimited amounts of email bodies that best suit the individual Word letters.
To create an email template you will first need Template Editing rights. You can see if you have these by going to the Template Grid (Right Click on any record -> Create a Letter). If you have Edit, Clone, Delete in the left hand column you have Template Editing rights. If you only have Clone you will need to speak to your Super User.
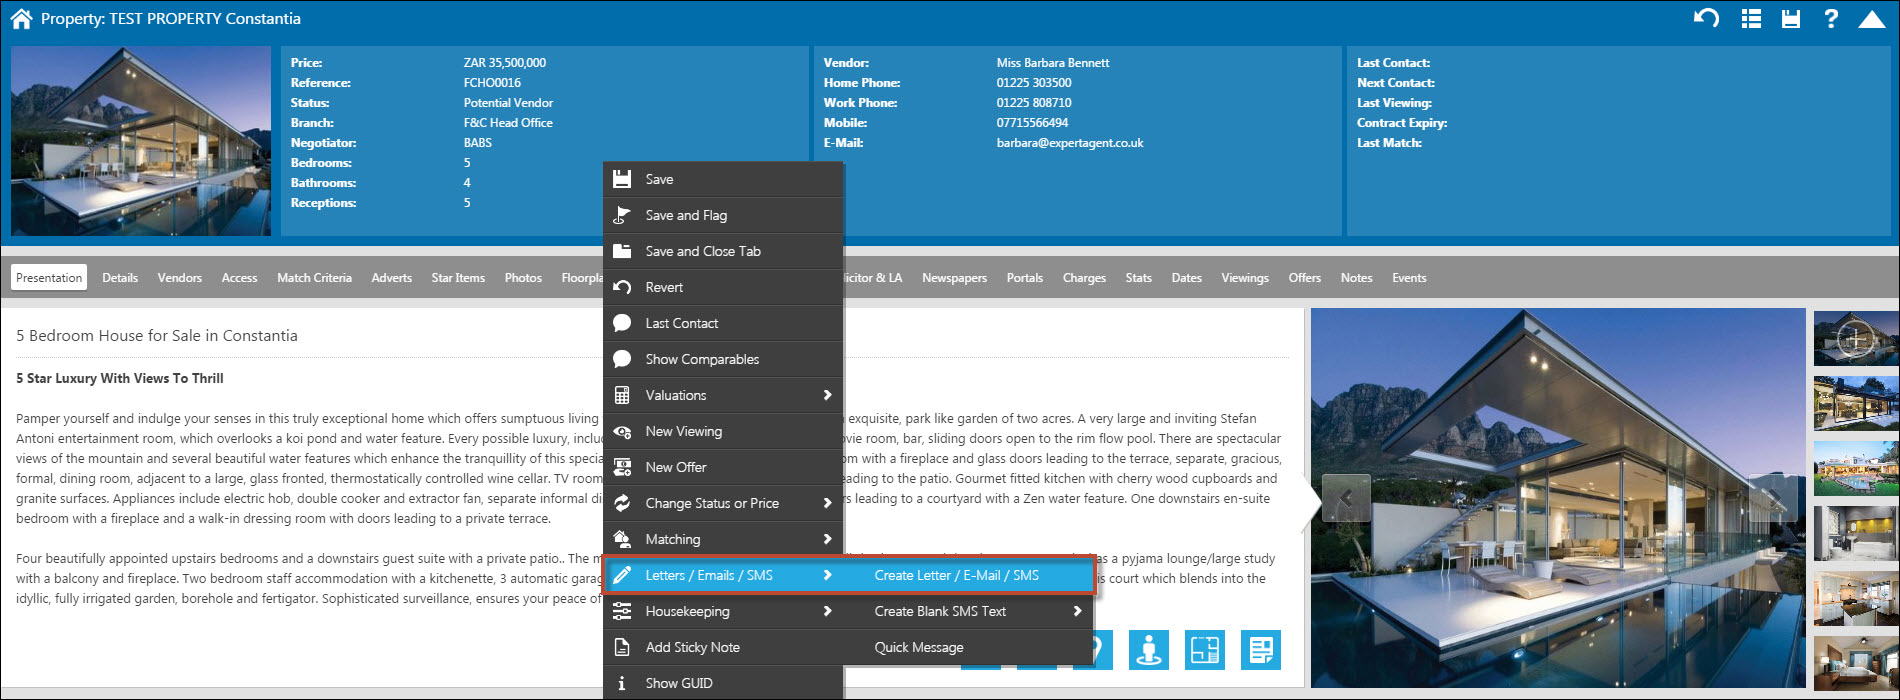
On a property record Right Click -> Letters/Emails/SMS -> Create Letter/E-Mail/SMS.
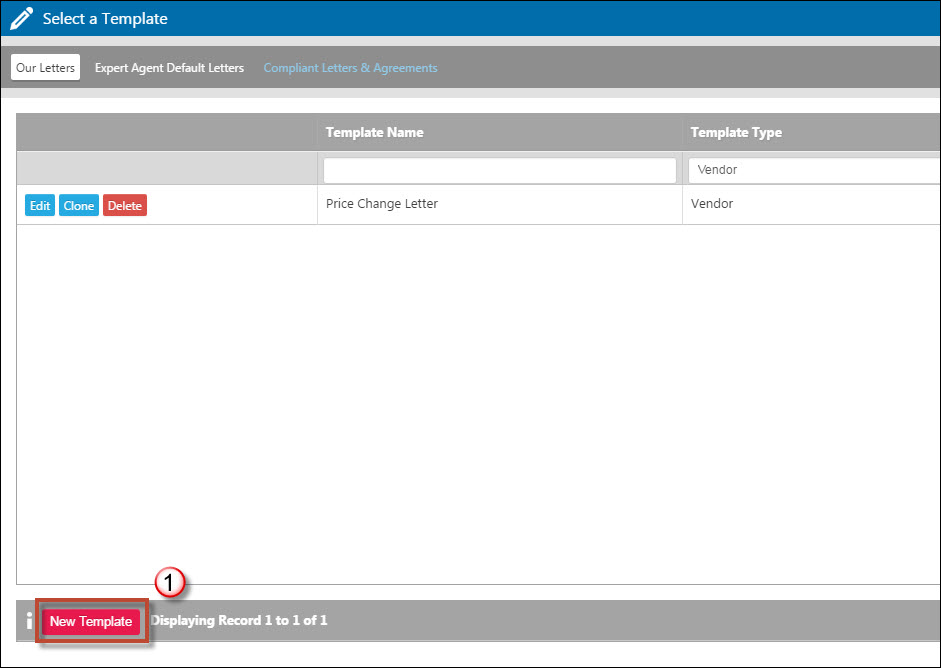
1) At the bottom of the Template Grid, select "New Template".
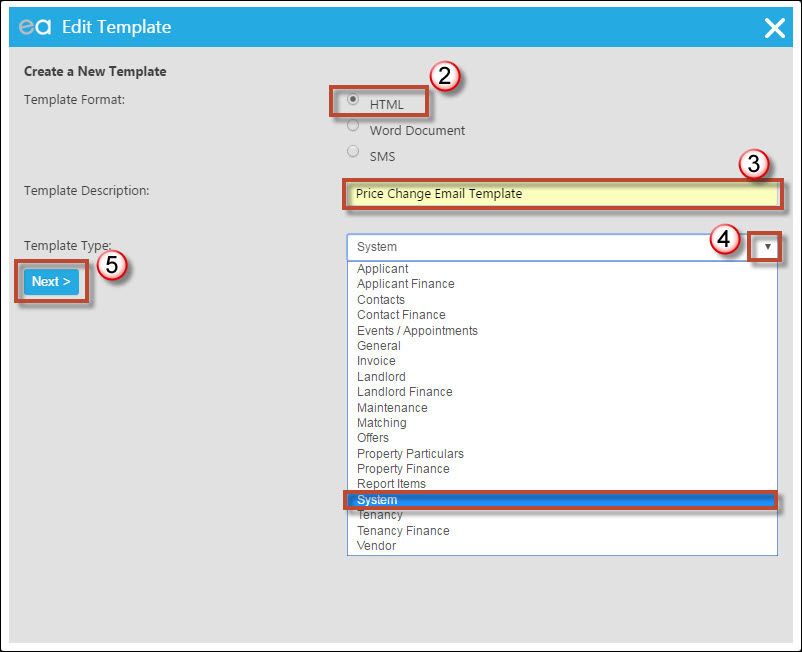
2) Email Templates need to be the Template Format of HTML.
3) Give the template a name. (In this example I have used Price Change Email Template because I want to assign this template to my Word price change letter).
4) The Template Type need to be "System".
5) Click Next.
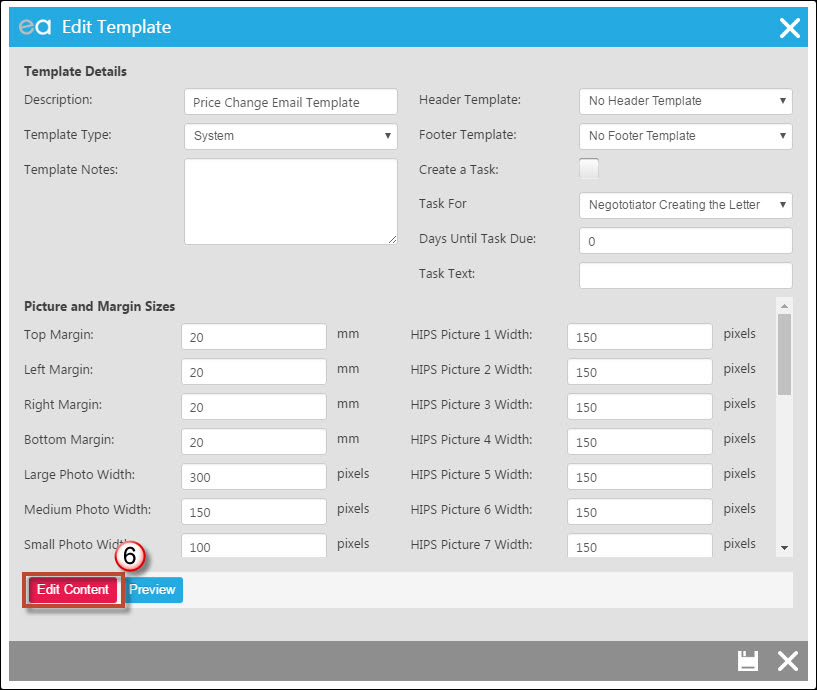
6) Most of this page you can ignore and click "Edit Content" at the bottom.
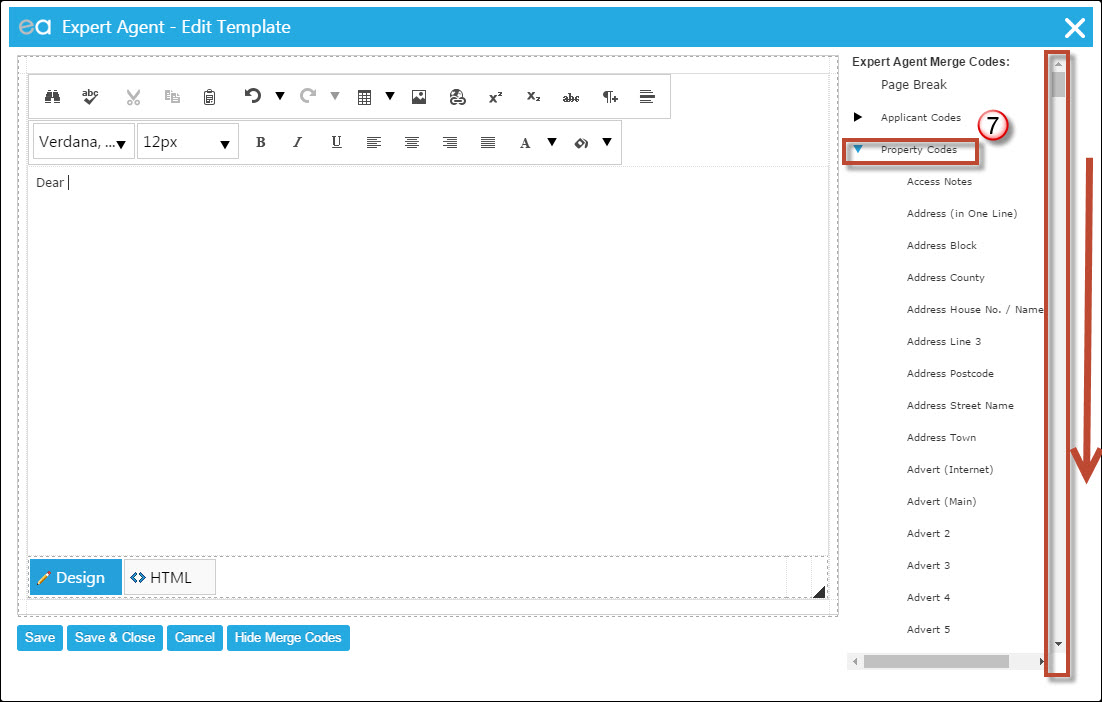
7) We have started the email by typing "Dear" in the body. We need to start adding merge codes. On the right hand side the merge codes are listed in sections. Click on the black triangle next to Property Codes and scroll down.
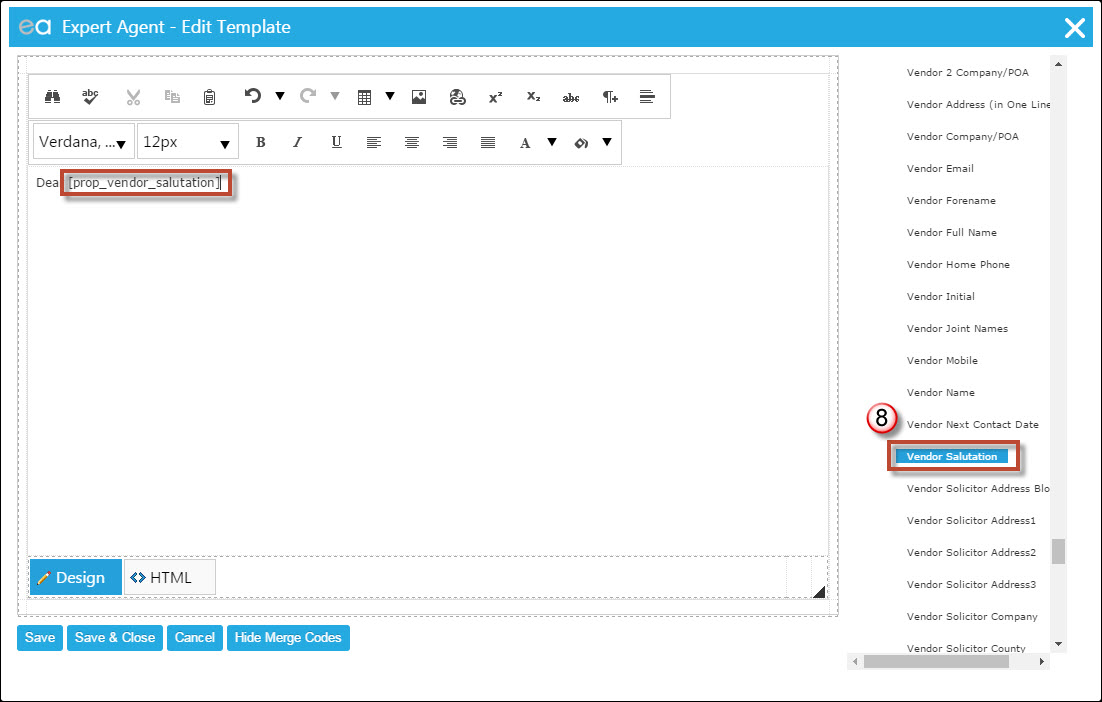
8) By left clicking on the Merge Code it will be inserted into the body of the email.
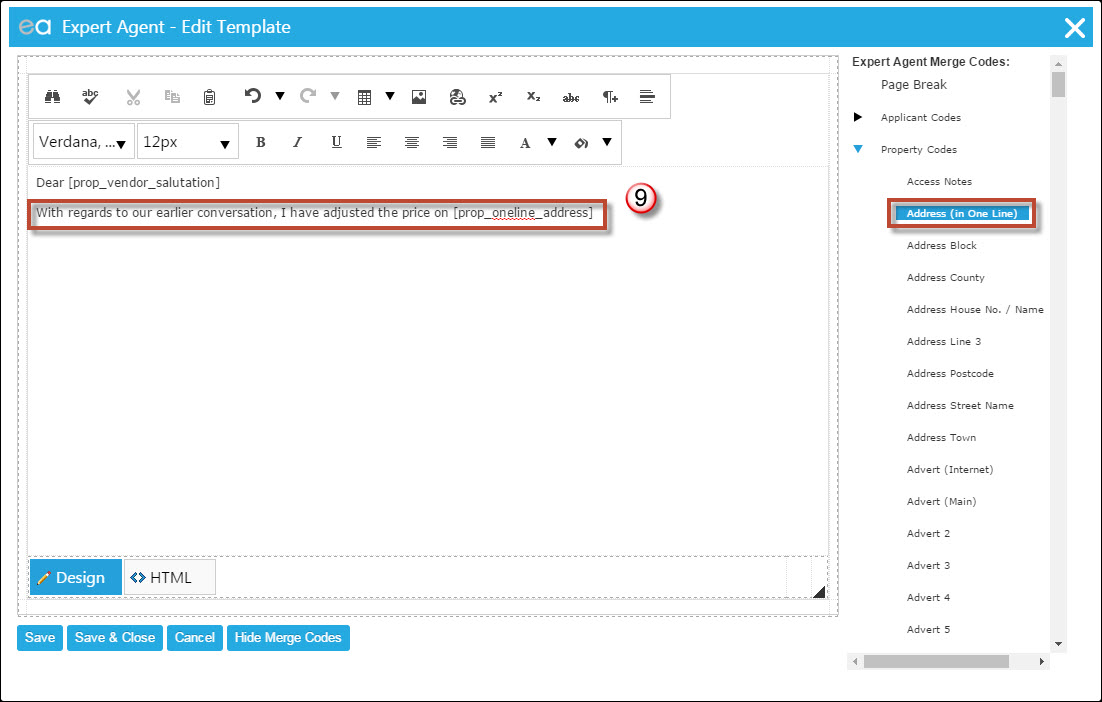
9) Carry on writing your email using Merge Codes from the right hand side.
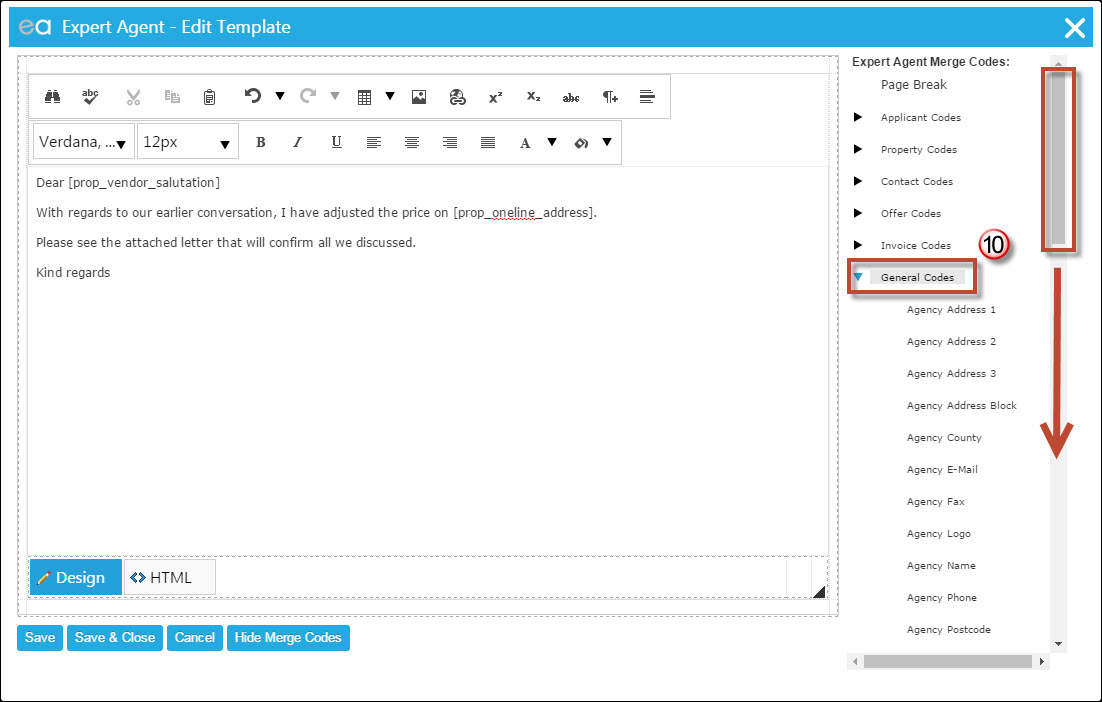
10) to End the email I am going to use the General Code for Negotiator which will use the details of whichever Negotiator is creating the template. Remember to use the scroll bar to find the right merge code.
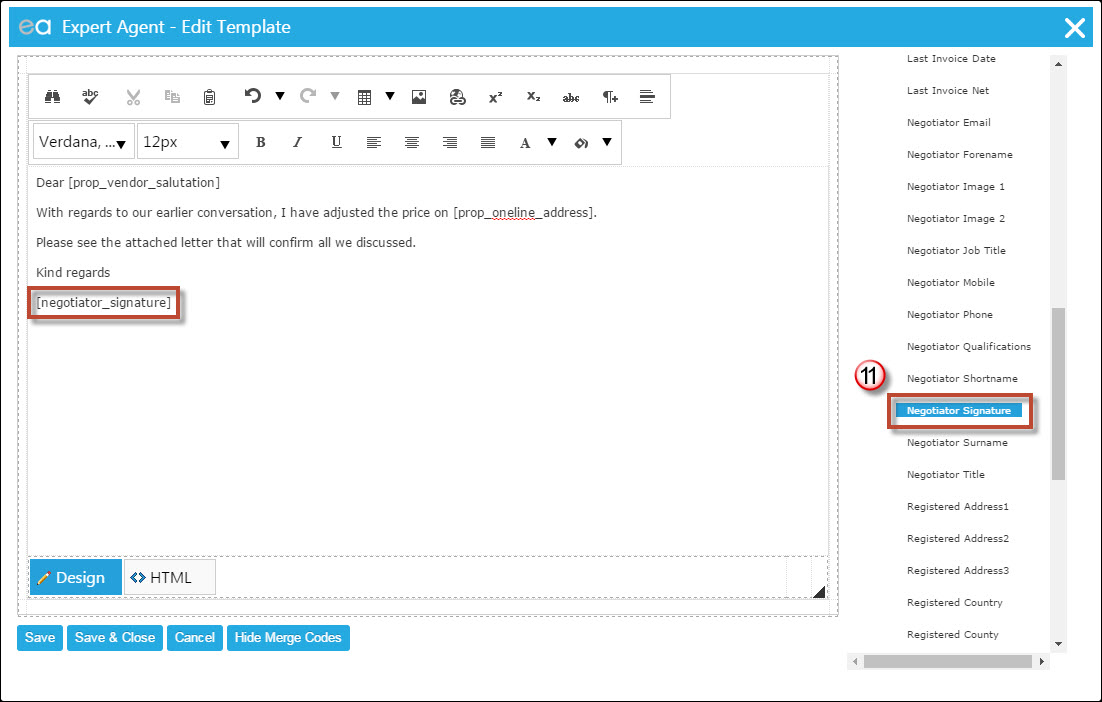
11) Left clicking on the merge code from the right will add it to the body of the email.
At this point you could press the Save & Close button at the bottom and carry on below from Point 8 (below).
If you wish to use an image as a footer or header in the email the steps below will explain how to do this.
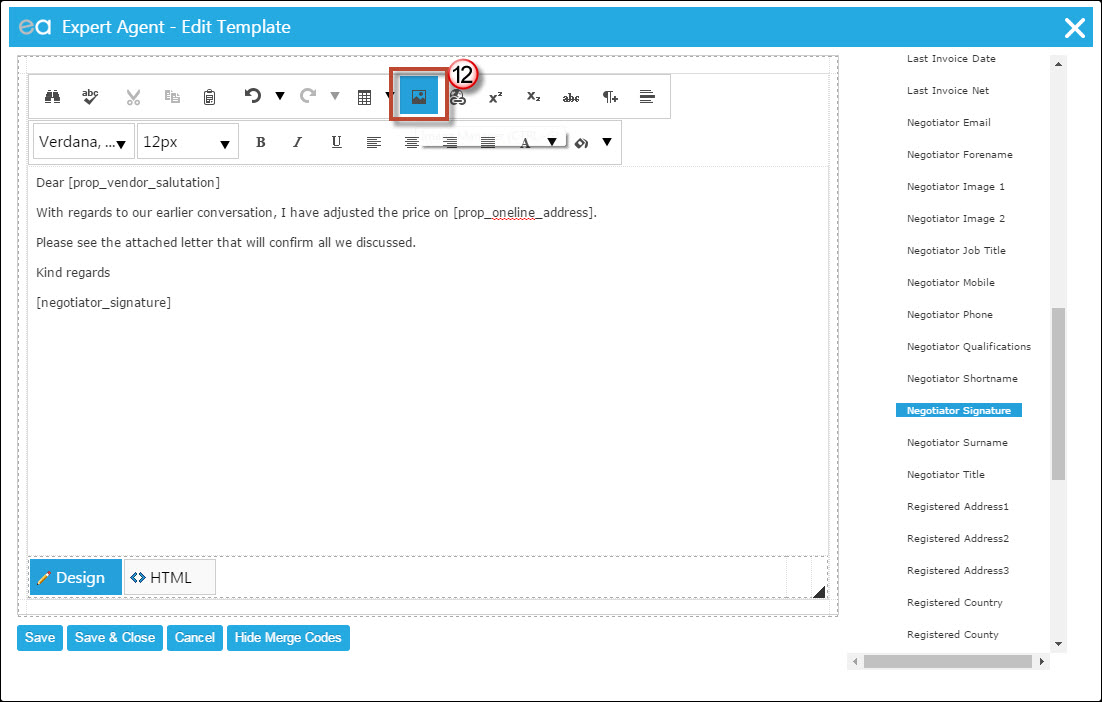
12) If you wish ti insert a header or footer the process is the same. Click on the Image Manager icon.
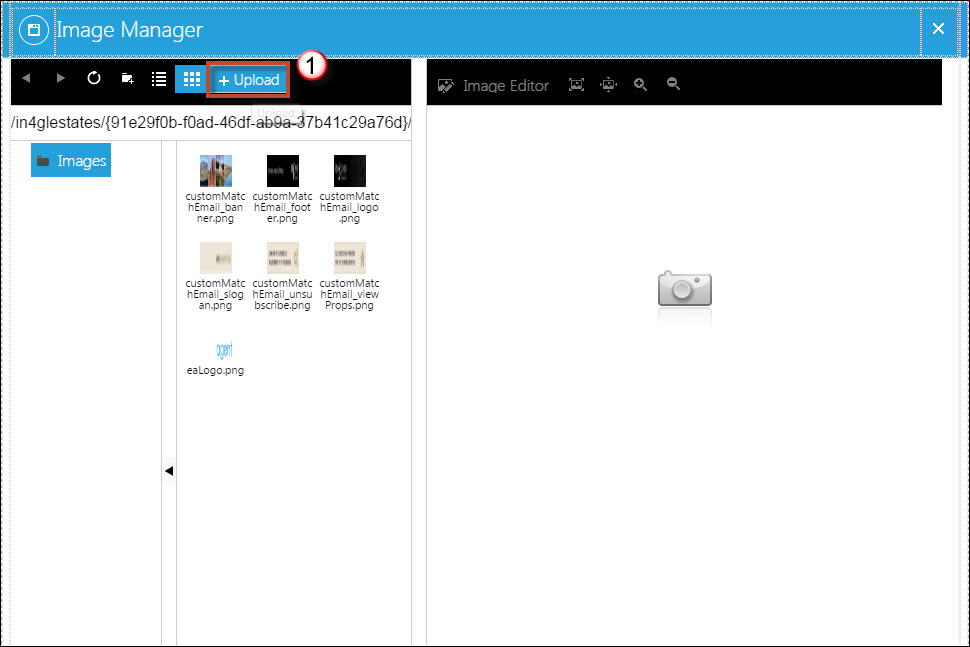
1) To uploaded from your local hard drive click on the Upload Button.
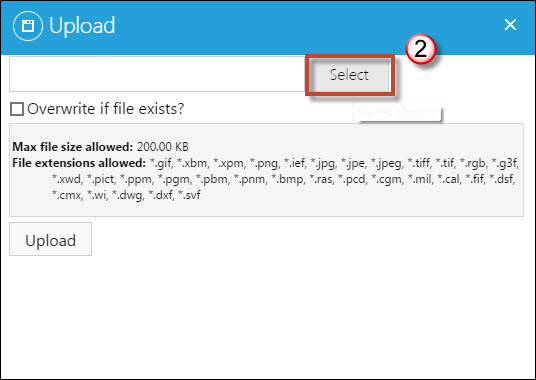
2) Click on Select to go find your image from your local hard drive. Then press the "Upload" button at the bottom.
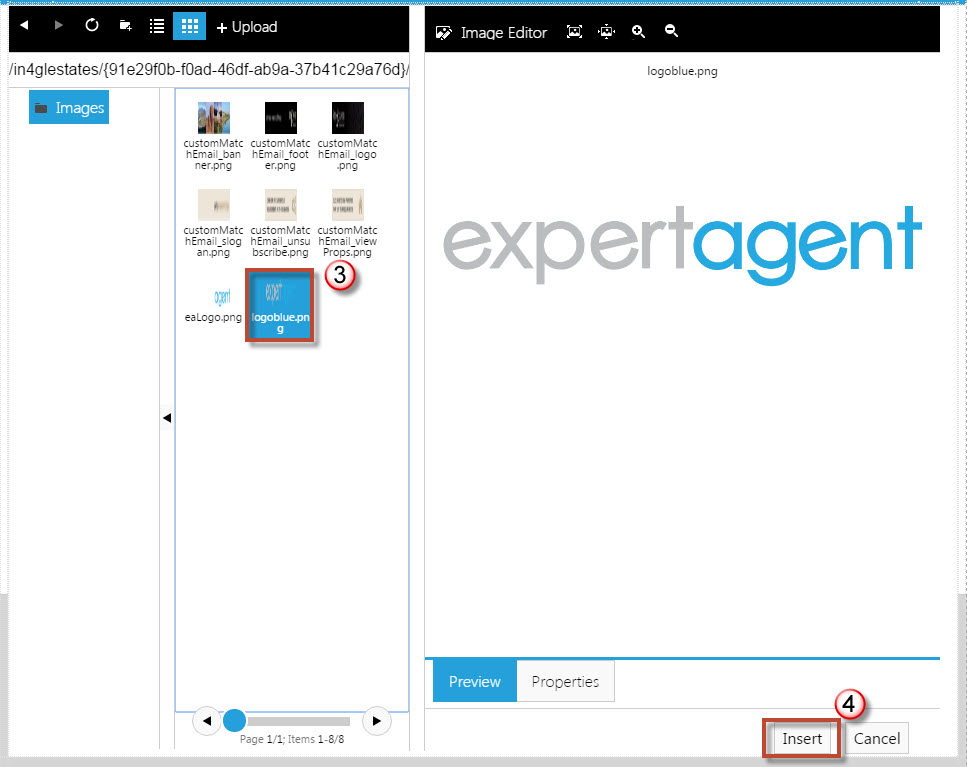
3) If your image is already uploaded to Expert Agent you can click on it from the left hand side.
4) Click "Insert".

5) Your image will be inserted into the template.
6) Click Save & Close.
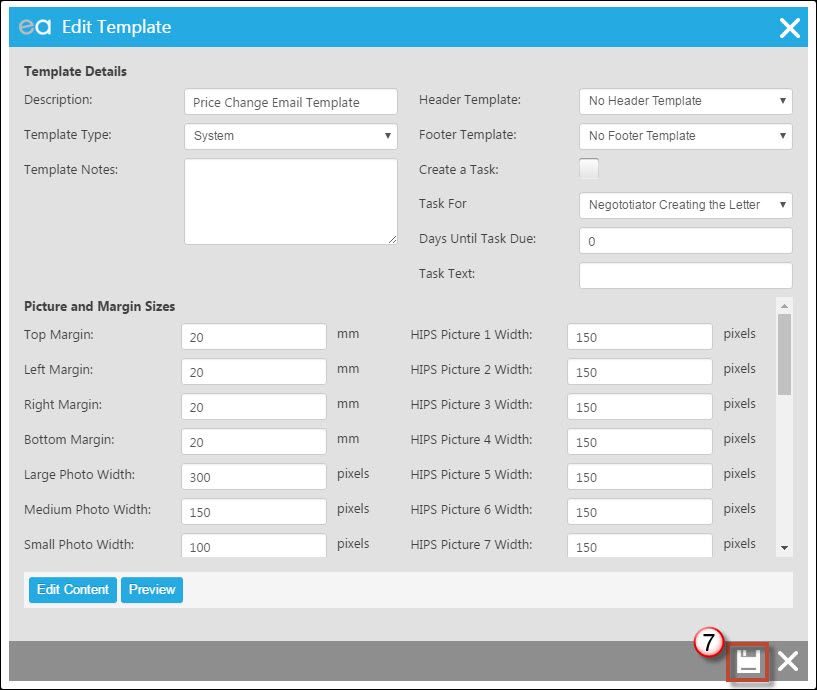
7) Press the Save button here and your Email Template will be saved into the Template Grid.
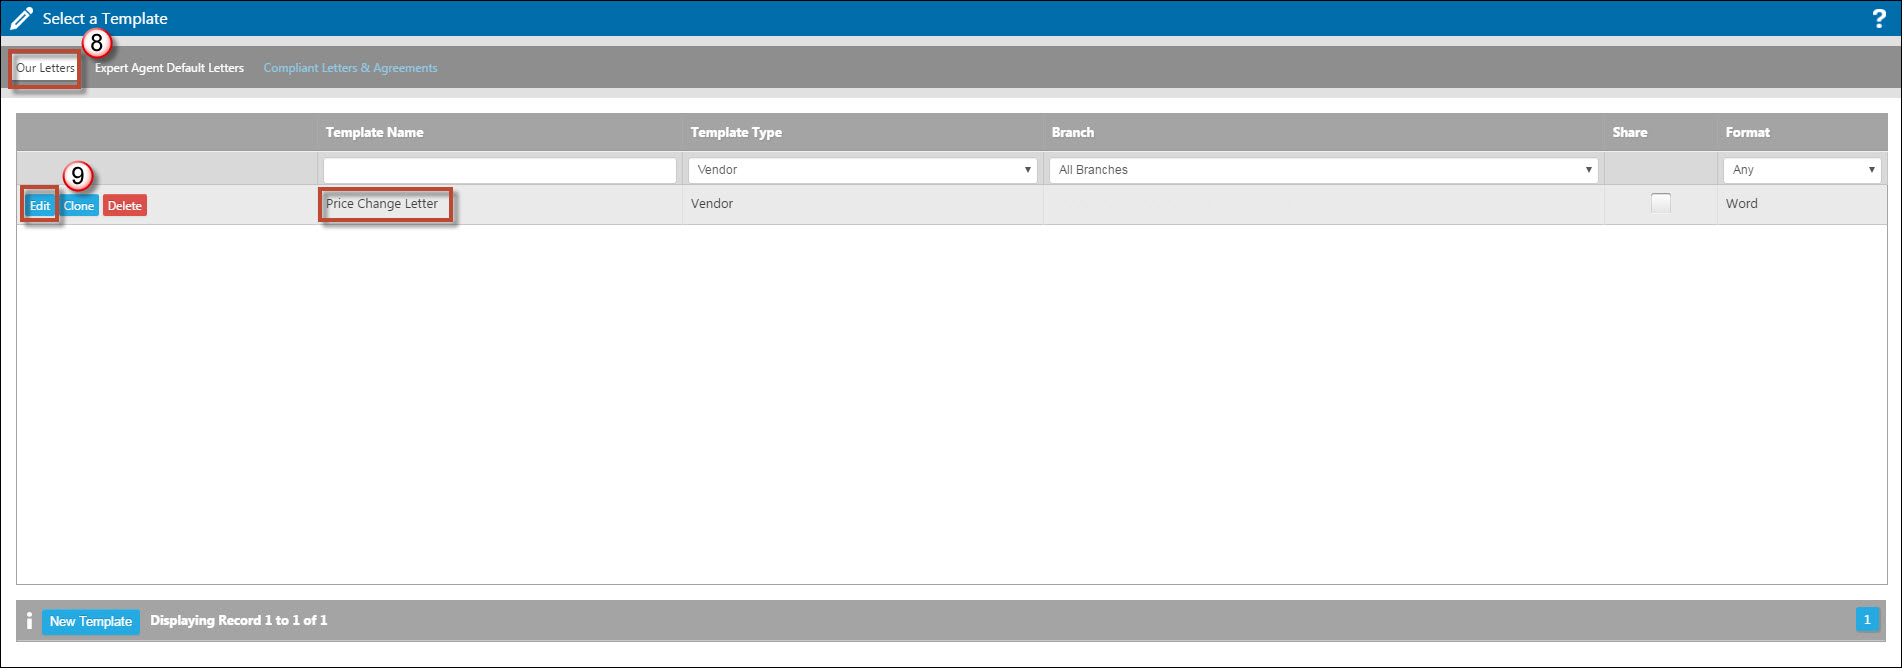
8) Back on to your Templates Grid, find the Template you wish to assign the Email Template to from the "Our Letters" tab.
9) Click "Edit".
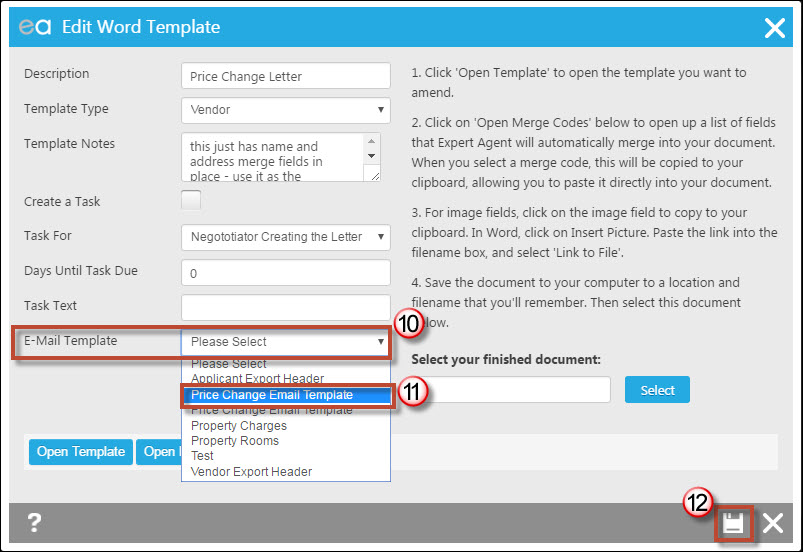
10) From the Email Template section click on the drop down.
11) Select your new template from the drop down.
12) Press Save.
Each time the Word Template of Price Change Letter is used and emailed, the Email Template you created will be assigned.
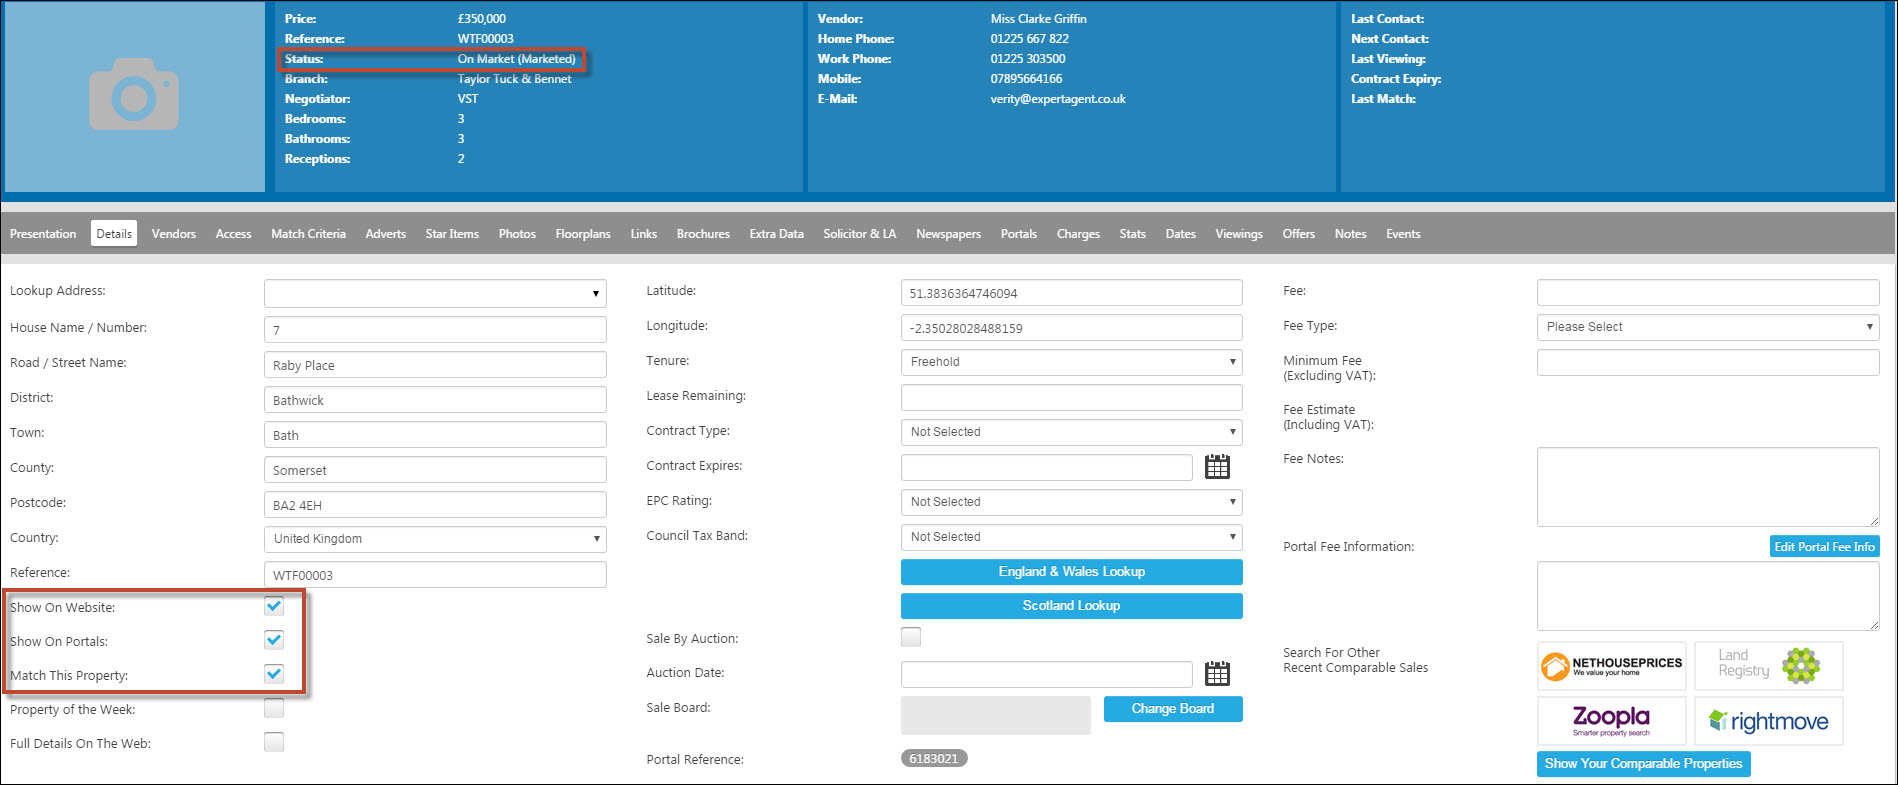
Why can't I send the Vendor Portal email?
If you are trying to send the Vendor Portal email you do not have the option on the Action Menu, you will need to Market the property.
Some times Agents will put the Property on the Market but not Market it.
The Property need to be Marketed before you can send the Vendor Portal email. Make sure on the Details tab of the Property that the marketing details are ticked.
Tel: 01225 303500 | Email: account.managers@webskyltd.com
Terms of Business | Cookie Policy | Privacy Policy | ZPG Modern Slavery Statement
Designed by the Expert Agent Design Department
