How do I save a CSV file on a Mac?
1. Open TextEdit on your Mac
2. Highlight TextEdit in the Menu Bar and open "Preferences"
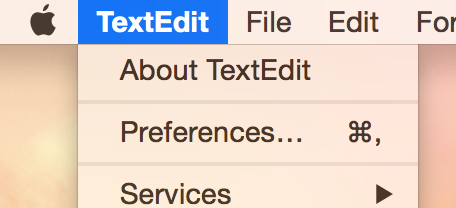
3. Make sure the New Document tab is selected. Change the button so that "Plain Text" is selected

4. Open a new document in TextEdit

5. If the above actions are correct this should open a new window with no options to style the text as below:
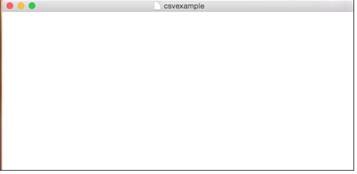
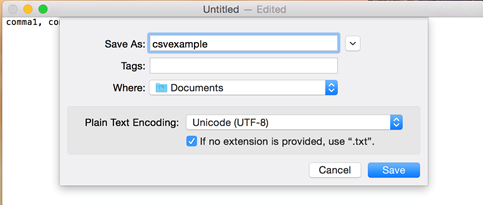
6. Add your data into the document and save.
7. Find the document you have just saved -> Right Click -> Get Info
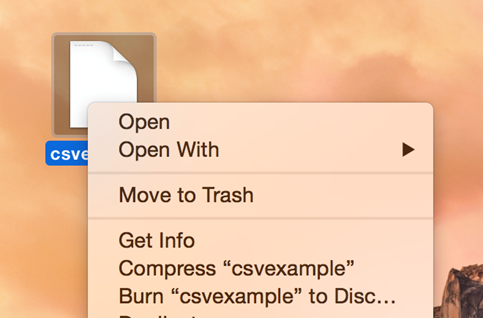
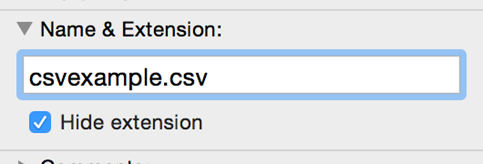
8. Open the Name & Extension drop down menu. Change the .txt to .csv
9. Then click use .csv
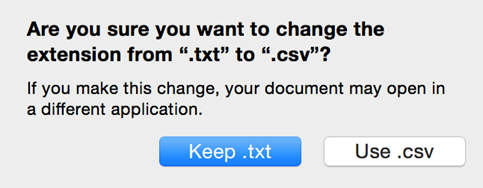
10. This will change the document to a CSV file which you can then open with Numbers.

How do I convert HTML Templates to Word Templates?
Why would I convert from HTML to Wordlink?
HTML is extremely unforgiving. If you get one symbol or character out of place it can cause major issues and is very hard to identify what is causing the issue. Event experts in HTML have to spend time pouring over the code to identify one out of place or missing character.
Wordlink is simple compared to HTML. It's basically the same as editing a Word document (please see Microsoft Word tips if you need any help using Microsoft Word, although Microsoft forums are usually the best place to start).
Additionally, each time you edit an HTML template, it leaves excess code in the background which will eventually start to cause issues.
What is the difference?
HTML (Hyper Text Markup Language) is what web pages are built on. It was the only option at the beginning of Expert Agent to allow the pulling of information from Expert Agent into Templates, but now technology has moved forward, Word can now work in the same way using similar merge codes to pull information into the documents.
So will all my templates work in Word after converting them?
Sadly, the answer is no. Reports still need to be done in HTML, as do e-mails. The reason for this is that they work in a different way.
How do I convert my HTML Templates into Wordlink?
Firstly, it must be noted that we strongly recommend starting from scratch and NOT using the method shown below as you will almost always achieve better results starting from scratch.
1. Open your HTML template (from Tools -> Configuration -> Output Config -> Templates). Find your template in the list and click the "Edit" button next to it. Then click the "Edit Content" button.
2. Make sure you are in the Design Tab (1).
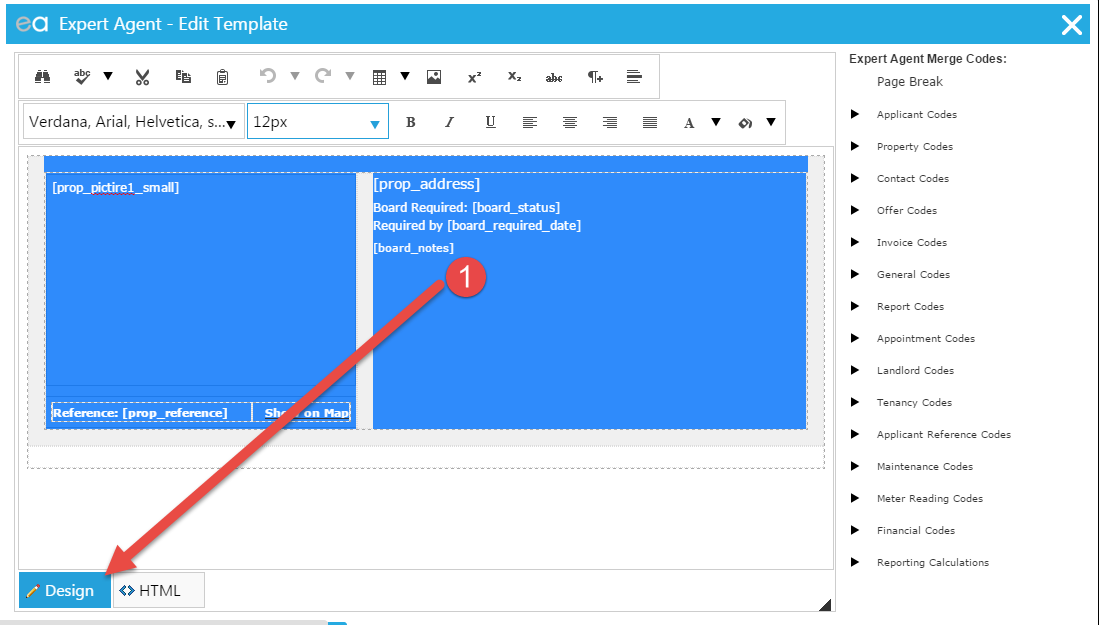
3. Copy the entire area and paste into a blank word document.
4. You then need to change the brackets of the Merge Codes. HTML uses [ and ] whereas Wordlink using { and }. There is an easy way to do this.
5. Click Find and Replace (use CTRL+F on your Keyboard and click into the Replace option)
6. In the top "Find box" put the [ symbol
7. In the bottom "Replace" box put a {
8. Then click Replace All
9. You will then need to do steps 5 - 8 using ] and } instead.
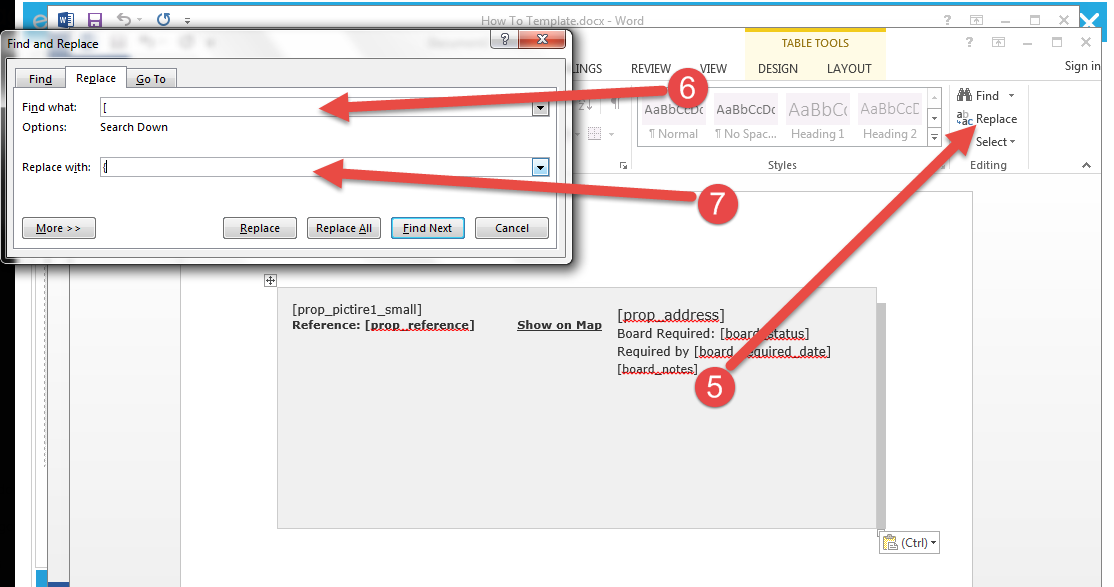
The template is now editable within Word, and most of the merge codes will work. However, there will be some that don't due to the wording being slightly different. The easiest way to identify these is to upload the template and try to using it.
The Merge Code that are still showing will need to be highlighted and replaced using the merge codes for Word. (Editing letters using EA data)
There is not a perfect way, but it does get the bulk of the HTML templates over to Word and save a little time.
REMEMBER this is only a quick guide to try and help you save time. They will not be final copied and you will still need to edit them to a degree to make them fully usable.
How do I change the margins on an HTML Template?
Why are my HTML Templates no longer displaying correctly?
Different browsers are supposed to work in the same way, however, it has come to light that they actually handle things differently. Chrome reads and displays HTML templates differently to Internet Explorer.
It worked fine in Internet Explorer
Internet Explorer enabled used to use templates that were bigger than the required size by having it use the "shrink to fit" function. Chrome does not have this function. Some printer drivers do, however, this is something you would need to investigate.
Is there a fix?
There is a sort of fix that we suggest doing/ In most cases it prevents the need to re-make all of your Templates. If this does not fix the issue, you may need to recreate your Templates.
How do I change my margins?
The following guide should help you adjust the margins so that your templates don't have to be re-made.
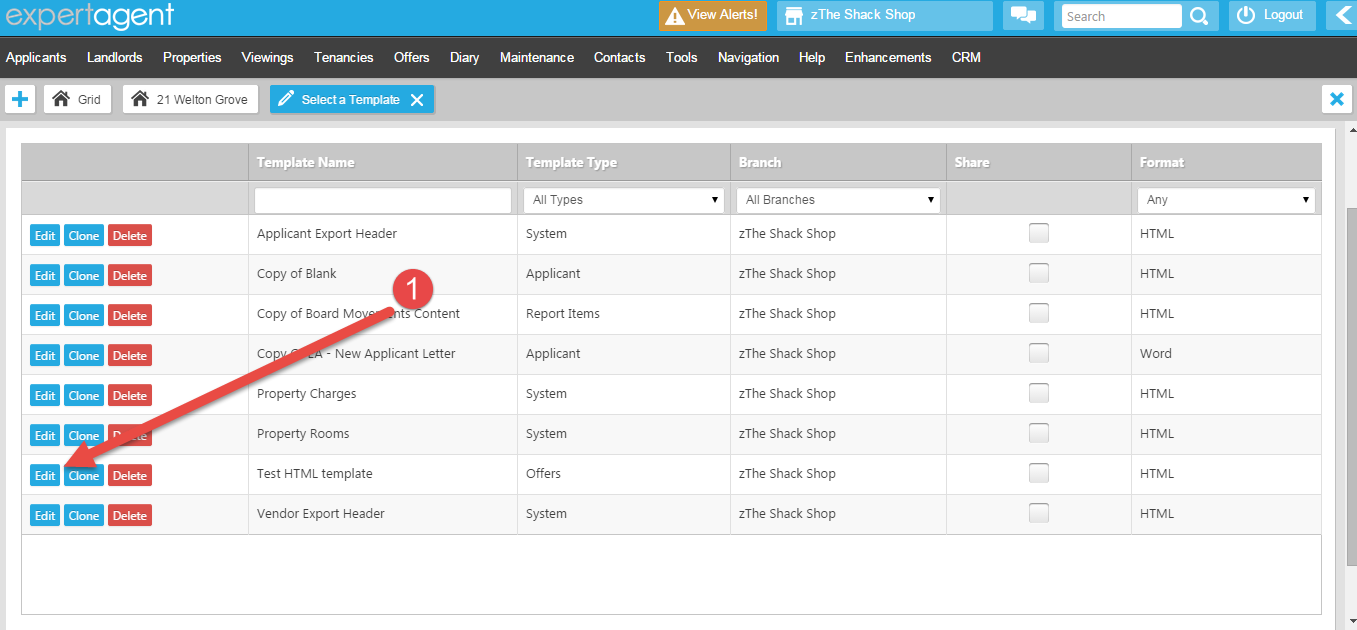
1. When in the "Select Template" page, click "Edit" to edit the required template.
2. As you can see in the image below, our Top, Bottom, Left and Right margins are set to 20mm.
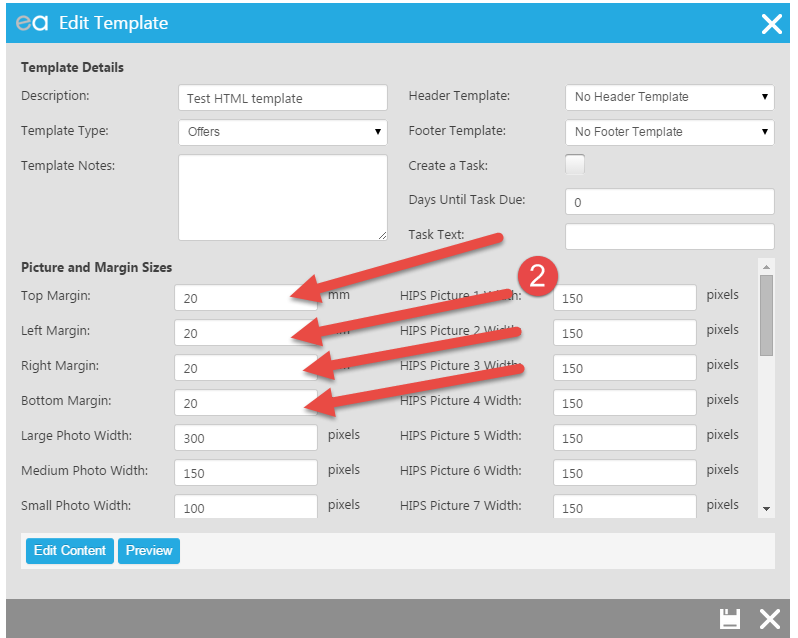
3. The best place to start is to half them, in this case we would change ALL these margins to 10mm.
4. Then click "Preview" to what difference has been made.
5. You may find that you need to raise or lower the number to achieve your desired results.
It should also be noted that these numbers do NOT need to be the same.
You will need to do this with each template before you use it, but once you have changed the margins this way and pressed "Save", it will be a permanent change to that template. However, if you need to use a different template, you will need to adjust it and save it before using.
How do I change the font size in an HTML Template?
Why might I need to change the font size in an HTML Template?
HTML is extremely unforgiving, Internet Explorer allowed us to shrink an image to fit the page. However, this feature is not available in Chrome. This often means that older templates that were made too big to fit on a page, now cannot fit onto a page. By changing the font size, this can create more space on the page, meaning that it makes the contents of the template smaller, requiring less room.
I'm using a report, I can't find the Template!
If you are using a report, you will need to identify the template that is the body of the report.
- Right click on the grid you are trying to run the report from, select Outputs -> Create Report.
- Find and click the report you usually use.
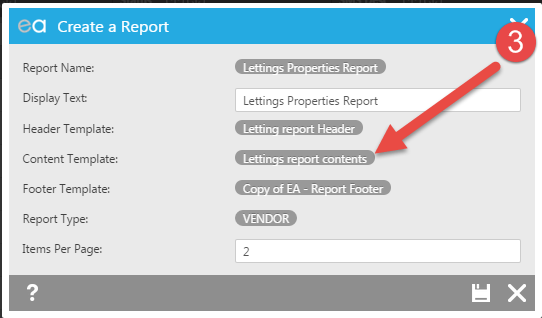
- Once clicked, you will see the following screen, the indicated section is the template this report uses and needs to be edited:
Changing the font in the Template
Changing the font is fairly simple, just follow the steps below:
1. Go to Tools -> Configuration -> Output Configuration -> Templates
2. In the Template Type select "Reports"
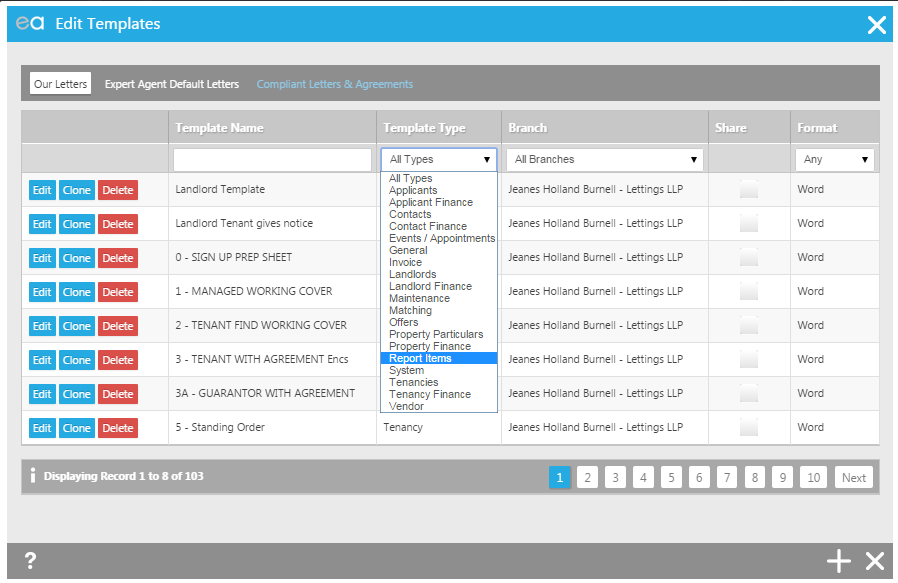
3. Then find your report and click "Edit".
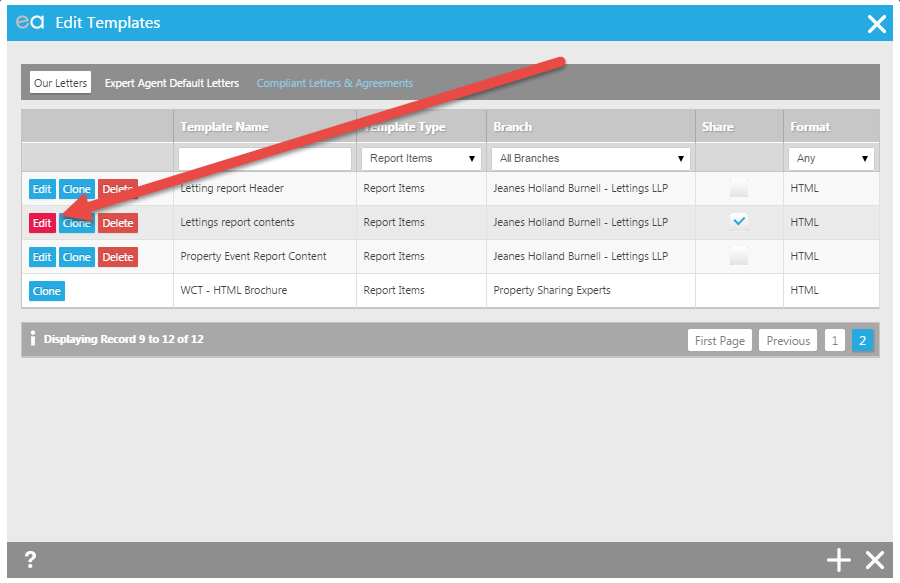
4. Then on the next window, click the "Edit Content" button
5. Highlight the merge code of the text that you want to format
6. Then use the formatting tools at the top to change the formatting. In this case we are changing the font size.
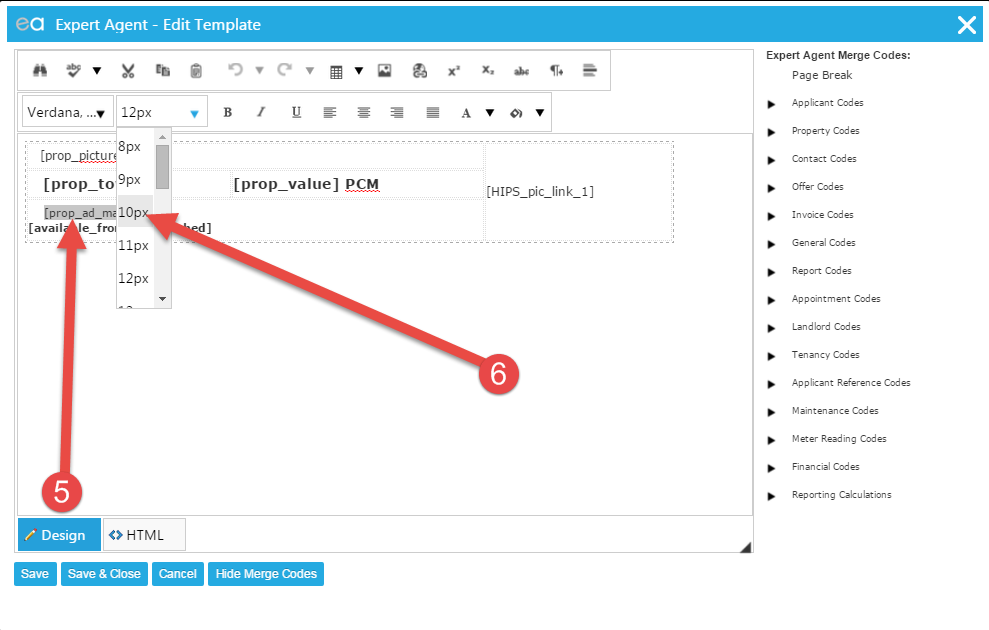
7. Then click the "Save & Close" button
8. Then click "Preview" to see an example and print preview of the newly edited template
9. If this is not how you want it, repeat steps 4 - 8 accordingly.
N/B This will change ALL reports that use this template.

 Login
Login


