 Login
Login


How do I display tasks?
There are 2 ways in which you can display tasks in Expert Agent.
Homepage
Ensure you have the 'Tasks' pod enabled on your homepage. To do this go to Tools> My Profile> Configure Homepage> Tick the tasks pod.
Tasks Grid
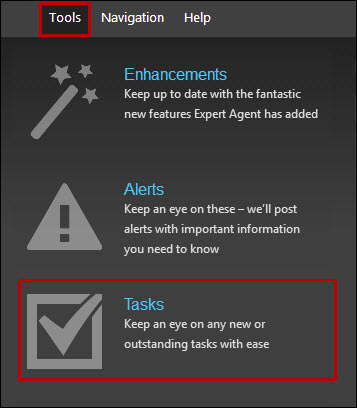
If you would like to view and manage your tasks more effectively access the tasks grid via Tools> Tasks
How do I work with tasks?
Using the tasks option within Expert Agent is a good way to ensure all jobs and tasks are being actioned correctly and efficiently.
Firstly, you will need to ensure you have the tasks pod displaying on your homepage. To do this hover over Tools in the top menu, select 'My Profile' and click on 'Configure Homepage':
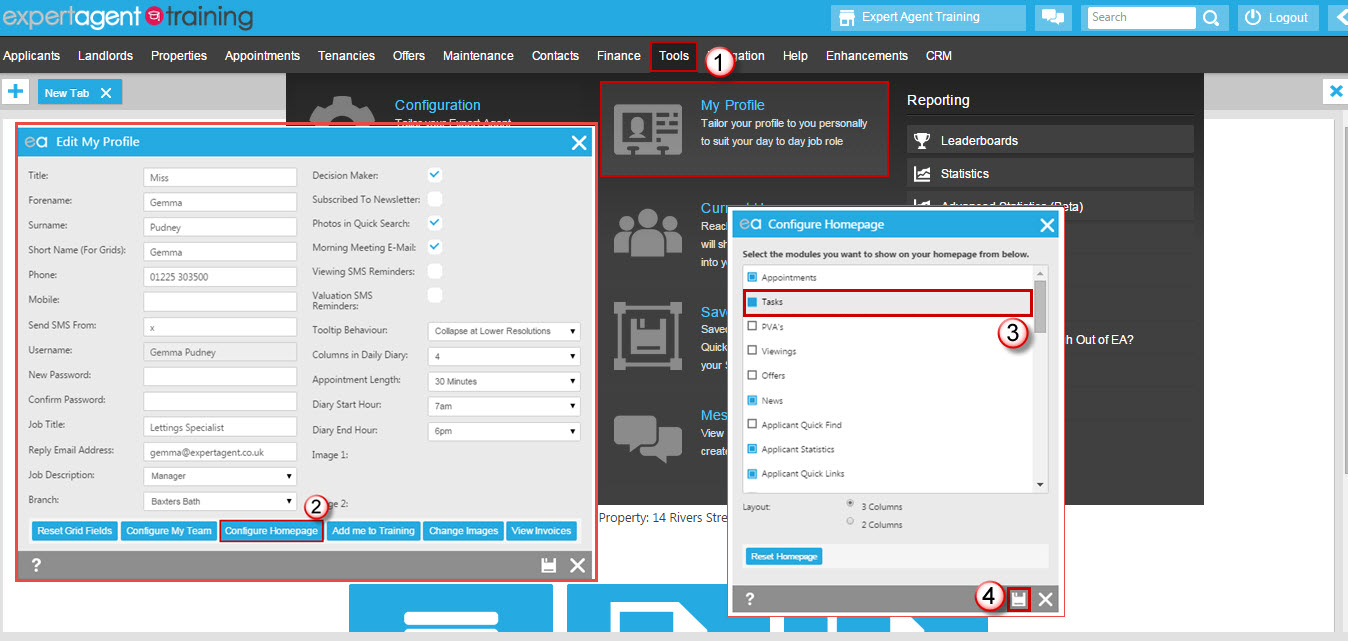
Ensure the tasks pod is ticked and click on the save icon.
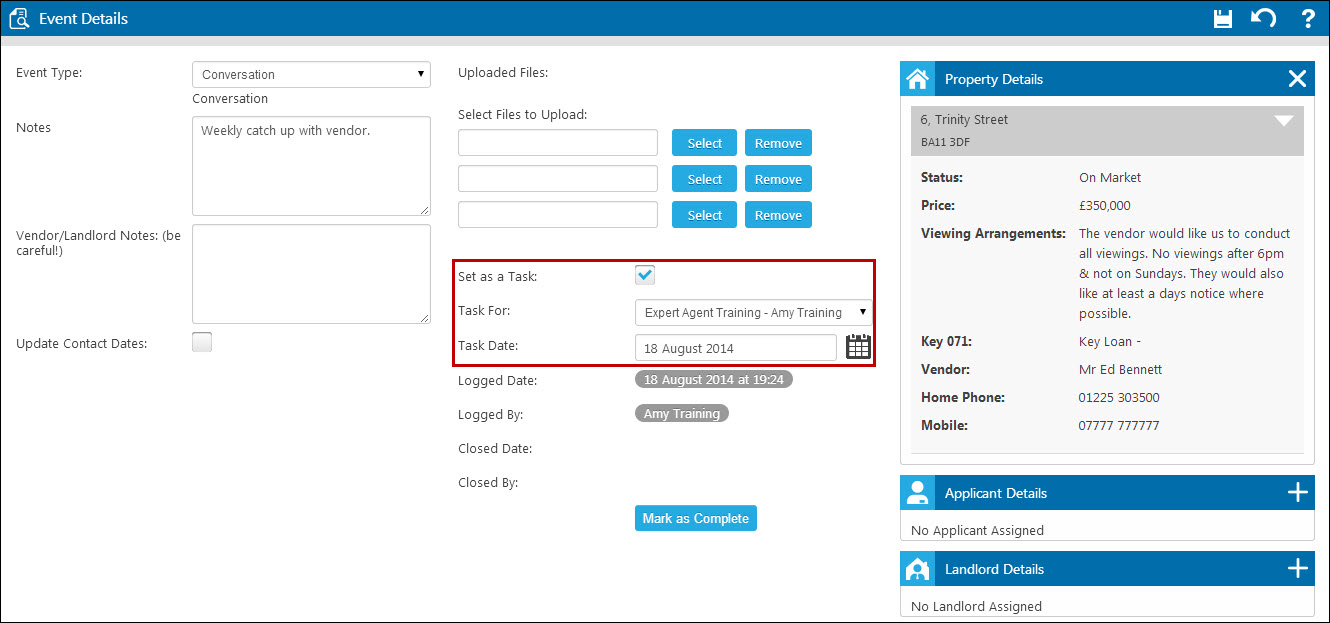
You can create tasks from the events tab in a property, applicant, viewing, offer, landlord, or tenancy record. You are able to set a task from most records simply by ticking the 'Set as Task' tickbox and setting who the task is for:
You are also able to manage tasks from the Tasks grid, accessed by hovering over 'Tools' in the top menu and selecting 'Tasks':
Your newsletter has some stats about my Applicants. What do they mean?
Our Winter 2012 newsletter has some stats on the back.
Here’s a breakdown of what they all mean and how we’ve arrived at them:
| Statistics | Description | All EA Members |
| Average Number of Days Since last Contact | This is calculated on the “last contact” date in each applicant record which you update every time you right click and choose last Contact in an applicant record. If you don’t ever use this, the last contact date is the date when you first entered the record. We’ve only calculated this on Live applicants | 126 |
| % of applicants that have default “Not Known” Status | Percentage of your “live” applicants where you’ve not filled in anything for the first of the 3 status fields. You might call it “Not Known” or “I forgot to ask”. Your manager will probably call it laziness! | 44% |
| % of applicants with email | Percentage of live applicants that have an email address. Surely, this should be nearer 100% these days? 80% of ExpertAgent member businesses are over 85% - the remainder drag the average down. | 68% |
| % with mobile numbers | Percentage of your live applicants that have a mobile number. | |
| % of on-market properties whose vendors have access to Vendor Portal and its live stats | Vendor Portal lets vendors log in to interact with you and review progress – vendor portal | 3% |
| % of applicants sent welcome emails in the last month | This is the percentage of the applicants that you’ve registered in the last month that have been sent the automatic welcome email with a list all suitable properties and the ability to change their own requirements | |
| % of applicants sent a weekly email in the last month | This is the percentage of your newly registered applicants (last month) that have had a Weekly Email update with a list all suitable properties and the ability to change their own requiremements. We’ve messed up here because any applicants that you’ve registered between 1st November and 7th November when we pulled this data together won’t have been counted. So, that’s one week out of the 4 in the month and that probably means that the maximum score would have been 75%. |
How do I export data from Expert Agent into a .csv format?
Many members use third-party mailing list products such as Mail Chimp, Constant Contact and Sign-Up.to in order to create newsletters.
Exporting data to these products from Expert Agent is possible using Expert Agent’s grids and reports.
Here’s an example of how to do this from an applicant grid.
Create a Report Item
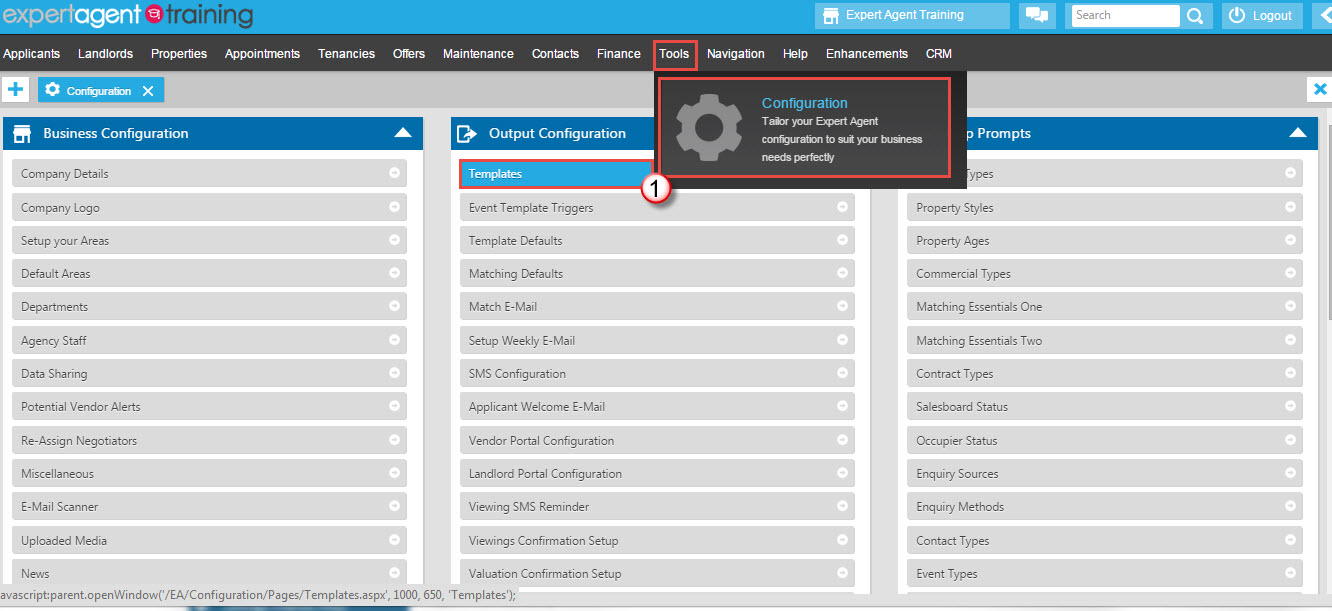
You’ll need a report that merges the content. To create this hover over 'Tools' in the top menu, select 'Configuration' and locate 'Templates' under the Output Configuration heading.
You can either set up your own report, or you can see if one of our default reports sounds like it may be suitable (you could even use one of our default reports but make small edits to it - this may still be easier than building a report from scratch).
To locate our default reports:
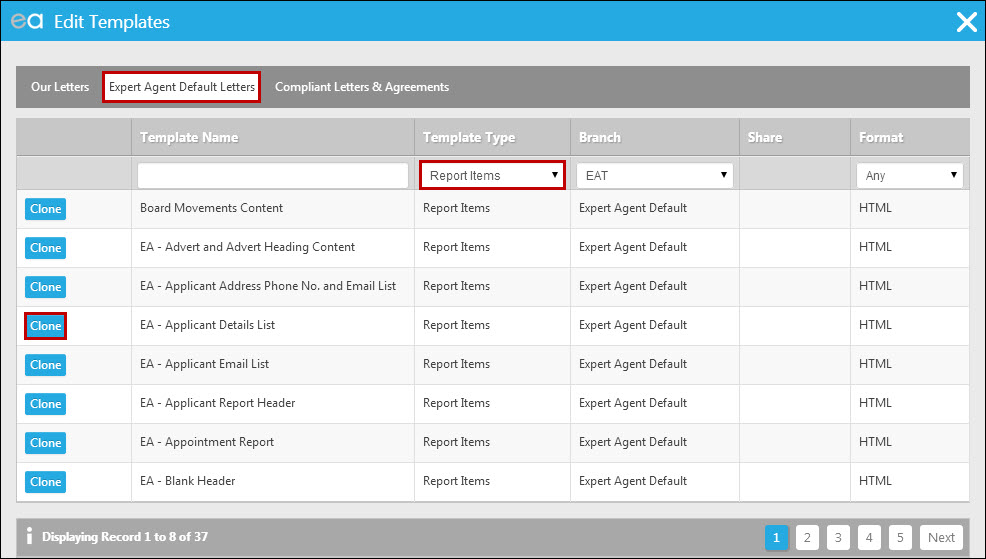
Click into the 'Expert Agent Default Letters' tab at the top, filter the Template Type column on Report Items and have a look through. If you find one that you would like to use, click 'Clone' next to it and save a copy into your 'Our Letters' tab.
If you were going to build your own report, you'd do this from the 'Our Letters' tab:
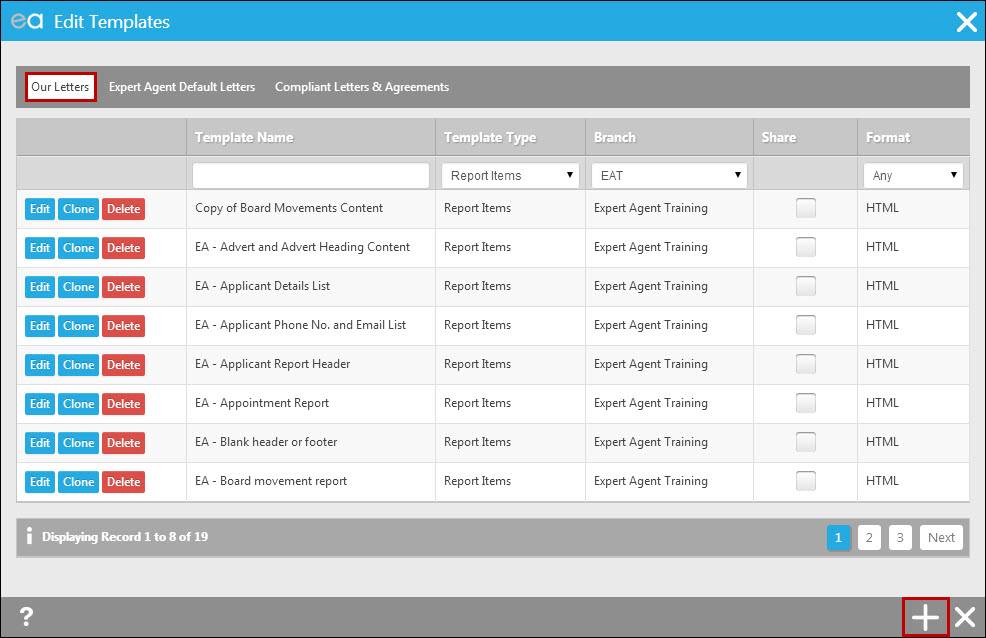
To start the process you click on the plus symbol at the bottom of the screen. The following window will open:
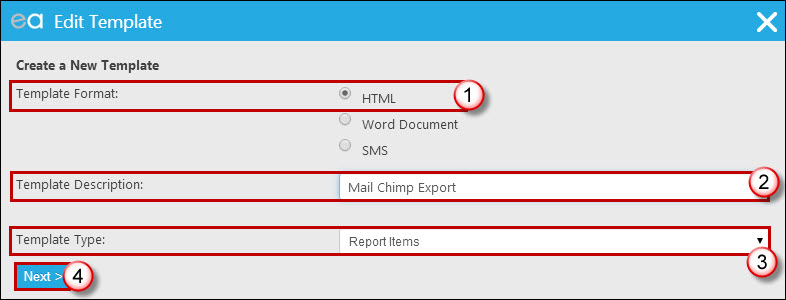
1. Choose 'HTML' as the template format.
2. Give the report a name.
3. Ensure the Template Type is set to be Report Items.
4. Click 'Next'.
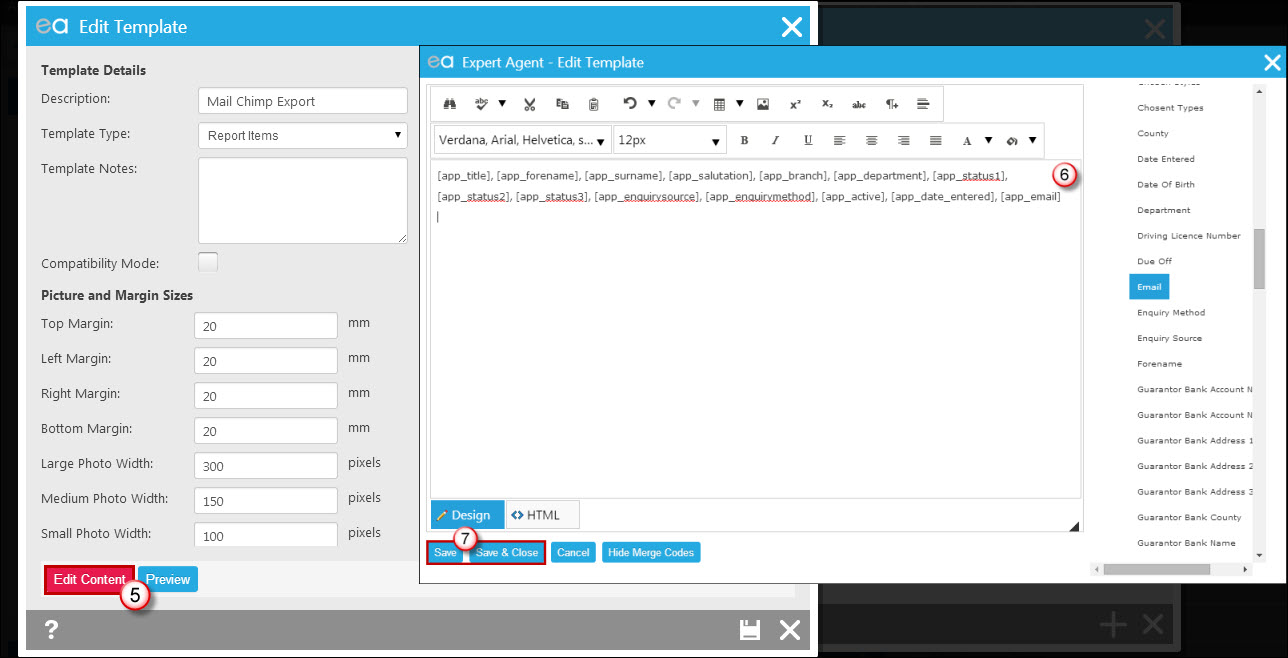
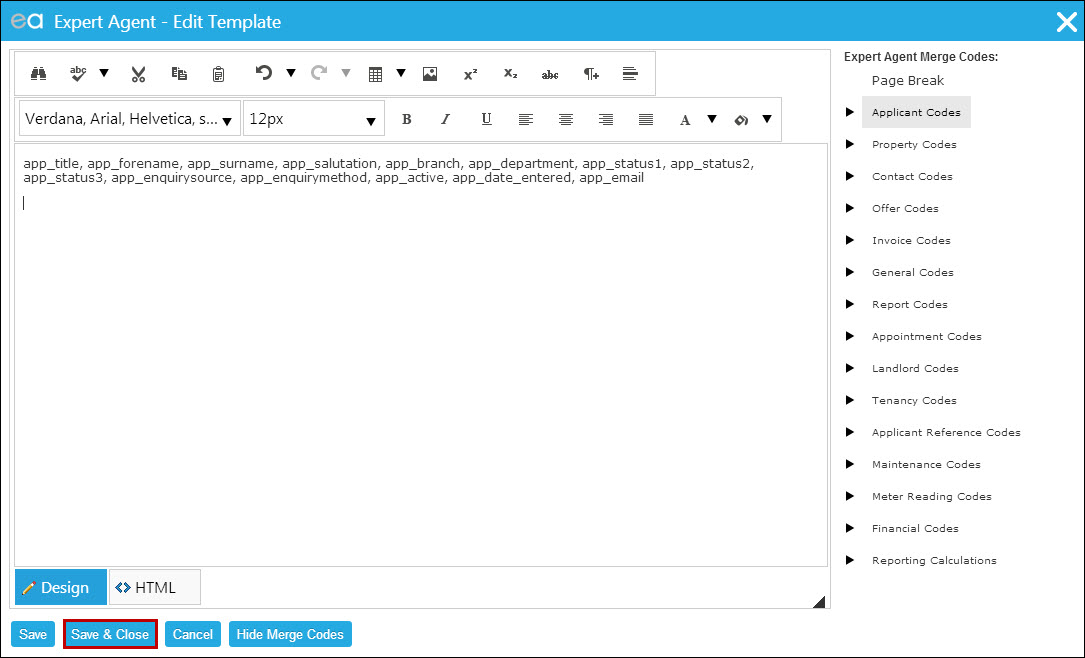
The window shown on the left in the screen grab above will open first. Click 'Edit Content' at the bottom. This will open the screen on the right.
6. Set the report format up with the fields you want to include – just use the field picker on the right. Put a comma after each merge field and a carriage return at the end (so that format wise it looks as above).
7. Click 'Save' or 'Save & Close'.
Create a header file
If you need to have a header row in your resultant .csv file with the field names in, EA can do this for you by using a header report item. If you don’t need this (if you are happy that the data starts in the first row – skip this section).
If you do need this:
1. Copy and paste the merge fields that you entered into your report into Notepad:
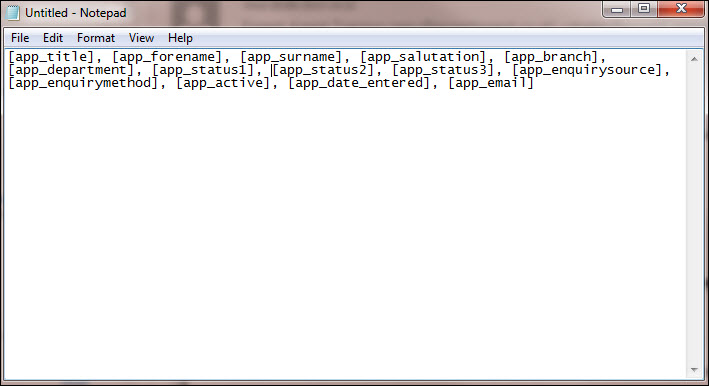
Take the brackets off of each code - so [app_title] becomes app_title.
Now, create another report item – maybe call it “Export Header”, and paste the text in from Notepad:
Save & Close this template.
Setting Up the Report
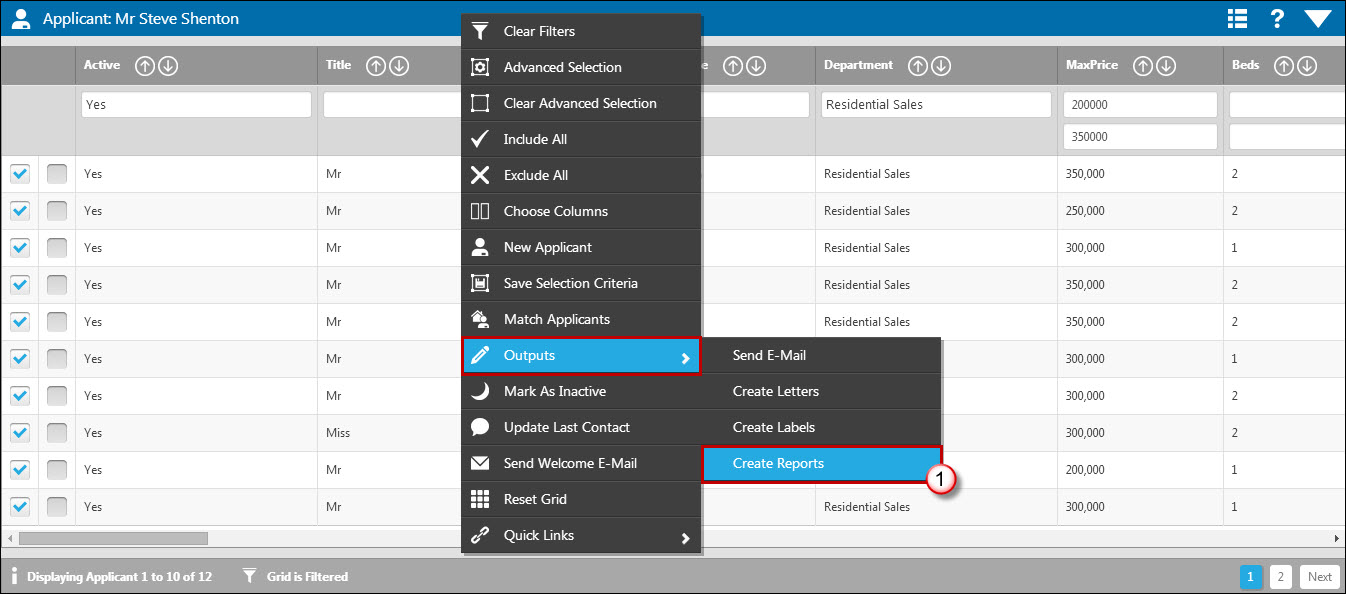
Go to your applicant grid and make the required selection.
Right click, hover over Outputs and select 'Create Reports':
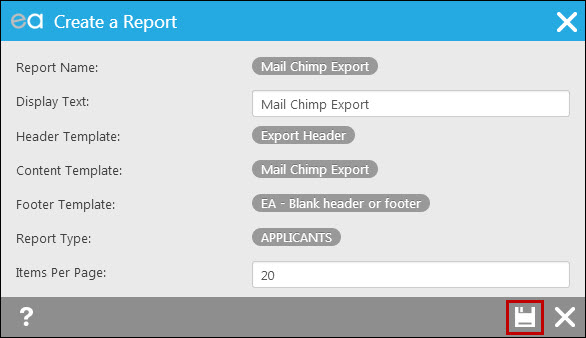
On the 'Create a Report' screen click to Create a New Report (2). The 'Edit Report' screen will open:
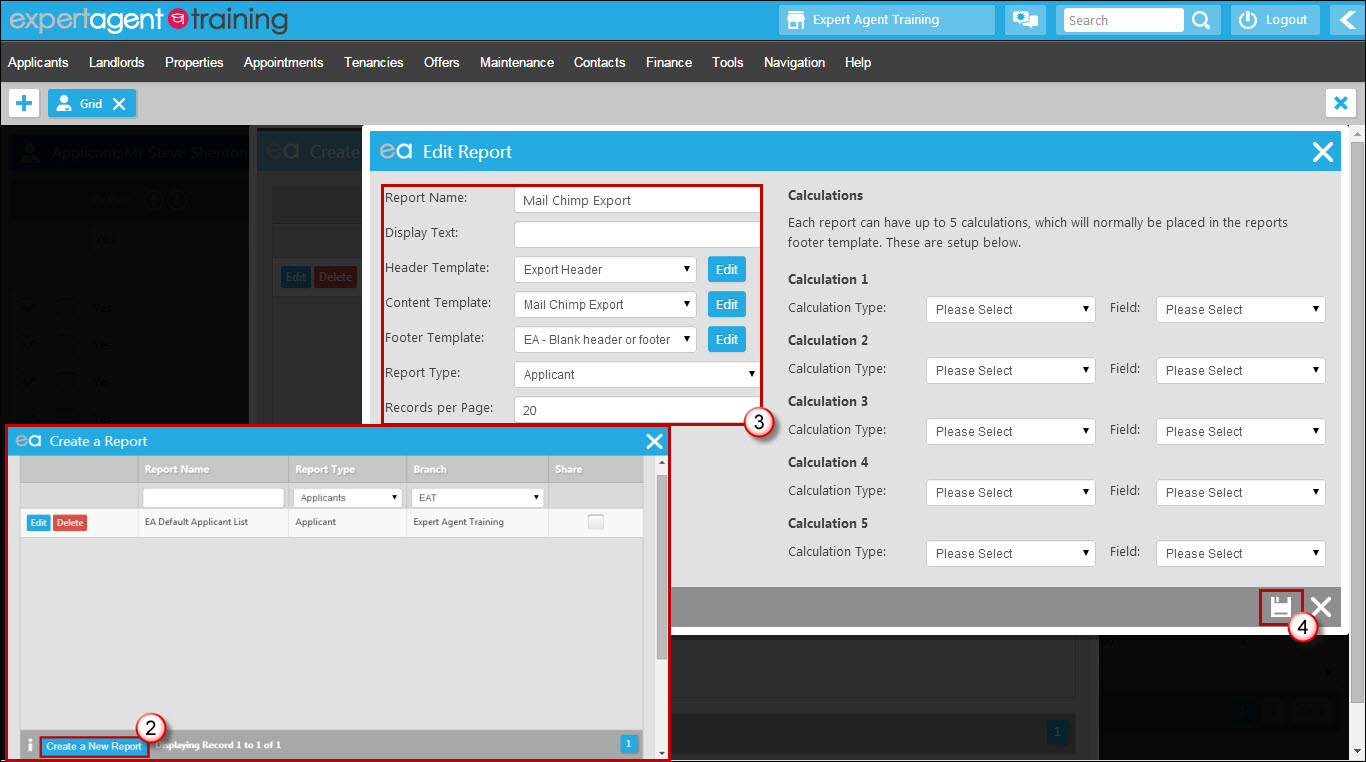
3. Name your report, choose either our Blank Header or Footer template or your 'Export Header' template as the header, your main report template as the content template (we called our example Mail Chimp Export) and choose the Blank Header or Footer template as the footer.
4. Click on the save icon.
Using the report/exporting your data
To run the report you open the applicant grid, filter the records to display the selection you require, right click and select 'Create Reports' (under Outputs). Select your report from the list. The following window will appear:
Run the report. The results appear in a separate window, like this:
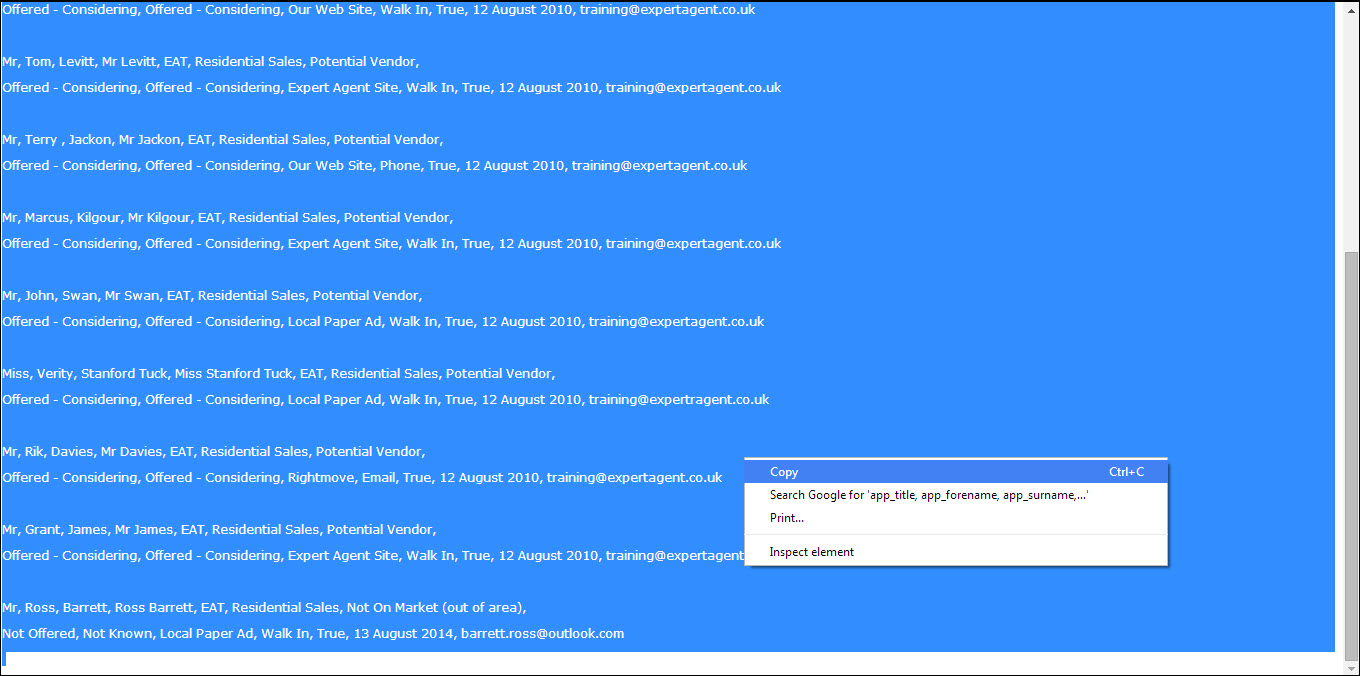
Copy all of the text and paste it into a Notepad document. Save it with a .csv file extension - so 'SeptApplicants.csv', for example. That’s your export file created!
If you need to add extra fields, edit the report item. If you have added a header with the field names, don’t forget to change it too.
Tel: 01225 303500 | Email: account.managers@webskyltd.com
Terms of Business | Cookie Policy | Privacy Policy | ZPG Modern Slavery Statement
Designed by the Expert Agent Design Department
