 Login
Login


How do I e-mail a brochure to a casual enquiry?
The best way to e-mail property details to a casual enquiry is using the Property Presentation tool.
This doesn't just send them the brochure, but the full property details. Once the email has been sent, it is recorded in Expert Agent. This ensures that you have accurate numbers when looking at how many people have been sent individual properties. If they are in the office with you, you can use the Property Presentation tool to actually go through the properties with them instantly on the screen - selecting in the process which properties you would like to then send.
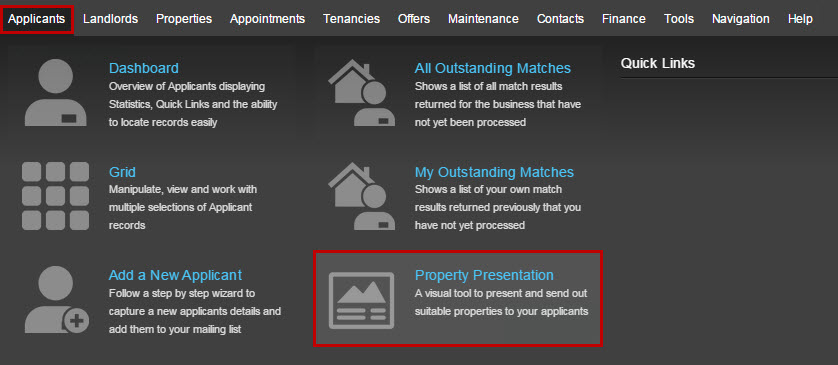
You get to the Property Presentation tool from the Applicants top menu:
This example assumes that the request for the details has come from somebody who isn't on your applicant list. If in doubt, you can check using the 'Find Applicant' box. The process differs slightly if they are already on your mailing list - see the What is the best way to quickly e-mail property details to existing applicants when they request them? FAQ for this.
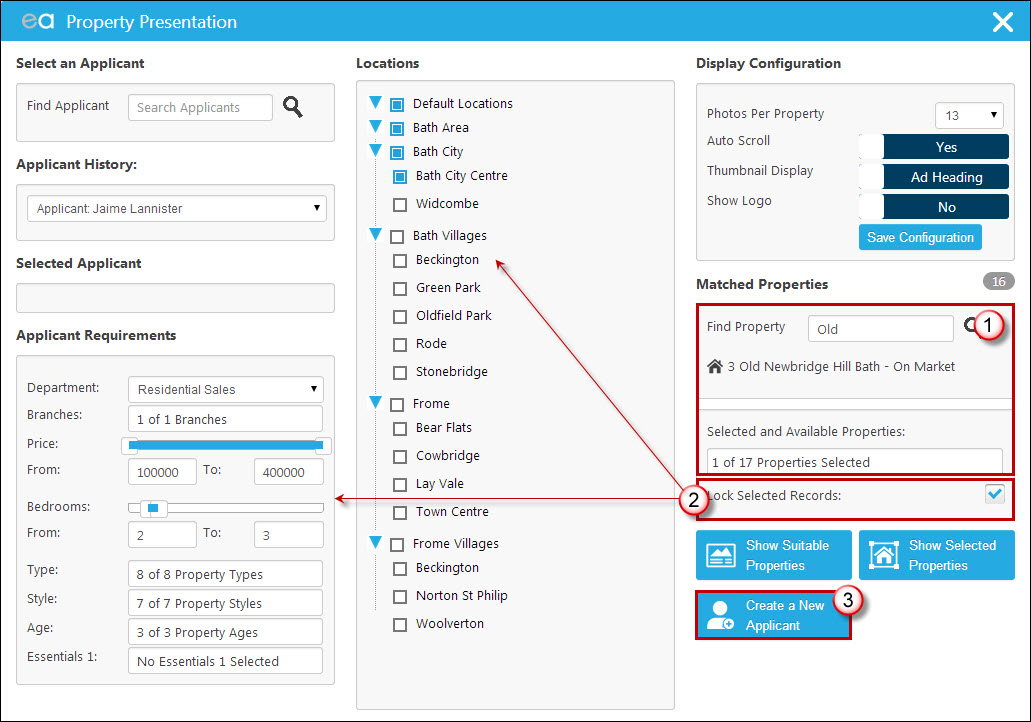
1. Select the property you would like to send them. It's likely they'll have given you the property address(es), in which case you'll be able to use the 'Find Property' box to search for the property. Clicking on the properties name when it appears underneath the search box will add it to the list in the 'Selected and Available Properties' section.
2. It is worth asking the applicant if they would like details of any other similar properties - they may not, in which case you would skip this step, however if they do you can edit the requirements on the left hand side of the screen and this will give you other properties in the 'Selected and Available Properties' drop down that you may wish to also tick. It is crucial that before you do this, however, you have ticked the 'Lock Selected Records' option on the right hand side so that you don't lose your manually selected property.
3. Click 'Create a New Applicant' to take their details.
The following window will open:
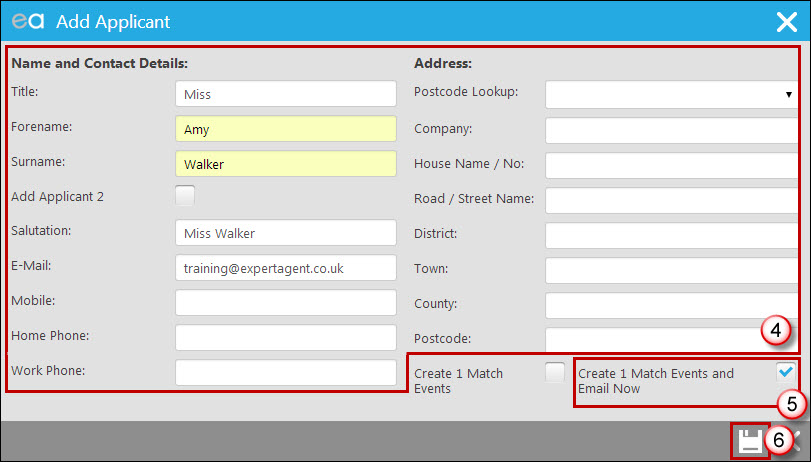
4. Either complete the whole wizard, or simply the name and e-mail address sections.
5. Tick 'Create 2 Match Events and Email Now'.
6. Click on the save icon.
Your standard match e-mail template will open for you to add a subject, and send.
The Property Presentation tool is not only brilliant for quickly sending brochures, but for visually displaying properties in your offices, using for matching and so on.
How can we set the default to 'Sales/ Lettings' when adding new applicants?
Within Expert Agent you are able to set a certain department as default, so that when you open wizards to add applicants, properties etc. they default to your most commonly used department.
This is something that has to be done by a super user as it is set from your configuration.
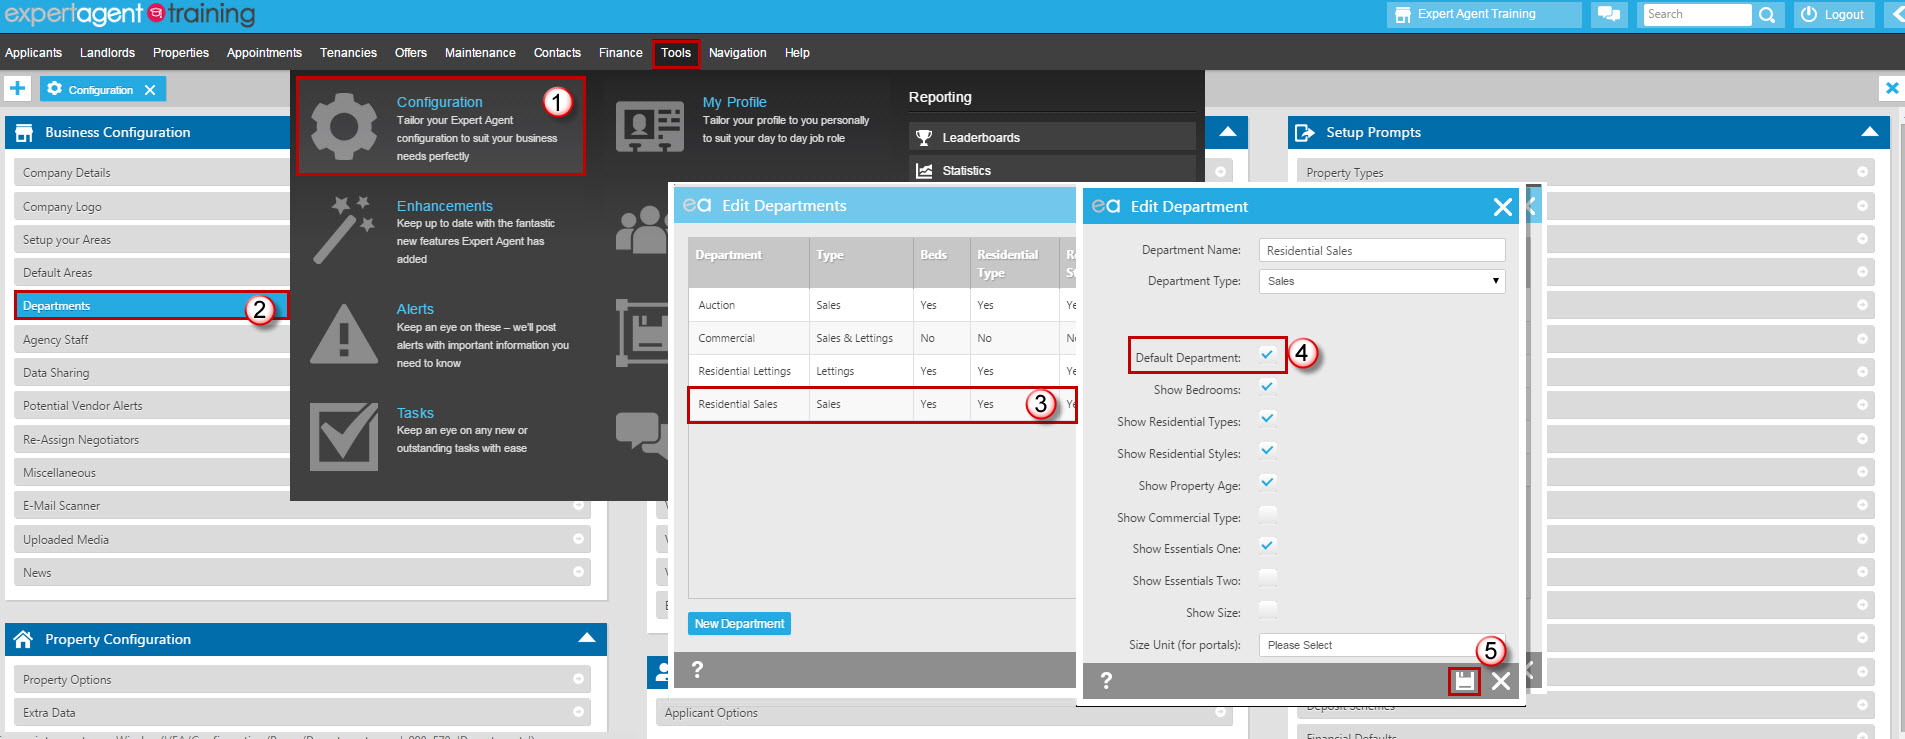
1. Hover over 'Tools' in the top menu and click on 'Configuration' from the drop down.
2. Click in to 'Departments' in the Business Configuration menu.
3. Click on the department you would like to set as default from your list of departments.
4. Tick the box for 'Default Department'.
5. Click on the save icon.
How do I send out a mass email to clients?
One of the common questions we face here at Expert Agent is how to send out a mass email to clients. Examples of this could be sending out a Christmas card/email, sending out invitations to an open house viewing or promotions of any kind.
In this section we will cover a step by step guide on how this is achieved.
Set up/Create an HTML Template
Your first step will be to set up/create an HTML template to send out. Help on this can be found in the HTML chapter of the manual.
Find the selection of records you require
Once you have your HTML template setup and ready to use, you will need to filter your grids to show the selection of records you wish to send your mail-out to. In this example we’ll use the open house example.
Filter your Applicant grid to show those records you intend to send the invitation to according to the specifications of the property. i.e. price, no of bedrooms etc. as shown below:
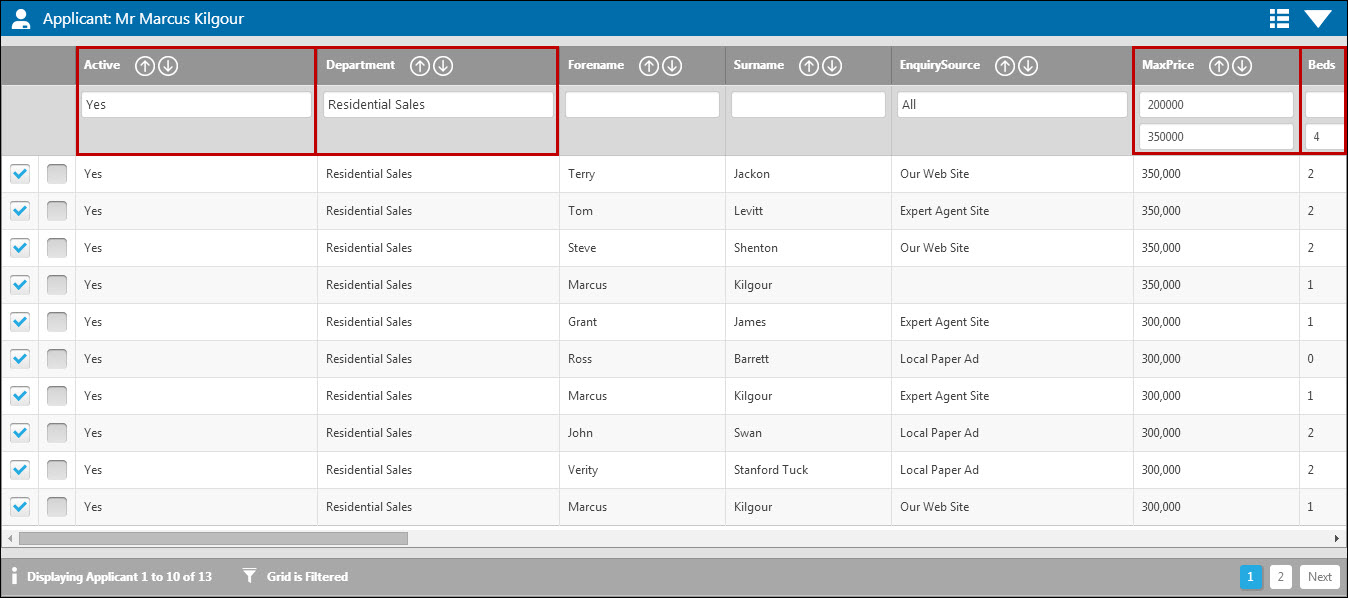
The grid is filtered to show only Sales Applicants looking for a property between £200,000 and £350,000 and a property with up to 4 bedrooms. After filtering, we have been left with 13 records to send the mail-out to.
Send the Emails
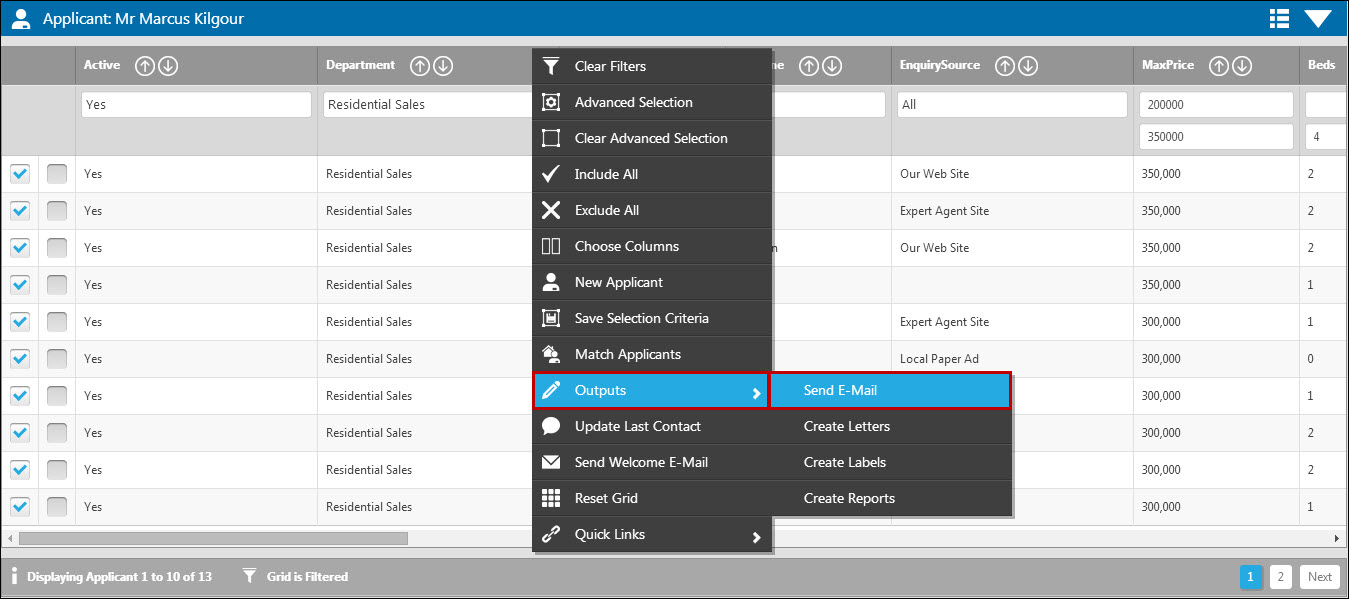
Right click on the grid to open the action menu, hover over 'Outputs' and choose 'Send E-Mail' as shown below:
You will be prompted with a marketing confirmation for you to confirm what time of email you are trying to send:

This action will present the template grid – click the template you wish to produce.
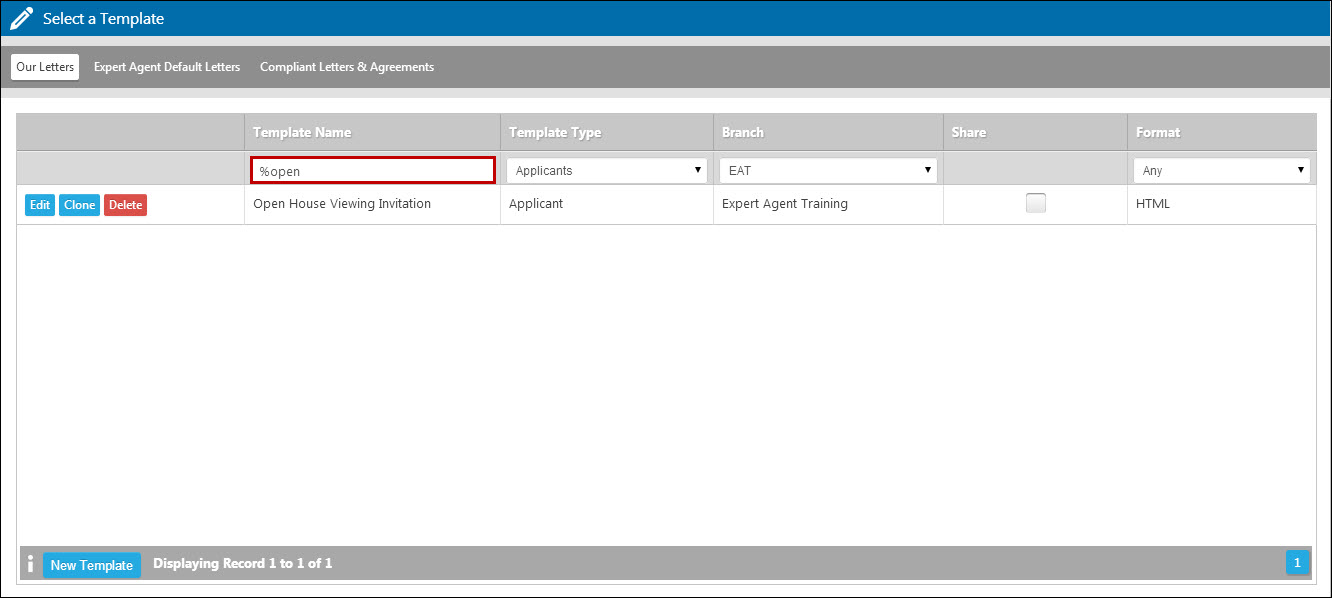
If you have numerous templates setup you may wish to filter the template grid in order to find to document you require - for example above, we have searched for the word 'open' as part of the template name. When you find the template in the list, click on it to produce it.
The following message will appear:

Click Yes to add attachments, or No to send the email straight away.
The email will send to those records set up with a valid email and who are set to receive the type of email you specified (i.e marketing/non marketing). Please see here for more information on what constitutes a marketing email. And here for more information on managing consent for your clients.
A message will appear confirming the number of messages that have been sent.
How do I remove an applicant from the system?
Due to the changes in GDPR you can now deleted Applicants yourself from Expert Agent. Please see the GDPR Deletions Applicant section of the manual for more information.
Please be aware this is a Staff Permission so you will need to make sure that you have the correct Permissions set before you can do this.
Tel: 01225 303500 | Email: account.managers@webskyltd.com
Terms of Business | Cookie Policy | Privacy Policy | ZPG Modern Slavery Statement
Designed by the Expert Agent Design Department
