 Login
Login


Expert Agent Mobile
Mobile Expert Agent Mobile was launched in June 2016.
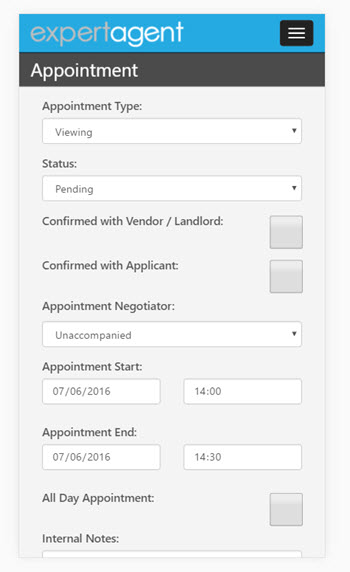
It is designed to get you out of trouble whilst out of the office by giving you access to important data. You can check your appointments and your tasks. You can look up vendor or applicant details and you can log file notes, send emails and texts. It isn't designed to let you run your businesses on it. If you are serious about working remotely, you need to use a laptop or tablet.
To access Expert Agent Mobile, just point your mobile's Google Chrome browser at:
http://mobile.expertagent.co.uk
Use your normal Expert Agent Login and Password
More Info:
Expert Agent Mobile Intro Video
Expert Agent Mobile Intro Video
Browser Choice
You should use Google Chrome - it will probably work in Apple's Safari but we've not tested it. We have tested it on Windows Mobile which won't run Chrome. The Windows Mobile Edge/Internet Explorer browser seems fine with EA Mobile.
User Names and Logins
Logging into Expert Agent mobile kicks you out of Expert Agent itself so take care!. When you log in, it checks for the total number of subscriptions in use - if you have 5 subscriptions, 5 of you are logged in at the office you won't be able to get into Expert Agent Mobile whilst out and about.
Enhancements and Bugs
To Log an Enhancement or Bug Fix Request on Expert Agent mobile, please click here and fill in the details requested
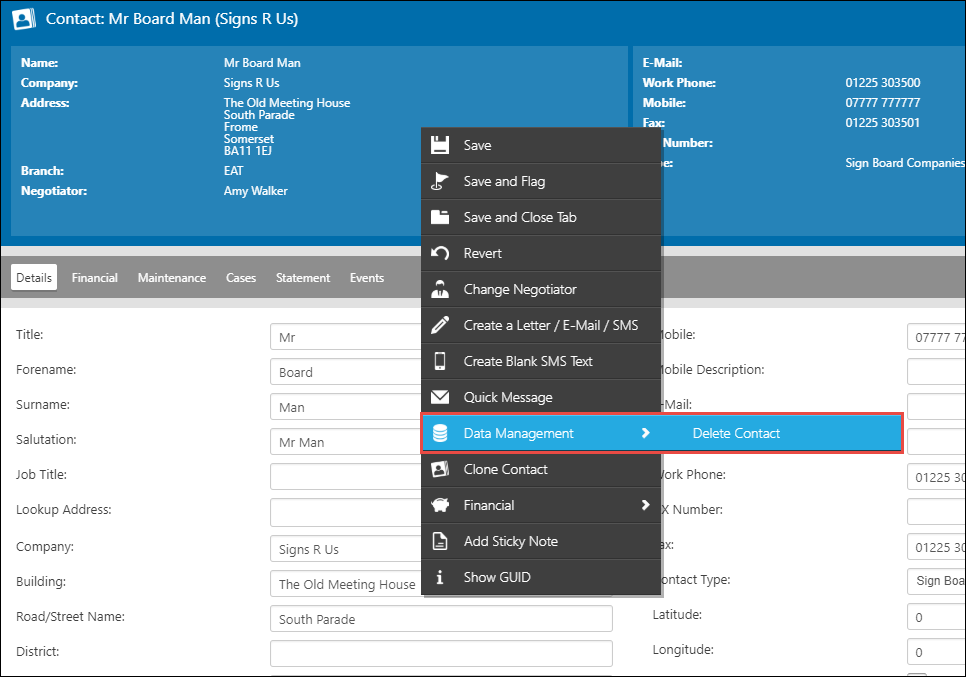
How Do I Delete A Contact?
Due to the changes in GDPR, you can now delete contacts from Expert Agent if they do not break the Data Retention rules (Data Retention Configuration).
On the Contact Record -> Right Click -> Data Management -> Delete Contact
Please see GDPR Deletions Contacts for more information.
Lettings Bookkeeper Support
Before we launched our Lettings Financial functionality, your support tickets related to "things that should work but wouldn't" and questions that started with "how do I.. ?". That's why we split our support team into the technical specialists who dealt with the former and the ex-estate agent product specialists who dealt with the latter.
Increasingly, though, we were being asked to provide bookkeeping support. Your requests ranged from help with simple mis-postings at one extreme to help with reconciling for ARLA inspections or ROPL-01 reports at the other. It became clear that we needed a separate team to deal with this.
Lettings Bookkeeper Support from our qualified, experienced lettings bookkeepers is £50+VAT per month per branch and that guarantees one hour of one-to-one advice and help in any month. In many cases, the help will be in the form of booked sessions where we share a screen with you and work on the issue together. Simpler issues will be dealt with in the normal way via the support ticket system. Our Bookkeeper Support team prioritise their response based on the priority you give to each ticket logged. They are nice people and don't "clock" each bit of help they give you. So, as long as you've paid for Bookkeeper Support, they'll often go beyond the call of duty. We guarantee an hour but there's a bit of "fair usage" flexibility here.
If you don't want the regular commitment, we can sometimes offer the same service in one hour blocks at £75 per hour - subject to availability.
The test we apply to deciding whether we can provide support for a matter when a customer doesn't have our optional Bookkeeper support is this:
If we're being asked to help with processes and functionality in general terms, we're happy to help without the need for the additional, chargeable Bookkeeper support. So, if you want advice on how to do a bank reconciliation or the best way to process your ARLA or NRL reports, we're happy to help as part of your standard support contract.
Here's an example of the type of ticket we can solve WITHOUT the need for Bookkeeper support:

However, if you want us to look at individual transactions, nominals, ledgers or reports, you'll need help from one of our bookkeepers and that help is only available if you have the optional bookkeeper support.
Here's an example of the type of ticket we can only resolve WITH the agency in question having subscribed to Book Keeper Support.

You can sign up for Bookkeeper support via an email to This email address is being protected from spambots. You need JavaScript enabled to view it. or put your request in a support ticket. We'll just start to bill your direct debit in the usual way.
If you have any queries, please call our customer service team on 01225 303500 option 2.
Please vote for us - You might win an iPad Pro
We'd really appreciate your help.
Our lovely Members kindly helped us win Supplier of The Year in 2013 and 2014.
We received over 1000 votes both years and our total score was well over 95%. You also left over 300 marvellous comments.
Last year, despite similar numbers of votes and a similar score, we were beaten into 3rd place by businesses that received far fewer votes (we believe one had just 25% of our votes) but with a fractionally higher average score.
So, we'd be very grateful if you would vote for us - just click here or click the big purple box and, if you feel able, please give us top marks! Thank you for your help!

You could win an Apple iPad Pro worth £899

The iPad Pro is Apple's latest giant iPad. It has a 13" screen (the iPad Air is a 10" screen), a faster processor, better graphics... All of us here would love one! If you win, we'll ship you the wifi and 4G version so you can use it for presentations on valuations or just to watch The Martian in super HD.
We're going to give one away to a random voter and if we win Gold, we'll give another one!
Tel: 01225 303500 | Email: account.managers@webskyltd.com
Terms of Business | Cookie Policy | Privacy Policy | ZPG Modern Slavery Statement
Designed by the Expert Agent Design Department
