 Login
Login


Why haven't I received the Viewing Request email?
As of December 2015, the Viewing Request emails that are logged by the Applicants from the Welcome, Weekly and Match emails are no longer being sent out by our servers.
We are currently looking at a fix for this so that these emails are once again sent to the Agency email address.
In the meantime, you can use the Pending Viewings quicklink (located on the Appointments Dashboard, Appointments Quicklinks Pod on your Homepage or the Right Hand Tool Bar).
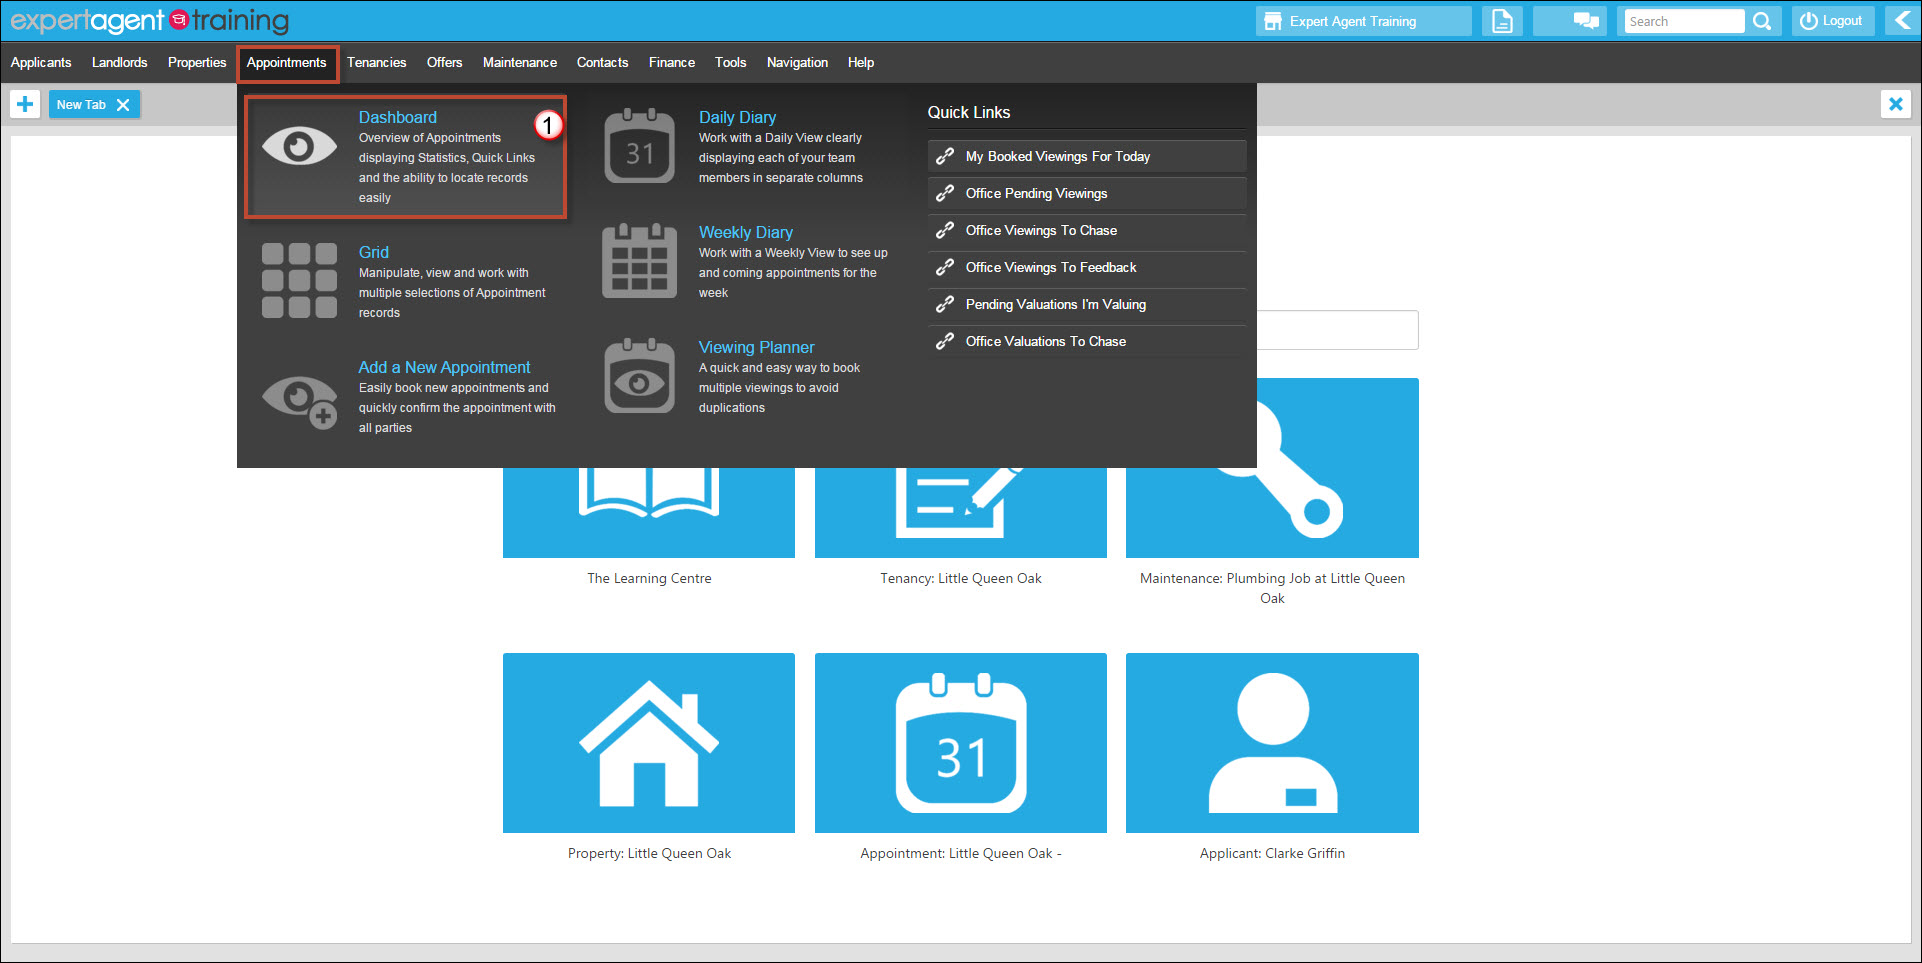
1) Hover over Appointments in the top menu and select Dashboard from the drop down.
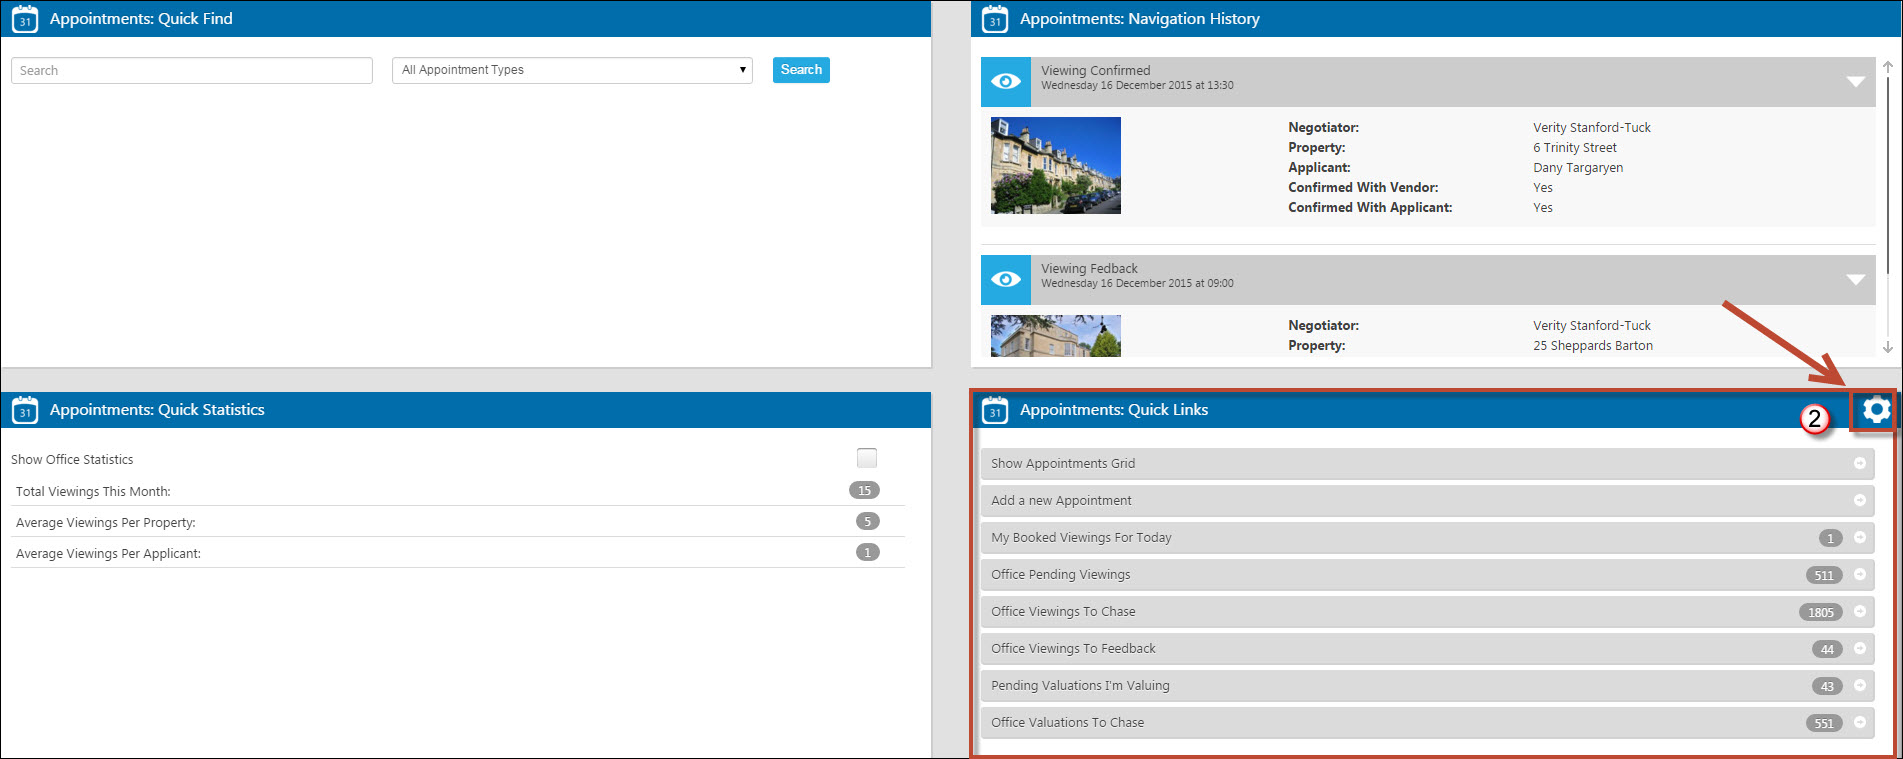
2) Click on the Cog icon from the Quick Links pod (bottom right hand corner)
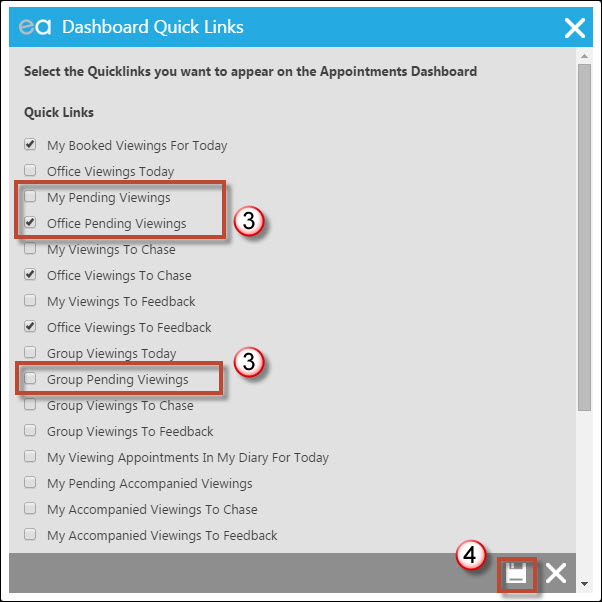
3) From the list of available Appointment quicklinks, select either My (your own viewings), Office (the entire office - advisable as Viewing Requests come in as unaccompanied) or Group (the entire group if you are part of a multi branch firm).
4) Press Save. This will then appear on the Dashboard, the Appointments Quicklinks pod on your Homepage and the Appointments drop down as well.
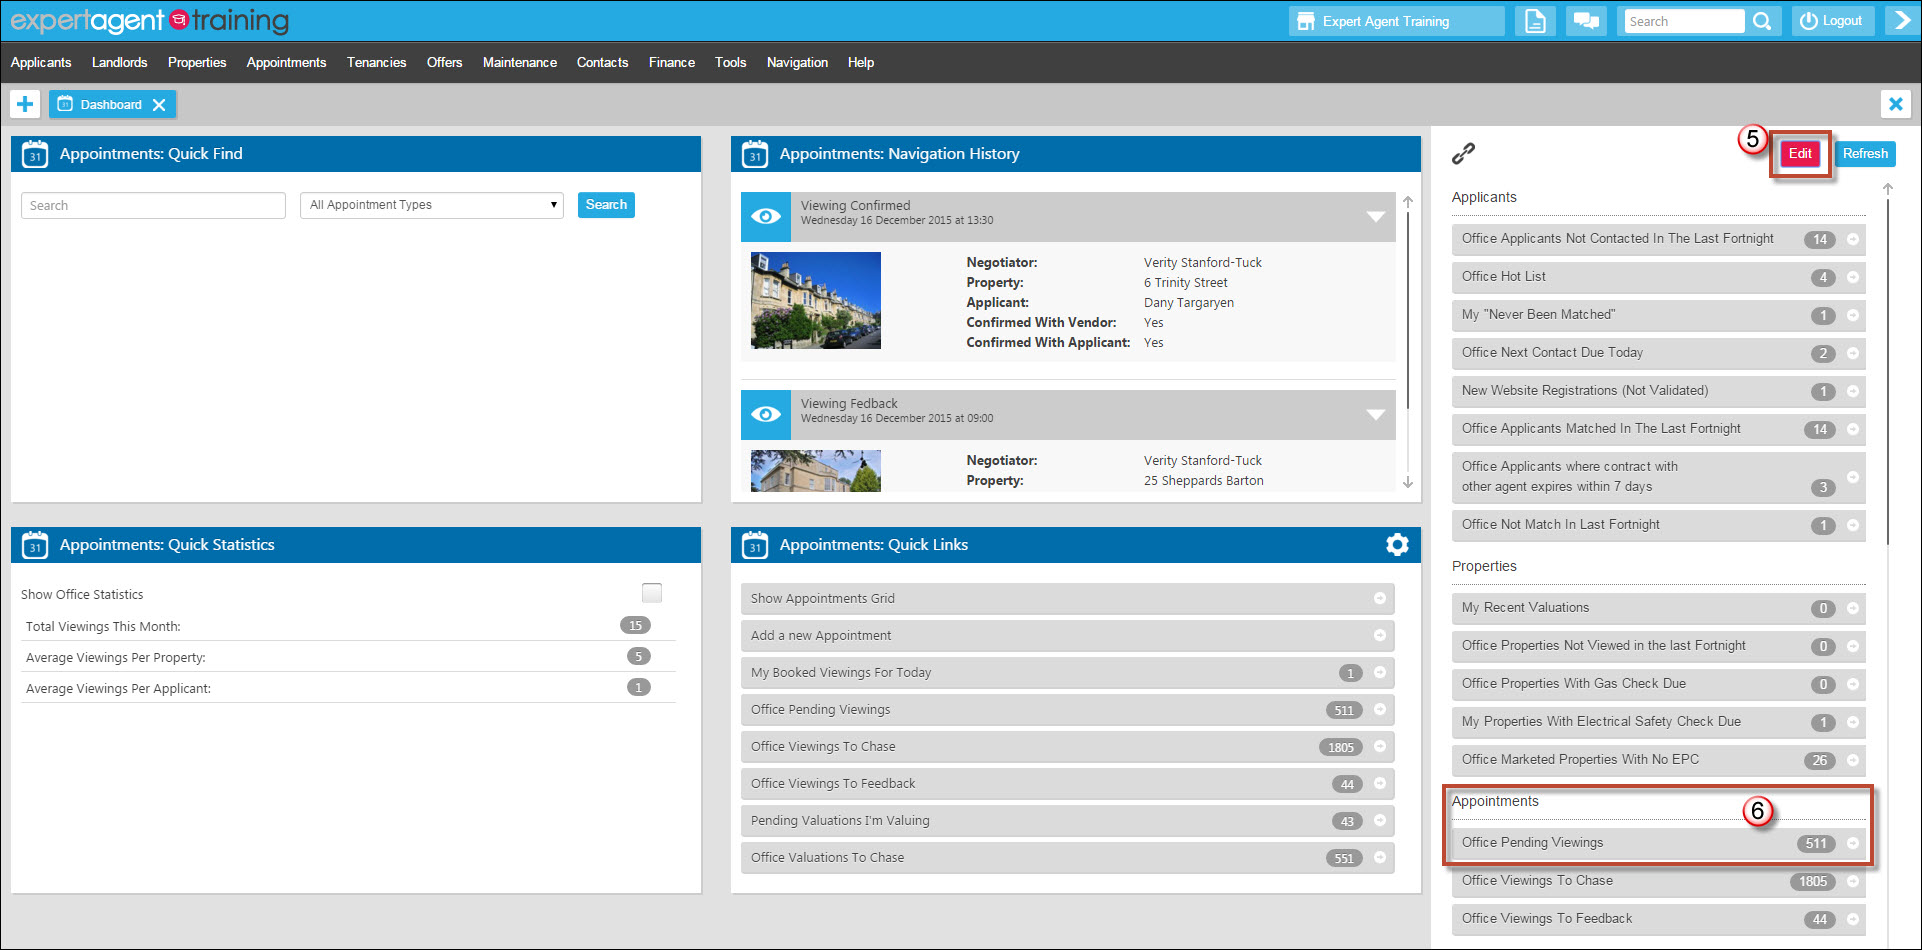
5) You can also have the Quicklink on your Right Tool Bar as well. Open the Tool Bar and press the Edit option.
6) Scroll down to the Appointments section and select the relevant Quicklink. and then Save. Once Saved it will then appear in the Right Tool Bar.
This FAQ will be updated once this has been fixed.
Add Me to Training
We recommend when you are doing all training sessions that you use the Expert Agent Training Account. This account is there for you to practise as much as you need without upsetting your own live data. You can add Tenancies, Offers, Properties, run Matches, put Properties on the Market, all with the knowledge that you are not going to be doing it in your live data and affecting statistics etc.
To log into the Training Account:

1) Go to Tools in the Top Menu and select "My Profile" from the drop down.
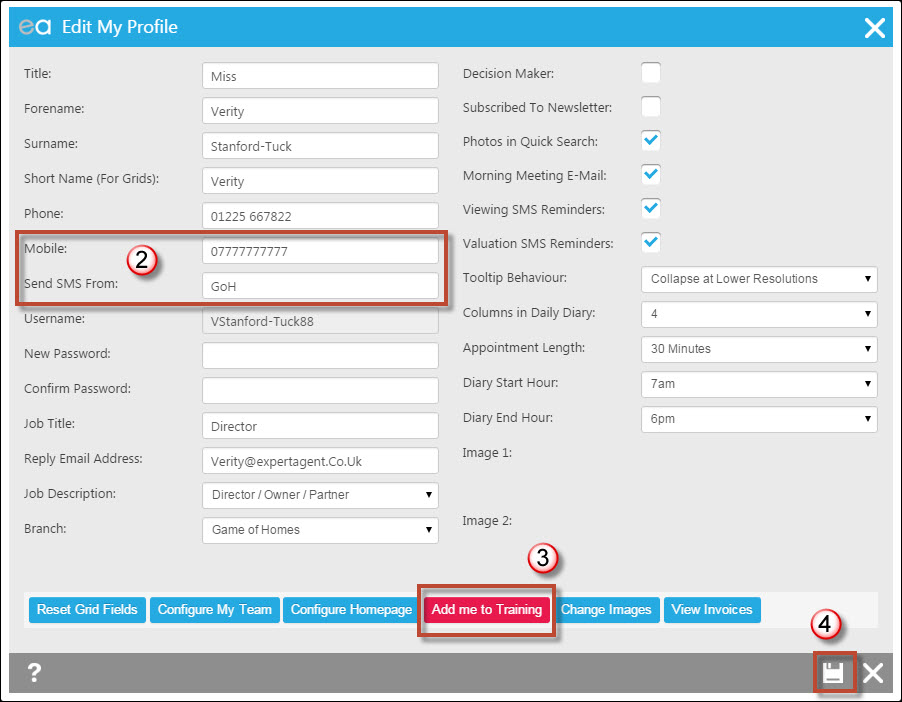
2) Make sure these two fields are filled in. The rest of the fields here are discussed in Personalising your Staff Profile
3) Click the "Add me to Training" button.
4) Press Save.
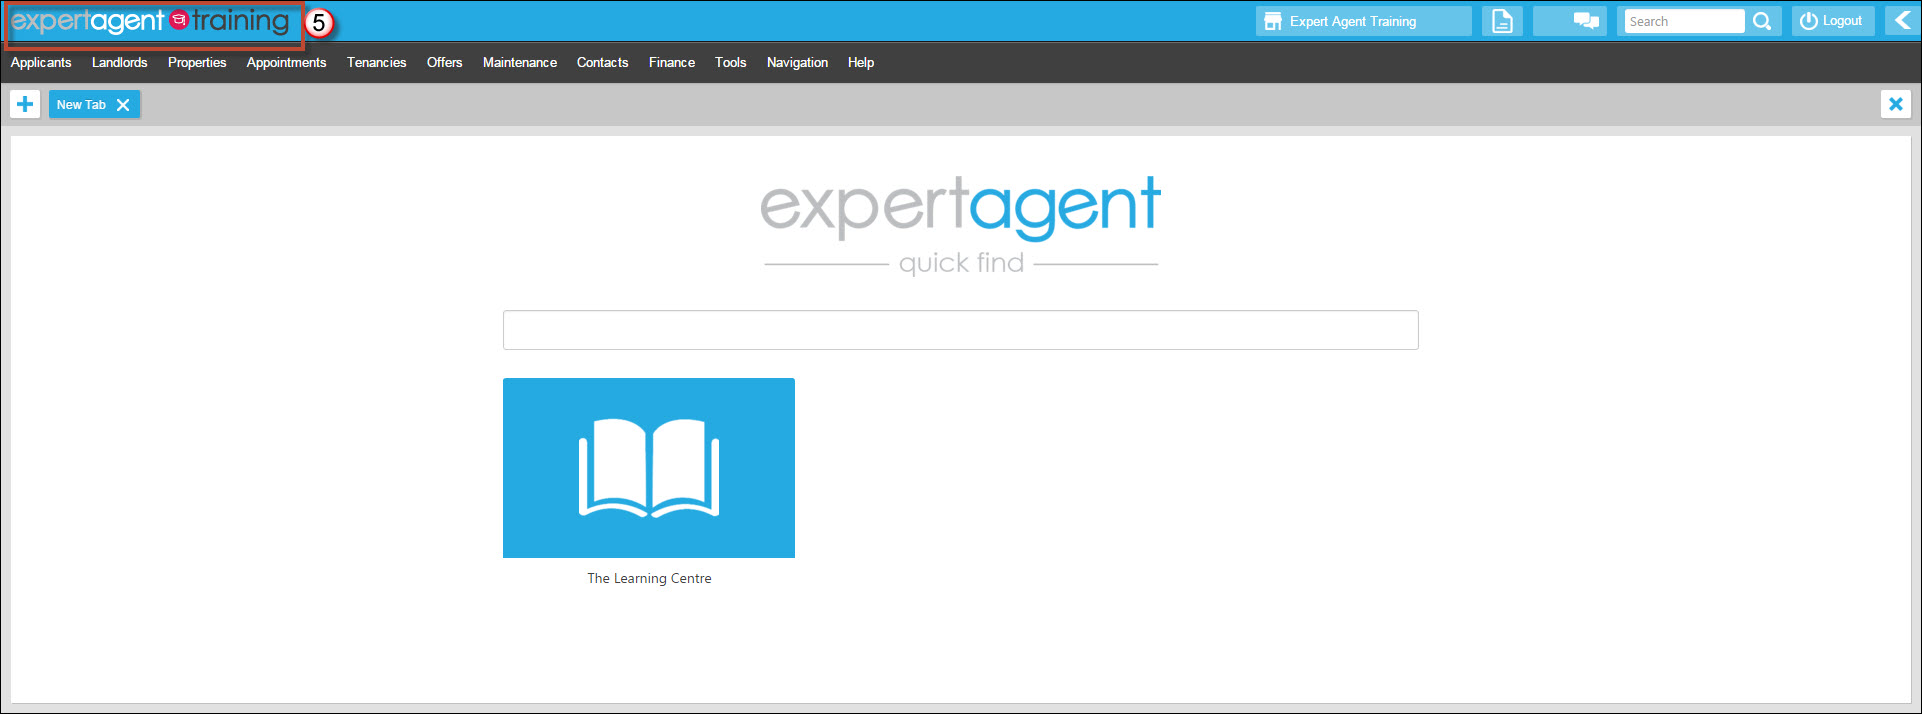
5) Make sure you are seeing the Training Logo in the top left hand corner.
To Remove yourself from Training, follow steps 1 - 5 (the button will say "Get Out Of Training" instead).
N.B STEP 2 ABOVE IS VERY IMPORTANT OTHERWISE YOU WILL NOT BE ABLE TO GET INTO THE TRAINING ACCOUNT

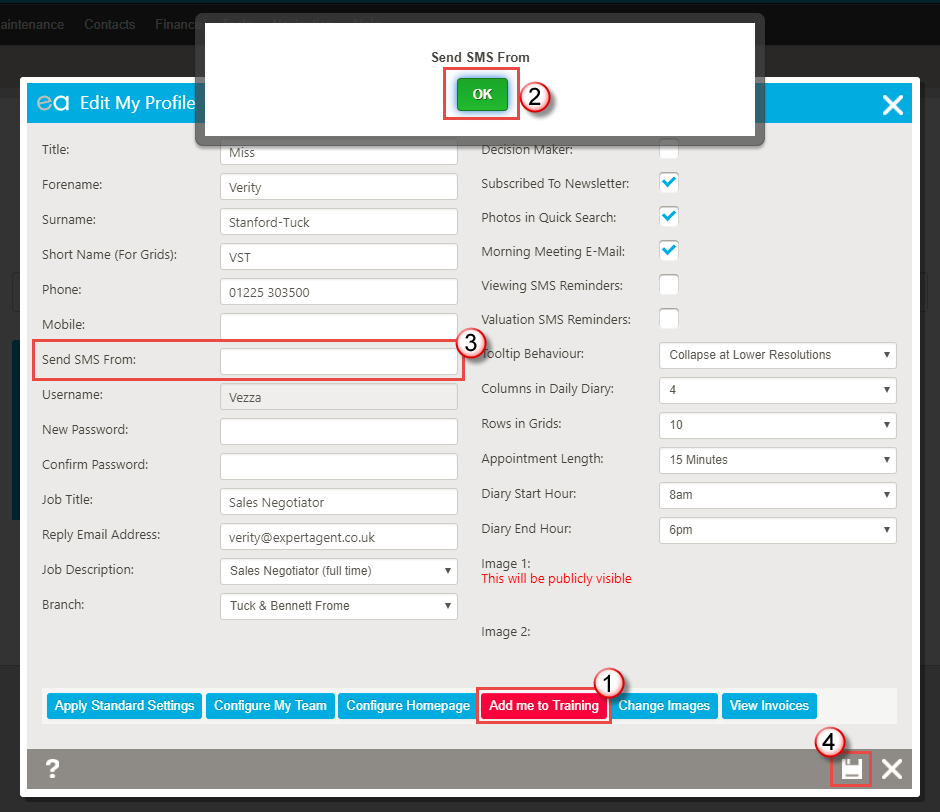
- Click on "Add Me To Training"
- If this pop up appears, press Ok
- Add something into this field, dashes will do until you know if you are sending text messages as a business or not
- Press Save. Re-Open your staff profile and try again.
Why are there landlords with negative balances showing in my landlord payments section?
You may find when using the landlord payment area that you have some landlords who show as having a negative balance. They will appear as a red row.
Any landlord who has "Property Received Funds" will be shown on the Landlord Payments (Paying Landlords) screen whether they have outstanding transactions or not. The red row indicates that there are outstanding invoices which are greater than the funds that have been received. If a landlord has had outstanding transactions which are less than the funds received, the landlord will be indicated lower on the page in blue.
You still have the option to pay a landlord who is marked in red, as you would just select the funds which you would like to pay under the landlord and not select any of the outstanding invoices.
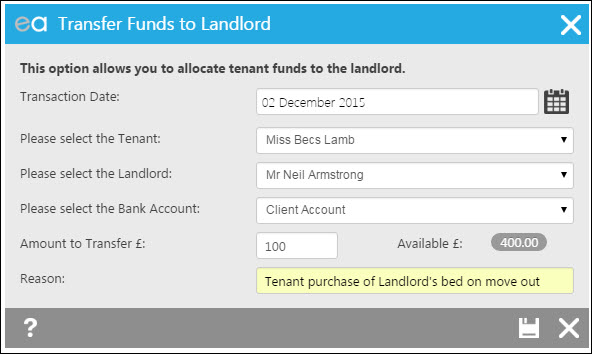
Transferring funds
There may be occasions when the landlord may need to pay the tenant during the tenancy. Alternatively the tenant may need to pay the landlord for expenses that are not related to you as an agency and are not rent. You may be asked to facilitate the transfer.
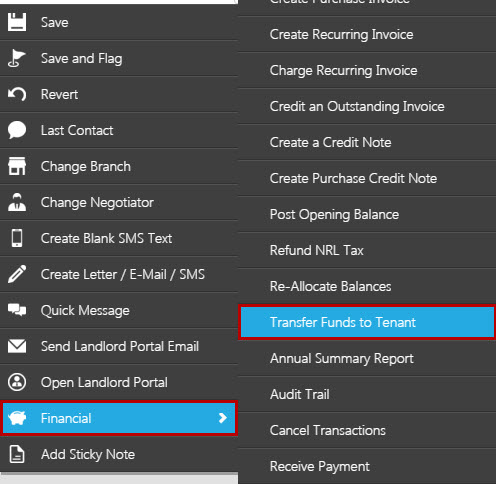
You can therefore via the financial sub menu on the right click action menu transfer funds from Landlord to Tenant and visa versa.
A key example of when you may use this is if the tenant has paid a contractor on behalf of the landlord and therefore the landlord owes the tenant.
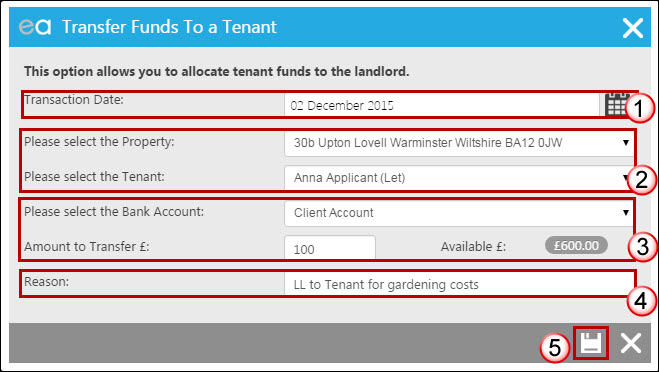
- First select the date you wish to use for the transaction.
- Select the property from which the funds will be allocated from together with the tenant listed in the drop down. (All tenants will be listed whether current or expired)
- Select the bank account and amount you wish to transfer.
- State the reason why you are transferring the funds - this will be displayed on the statement for both as below.
On the landlord statement showing as a Charge:

On the tenancy statement showing as a Receipt:

Alternatively if a tenant was purchasing an item of furniture for example from the landlord you may wish to use the transfer funds function to show this from tenancy to landlord, again found in the right click action menu.
Tel: 01225 303500 | Email: account.managers@webskyltd.com
Terms of Business | Cookie Policy | Privacy Policy | ZPG Modern Slavery Statement
Designed by the Expert Agent Design Department
