 Login
Login


GDPR
As of May 25th 2018 the new regulation of GDPR comes into force. If you are in any doubt how this regulation will affect you and your business, please see the ICO website.
We, at Expert Agent, have made changes to the software to enable you to be compliant with the regulation.
The articles below will show you the changes made to Expert Agent.
GDPR Personal Information Requests
GDPR Consent
Ahead of the introduction of the General Data Protection Regulations on May 25th 2018 we have added new features to help you comply.
Below is a short video that will take you through the changes we have made within Expert Agent.
Article Contents
Applicants
When you add a new applicant via the Add Applicant Wizard, you'll see a button on the Details tab called Applicant Preferences. You can click it to launch the below screen, but this will pop up automatically if you click Next or Save in the Wizard. Fill in all of the options, then work through the rest of the wizard as usual.
N.B Under all of the options you have Yes, No and I Did Not Ask. I did not ask is NOT specifically for your Super Users to see who isn't asking that question, more of a way of answering if you didn't explicitly get a yes or no from that Client. If, for example, you spoke to them on the phone then added them in later and forgot to ask whilst on the phone. You can change this at any point.
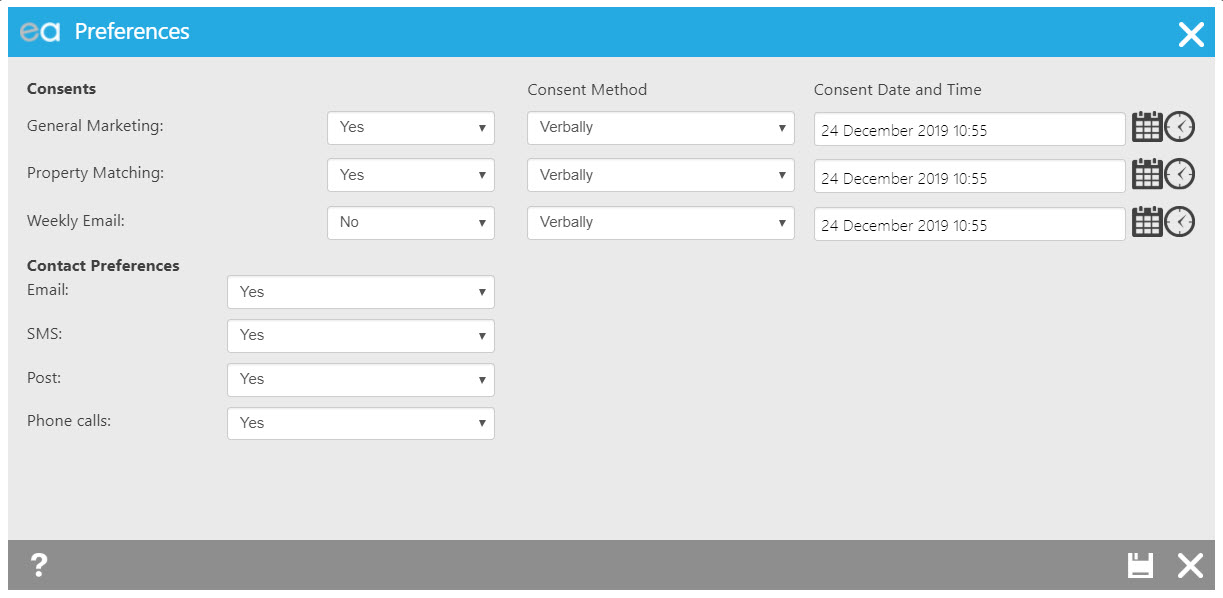
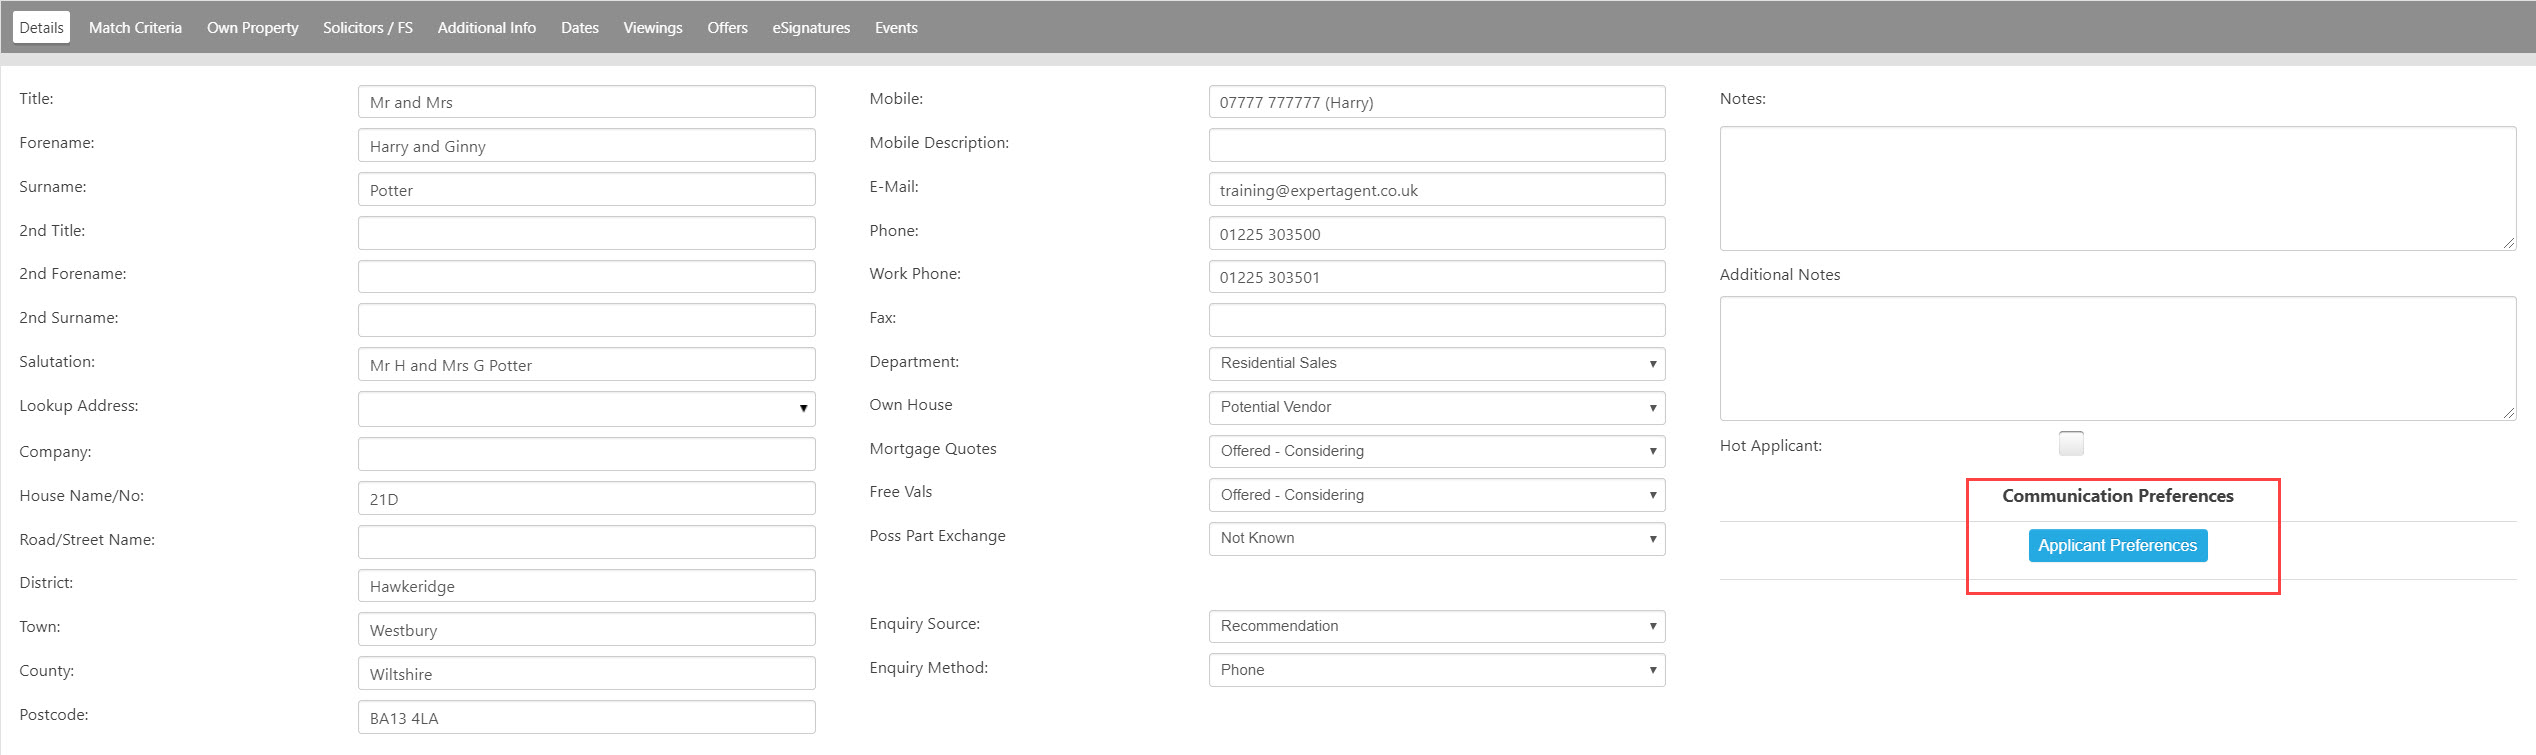
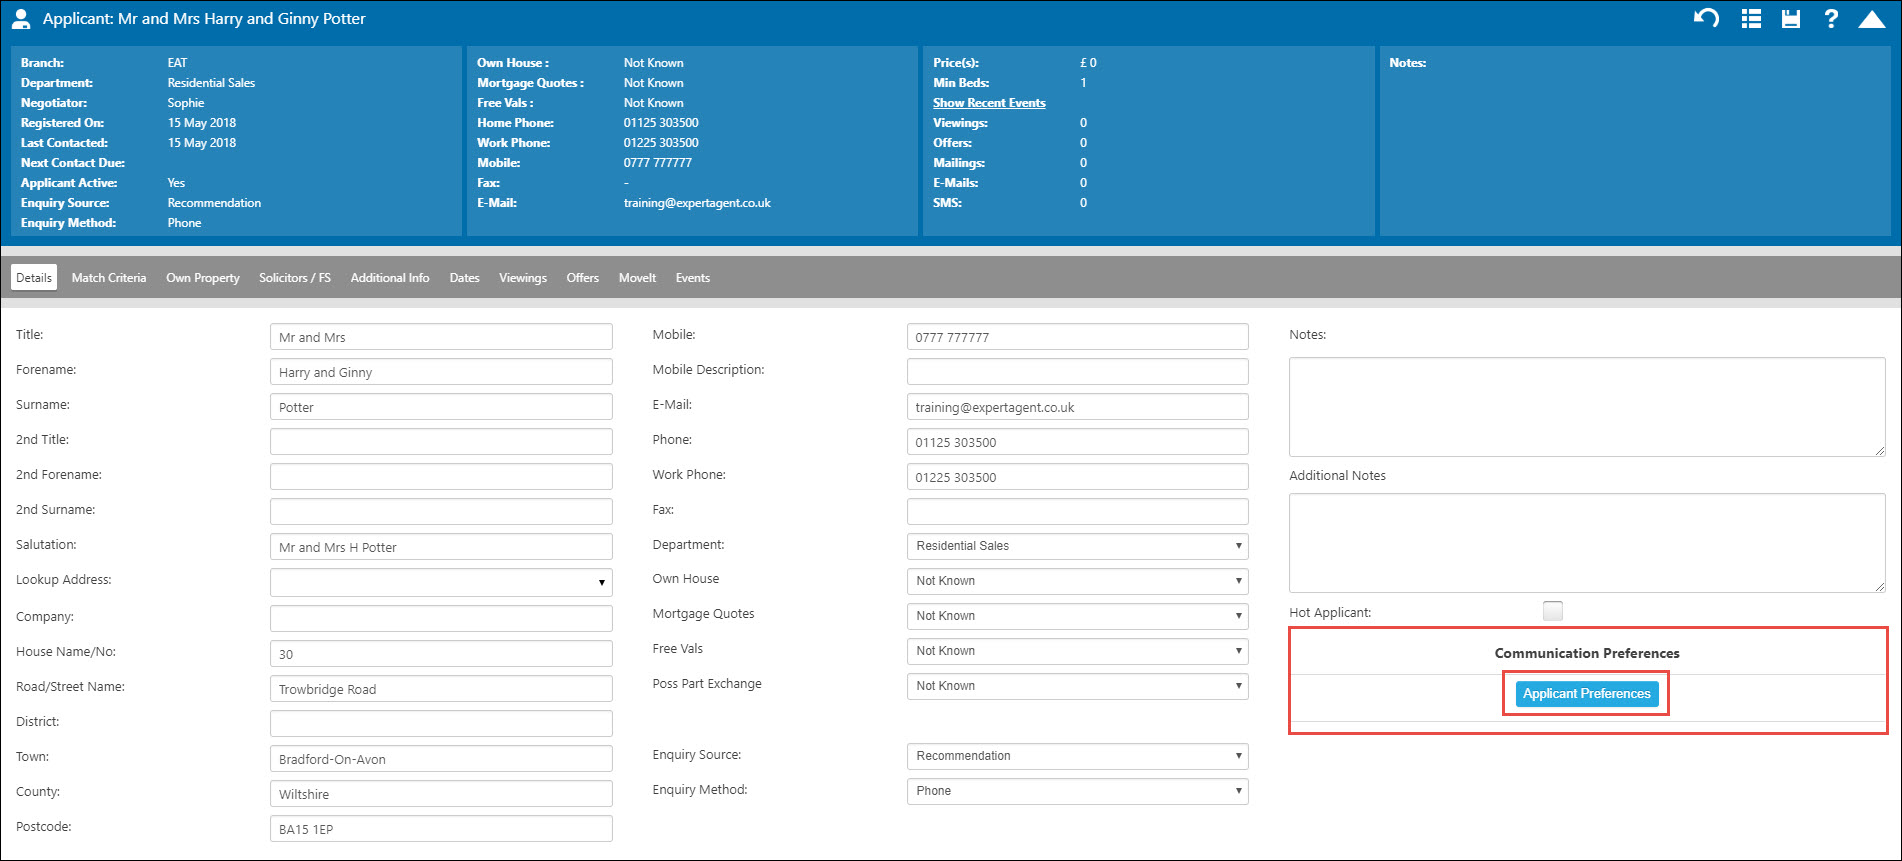
To access these options on an existing applicant, you'll see the Applicant Preferences button on the Details tab of their record. By default, all of their Consents will say Please Select, except if they had previously opted out of the Weekly Email then that option will say No.
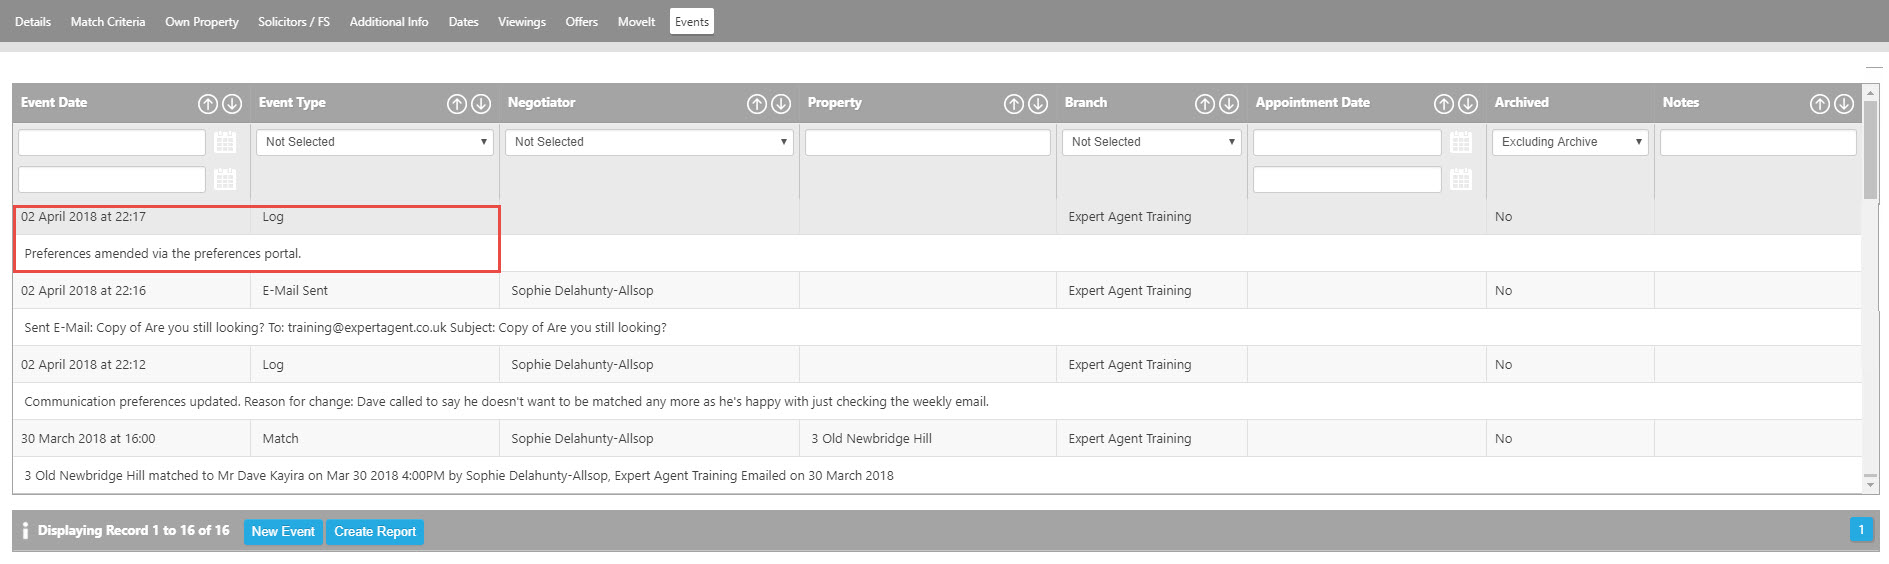
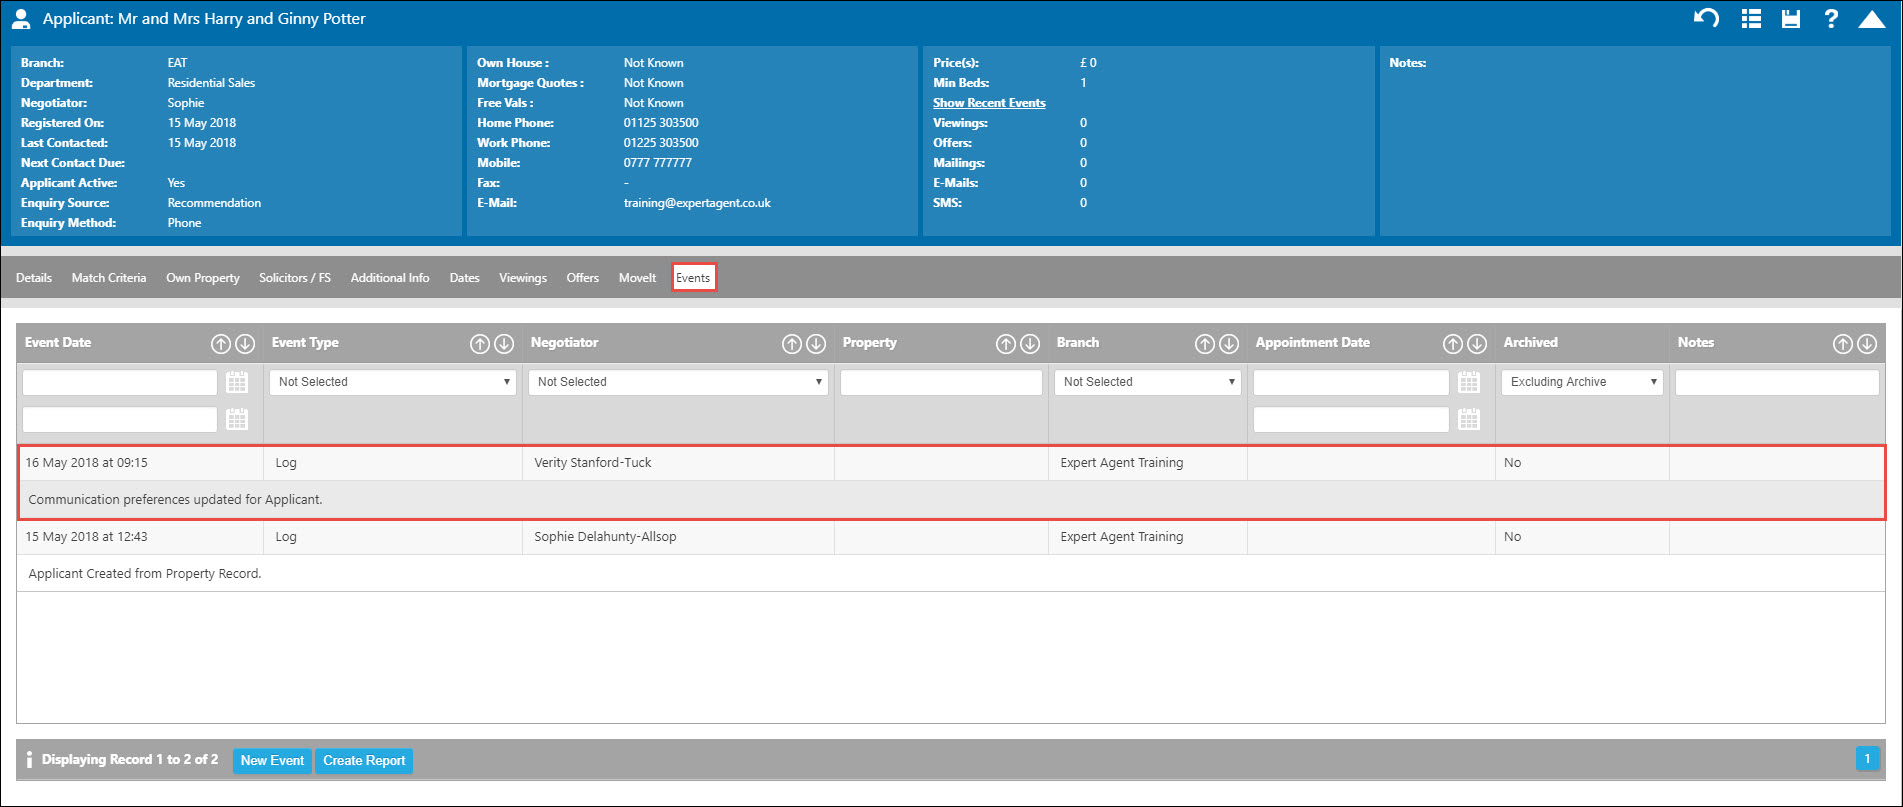
Anytime you update their consents, an Event will be created on the applicant record.
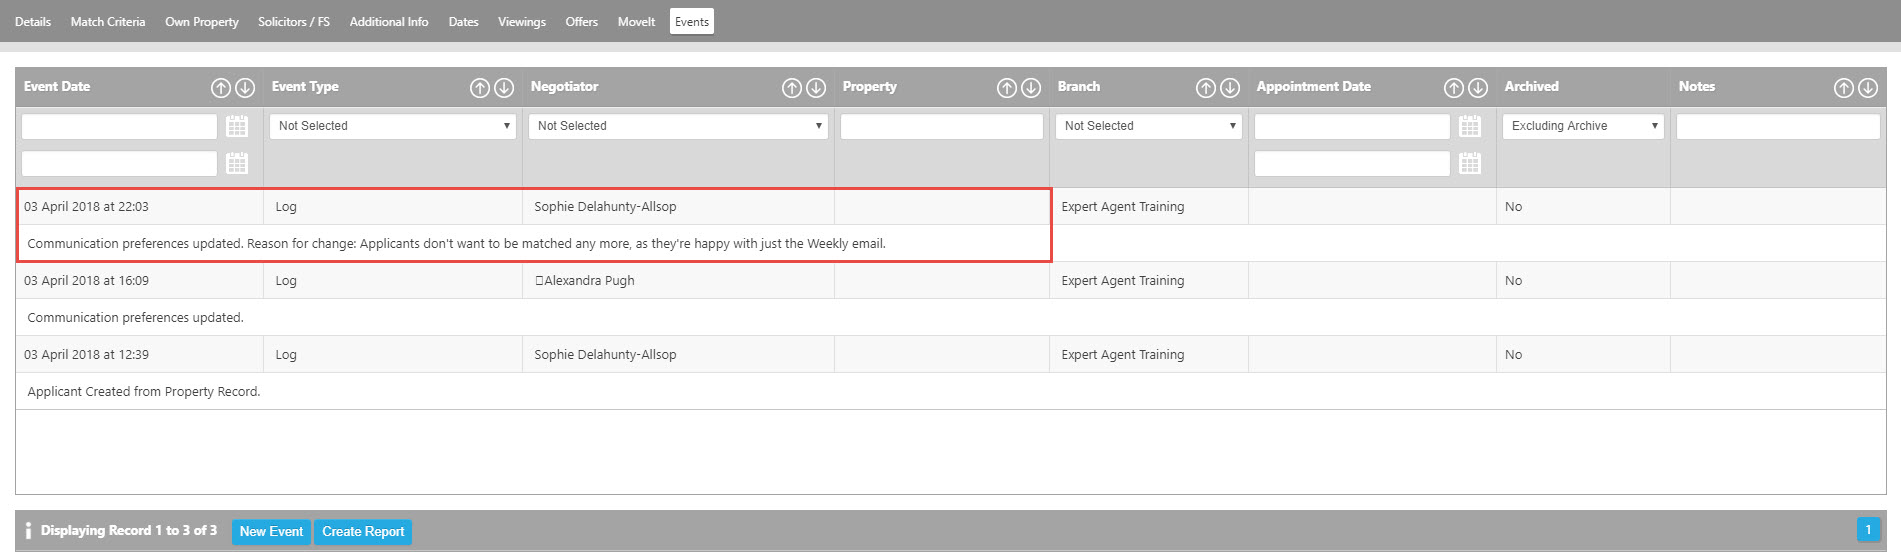
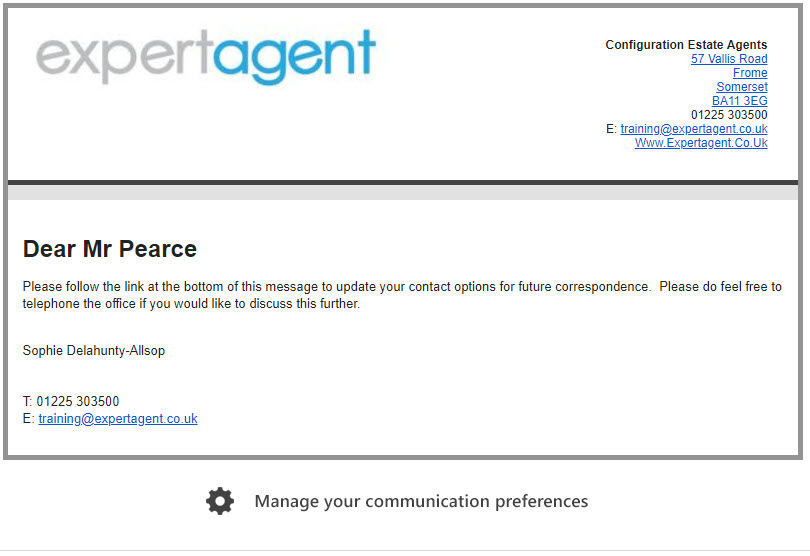
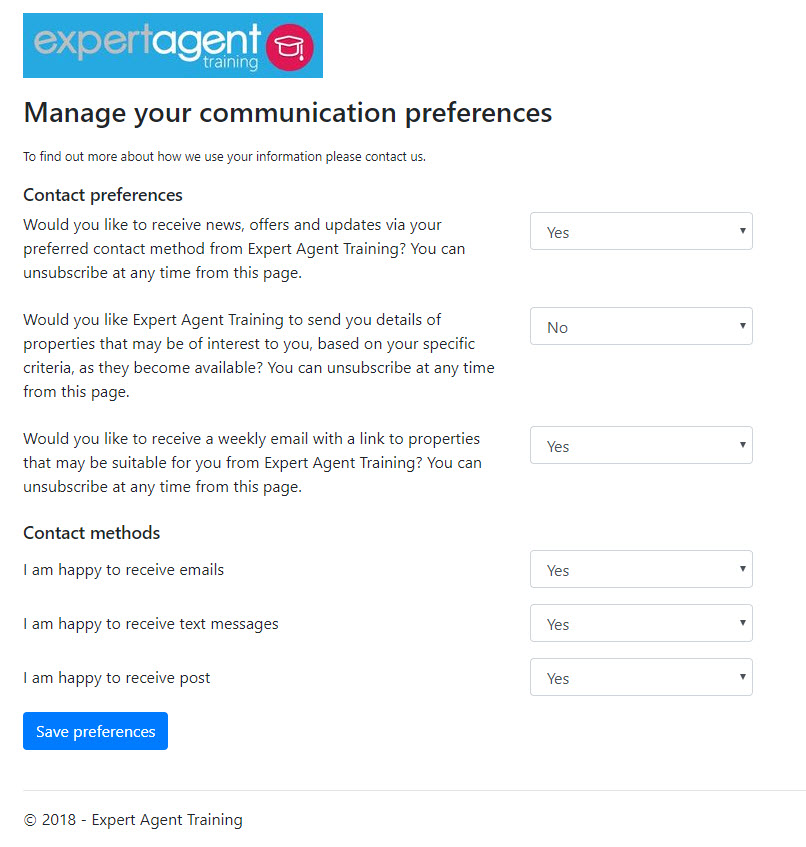
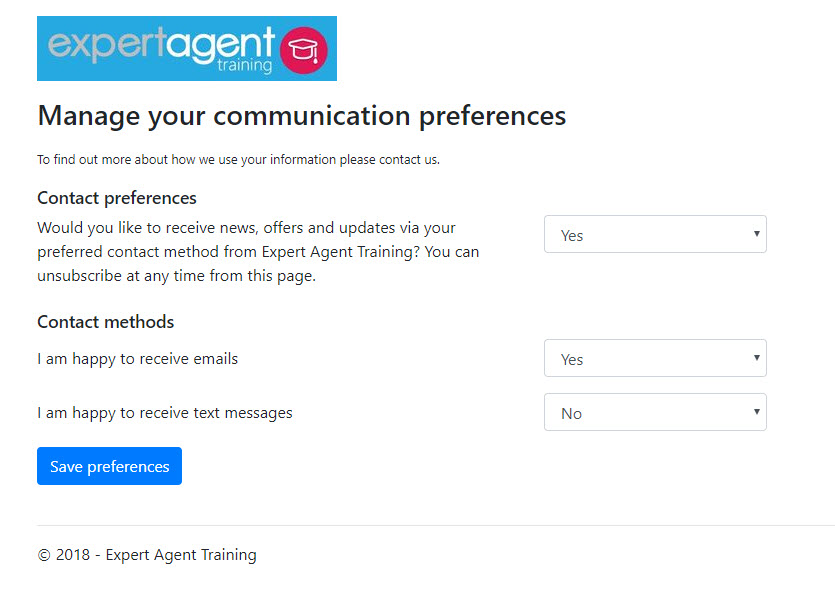
Any emails which you send the applicant will have a link at the bottom to a dedicated portal allowing them to update their own preferences. If an applicant makes any changes via the portal, an event will be added to their record in Expert Agent to notify you of the changes.
N.B WHEN SENDING AN EMAIL WITH AN OPTIONAL CC, THE EMAIL THAT IS SENT TO THE CC'D PARTY WILL NOT INCLUDE THE COMMUNICATION PREFERENCES FOOTER
To help you work through all of your existing applicants, we've added some QuickLinks
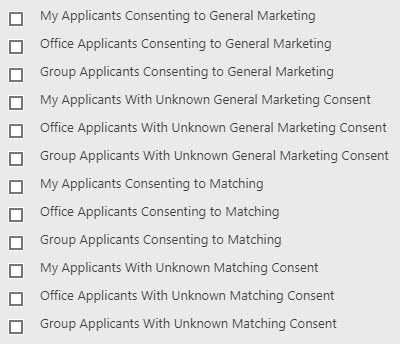 .
.
There are also new columns available in your grids, so you can filter records and make your own Saved Selections.

When you look to send bulk emails or SMS from the applicant grid, you will see the following pop up asking which consent options you would like to apply before sending.

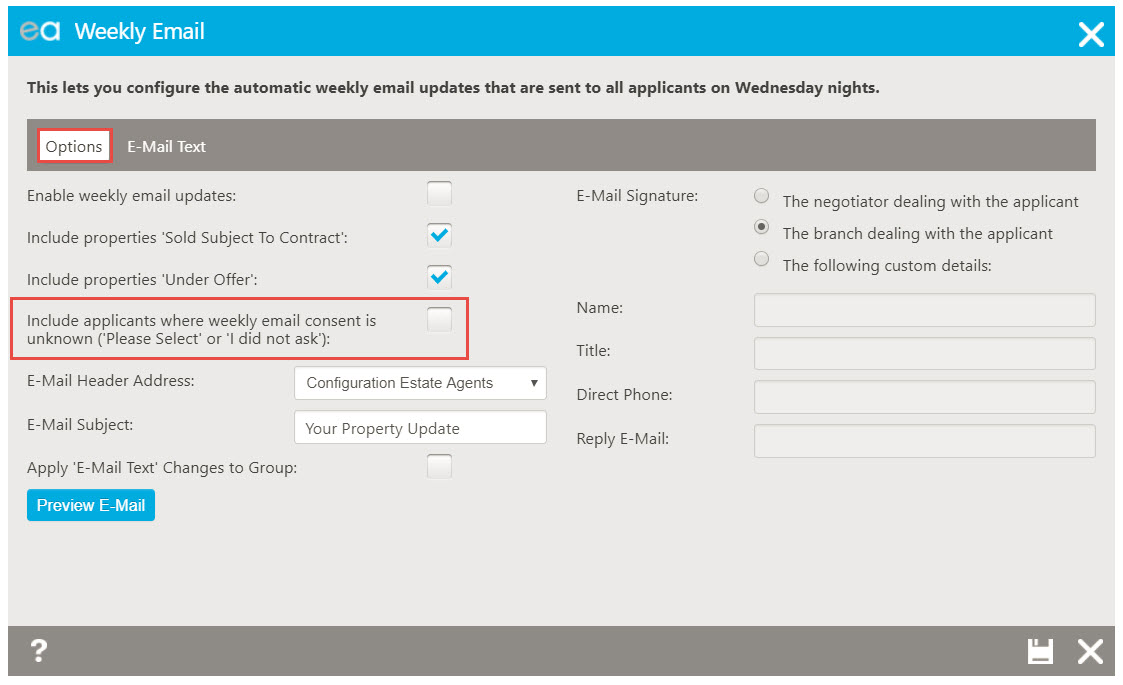
To decide which applicants receive the weekly email, we've added a new Configuration option (Tools> Configuration>Output Configuration>Setup Weekly Email).
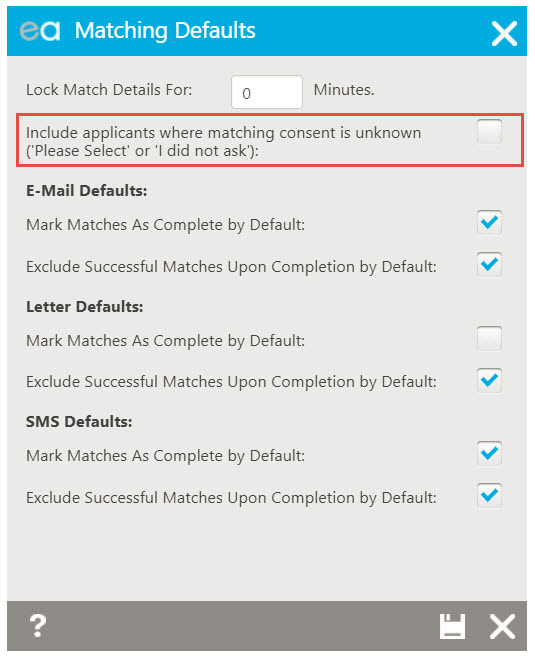
And to decide who is included when you run a match from a property, there's another tick box (Tools> Configuration>Output Configuration>Matching Defaults)
Vendors
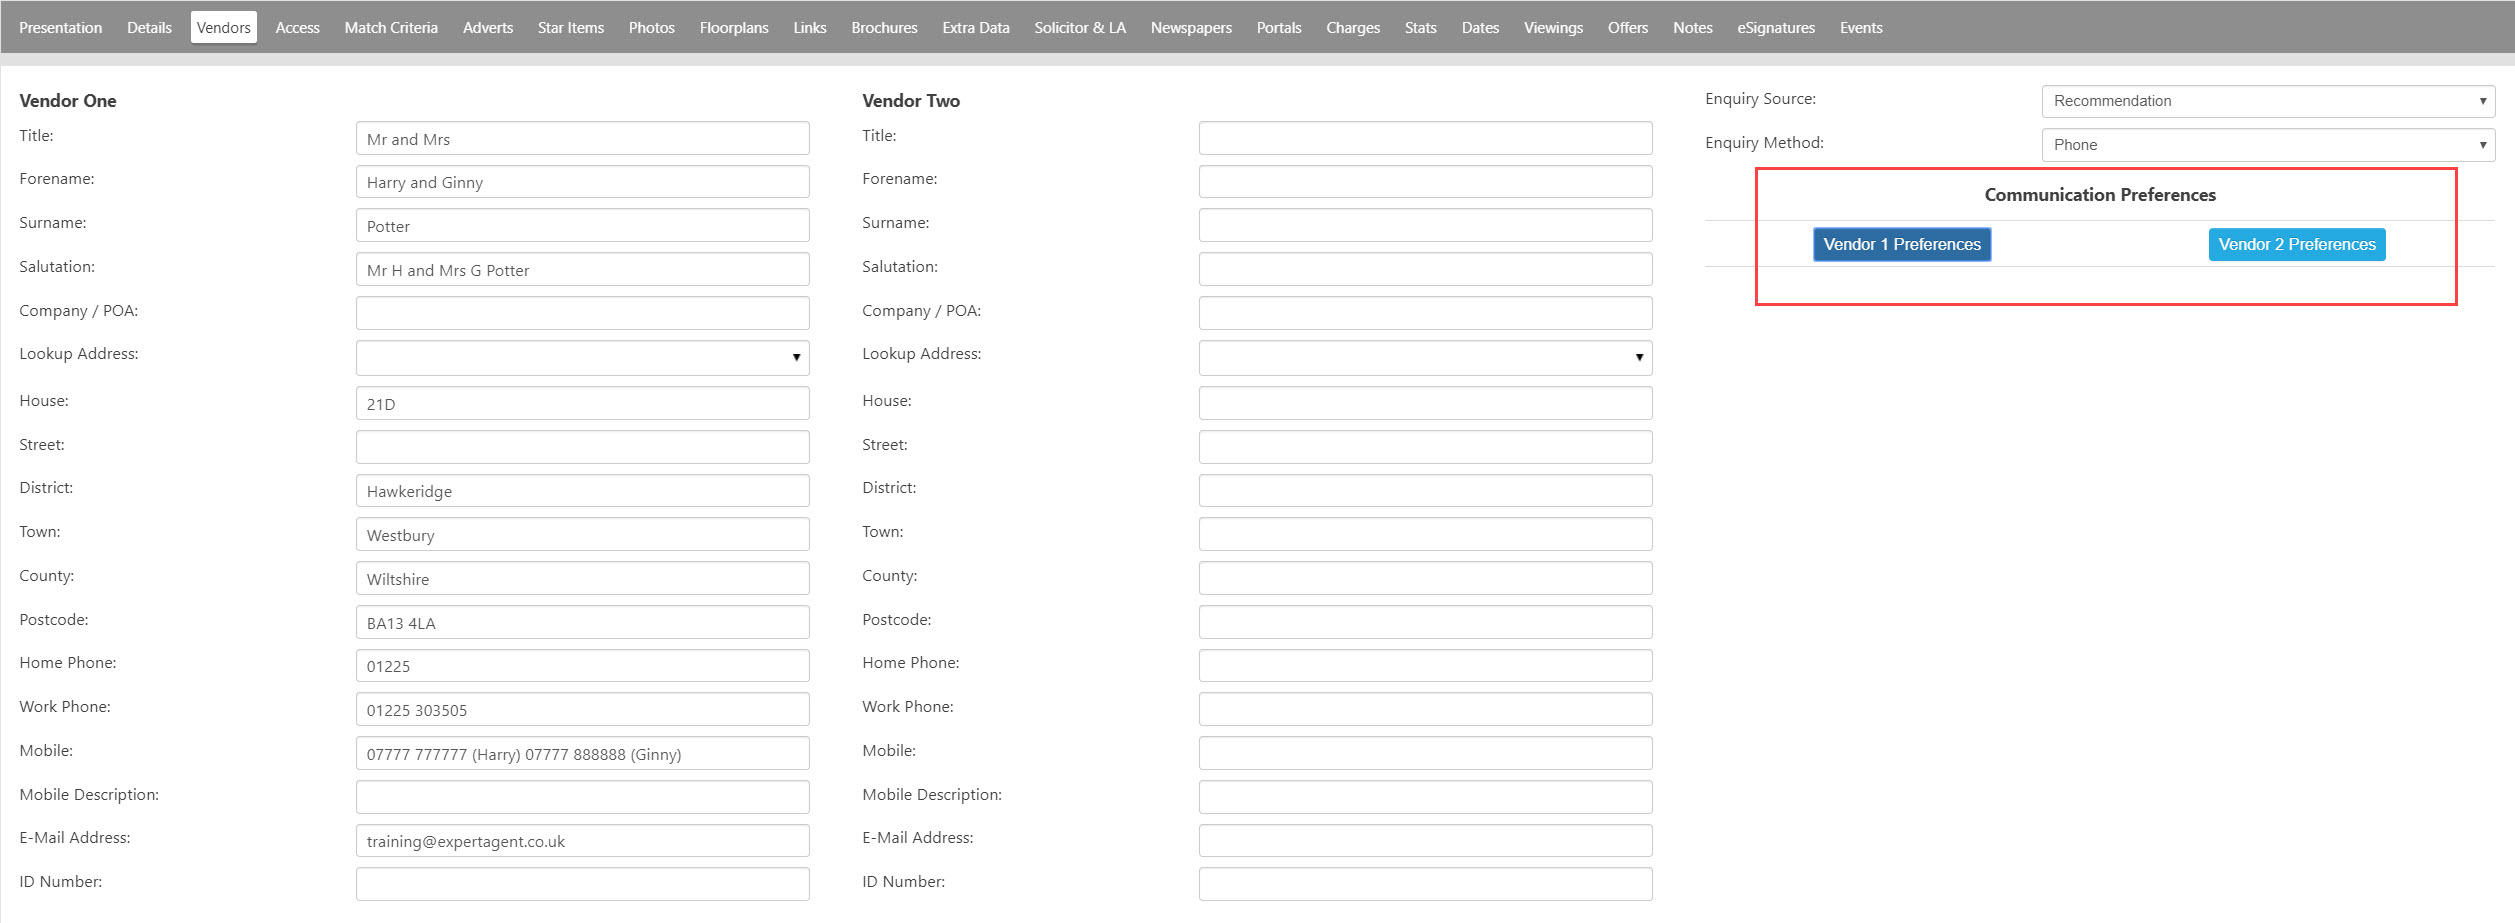
When you add a Sales Property in to Expert Agent, on the Details tab of the Add New Property Wizard you'll see buttons to set consents for Vendor 1 and Vendor 2 (if you've added a 2nd Vendor!) You don't need to click the buttons- the consent will pop up for you when you click Next or Save in the property record.
N.B Under all of the options you have Yes, No and I Did Not Ask. I did not ask is NOT specifically for your Super Users to see who isn't asking that question, more of a way of answering if you didn't explicitly get a yes or no from that Client. If, for example, you spoke to them on the phone then added them in later and forgot to ask whilst on the phone. You can change this at any point.
![]()
To set these options on an existing property record, you'll see the Vendor 1 and 2 Preferences on the Vendors tab.
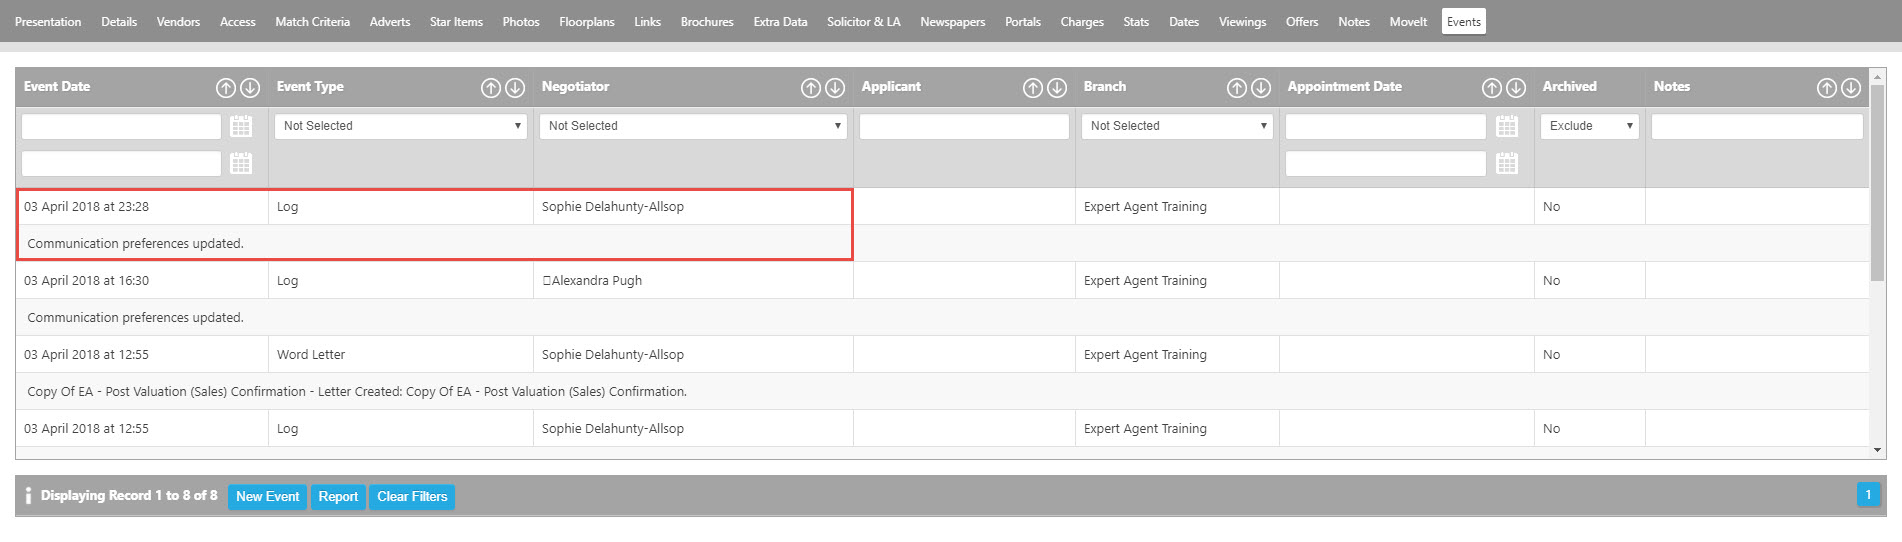
Whenever you change a Vendors consents, an Event will be added to the property record.
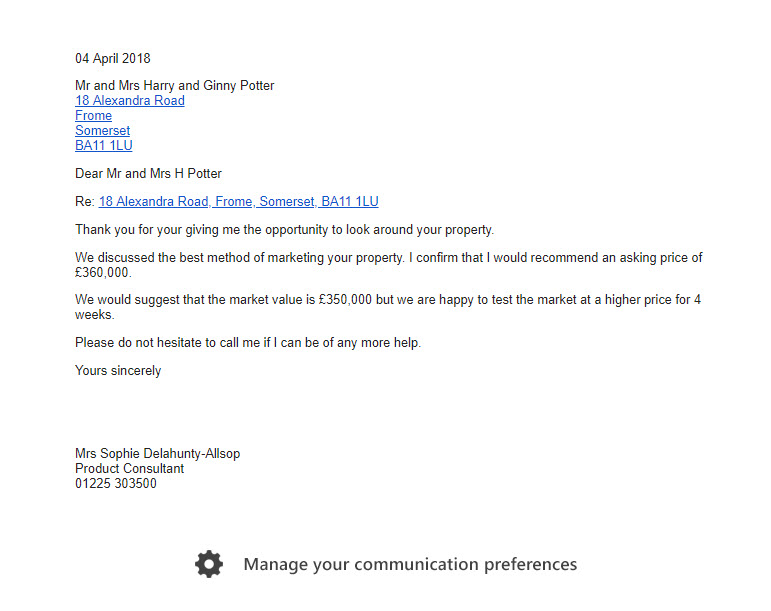
Every time you email your vendor, there will be a link at the bottom of the email allowing them to update their own consent.
N.B WHEN SENDING AN EMAIL WITH AN OPTIONAL CC, THE EMAIL THAT IS SENT TO THE CC'D PARTY WILL NOT INCLUDE THE COMMUNICATION PREFERENCES FOOTER
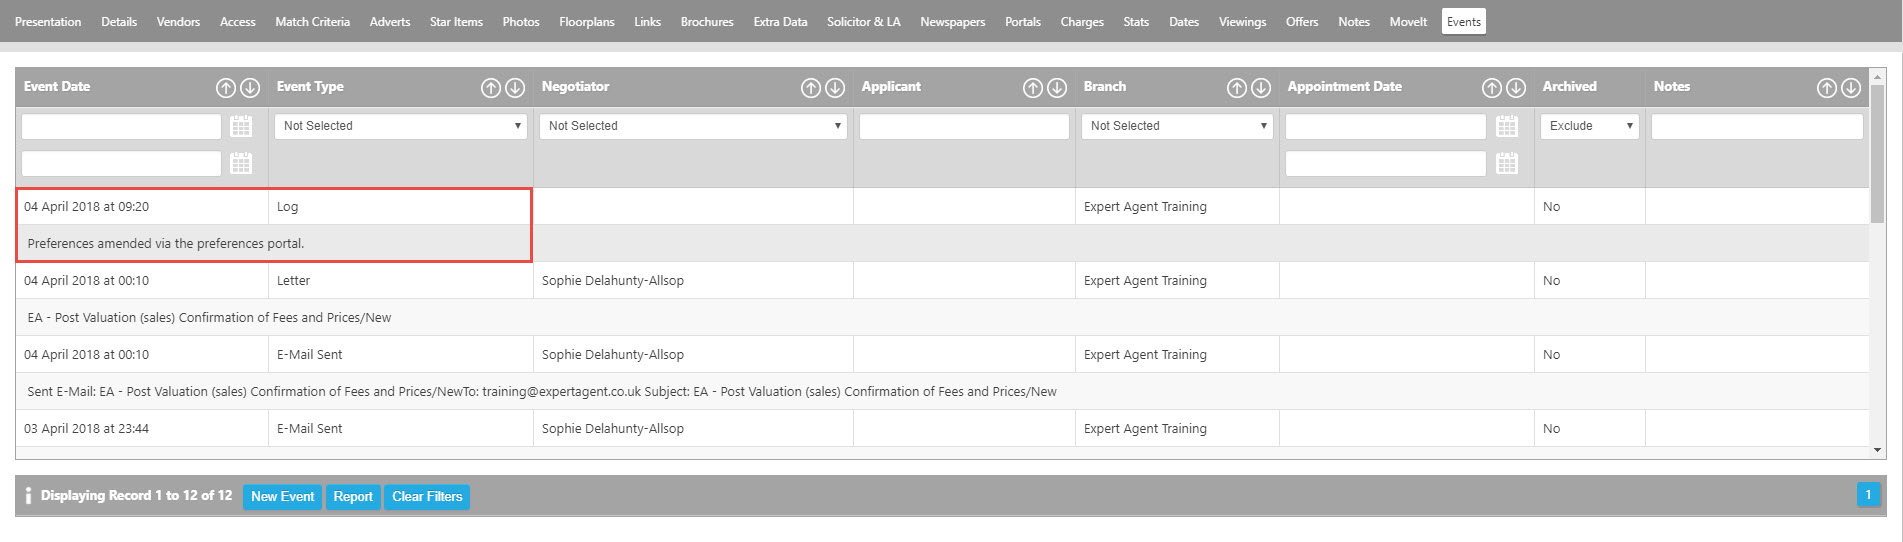
And any changes they make will be recorded as Events on their property record, so you can keep track of when the changes were made.
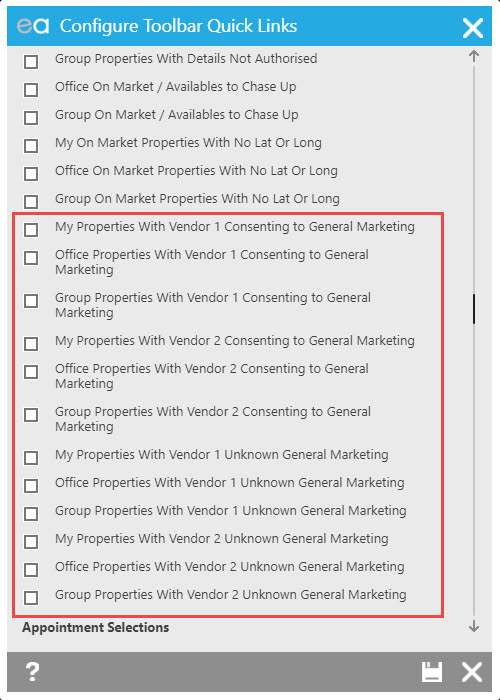
To help you work through your existing records, we've given you some QuickLinks
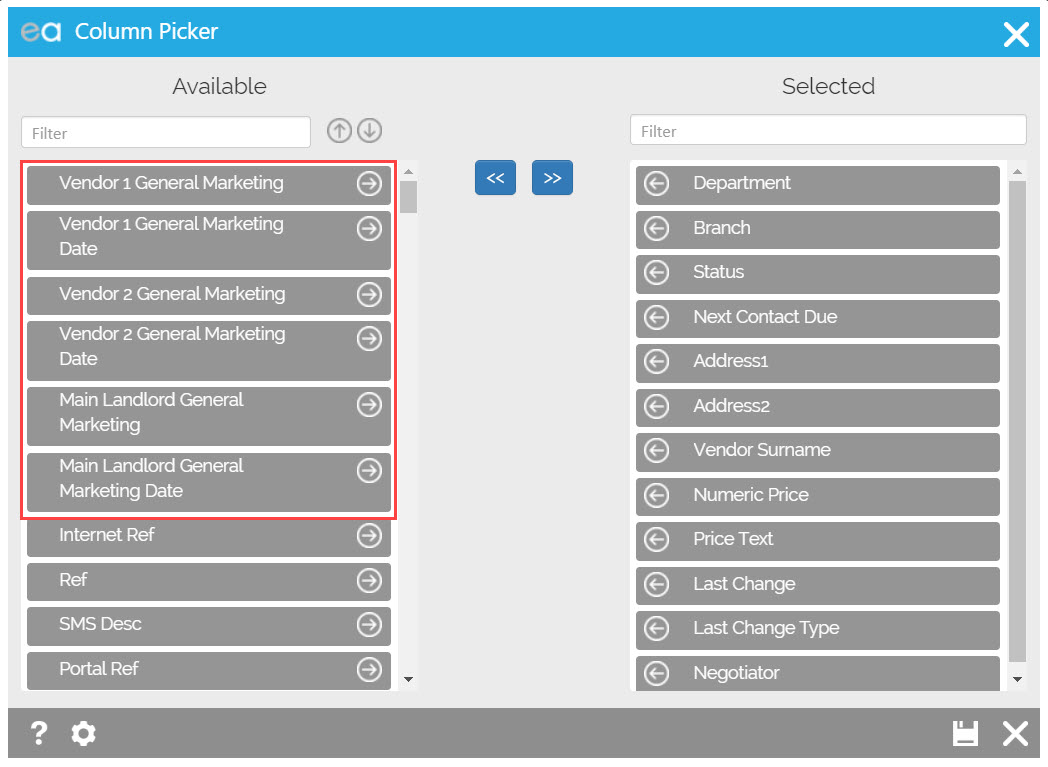
There are also new columns available in your Properties grid, to allow you to filter your records and make your own Saved Selections.
When you look to send bulk emails or SMS from the properties grid, you will see the following pop up asking which consent options you would like to apply before sending.
Landlords
When you add a Lettings Property in to Expert Agent, on the Details tab of the Add New Property Wizard you'll see a button to set consents for the Landlord. You don't need to click the buttons- the consent will pop up for you when you click Next or Save in the property record.
N.B Under all of the options you have Yes, No and I Did Not Ask. I did not ask is NOT specifically for your Super Users to see who isn't asking that question, more of a way of answering if you didn't explicitly get a yes or no from that Client. If, for example, you spoke to them on the phone then added them in later and forgot to ask whilst on the phone. You can change this at any point.
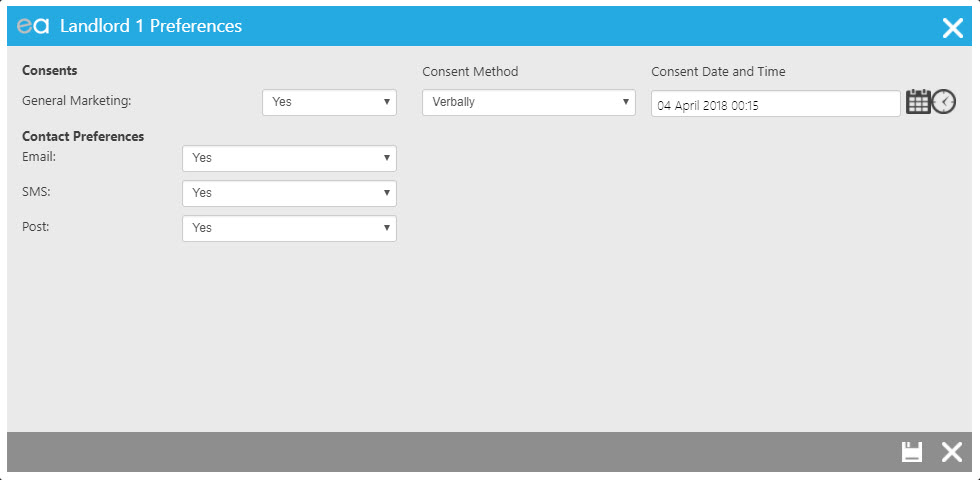
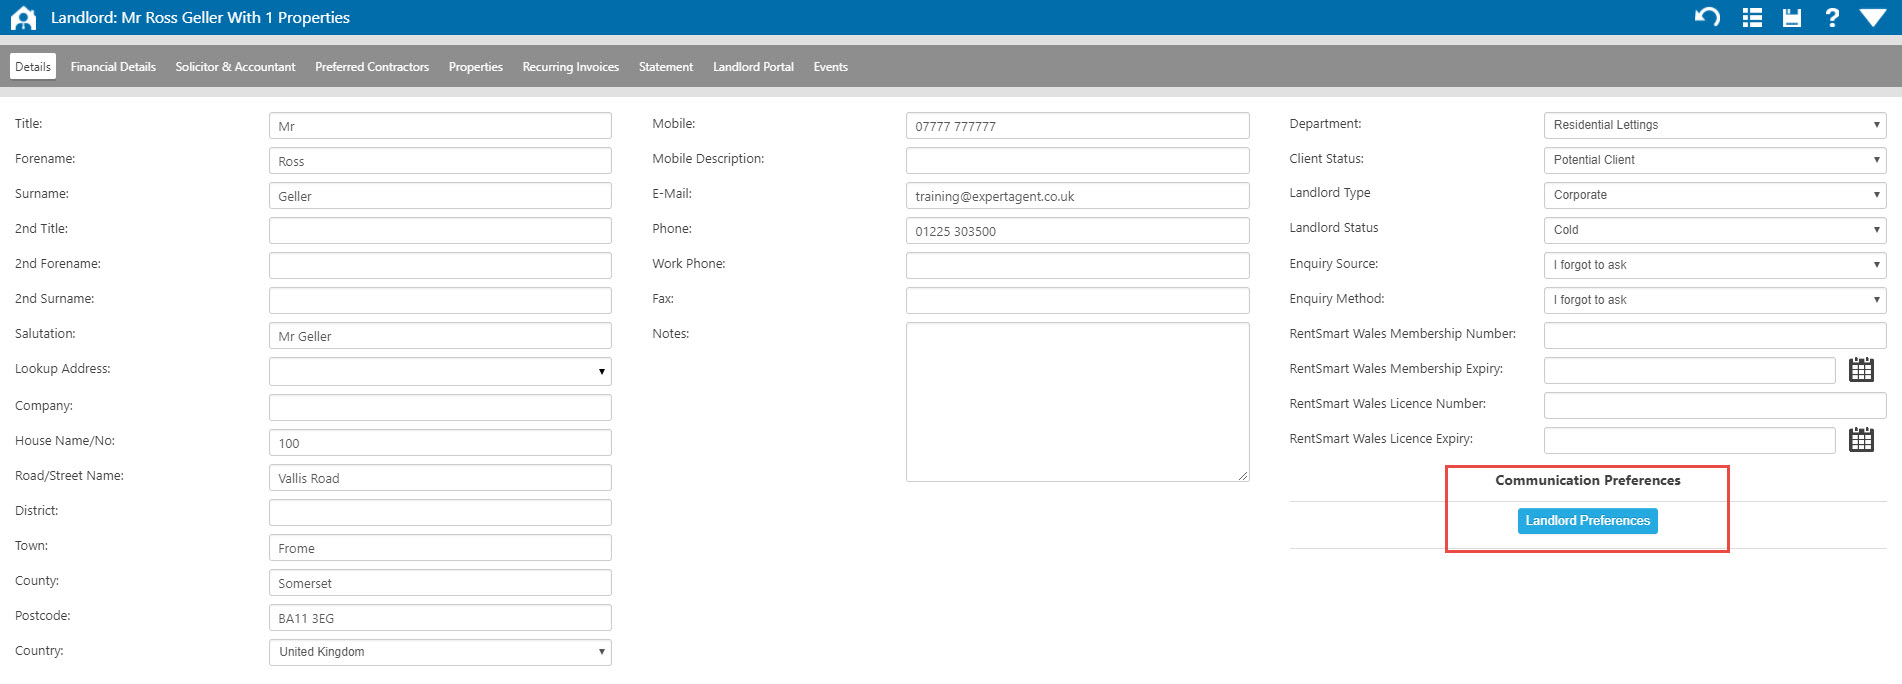
To see these options on an existing record, ensure that you start from the Landlord record itself, not the Property record to which the Landlord is assigned.
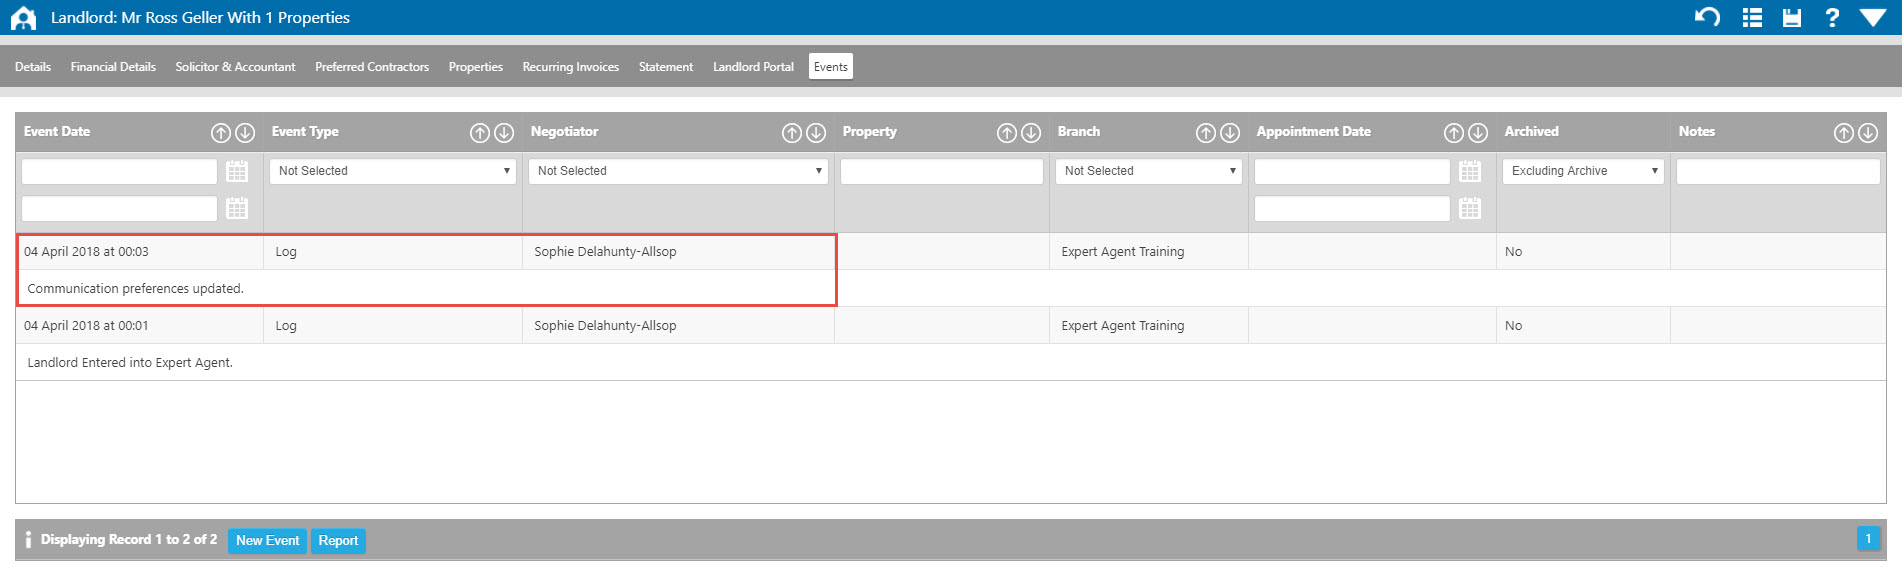
If you update a Landlords consents at any point, an Event will be added to their record.
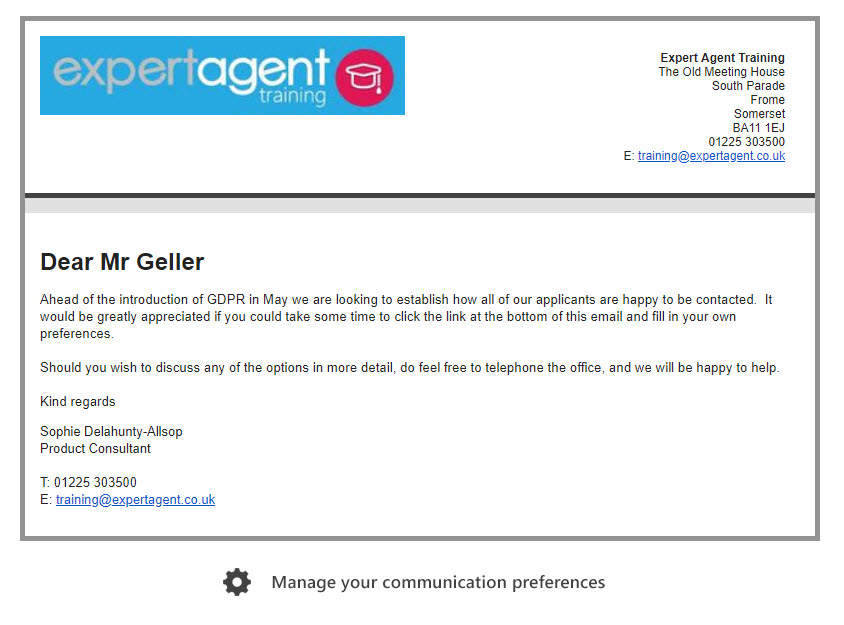
Every time you email your landlord, there will be a link at the bottom of the email allowing them to update their own consent.
N.B WHEN SENDING AN EMAIL WITH AN OPTIONAL CC, THE EMAIL THAT IS SENT TO THE CC'D PARTY WILL NOT INCLUDE THE COMMUNICATION PREFERENCES FOOTER
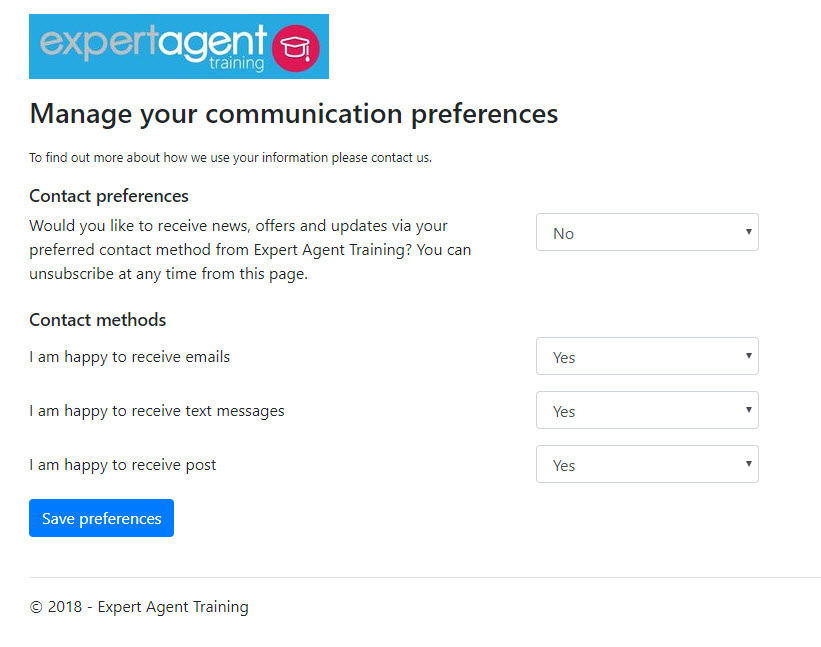
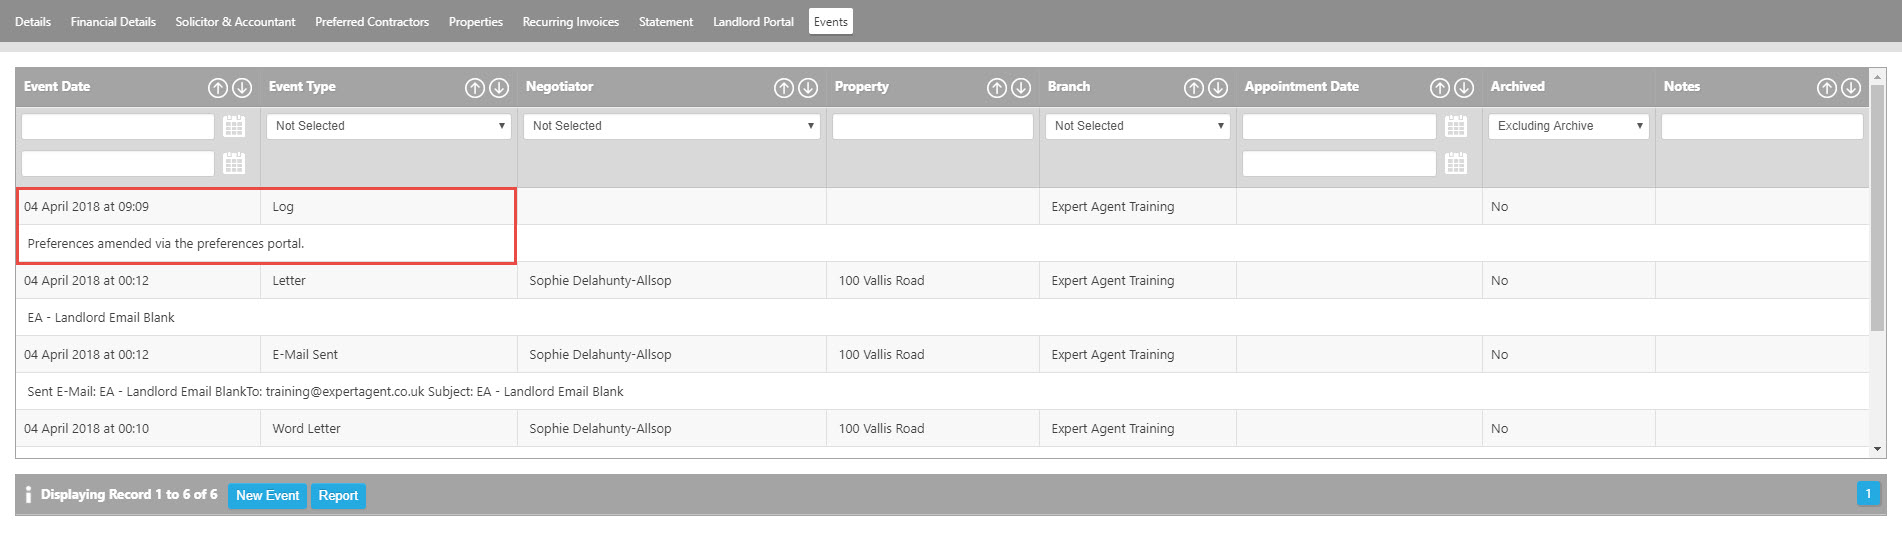
And any changes they make will be recorded as Events on their landlord record, so you can keep track of when the changes were made.
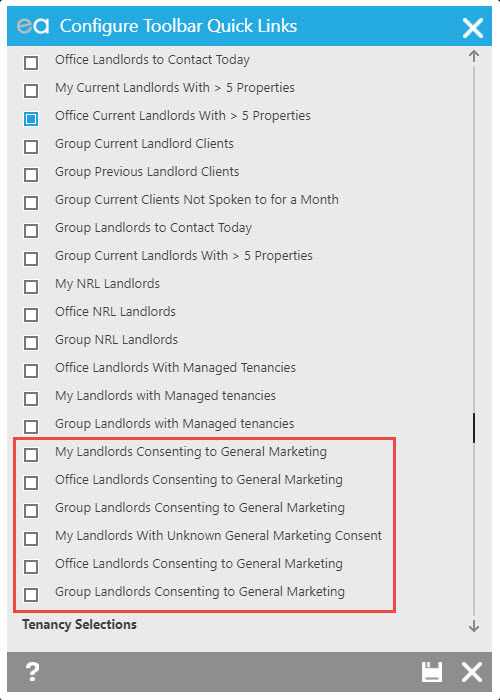
To help you work through your existing records, we've given you some QuickLinks
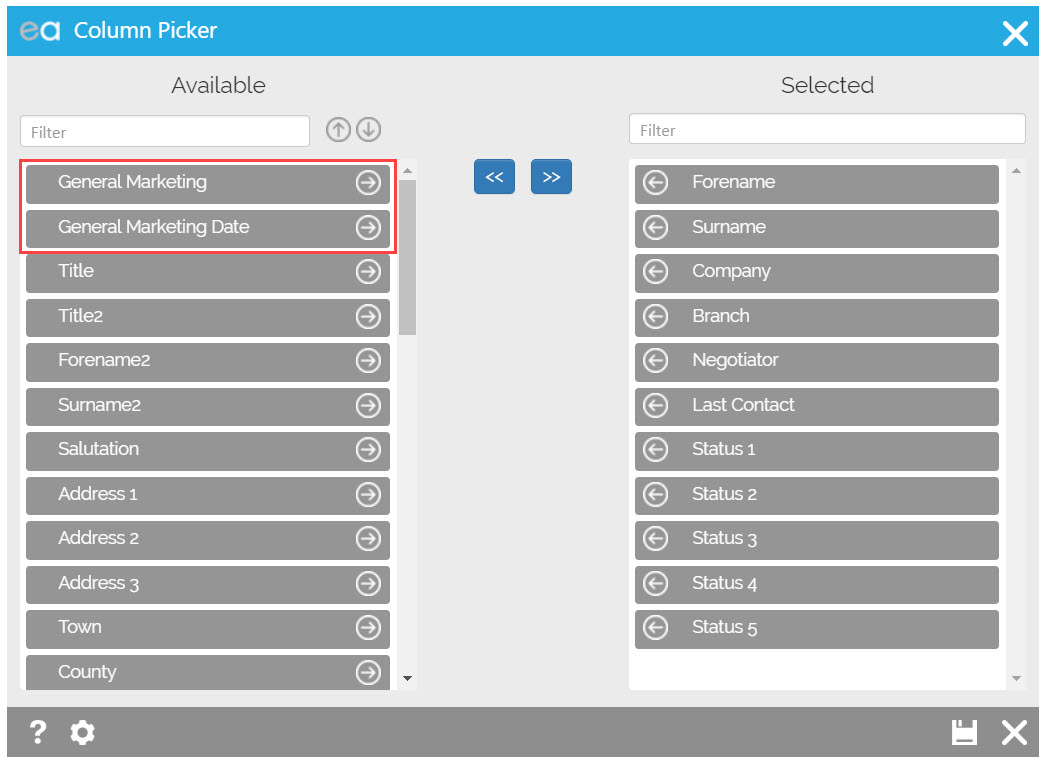
There are also new columns available in your Landlords grid, to allow you to filter your records and make your own Saved Selections.
When you look to send bulk emails or SMS from the Landlords grid, you will see the following pop up asking which consent options you would like to apply before sending.
Matching
NB Ensure you've checked the Match Defaults option within Configuration (mentioned in the Applicants section above,) before you start running matches. That is what will dictate if applicants who have not yet explicitly consented to matching will be included in matches you run from a property.
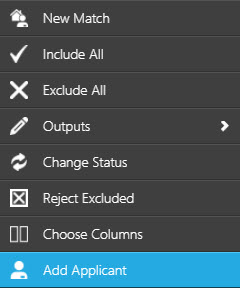
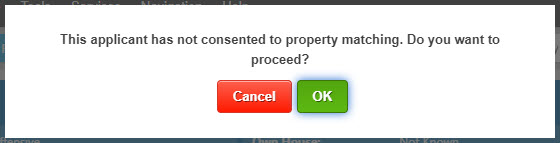
When you are running a match from a property, if you manually add an applicant (using the right click>add applicant method shown below,) if that applicant has not consented to matching then you will see this pop up allowing you to override that decision if you wish.
If you run a match from a specific applicant record, and that applicant has declined consent to be matched, then no results will appear.
Grids
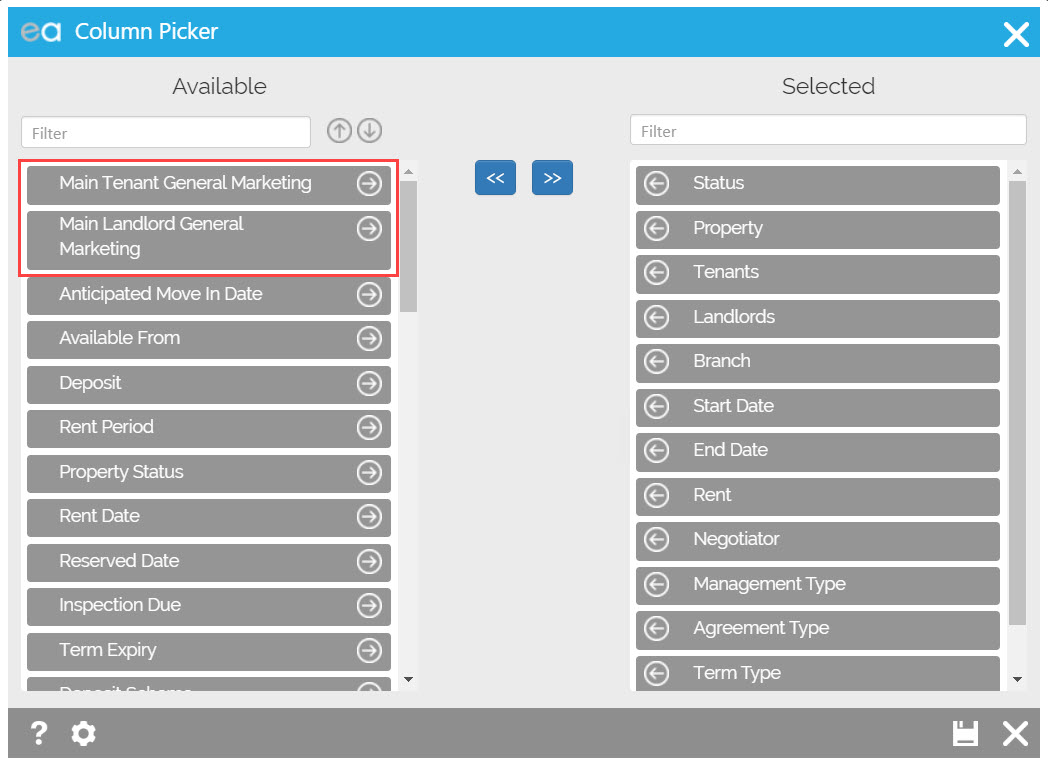
When sending any bulk output from either the Applicant, Landlord, Property or Tenancy grid, there are new columns to be aware of. When Applying Standard Settings (Apply Standard Settings on Grids and Quick Links) the General Marketing column will appear in these grids.
The new grid columns will be different depending on what Grid you are on. As always though Right Click on the Grid -> hover over Grid Columns -> select Column Picker BEAT -> The new columns will at the bottom.
Applicant Grid:
Landlord Grid:
Property grid:
Tenancy Grid:
QuickLinks
Apply Standard Settings on Grids and Quick Links
We have made new QuickLinks for you to manage your Consents.
Please see our GDPR FAQs section for more information.
Bulk Consent Update
You also have the ability to update Consents in Bulk. However, this is a Staff Permission, so depending on what your Super User has set for you, you might not be able to access this.
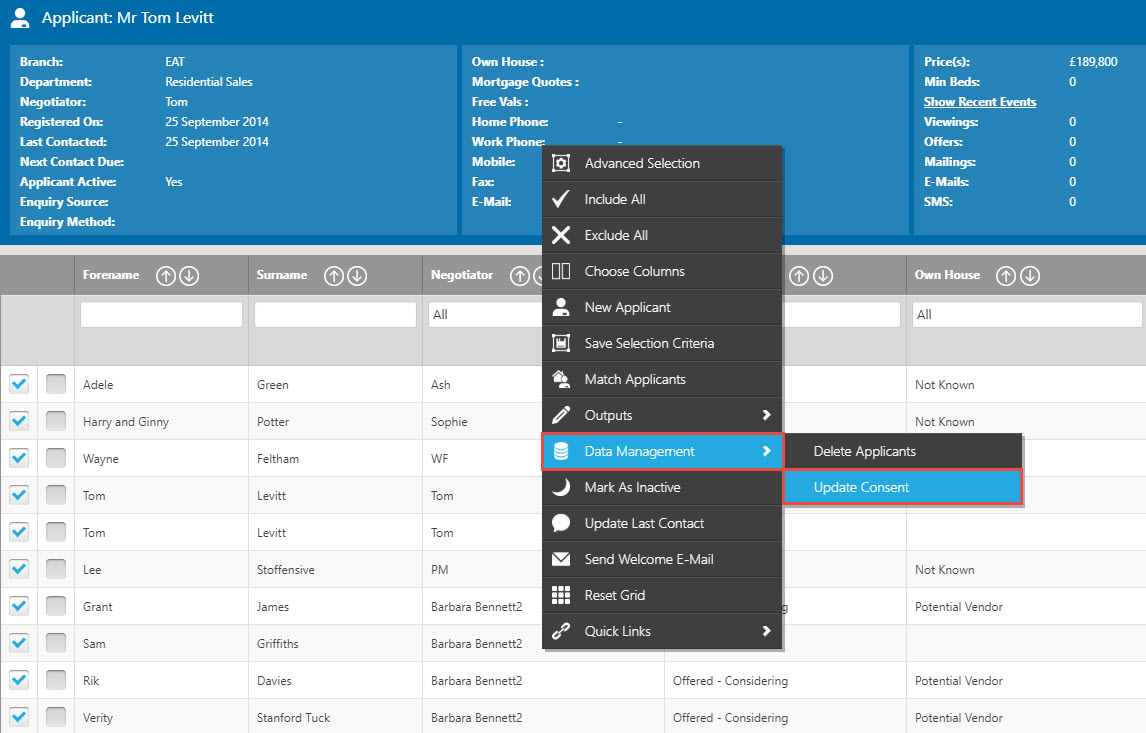
From under the Data Management section of the Action Menu (Applicant Grid, Property Grid and Landlord Grid) you have the option for Update Consent. Shown below is the Applicant Grid but all the other Grids work the same way. (Please make sure you filter the grids before you press Update Consent.)
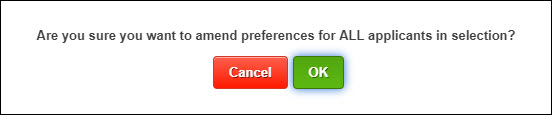
Once you press Update Consent you will get this pop up below asking you to confirm you are happy with updating ALL Applicants in the selections consent.
You will then be presented with the below screen:

1. When updating the Consents you will be presented with the normal consents for that record type (for example these three for Applicants, Vendors and Landlords will have General Marketing only). Be aware that you will not see what the Applicants current Preference is. It will only say "Current Preference" as you have multiple applicants selected. When changing them, you will change the Consents for ALL records selected from the Grid. And update ALL methods and ALL Date and Time to the same.
2. The same can be said for the Contact Preferences. Please make sure that ALL records wish to be contacted in the same way.
3. Any notes added in will need to be the same for ALL records.
4. Press Save.
When updating Consents from any Grid, please make sure that you have the correct information for the records selected BEFORE updating the consents in bulk.
Consent History
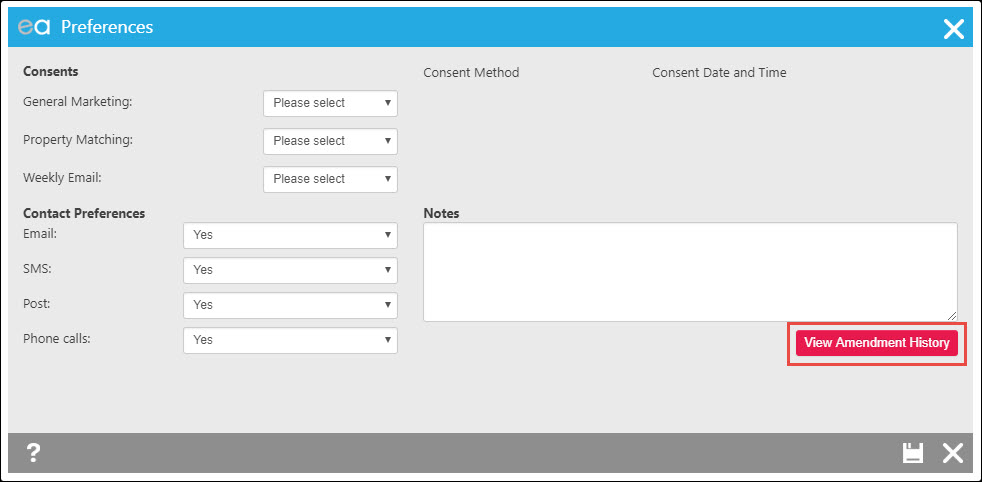
On a Record (Applicant, Landlord and Vendor) you can view the consent history from the Communication Preferences button (Details tab of Applicant and Landlord, Vendors tab on Property records). Click on the Preferences Button:
And then on View Amendment History:
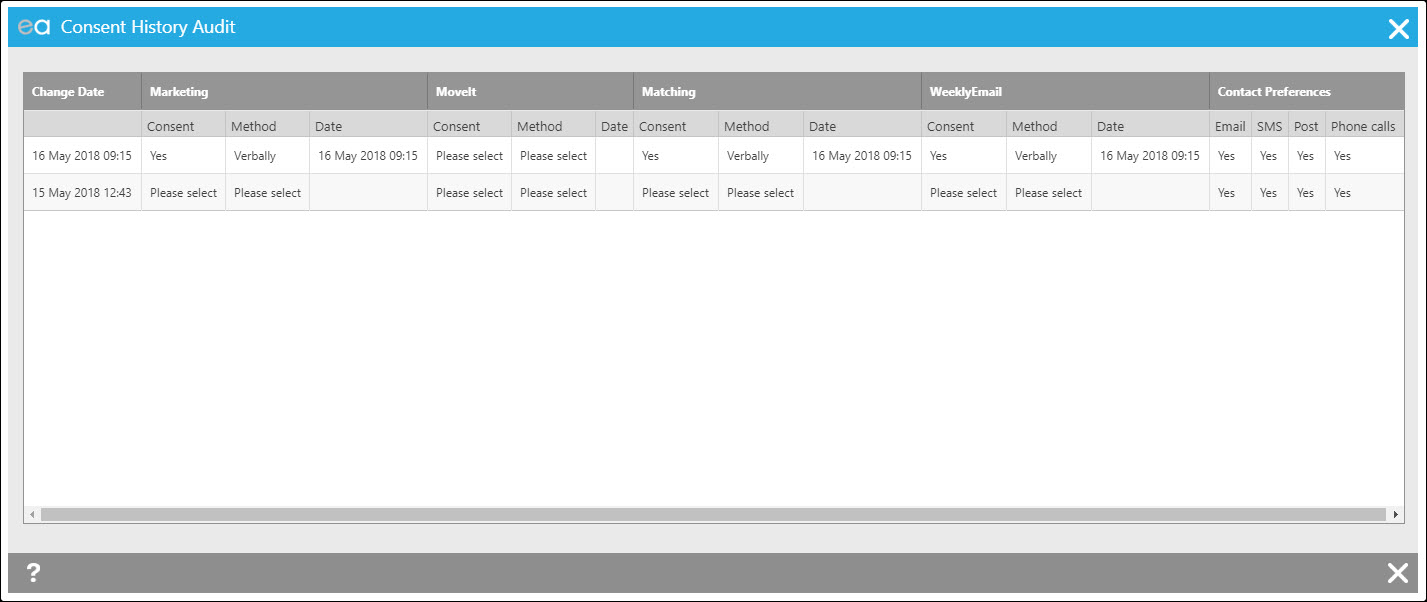
Once you click Amendment History you will see the below screen:
You can also access this from the Events tab of all records as well. On the Events tab, click in to the relevant Event:
Click on "View Consent History":
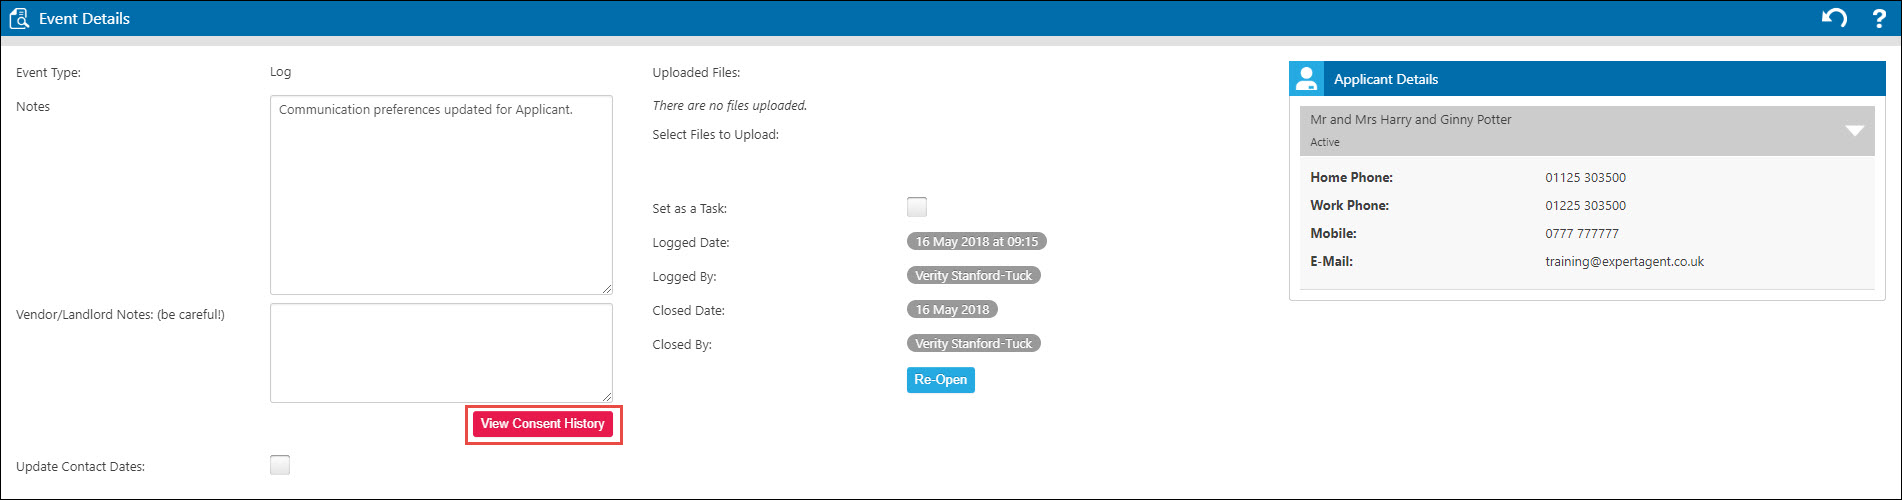
This is the same process that you will follow for Landlords and Vendors as well.
Expert Agent
We have a plethora of useful additional products that can be used within Expert Agent:
Expert Agent Tenant Referencing
Online Interaction with your Clients
Online Interaction with your Clients
Many of the new, national hybrid agents have clever ways of interacting with their clients online and many of our agent customers have asked us to give them similar functionality.
Expert Agent already has some great ways of achieving this.
We've had an Applicant Portal, a Landlord Portal and a Vendor Portal for some time. More recently, we've added a Tenant Portal.
We are planning to introduce a lot more of this shortly. All of these allow members to exchange transaction relevant information with their clients.
In particular, we've just updated the Landlord Portal in our September 2017 upgrade. Click here for more info.
Applicant Portal- accessed from Welcome Email, Weekly Email, Match Emails and your own Expert Agent powered website. Applicants can view their personalised property selections, change their requirements and request viewing appointments
Tenant Portal - once an applicant expresses interest in signing up for a tenancy, you can send them a link to Tenant Portal which lets them apply online and, later, once an active tenant, review their tenancy dates and data, report and review repairs and look at their statements.
Vendor Portal - soon to be upgraded, this lets Vendors log in and review progress.
Landlord Portal - now a new 2017 Landlord Portal Beta, this option lets landlords log in, review their portfolio, check dates & statements, review and approve repairs and interact with their property manager.
Tel: 01225 303500 | Email: account.managers@webskyltd.com
Terms of Business | Cookie Policy | Privacy Policy | ZPG Modern Slavery Statement
Designed by the Expert Agent Design Department
