 Login
Login


Online Valuations Grid
The Online Valuations Grid works in a similar fashion as other grids within Expert Agent. The differences are the lack of Tool Tip in the top and you do not get the option to choose columns.
However, you can use the columns like any other grid, to filter and sort.
You also have the Right Click Action Menu (or the list icon in the top right).
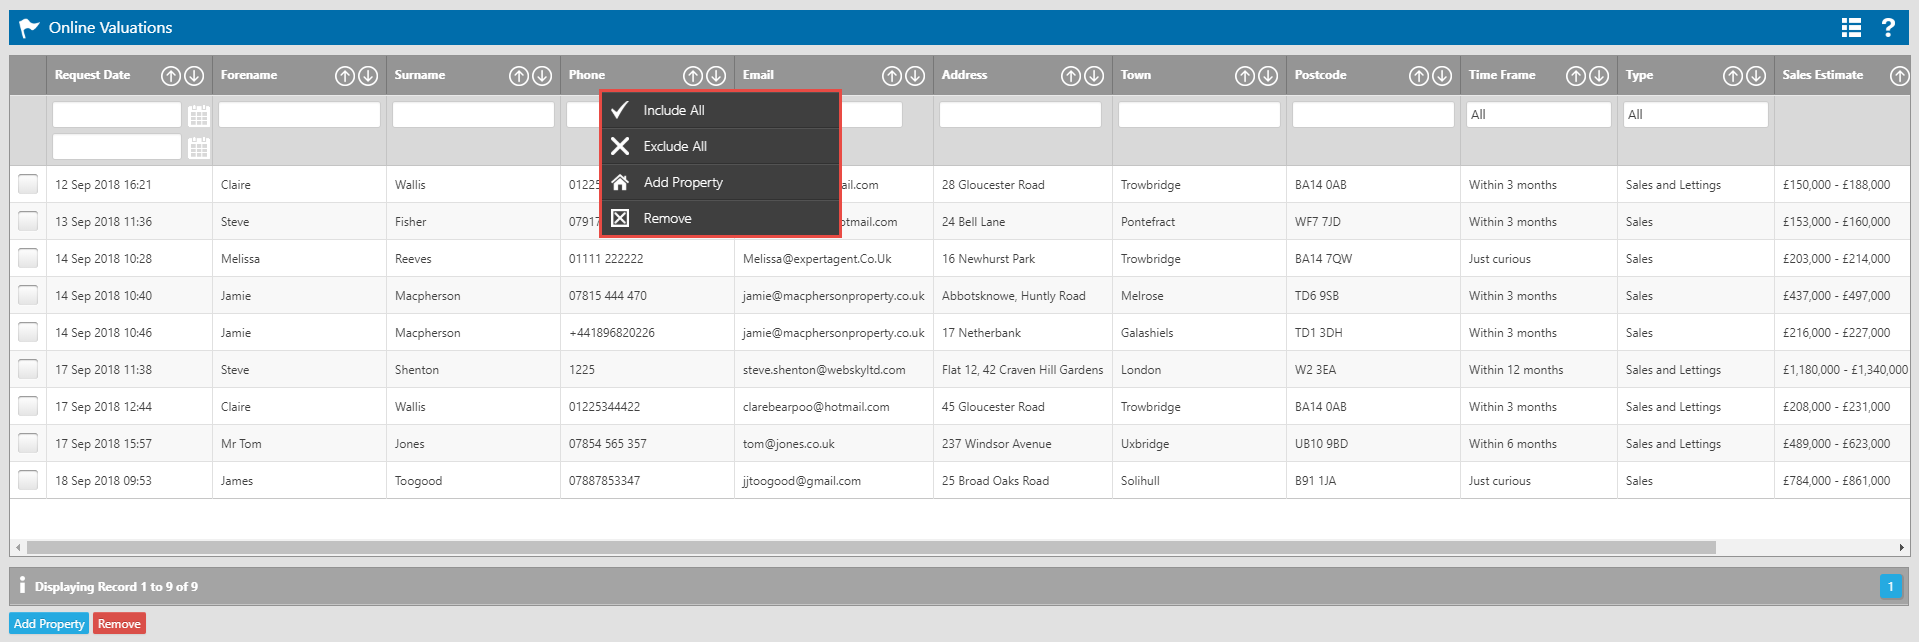
- Include All - This will tick all records within the grid.
- Exclude All - This will untick all records within the grid.
- Add Property - This will create property records for all the records that are ticked in the grid.
- Remove - This will remove the records from Expert Agent that are currently ticked in the grid.
You can also add/remove properties using the Add Property and Remove buttons at the bottom left.
Please Note: As these records are not yet properties, there is no click through from this grid until you use the Add Property buttons on either the Action Menu or the bottom left.
Online Valuation Drop Down
Once the Online Valuation Tool is enabled you will have access to the new item on the Properties Drop Down.
Hover over Properties and click on Online Vals:

This will take you to the Online Valuations Grid
Online Valuation Tool
Vendors and Landlords want to know how much their property is worth. Offer them a free instant valuation from your Expert Agent website, converting more traffic into leads.
Unlike other valuation plugins, ours keep traffic on your main site, with all your branding, throughout the journey.
The leads go straight from your website into your Expert Agent software, you don't have to set anything up.
Using the Online Valuation Tool can make the most of your marketing resource and improve your conversion rate.
To ensure your Online Valuation Tool functions correctly, ensure you complete the steps for:
Online Valuation Tool Configuration
To familiarise yourself with how the tool works:
Online Valuation - The Customer Journey
Processing Online Valuation Requests
Video Test
Tel: 01225 303500 | Email: account.managers@webskyltd.com
Terms of Business | Cookie Policy | Privacy Policy | ZPG Modern Slavery Statement
Designed by the Expert Agent Design Department
