 Login
Login


Using International Currency Features
If you ever advertising your properties using any other currency other than £ then you will need to enable International Currency Features from the Company Details section in Configuration.
Tools -> Configuration -> Business Configuration -> Company Details
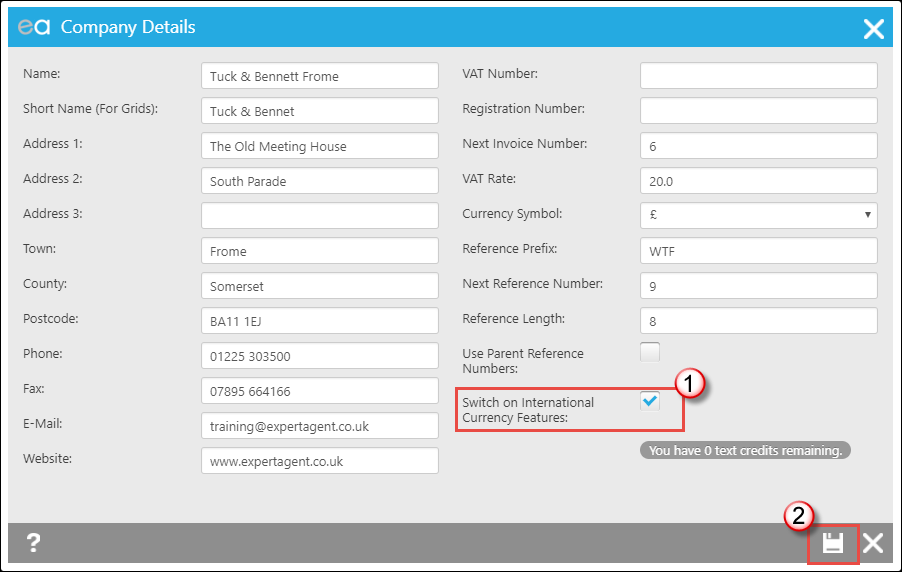
1. Tick the Switch on International Currency Features tick box.
2. Press Save.
Property
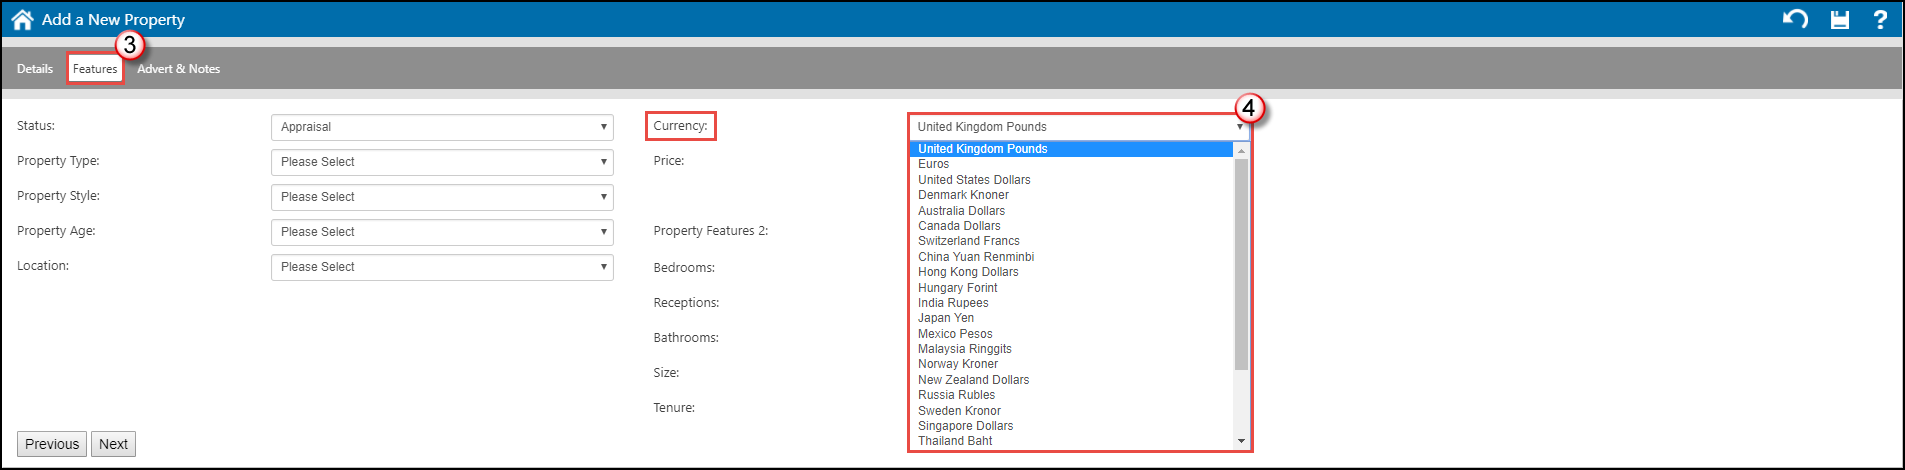
3. When using the Add New Property Wizard, select the Features tab
4. Click into the Currency drop down and select your currency.
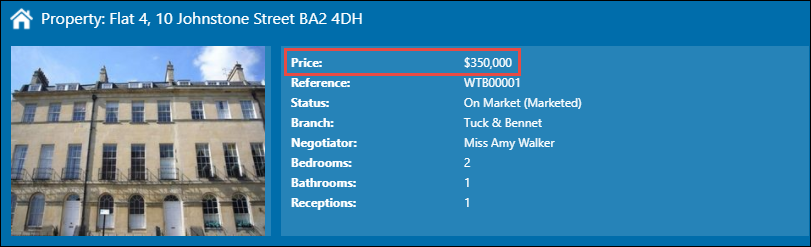
The Property will have the currency feature set in the Tool Tip. This can be changed at any time by doing a Price Change (see Sending particulars for vendor approval).
Applicant
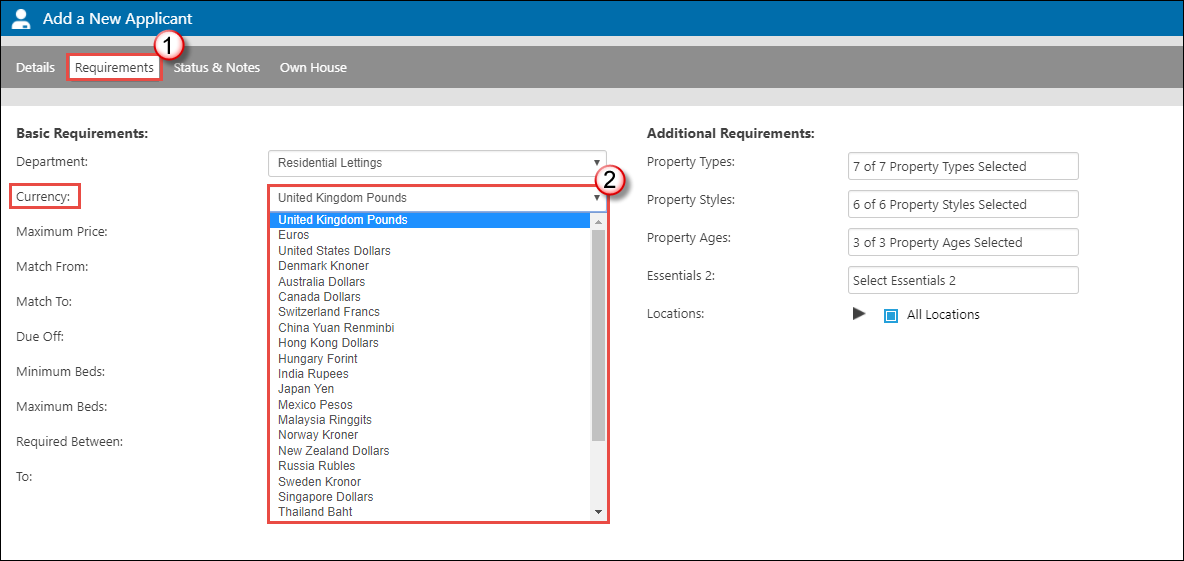
1. When using the Applicant Wizard select the Requirements tab.
2. Click into the Currency drop down and select your currency.
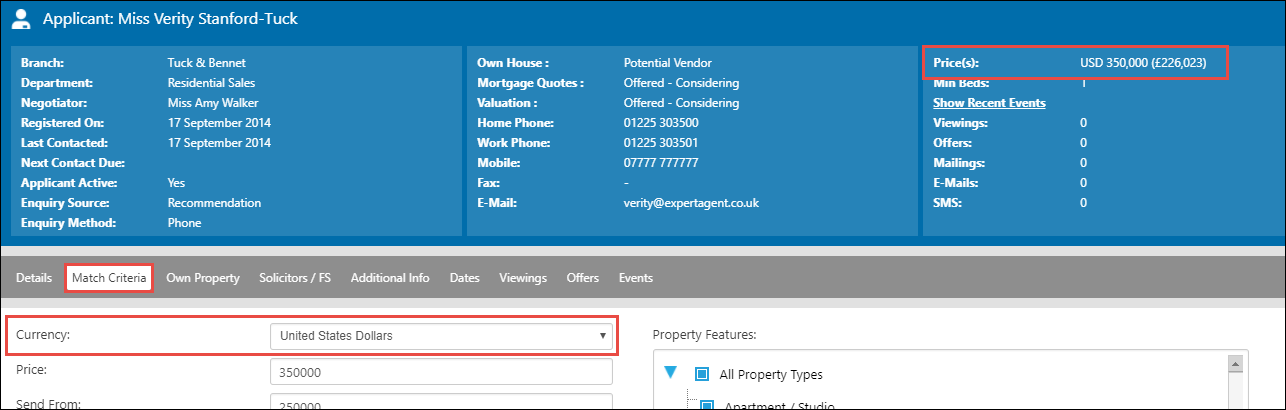
The Currency is set from the Match Criteria tab of the applicant and can be changed at any point.
The Currency they are looking for is displayed in the Tool Tip panel (with the £ equivalent in brackets).
Matching
Please be wary when matching as it will bring all properties within the numerical "price range" for the Applicant. And all applicants for the properties. When matching, make sure you have the "Applicant Currency" and "Property Currency" columns in your match grid, and filter on those after running a new match.
Using the Grid
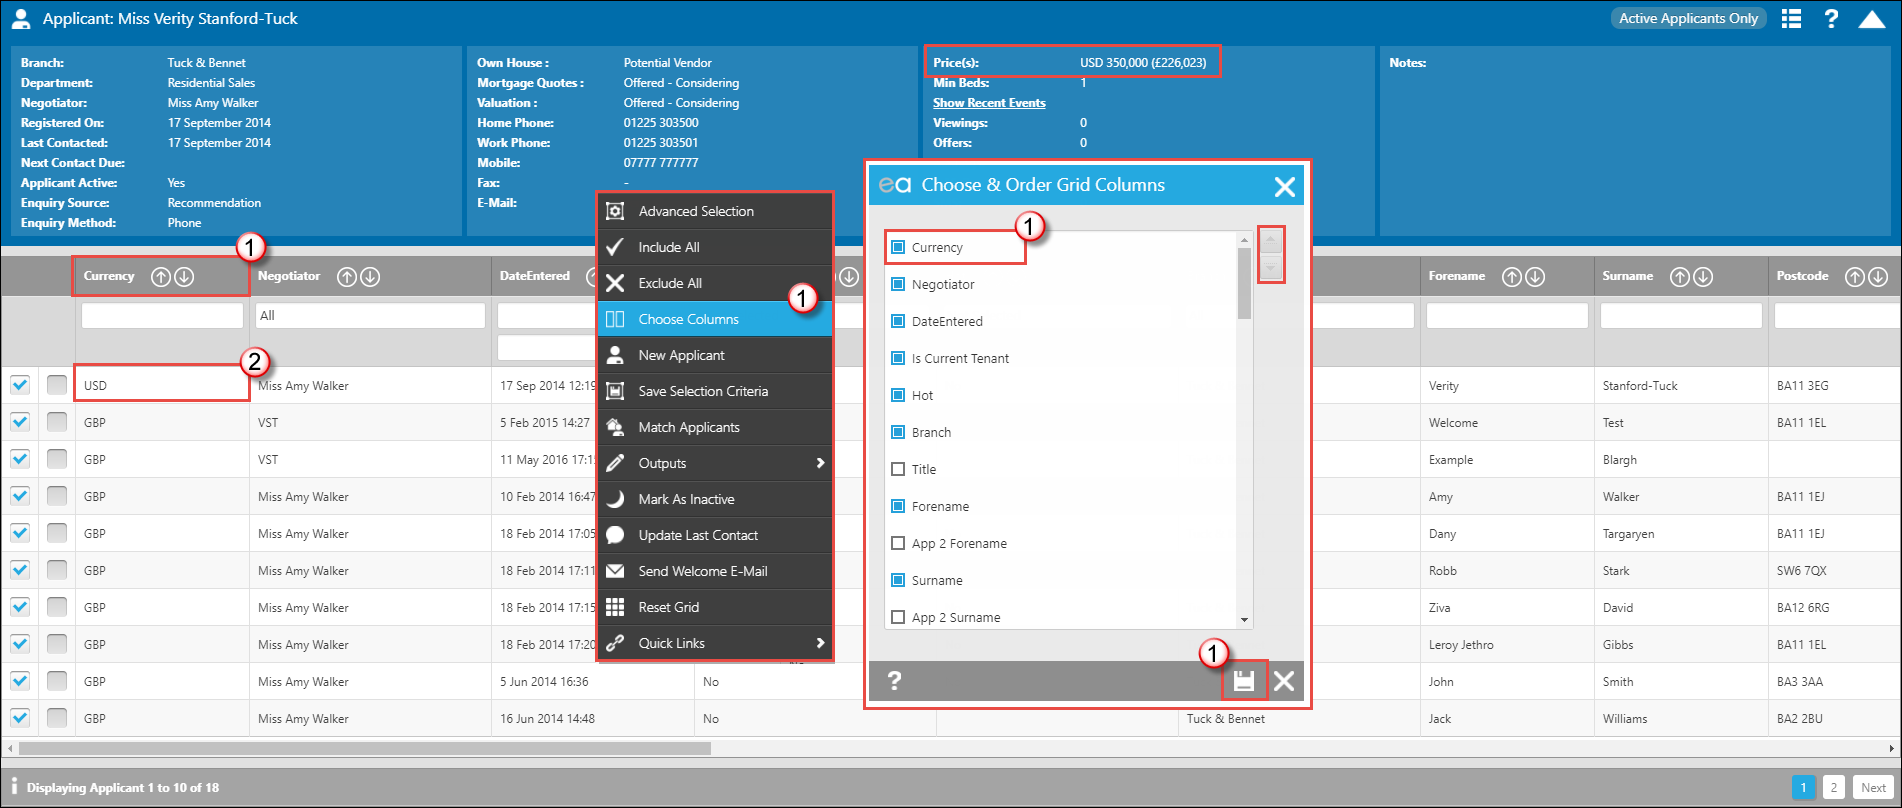
1. You will need to make sure that the Currency column is showing. Right Click and select Choose Columns. Find the column and move it up, press save.
2. The Currency column is now showing. You can order the column by clicking the up and down arrows or filter by using the text box and making sure you type % in before (the Wildcard Feature). You can also create Saved Selections (Custom Quicklinks) for your different currencies.
These steps are the same for the Property Grid as well.
Receiving Commission Payments
When you create an invoice from an Offer Record (see Exchange) the charge is added to the property record.
This is generally the only time you would move away from the Offer and work from the property record.
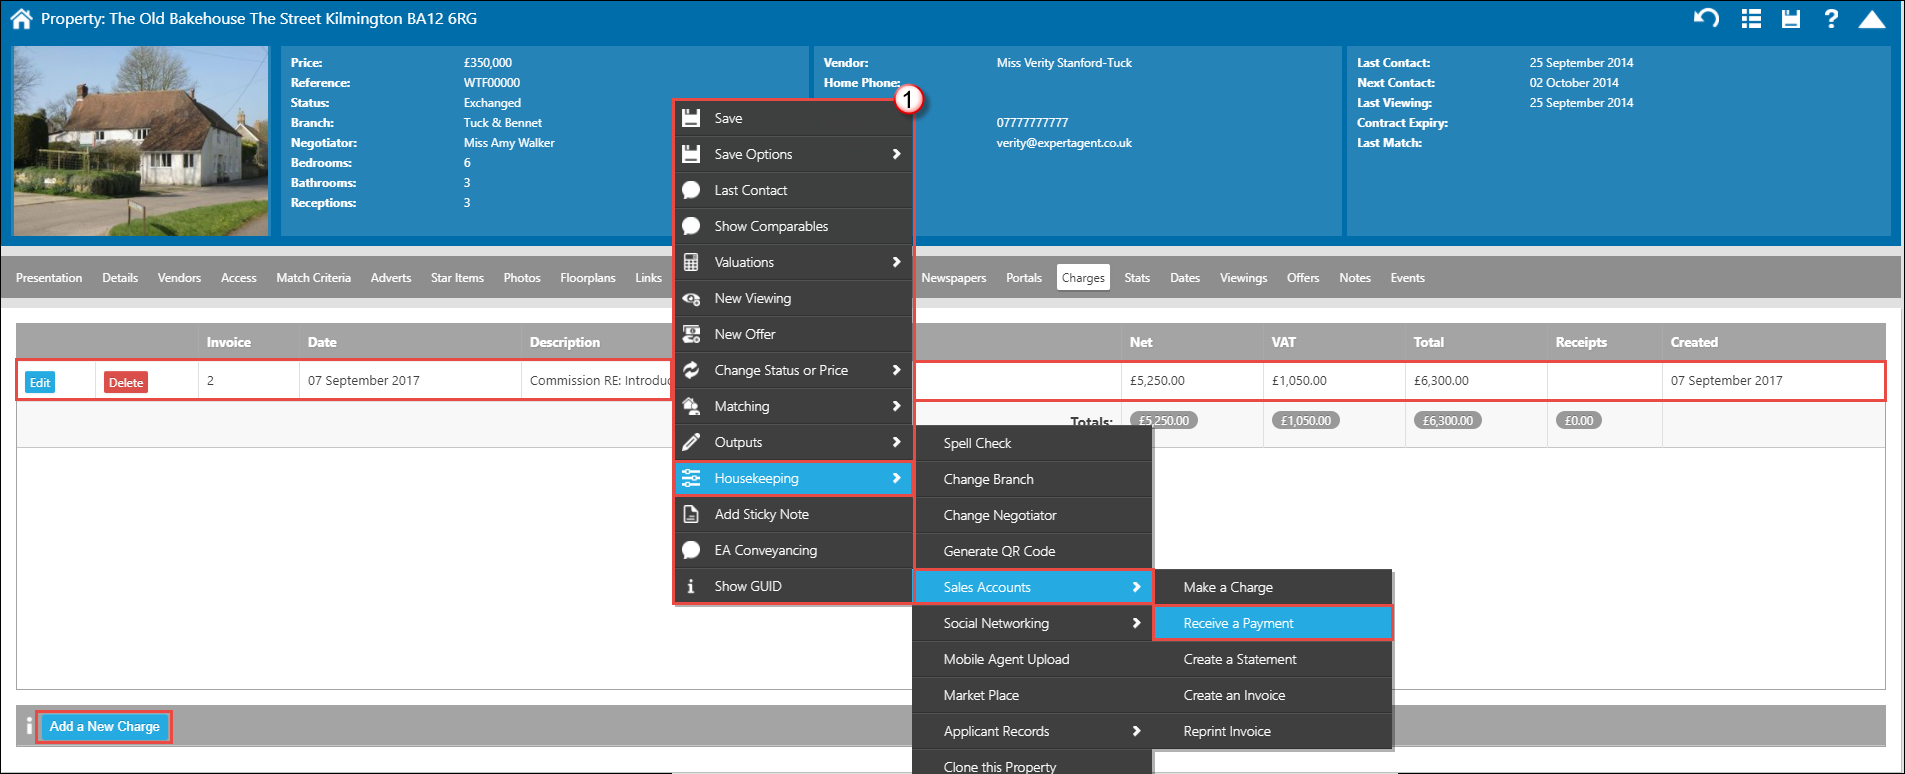
On the Charges tab of the Property Record you can see the invoice that was created when we exchanged the Offer. You can Edit or Delete this if needed.
You can also "Add a New Charge" for any ad hoc payments you may need to add (EPC charge for example).
1. Right Click -> Hover over Housekeeping -> Hover over Sales Accounts -> Click "Receive a Payment".
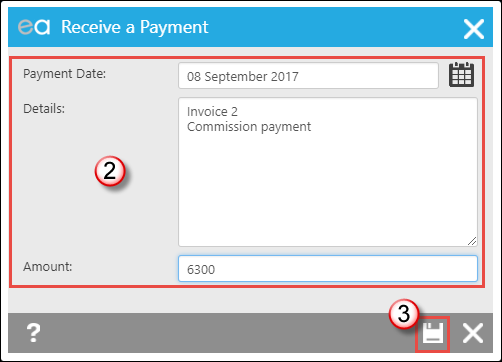
2. You can change the Payment Date by clicking on the calendar icon. Add in the details (the invoice number, what the payment is for etc), and the amount.
3. Press Save

The Charge is now showing on the Charges tab.
All your Invoices can be looked on from the Property Invoices option under Offers in the top menu.
Sending Invoices to multiple recipients
If you are creating your Sales invoices for Offers using Expert Agent when you Exchange the Offer you get the option to create an invoice. This picks up the fee details from the Property record and your VAT rate set in Company Details.
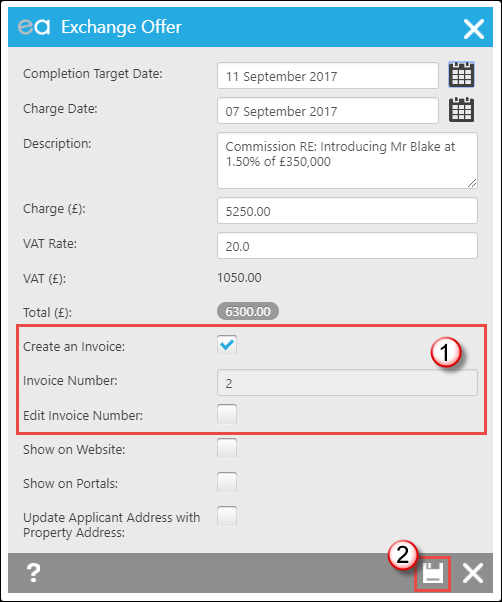
1. You can't change the invoice number in the Invoice Number field. You have to do this by clicking "Edit Invoice Number" and this only works if you have the correct Staff Permissions set (see Agency Staff)
2. Press Save.
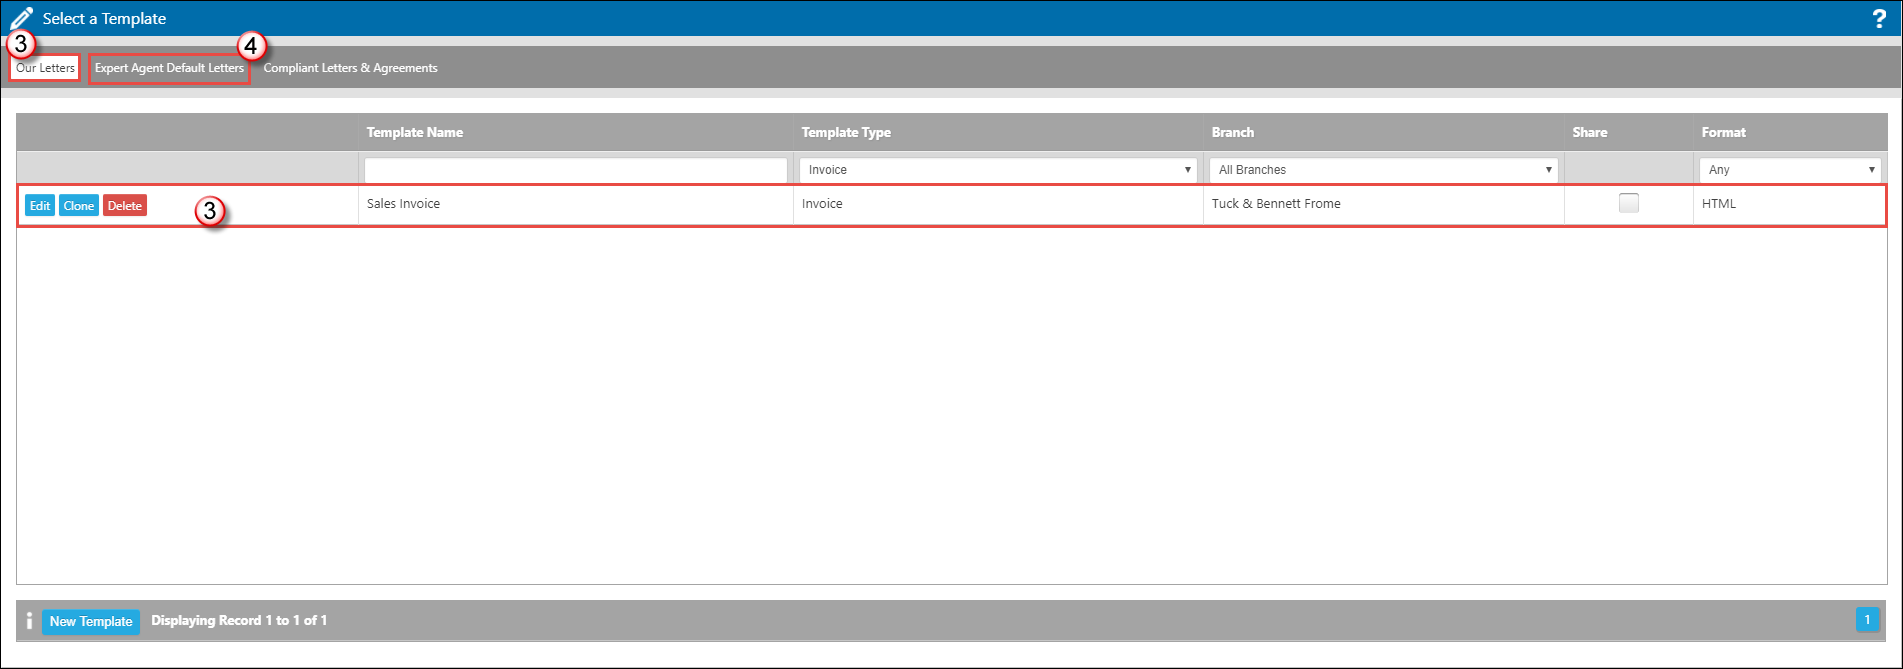
3. On the Our Letters tab you should have a Sales Invoice. Click on this to produce it.
4. As always you have access to the Expert Agent Default Letters from here if you do not have a relevant template.
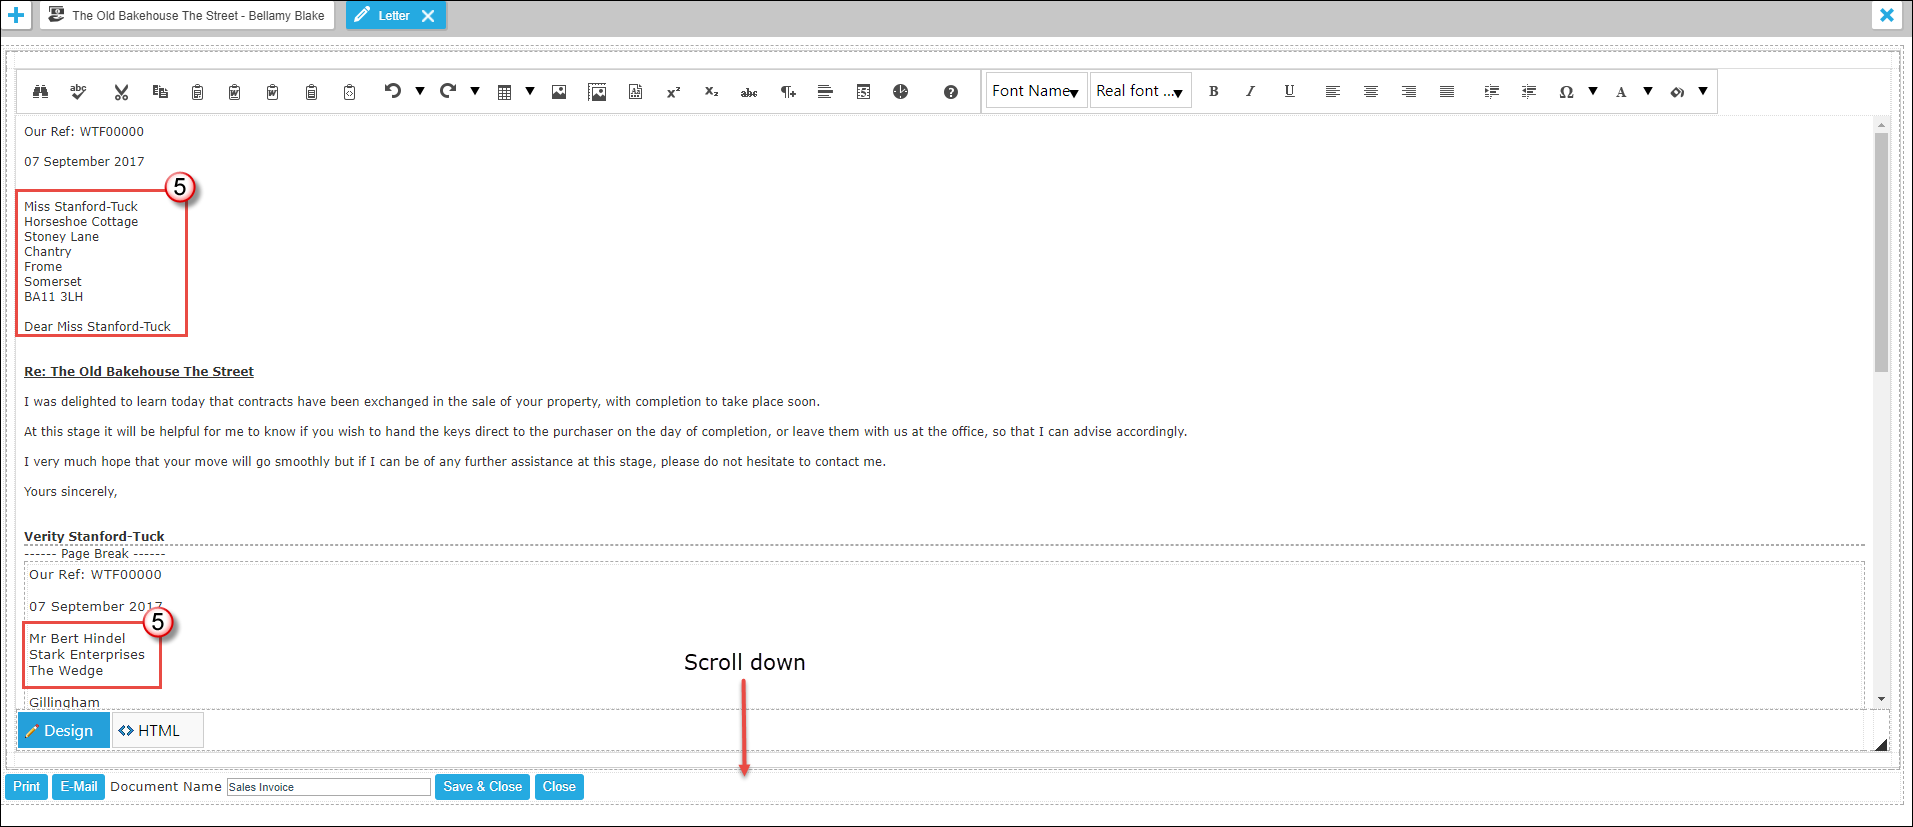
5. In the example we have used, an HTML Sales Invoice (cloned from the Expert Agent Letters Tab) there is a letter to the Vendor, a letter to their Solicitor...
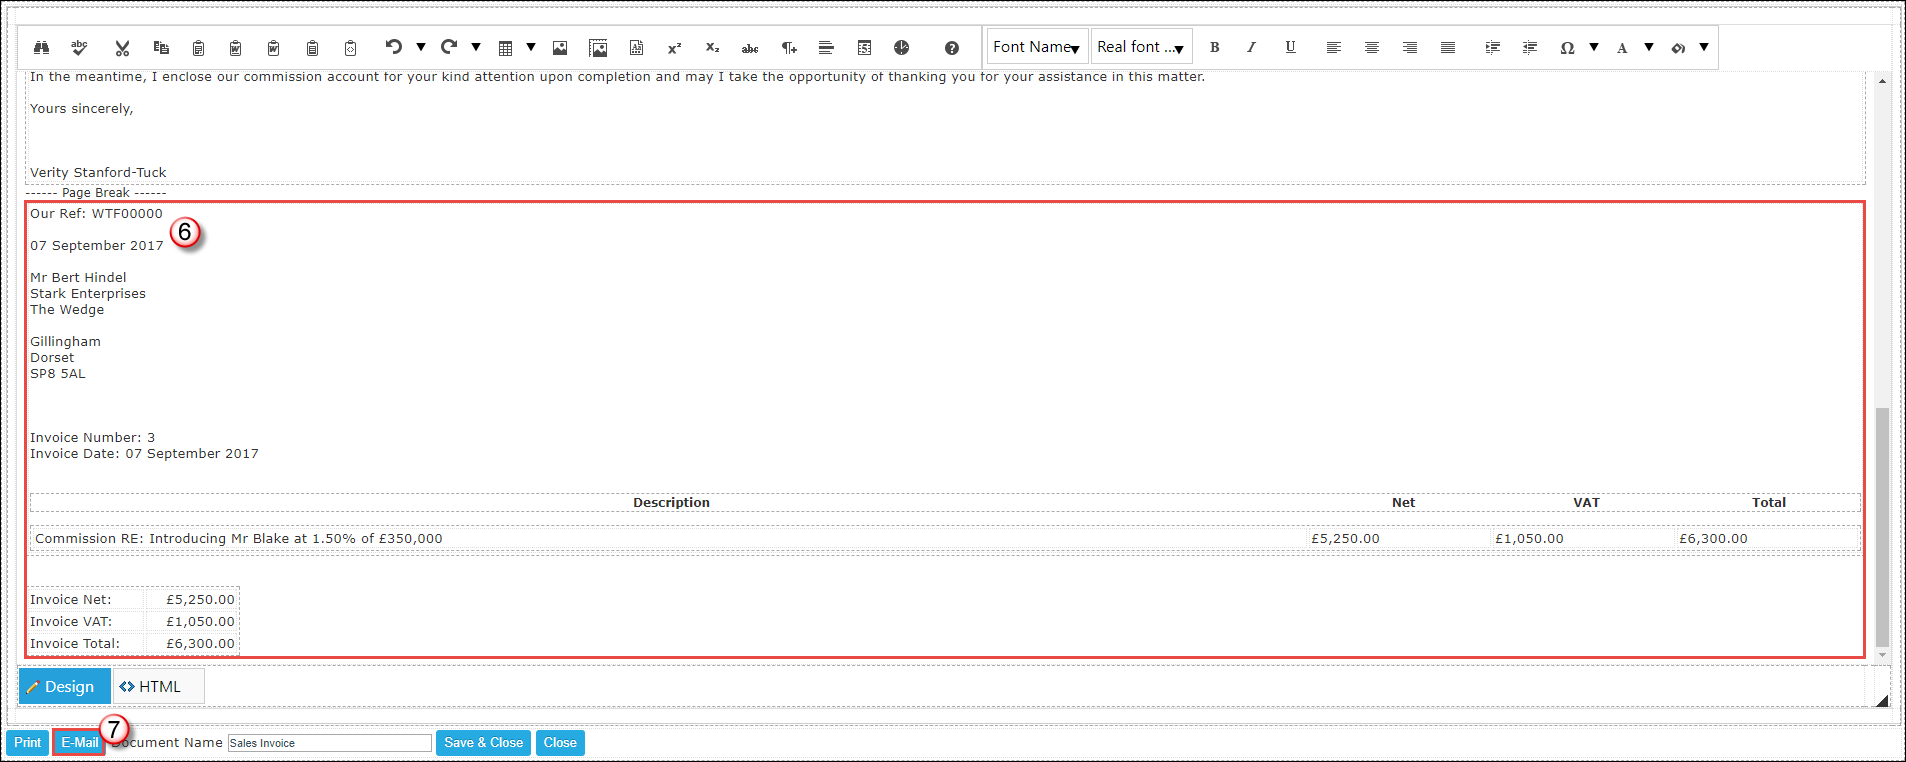
6. Plus an invoice to the Vendor's solicitor.
7. Press the Email Button
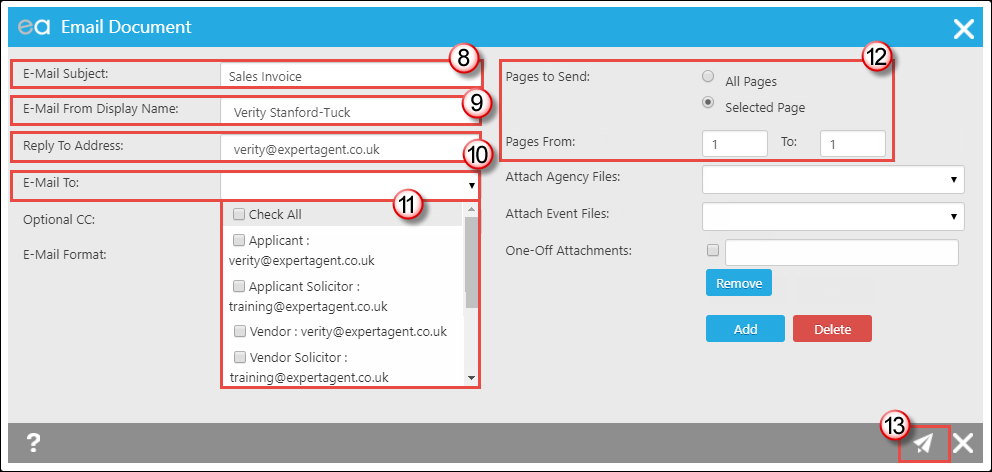
8. The E-Mail Subject is taken from the Template Name. This can be changed.
9. This will either display the Offer Negotiator name or the Branch name. Click in here to change it.
10. The Reply E-Mail address is set in your Staff Profile.
11. Click in to the E-Mail To field and it will give you the option of all records attached to that Offer. In this example we are sending to the VENDOR ONLY at the moment.
12. In Pages to Send click Selected pages and type in 1 to 1.
N.B You can only send a page range, page 1 to 3, not page 1 AND 3.
13. Press Send.
This will take you back to the Template open in Expert Agent. Press the Email button again and follow steps 8 - 13 selecting the Vendors Solicitor and pages 2-3 this time.
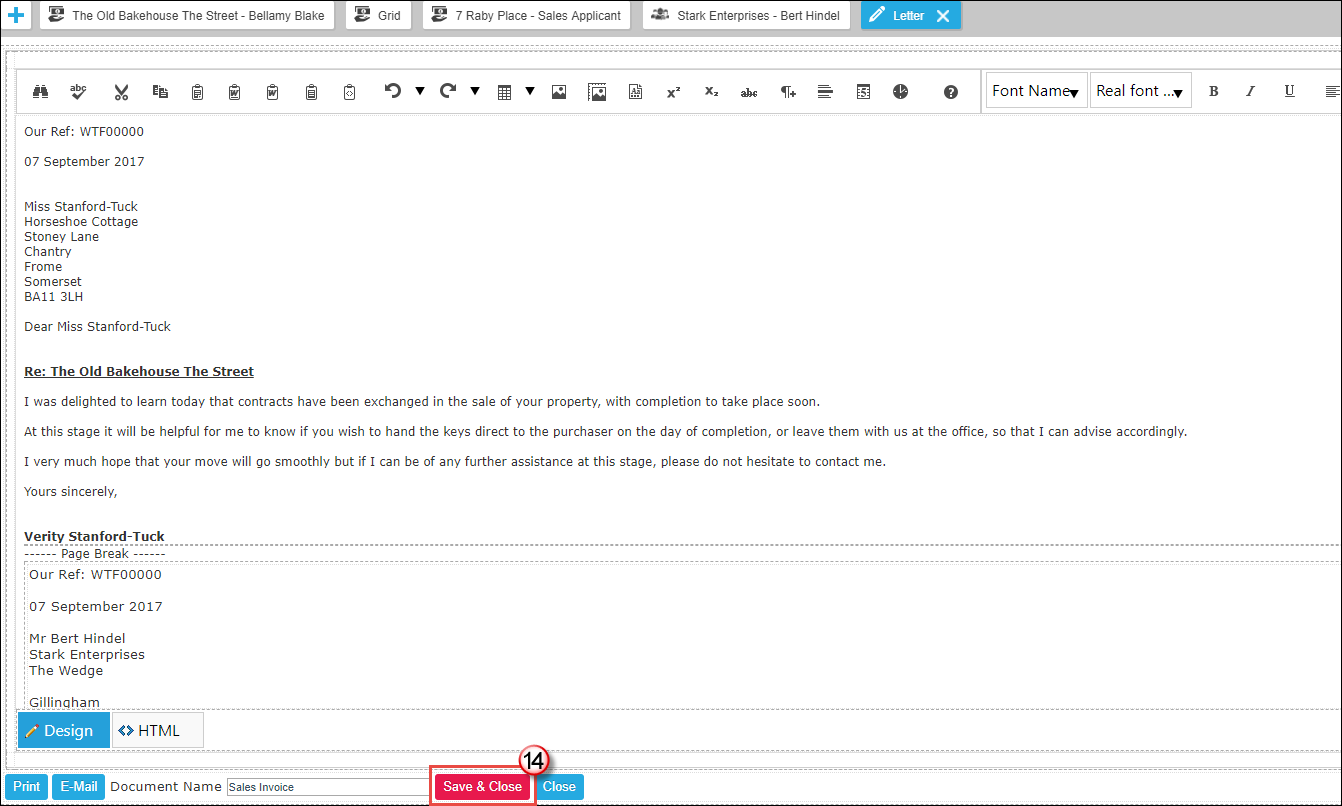
14. Pressing Save & Close once you have emailed all parties their relevant pages will ensure that the emails are saved onto the Events tab of the Offer.
Managing New Website Registrations
When you have an Expert Agent Website, or have turned on the Portal Applicant Import within your Configuration, your Applicants will be able to register themselves.
They will be imported within Expert Agent. You still get an email from Rightmove letting you know but EA has done a lot of the hard work for you, meaning you do not need to transcribe all of the information again into the system.
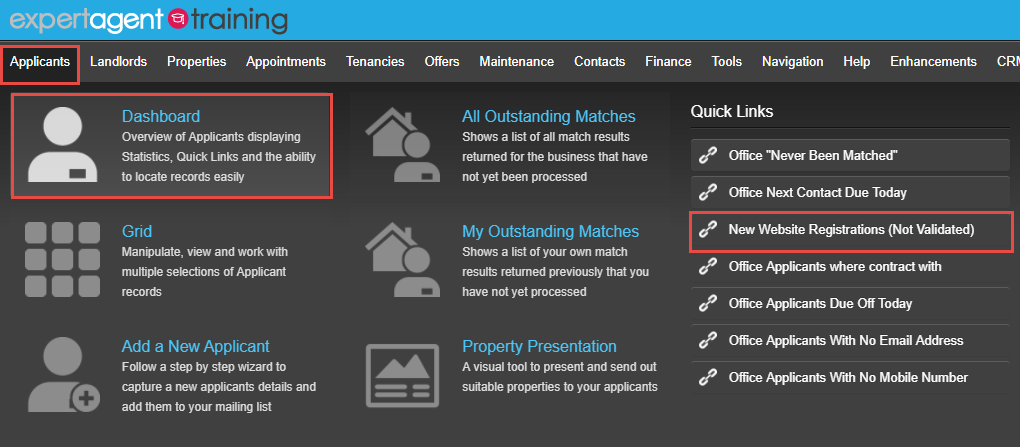
The QuickLink you will need is "New Website Registrations (Not Validated)". You can access this from the Applicant Dashboard. If you have set it to be on your Dashboard it will also appear on the Applicant dropdown (Quicklinks on your Dashboards).
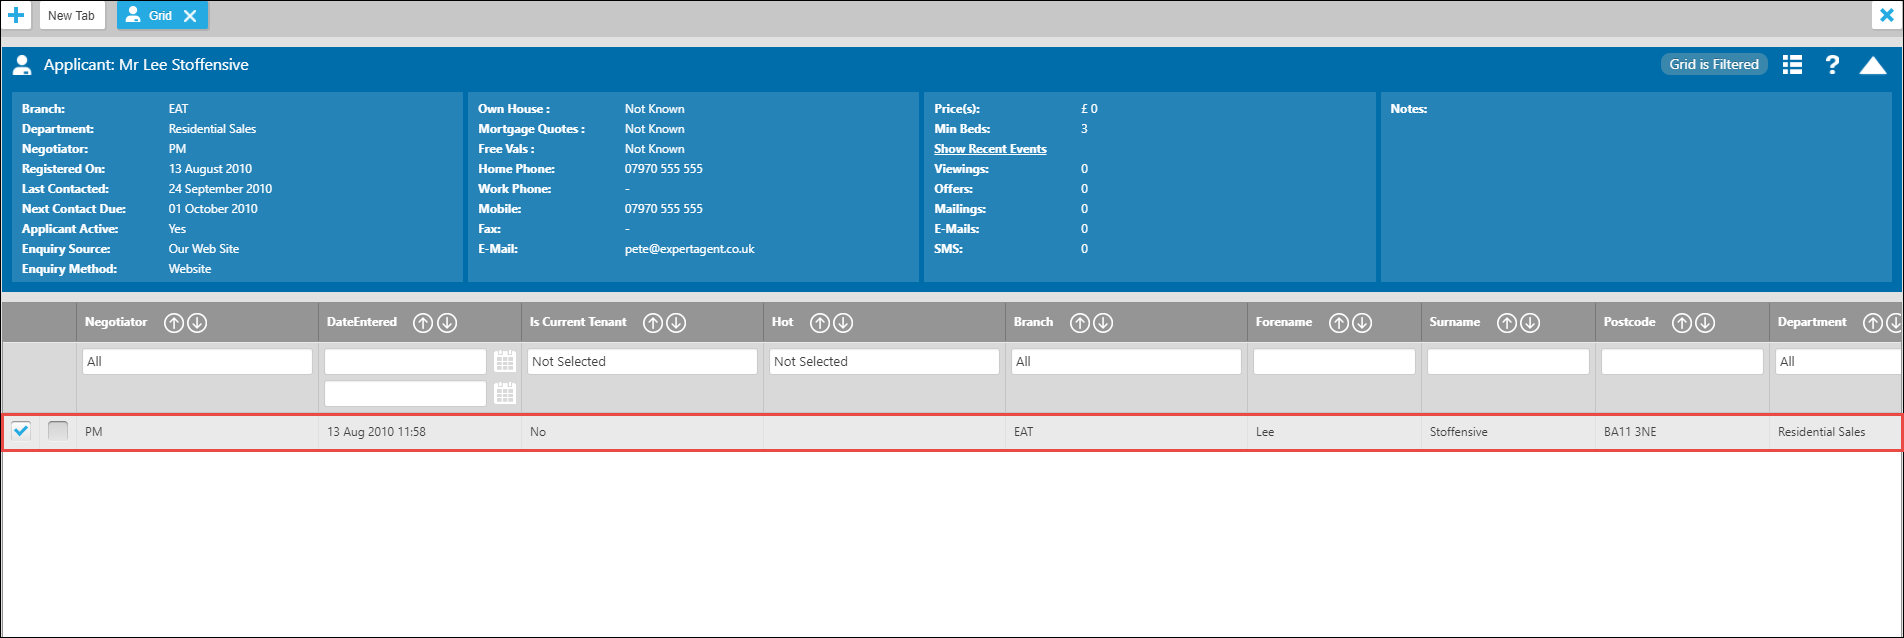
Clicking into the Quicklink will open up a Pre Filtered Grid of all of your Non Validated Applicants. This doesnt mean they are not live applicants, it just to alert you that you may need to check their match criteria.
From the Grid you can click into the Applicant.
Check the Details Tab (for their contact details and preferences) and then the Match Criteria tab. Once checked, Right Click and Select Validate:
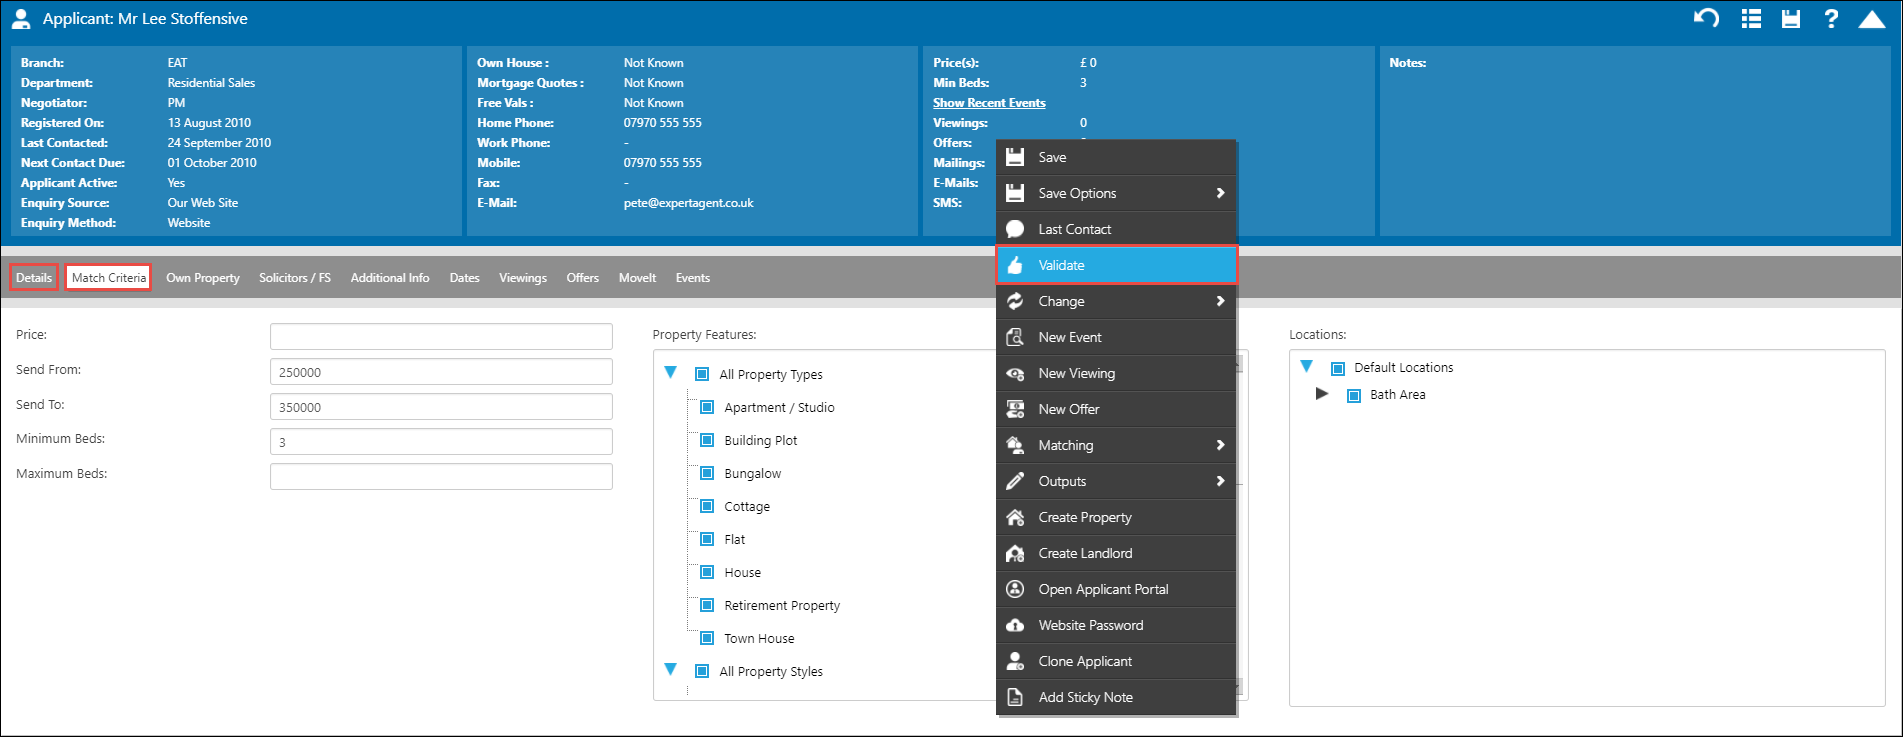
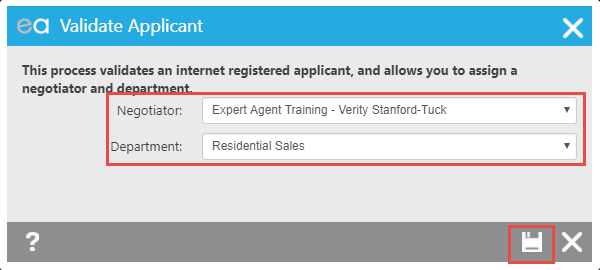
When you click Validate the popup will open asking you to choose which Negotiator your wish to give this applicant to, and which Department you want to assign them to. Press Save and the Applicant will be removed from the QuickLink and will be fully live.
Tel: 01225 303500 | Email: account.managers@webskyltd.com
Terms of Business | Cookie Policy | Privacy Policy | ZPG Modern Slavery Statement
Designed by the Expert Agent Design Department
