How do I change label formats?
Sticky labels are a nightmare!
We don't use them here - we'd always prefer to use a letter and a window envelope.
Laser printers hate them - they get stuck on the drum, they get jammed in the rollers but the biggest problem is that they don't print where they say they should.
Every printer has slightly different left, right top and bottom margins. They also have slightly different default font sizes.
So, if you want to use sticky labels, do yourself a favour, get a box of the Avery L7160 labels that we've battled long and hard to set up (but see the small print disclaimer below) OR if you want to use those dusty old labels you found in the store cupboard, be prepared to waste half the box and half a day setting them up.
Avery L7160 Label small print Disclaimer:
These labels work out-of-the box on 70% of laser printers. Some laser printers set their minimum gutters, margins, headers and footers up in an odd way such that even these labels won't instantly print and you'll have to do some messing about
You can generate labels from the applicants, properties, landlords and contacts grids.
Just start up the grid, make your selection, right click and choose labels.
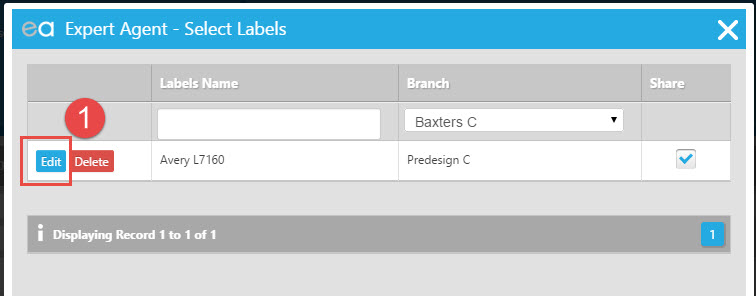
The form below is displayed.

This shows any layouts that have been set up previously including our standard Avery L7160.
To use these, just click on them. Expert Agent Touch will open the standard Chrome print preview. If it doesn't open - check for popup blockers - see Chrome FAQs
Changing Label Formats
We're really sorry but you are on your own with this when it comes to getting labels set up. This has always been a time-consuming black art and even if we had the time, we don't have your PC and printer. However, the following sections may help.
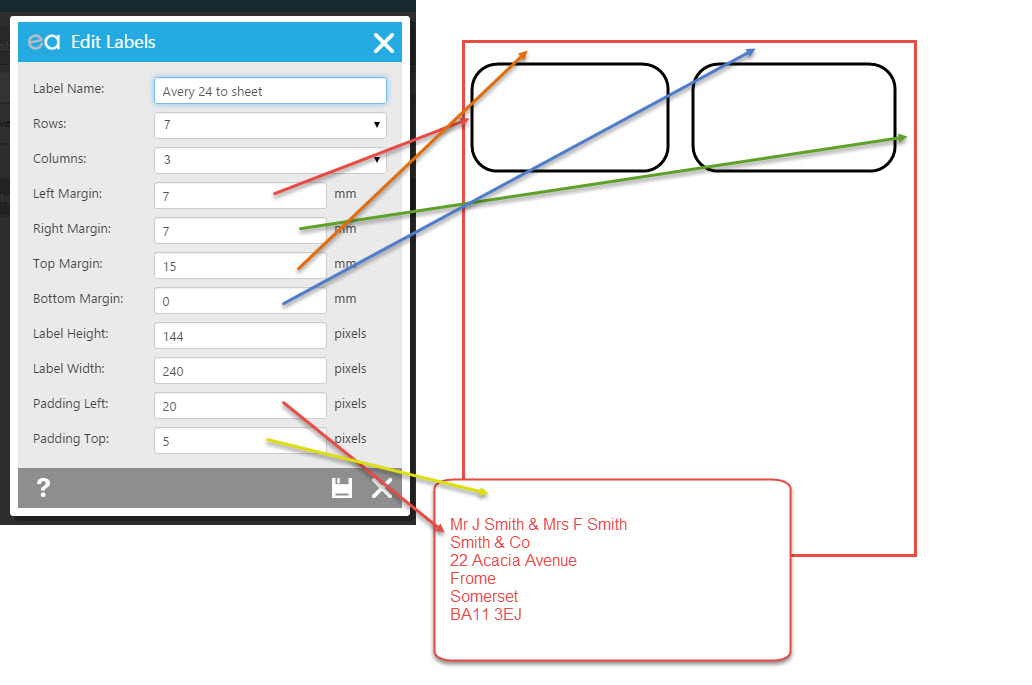
The labels grid works in a slightly different way to the other output grids. There's no new or clone option. Instead, click on Edit and change the label name - that creates a new label format
This opens the form below and we've showed a diagram showing what each element relates to:

The test content of the label is always title forename/initials surname + (if a second name is presentpresent) & title2 forname/initials2 surname2 plus 5 lines for company name and address.
You adjust the margins in millimeters and the the padding in pixels (to get more accuracy - printers convert millimeters to pixels.
Microsoft Word to Expert Agent Calculator
If you've already got your labels set up in Microsoft Word (probably by choosing or modifying one of Word's standard label formats), we've created a little calculator that takes the settings from Word's label setup and gives you what you need for Expert Agent. You'll need Microsoft Excel for this
First, download and open our labels calculator using the link below:
https://dl.dropboxusercontent.com/u/6283273/EA%20Label%20Calc/EA%20Labels%20Calculator.xls
Open up the calculator. You'll need to get the numbers needed for the top Microsoft Word section in Word itself.
These instructions are for Word 2013 - they'll be different in other versions of Word.
Do File>New in Word. search for the required label template and create a new document based on the required label format.
Go to Page Layout>Margins>Custom Margins
That gives you the margin settings.
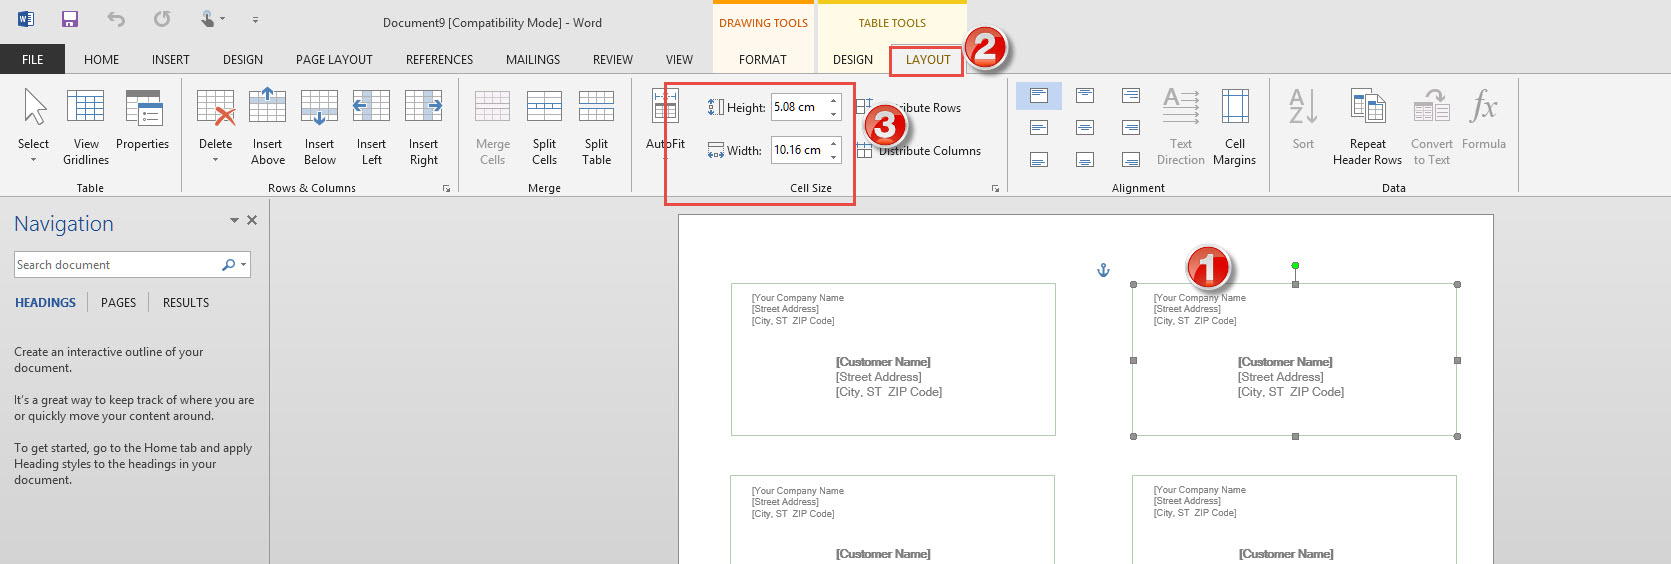
Then, click on one of the labels themselves and go to Layout>Table Layout as below:

This will give you the height and width of each label.
If you type all this into the calculator, it will give you the required settings for your label format in Expert Agent (maybe!).

 Login
Login

