How do I create an HTML Header?
Why should I create an HTML Header?
By creating an HTML header, and using it in the way it was designed, you are saving yourself and your team a lot of time and hassle. Especially if you ever decide to re-brand or simple change your logo.
What is wrong with uploading the header into the email?
The issue with the way the majority of agents add the header and logo is that if it ever needs to be changed, you will need to go throguh all your current templates, and any you create in the future, and manually change the logo and other details. This can be quite a job when you have a few hundred templates.
So how should I be doing it?
By following the instructions below, you will be able to add the same header with a quick three clicks. It will also mean that if you ever need to change anything in the header, you only need to change one template, and it will update across all of your templates that the header is attached to.
1. Go To Tools -> Configuration -> Output Configuration -> Templates
2. Click the + symbol at the bottom to create a new template
3. Select the template format of HTML (1), name your template clearly (2) and change the type to General (3).
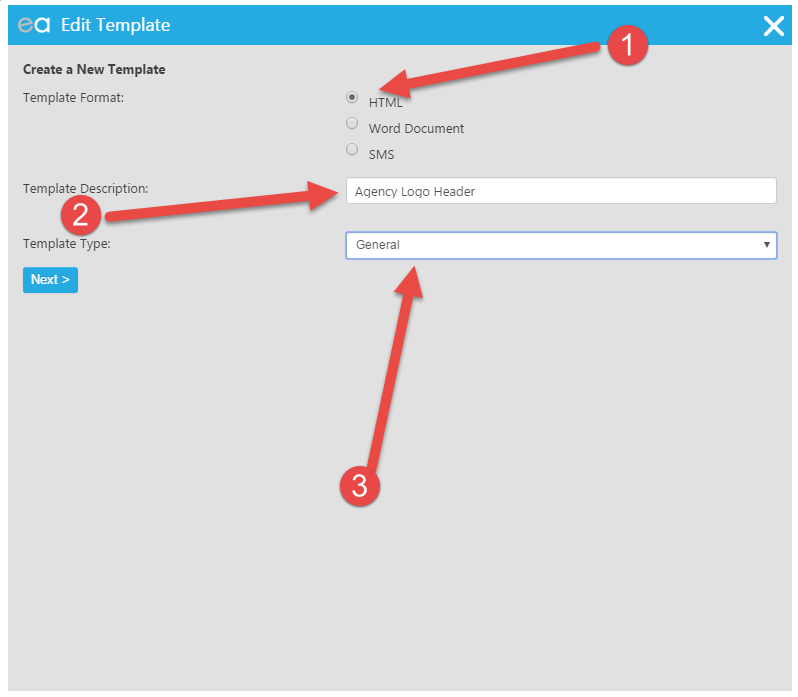
4. Click Next, then on the next screen, click "Edit Content"
5. Then click the Image Manager icon as indicated below:

6. Then click the Upload option (1), select your logo from your computer (2), then click the upload button (3) to upload the image to Expert Agent.
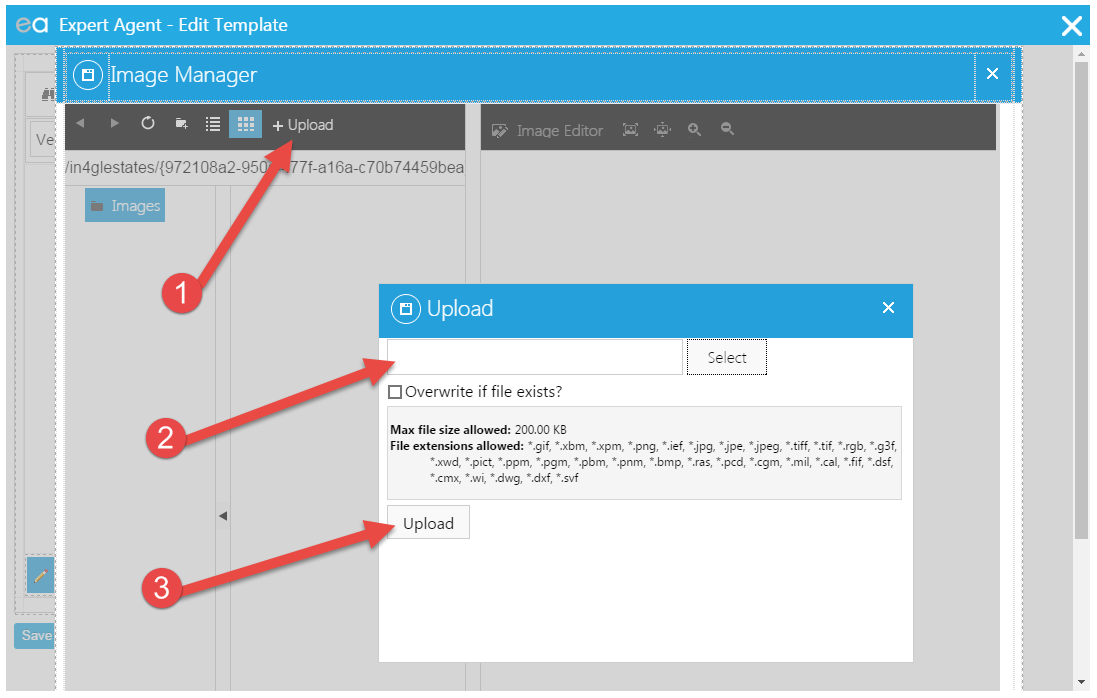
7. If you are only adding a logo to your header, please skip to section 9 of this guide.
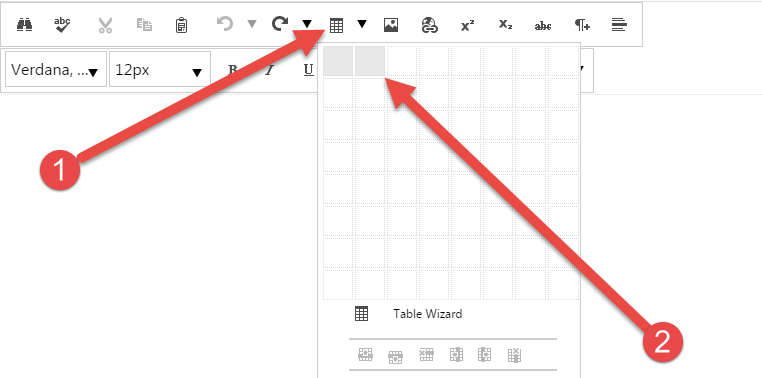
Once your logo has been uploaded into the system, close the image manager using the X at the top right, or the cancel button at the bottom left. You then need to add a table by clicking on the table icon (1) and in this instance we are using two cells (2) in the table so we have room for the logo and one for the company details. You can use as many as you need.
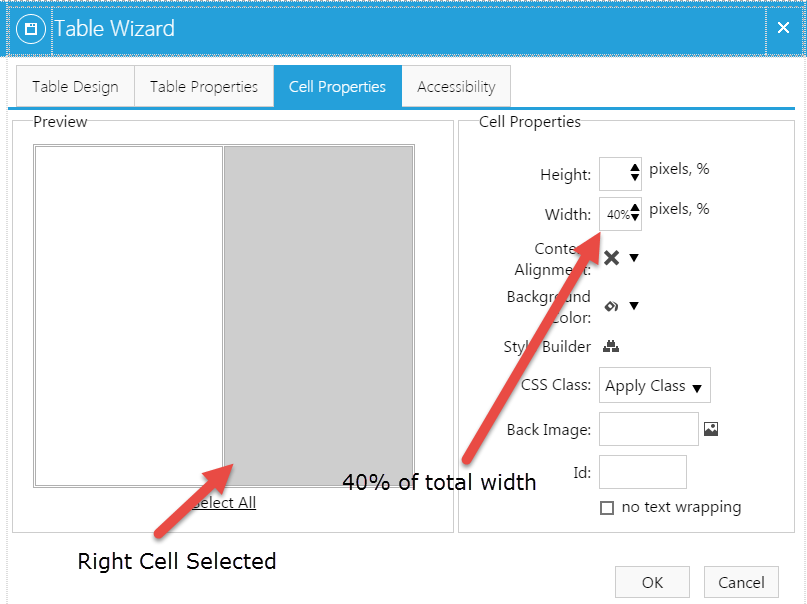
8. Drag your table to the correct approximate size you want. It will automatically split the table equally. If you don't want it to be equal, right click in the table and select "Cell Properties". From this screen, you can select which cell you want to control, and enter what percentage of the total width you want each cell to be. Remember to add the percentage sign, all cells must equal 100% when added together. This can be adjusted at a later time.

9. Once you have okayed back to the template, click inside the table where you want your logo to show, and click on the image manager icon from before. Then select your logo (1) and click Insert (2).


10. If you are only using a logo, please skip to section 11
Your logo should have loaded into the side of the table you previously selected. You may need to grab a corner/side of it and resize it so that it's the correct dimensions. Once you have the logo in the right position, click into the next table for you address and add the merge codes for the information you want to be displayed.


11. You now have the basic header template that you can come back and make adjustments to at a later date. Click save and close, and then click the save icon, so you are looking at the "Edit Templates" screen.
12. The following step can be repeated to add your new header to any HTML/Email templates. The most productive way is to inform your colleagues of the method, so that whenever they use a template, they make sure they have added the header to it. Which means you don't have to do them all at once.
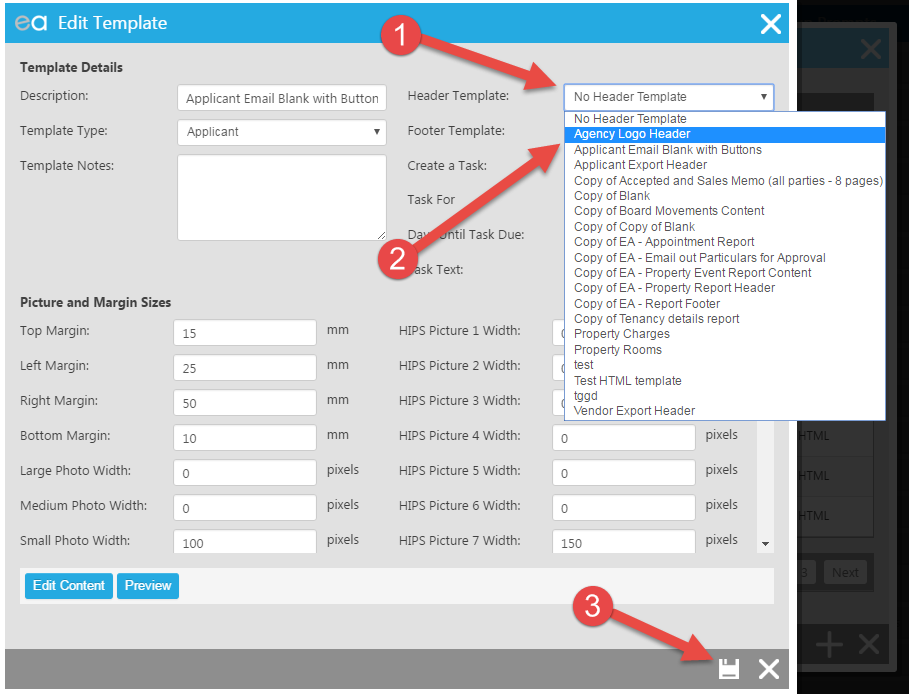
13. Select an HTML template, and click the "edit" button in the left column. You will then see a couple of dropdowns in the top right of the window. Use the drop down "header" field (1) to select your new header (2). This can also be done for footers in the same way you have done for a header. Once you have selected it, you can click the preview button to see how it will look, or just the save button (3).
This exact same method can be used to create footers as well. By using this method, if you ever need to make changes, all you need to do it edit you header template, and it will change on every email it is attached to.

 Login
Login

