Editing letters using EA data
Provided you have the correct permissions set to allow template editing you will have the option to edit your template text, add branding, headers & footers etc. If you have this permission enabled you will see the Edit/Clone/Delete options listed next to each template in the “Our Letters” page tab. Shown below:

1. Click into the “Our Letters” page tab to show the list of your standard templates.
2. Find the template you wish to edit and select “Edit” as shown above.
You will then be shown the “Edit Word Template” screen. You should be quite familiar with this screen now.
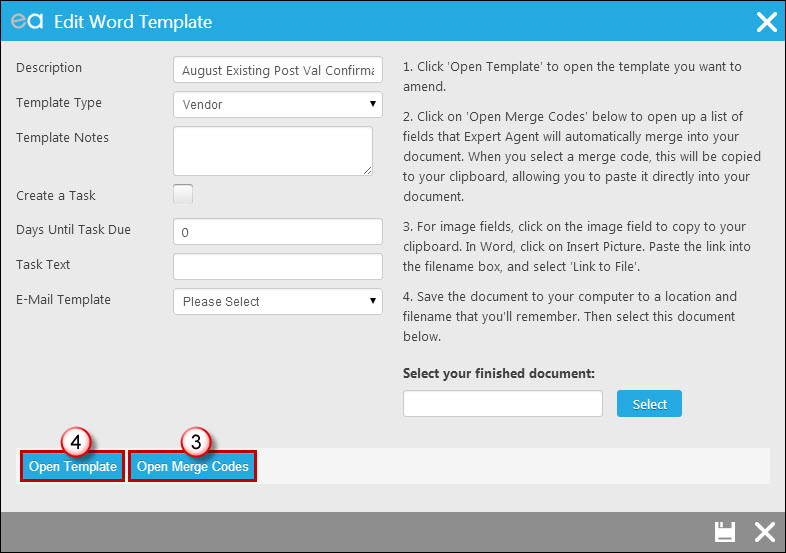
3. Choose Open Merge Codes – this opens a list of codes in a separate browser window. This is designed to float alongside your Word Doc.
4. Choose Open Template – you’ll see the download bar appear at the bottom of the screen and will need to click on the file when it has downloaded.
The template will open on the screen and look similar to this:
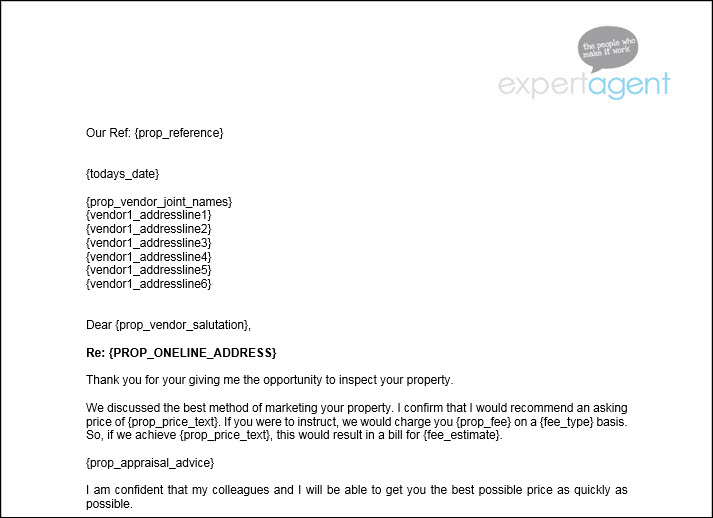
This is a normal Word Document, but one that includes merge codes, identified like this: {and}. Merge codes are fields that are automatically populated with relevant data from records in Expert Agent.
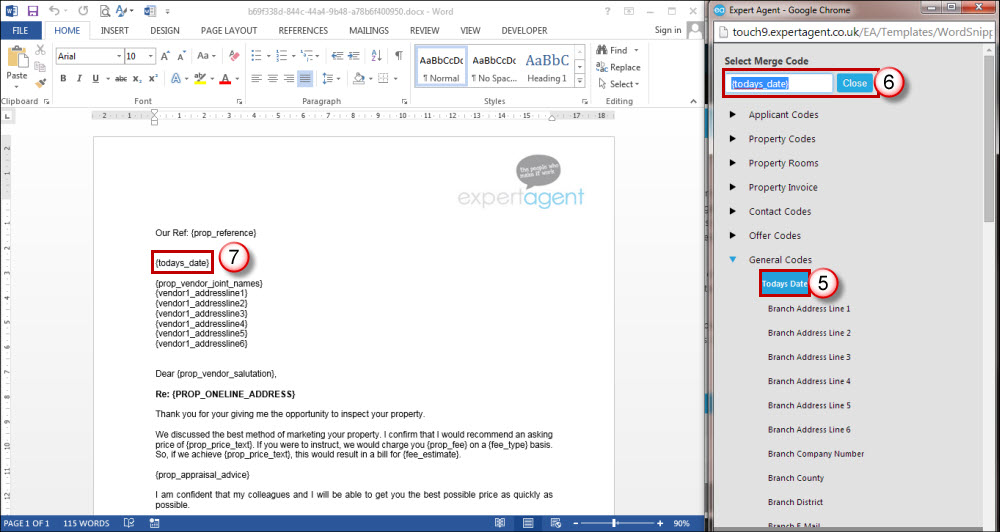
5. To insert a new merge code, click once on the merge code you require from the list. All codes are grouped together in various sections such as Property Codes, Applicant Codes, General Codes etc.
6. The code appears in a box at the top of the list (you may need to scroll up depending on how far down the list you are) - copy the link in the box (Ctrl + C on the keyboard).
7. Click on the place in the document where you would like the code to appear and paste it into the document. A shortcut for this is - hold down your Ctrl + V on the keyboard. This will paste the code into the document.
Continue to do this for the rest of the codes you want to add. Note: you will not need to allow access to the clipboard each time.
TIP: If you would like to capitalize Merge Codes simply highlight the code, right-click and select “Font” then tick “All Caps”.
Inserting Headers & Footers
In order to add headers, footers and logos into your template it’s as simple as adding an image (if you have any experience with Microsoft Word). For those of you who are new to using Microsoft Word you can see instructions below.
In this example we will look at adding our logo as our header.
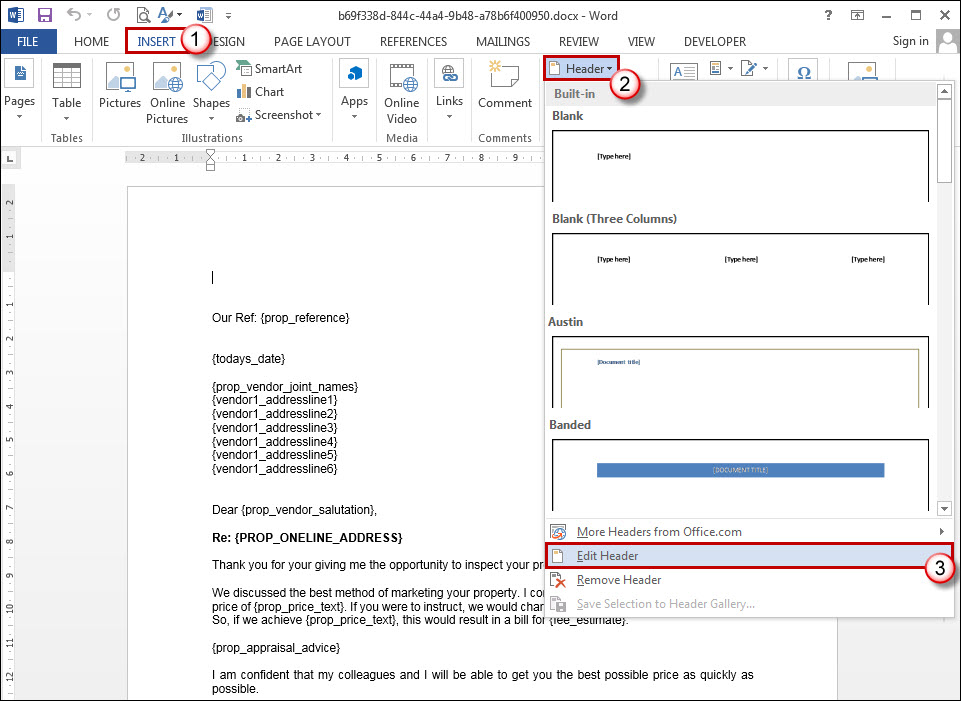
We’ll start with adding our header.
1. Click into the “Insert” tab.
2. Click the Header dropdown
3. Select “Edit Header”
This will open the header pane where you can add your logo/letterhead.
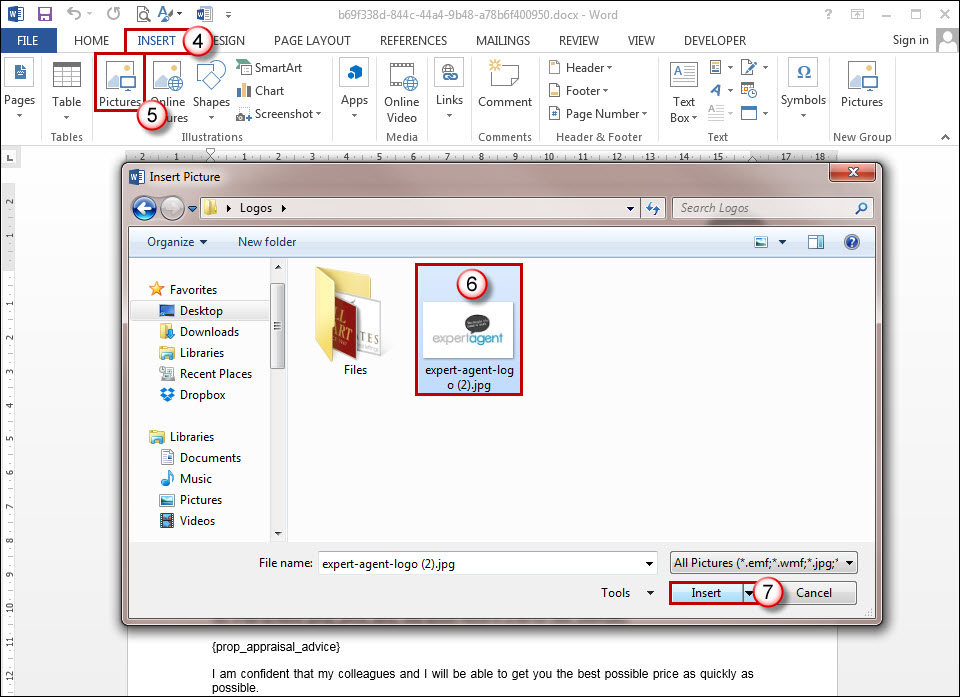
4. Click the Insert tab.
5. Choose Picture.
6. Find the image you want to add into your header.
7. Click Insert.
This action will place your chosen image into your header.
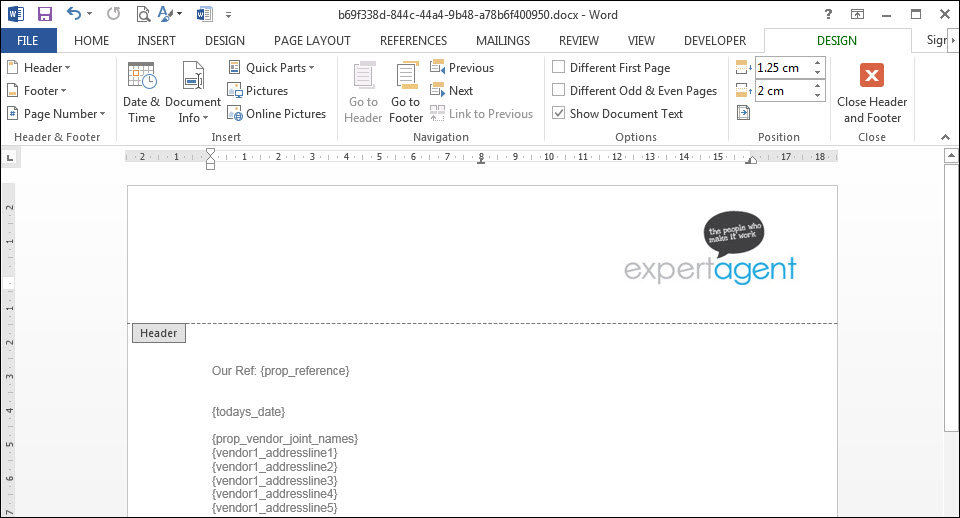
To add a Footer:
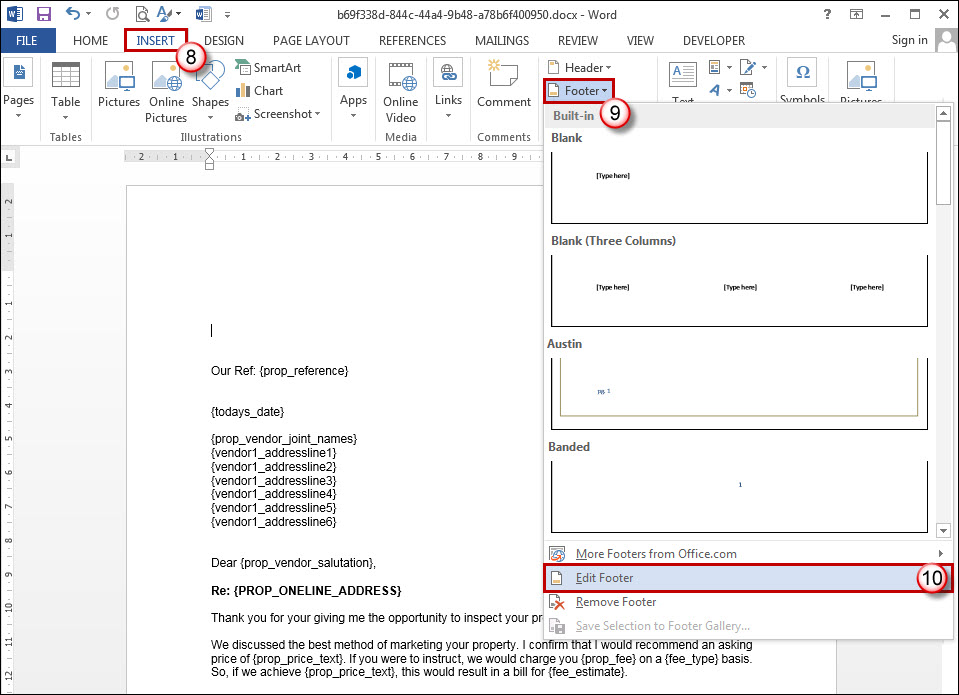
8. Click the Insert page tab.
9. Choose Footer.
10. Select “Edit Footer”.
Once your footer pane has opened follow the same steps as the header to add in your images. You can use merge codes in headers and footers as well as images - so if you are a multi-branch firm and want the header to pull in the correct offices address, for example, you would use the branch address merge codes.
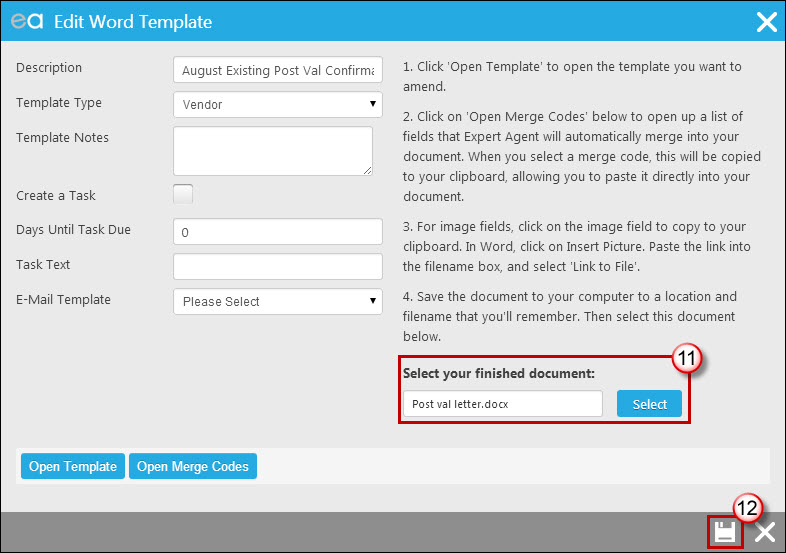
Don’t forget once you have your completed document to save it to your desktop and upload your new template to Expert Agent via the upload screen and save - as below:

 Login
Login

